For more detailed information on workflows, see the Workflows section in the Resolver Core Administrator's Guide.

Create & Configure States
To create and configure the workflow states:
- Click the
 icon in the top bar > Object Types in the Data Model section.
 - Begin typing Risk Response Plan in the search field, then click the object type to open the Edit Object Type page.
- Click Configure Workflow on the Edit Object Type page.
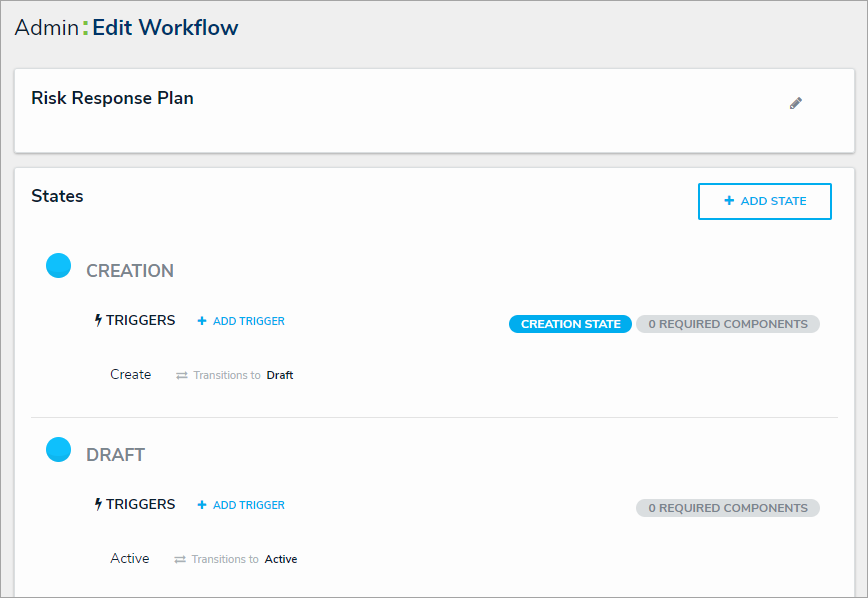 The Edit Workflow page.
 - Click Add State.
- Enter Pending Update in the Name field, select In Progress from the State Category dropdown menu, then click Create.
- Click the Creation state, then select the Company reference in Required Components.
- Click the Pending Update state, then select the Plan field in Required Components.
- Click the following states, then type or paste the following colors codes in the Color fields:
- Draft: #DADEE0 (Grey)
- Active: #66CDF4 (Blue)
- Pending Update: #FFBF02 (Yellow)
- Archived: #092030 (Black)
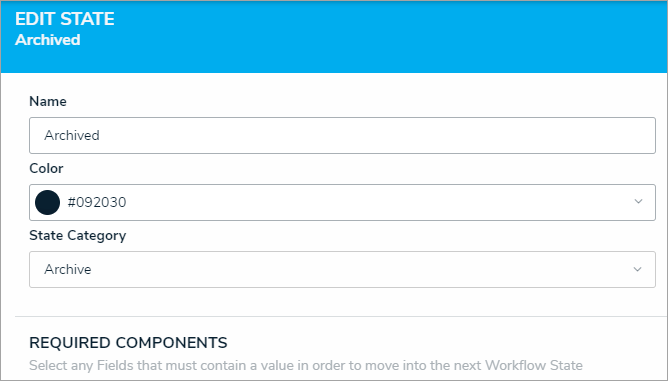 The Edit State palette.
 icon in the top bar > Object Types in the Data Model section

Create Triggers & Transitions
Note that the following section provides instructions for configuring the sequence of the workflow, not the order that the states appear on-screen. Should you wish to have the workflow states reordered, contact Resolver Support.
To create triggers and transitions:
- From the Risk Response Plan workflow, click Add Trigger in the Active state section.
- Select Timed from the Type dropdown menu.
- Enter Send for Update in the Name field.
- Select Nightly from the Frequency dropdown menu.
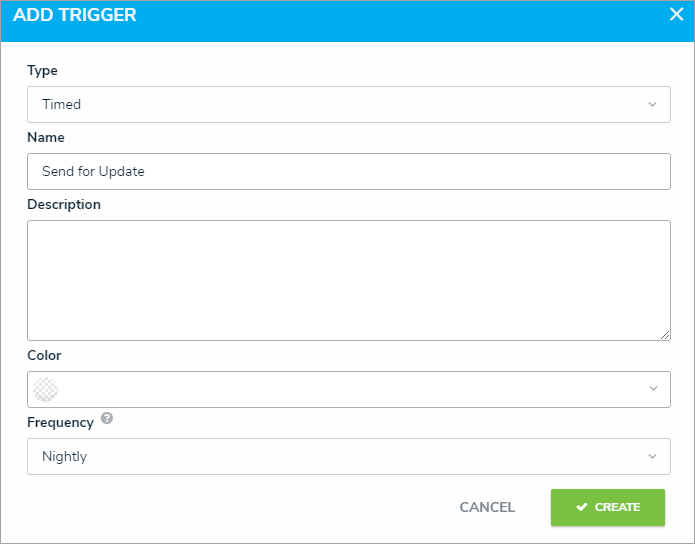 The Add Trigger palette.
 - Click Create to display the Edit Trigger palette.
- Click Add Transition.
- Enter a name for the transition in the Name field, then select Pending Update from the Destination State dropdown menu.
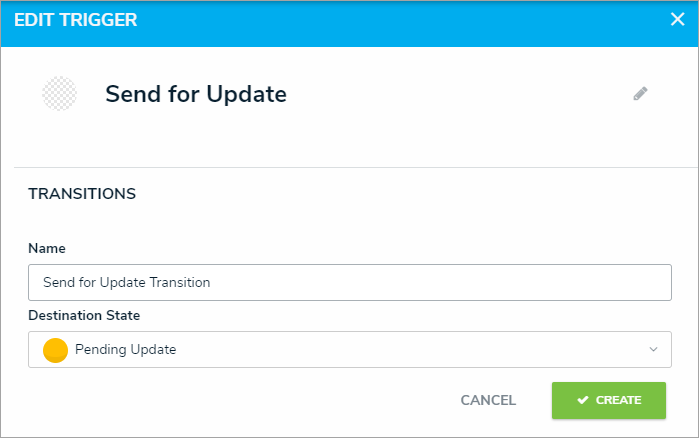 The Edit Trigger palette.
 - Click Create.
- Click Add Trigger in the Pending Update state section.
- Select Button from the Type dropdown menu.
- Enter Complete Update in the Name field.
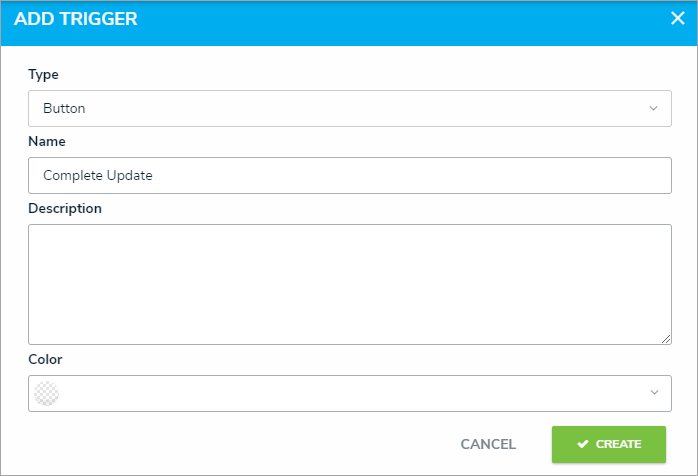
- Click Create.
- Click Add Transition.
- Enter a name for the transition, then select Active from the Destination State dropdown menu.
- Click Create.


Create Conditions
To create workflow conditions:
- From the Risk Response Plan workflow, click the Send for Update trigger.
- Click the
 icon next to the transition.
 - Click Add Condition.
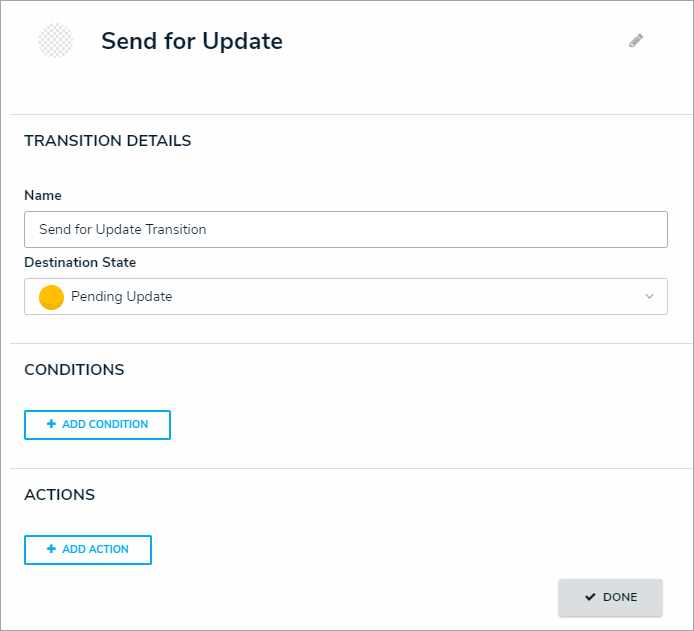 The Transition Details section of the Edit Trigger palette.
 - Enter Check for Date of Next Review in the Name field.
- Click Add Variable, then select Field from the Variable Type dropdown menu.
- Select Date of New Review from the Available Components dropdown menu.
 The Variables section.
 - Click Create.
- Paste timeDiff(DATEOFNEXT,today(),"days")<=0 in the Formula field. This formula ensures the trigger will run only if the Date of Next Review has the current (or earlier) date selected.
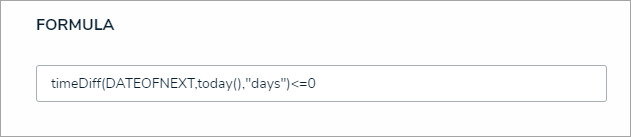 The Formula section.


Create Workflow Actions
To create the Set Date Updated action:
- From the Risk Response Plan workflow, click the Complete Update trigger.
- Click theicon next to the transition.
- Click Add Action.
- Select Set Field Value, then enter Set Date Updated in the Name field.
- Select Date of Late Review from Field.
- Select Set Current Date.
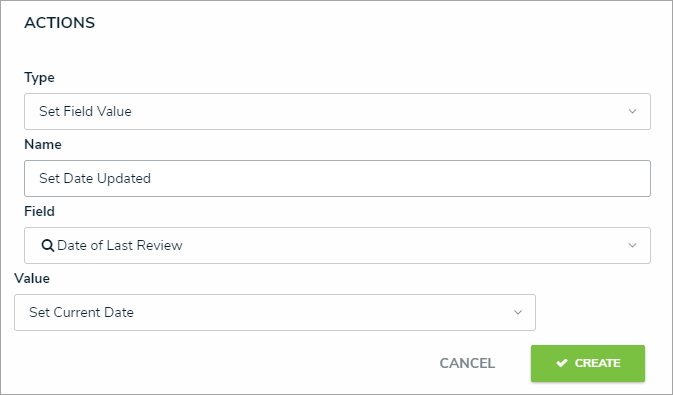 The Actions section on the Edit Trigger palette.
 - Click Create.

To create the Date of Next Review action:
- From the Complete Update trigger, click Add Action.
- Select Clear Fields from the Variable Type dropdown menu.
- Enter Clear Date of Next Review in the Name field.
- Select Date of Next Review from Field.
- Click Create.
| << Previous |