To create a new rule:
Click Rules to display the Rules page.
Click New to display the New Rule screen.
Enter a name for the rule in the Rule Name field.
Type a priority number in the Priority field. Rules with a lower priority number take precedence over rules with a higher number (e.g. a rule with a priority of 3 will take precedence over a rule with a priority of 5). By default, the next available priority number will appear in the field. One is the lowest number (and highest priority) that can be assigned to a rule.
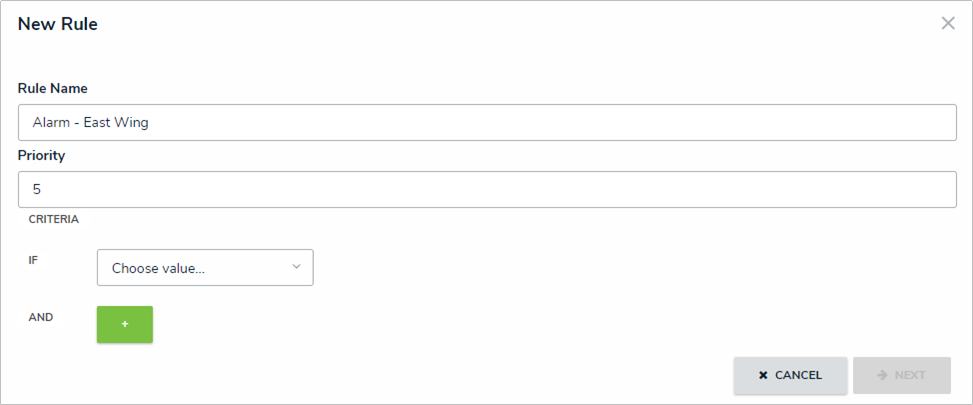 A new rule with a name and priority, but no criteria.
If a rule is assigned a priority that was previously assigned to another rule, Connect will automatically assign the next available priority number to the existing rule (e.g. if two rules were assigned a priority of 10, the new rule will automatically be assigned a priority of 10 and the old rule will be assigned 11). From the Choose value… dropdown, select one of the following rule categories:
- Event Type Name: Type the exact name of the event type in the field.
Event Type Tag: Select an event type tag from the dropdown menu.
Event Time: Select a period of time during which the event must occur (e.g. between 13:00 on Tuesday and 13:00 on Monday) from the time pickers, then select the days from dropdown menus.
Connector Name: Select a connector from the dropdown menu.
Device Name: Type the exact name of the device in the field.
Device Tag: Select a tag from the dropdown menu.
Device Type: Select a device type from the dropdown menu.
- Device Location: Select either Equals or In from the middle dropdown menu, then select a location or indoor location from the last dropdown menu. Equals means the rule applies to events that occurred at the exact selected location (e.g. Benjamin Building) while In means the rule applies to the selected location and any indoor locations saved to it (e.g. Benjamin Building, Floor 1, and Floor 2).
 Adding criteria to a new rule.
Optional: Click the OR
 icon to include additional OR criteria. For example, including an additional OR criteria for Event Type Tag means that an action will be triggered if an event with an Access Denied tag or Alarm tag occurs. Click the
  icon beside criteria to delete them, if necessary.
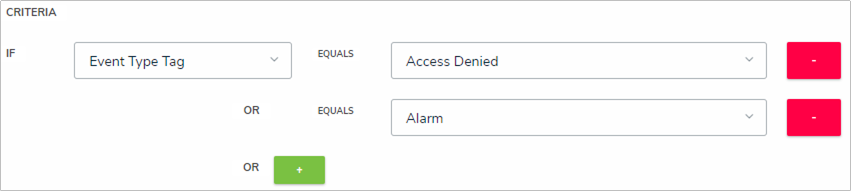 Including additional OR criteria to the rule.
Optional: Click the AND
 icon to include additional AND criteria. For example, adding an Event Type Tag for Access Denied then adding AND criteria for the Camera Device Type means that an action will be triggered only if an event with an Access Denied tag and an Access Control Device Type occurs. Click the
  icon beside the criteria to delete them, if necessary.
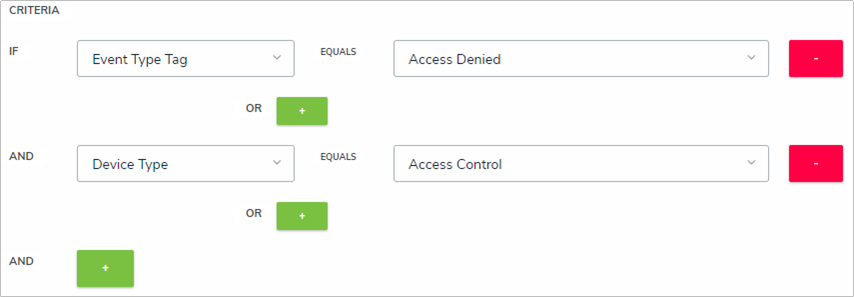 Including additional AND criteria.
If you’re creating multiple criteria for a single category type (e.g. Event Type, Connector Name, Device Location, etc.), use the OR operator. If AND is used, Connect will automatically apply the OR operator once the criteria are saved and the page is refreshed. Click Next to display the available actions.
Select a checkbox beside one or more of the actions, which include:
Create Dispatch: Creates a new dispatch. If you select this action, you must also select a Dispatch operational zone, work zone, and template from the dropdown menus.
Create Alarm: Creates a new alarm in Dispatch to be managed by the dispatcher in the Alarms panel, where they can create new dispatch for the alarm or acknowledge and close the alarm in both Dispatch and the source system. If you select this action, you must also select an operational zone, work zone, and template from the dropdown menus.
Create Activity: Creates a Perspective activity based on the event. If you select this action, you must also choose a Perspective priority and call category (or categories).
Acknowledge: Automatically acknowledges in the source system that an event has occurred. If you select this action, you cannot select the Close action. This action may vary by connector. Refer to your source system’s documentation for more information.
Close: Automatically removes the event in the source system. If you select this action, you cannot select the Acknowledge action. This action may vary by connector. Refer to your source system’s documentation for more information.
You can only select one Create action (Create Dispatch, Create Alarm, or Create Activity) per event. 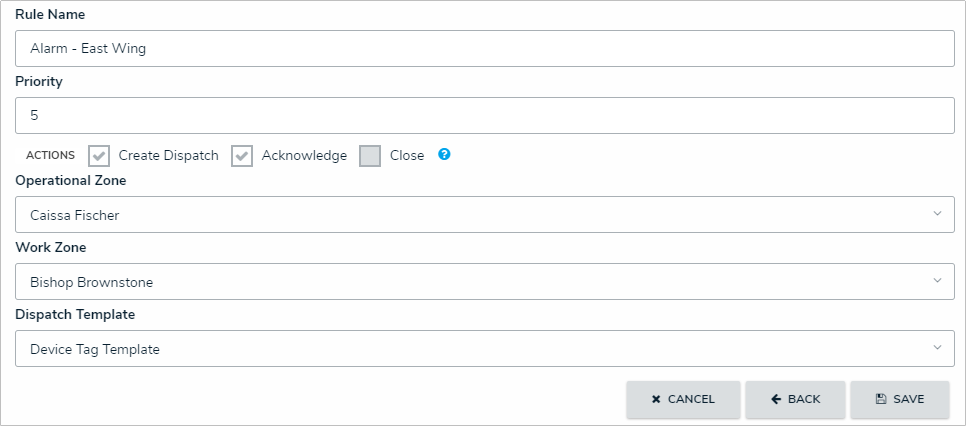 Selecting the actions for the rule.
Click Save to save your changes.


