Overview
If a user belongs to two or more roles that have permission to view the same object, but each role should be accessing that object through a different standard form (including palette forms), a form conflict exists. To resolve this, Administrators can use the Impersonation mode to identify any conflicts, then assign number priorities to the forms to ensure the correct form is displayed.
User Account Requirements
The user must have Administrator permissions to use Impersonation mode.
Related Information/Setup
Please refer to the Impersonate Another User article for more information on using Impersonation mode.
Navigation
To identify a conflict and set a form's priority, you must first assign the user you'll impersonate to an object by completing one of the following:
- Adding the user via the role element on a form, then creating a view using the object type's default form
- Assigning the user via the Assign permission on the role, ensuring the Default option is selected for the appropriate state in the Select a default form for this state for this role drop-down menu in the role's workflow permissions
 Note:
Note:
This method should be selected if you'll be using the search function to locate the object once Impersonation mode is activated.
- From the Home screen, click the Administration icon.
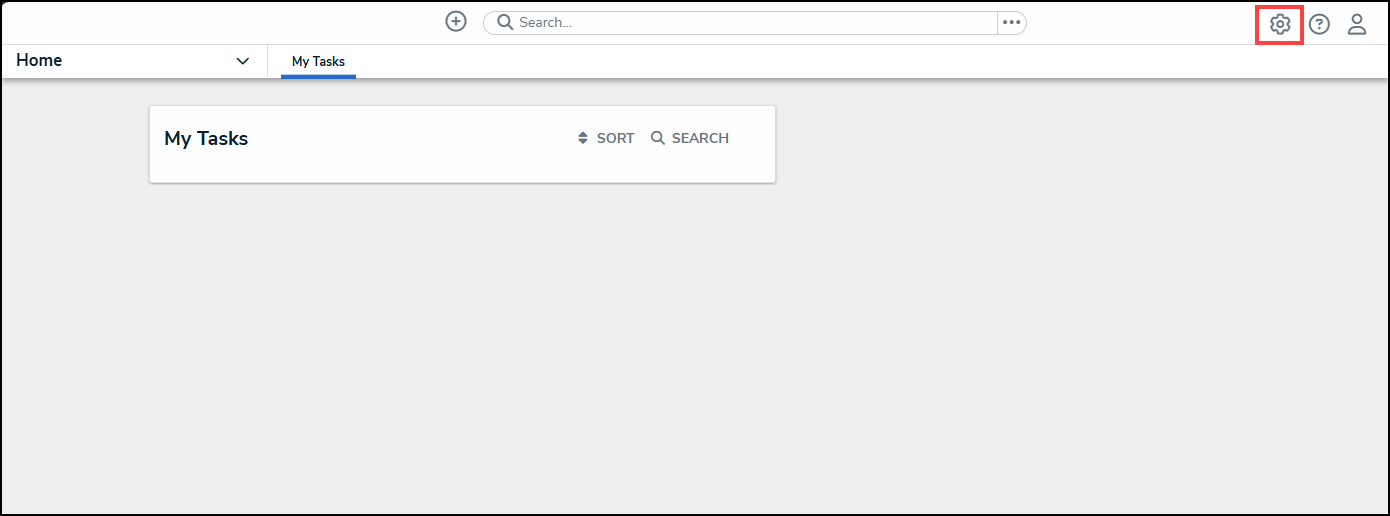
Administration Icon
- From the Administrator settings menu, click User Management.
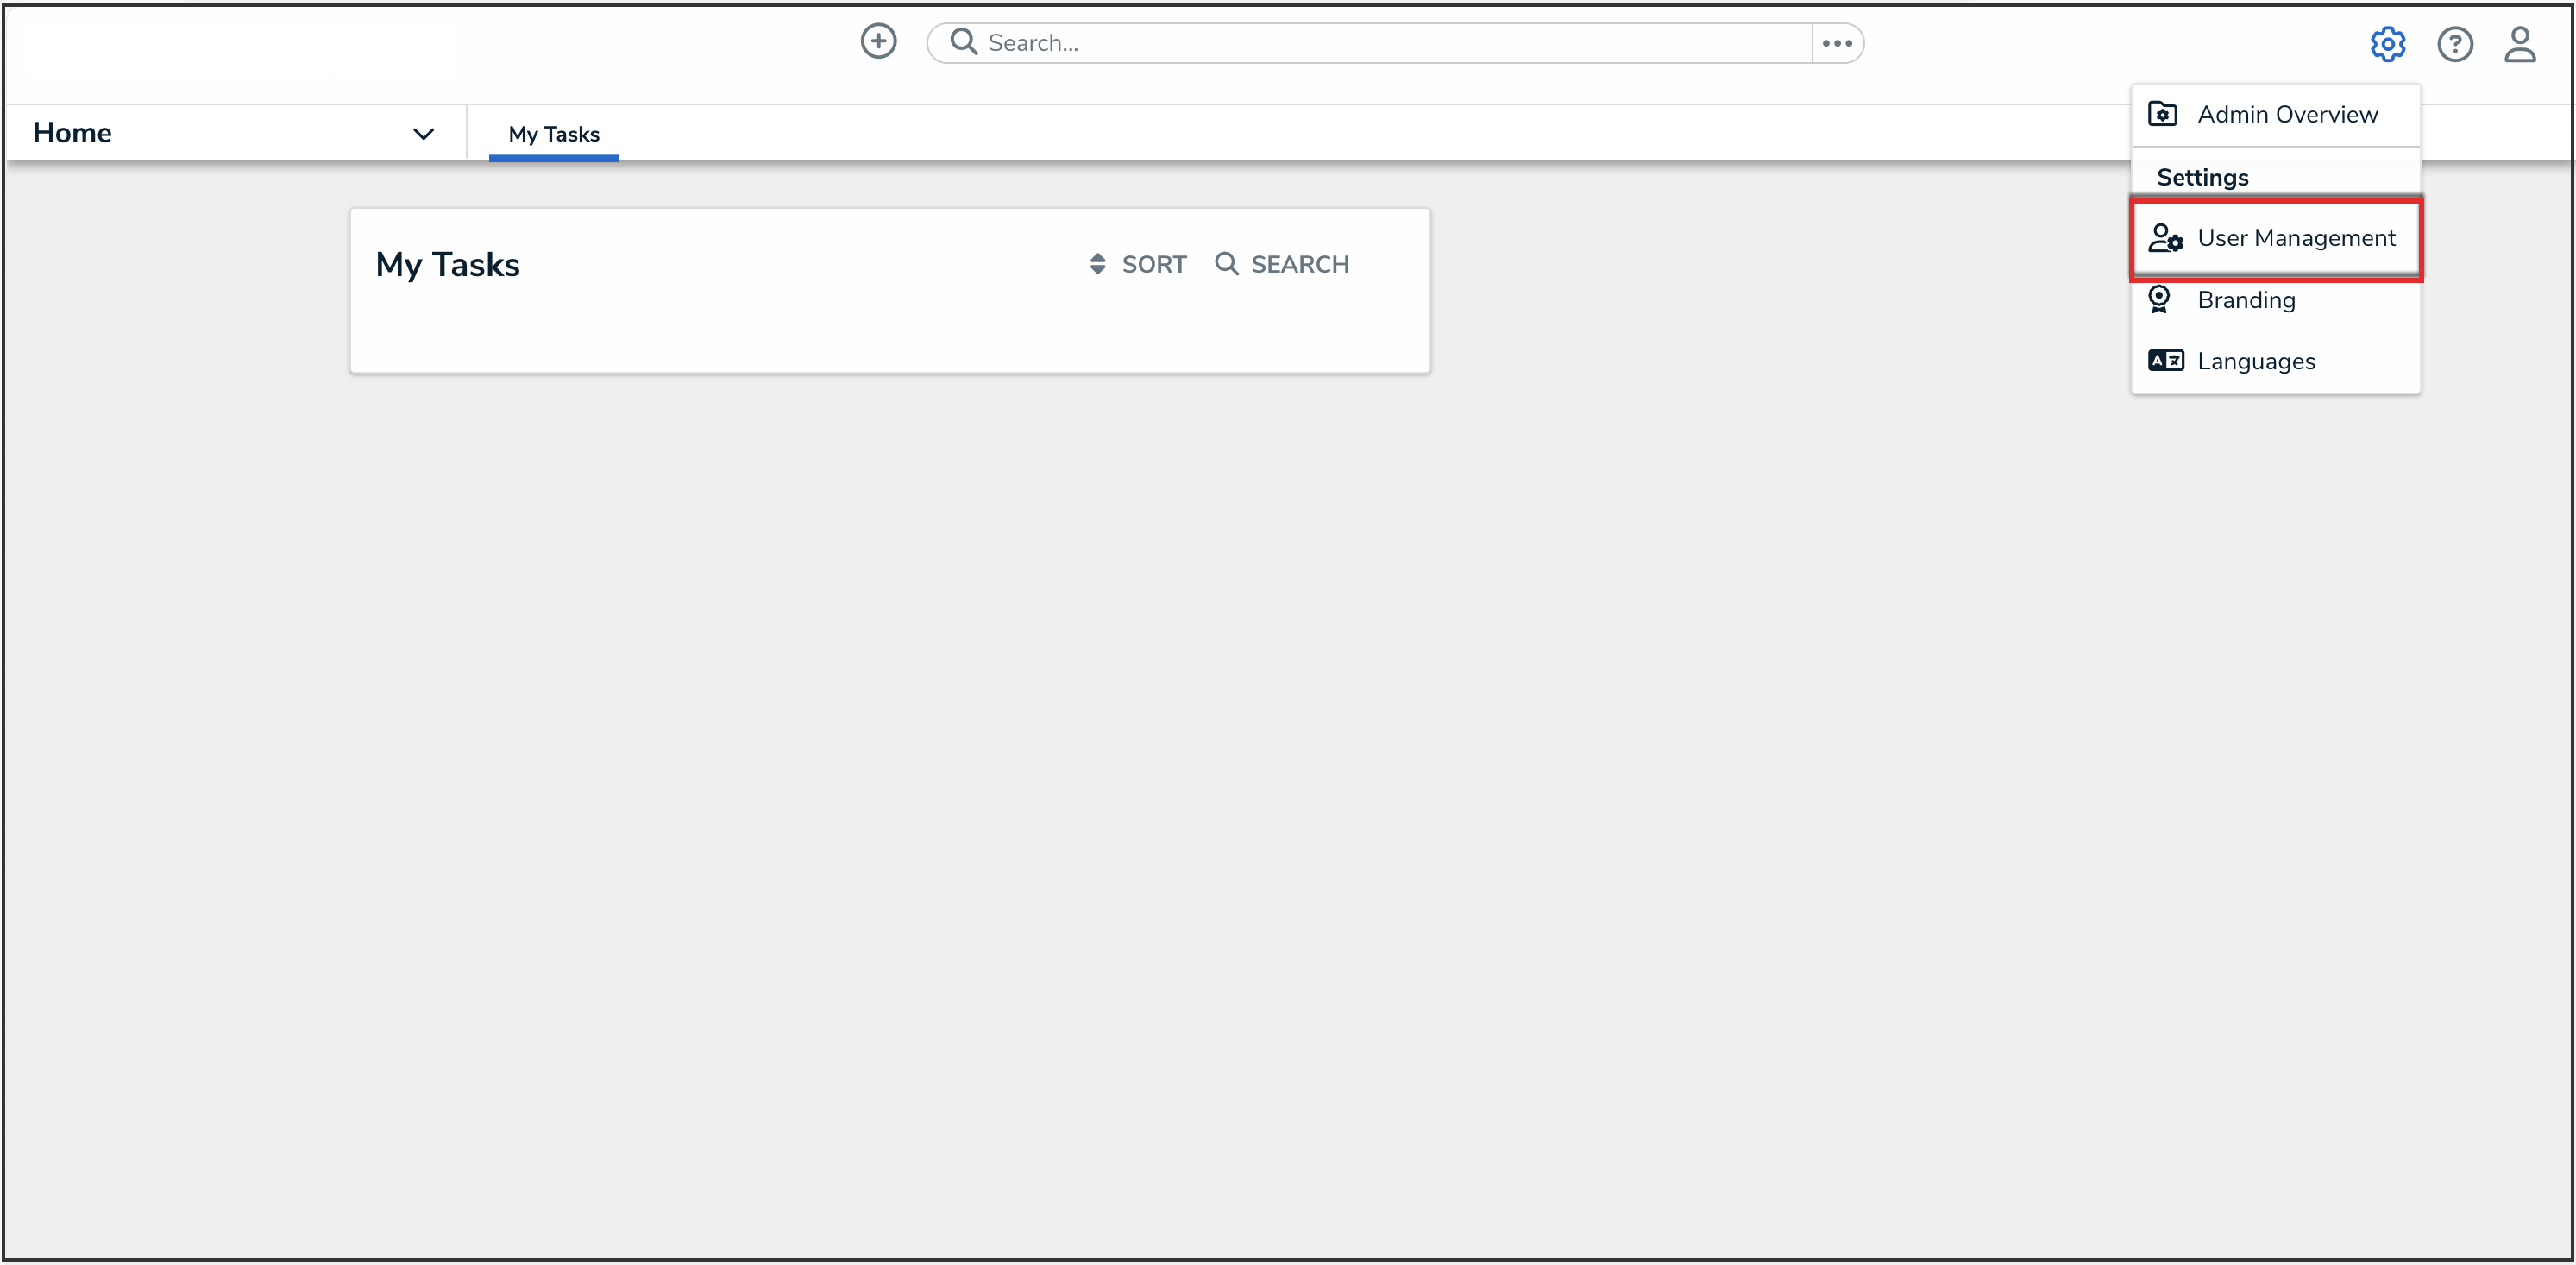
Administrator Setting Menu
- On the User Management screen, from the list of users, click the Impersonate button beside the user that you want to impersonate.
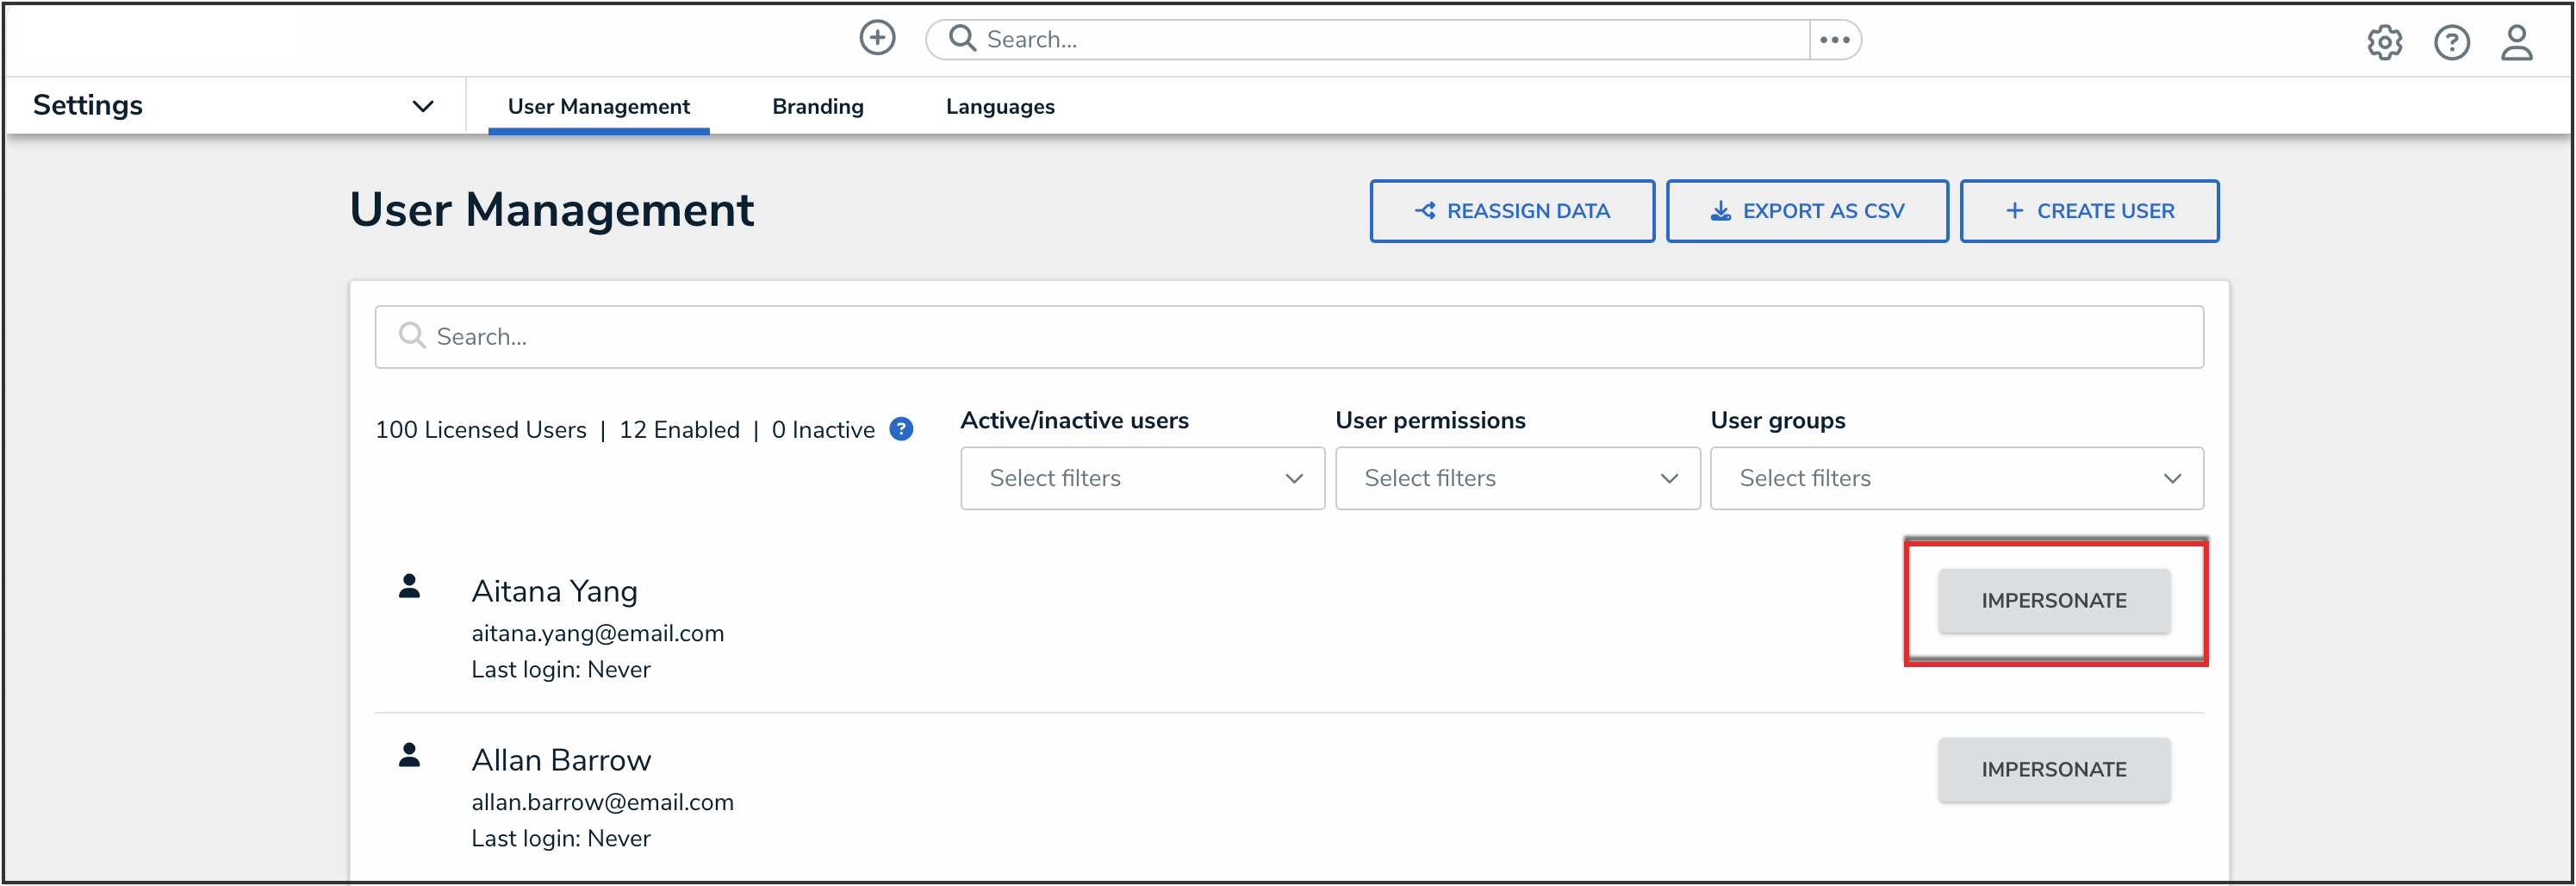
Impersonate Button
Identifying a Conflict and Setting a Form's Priority
- Navigate to the object according to the assignment method in the Navigation section. If a conflict exists, a blue banner will display while in Impersonation mode. The banner will not show for end users using Resolver normally.
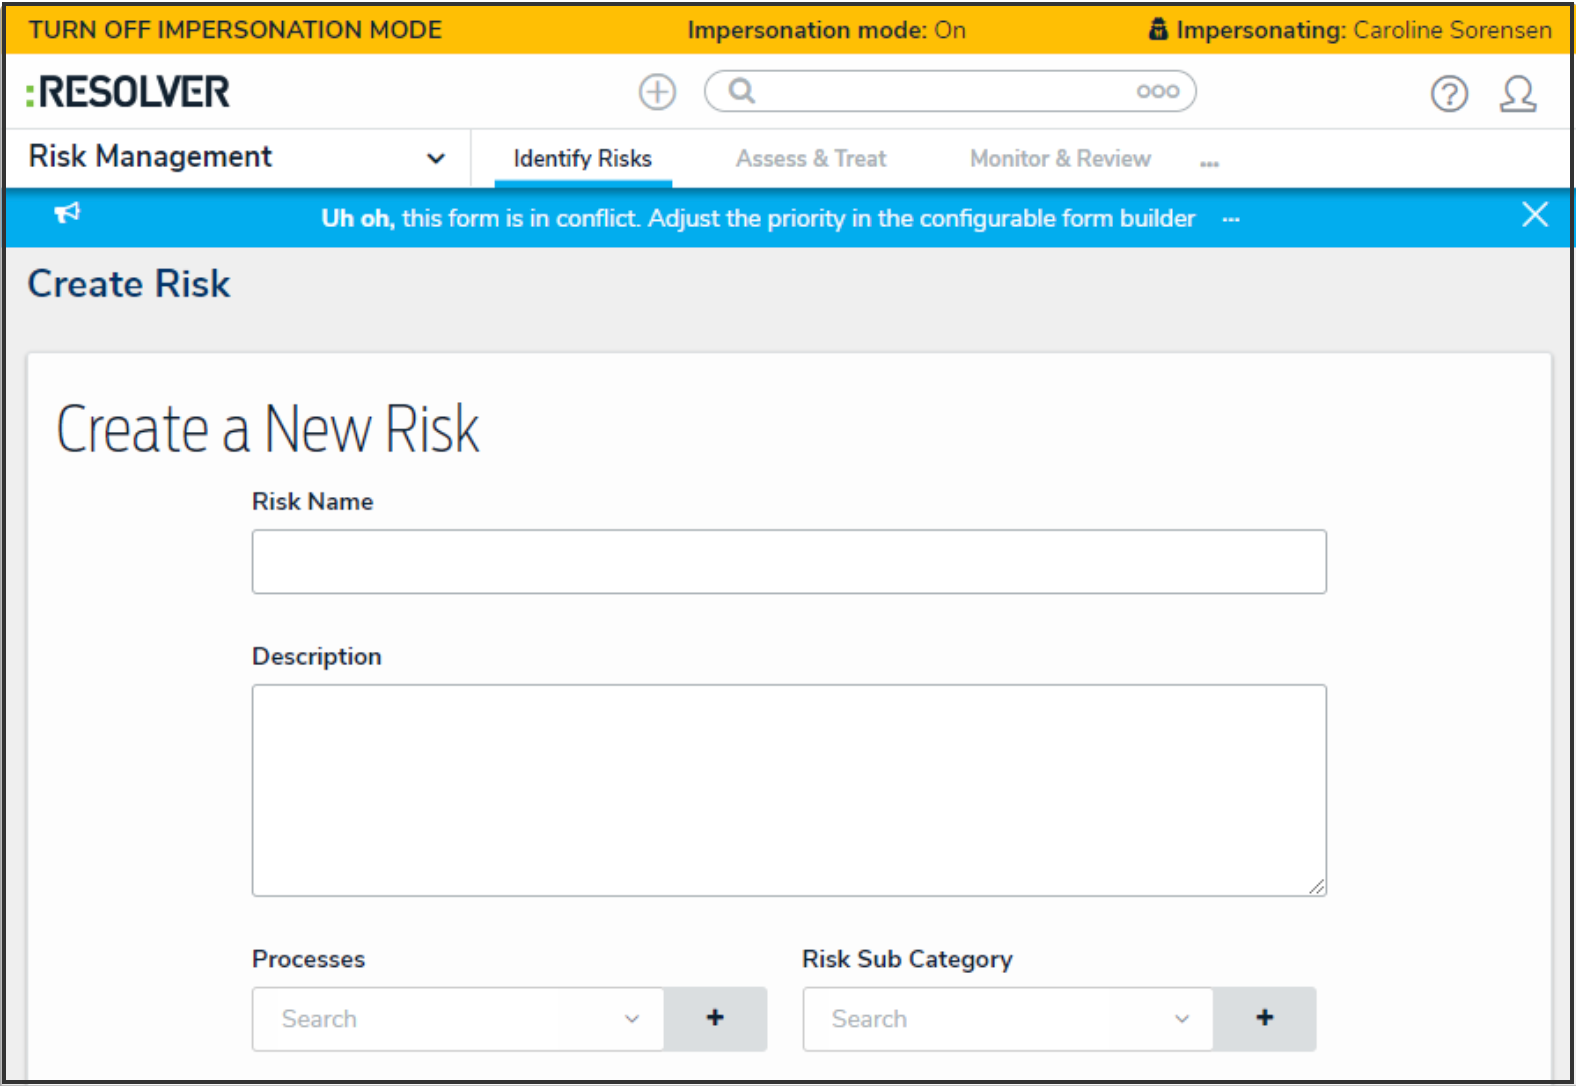
Conflict Banner
 Note:
Note:
If a form and a palette are both in conflict, two blue banners will appear at the top of your screen. - Click the ellipsis in the blue banner to display the forms in conflict.

Conflicting Forms
- Click a form to display the Edit Configurable Form page. This will turn off Impersonation mode.
- Click the Edit icon at the top of the page to display the Name, Description, and Priority fields.
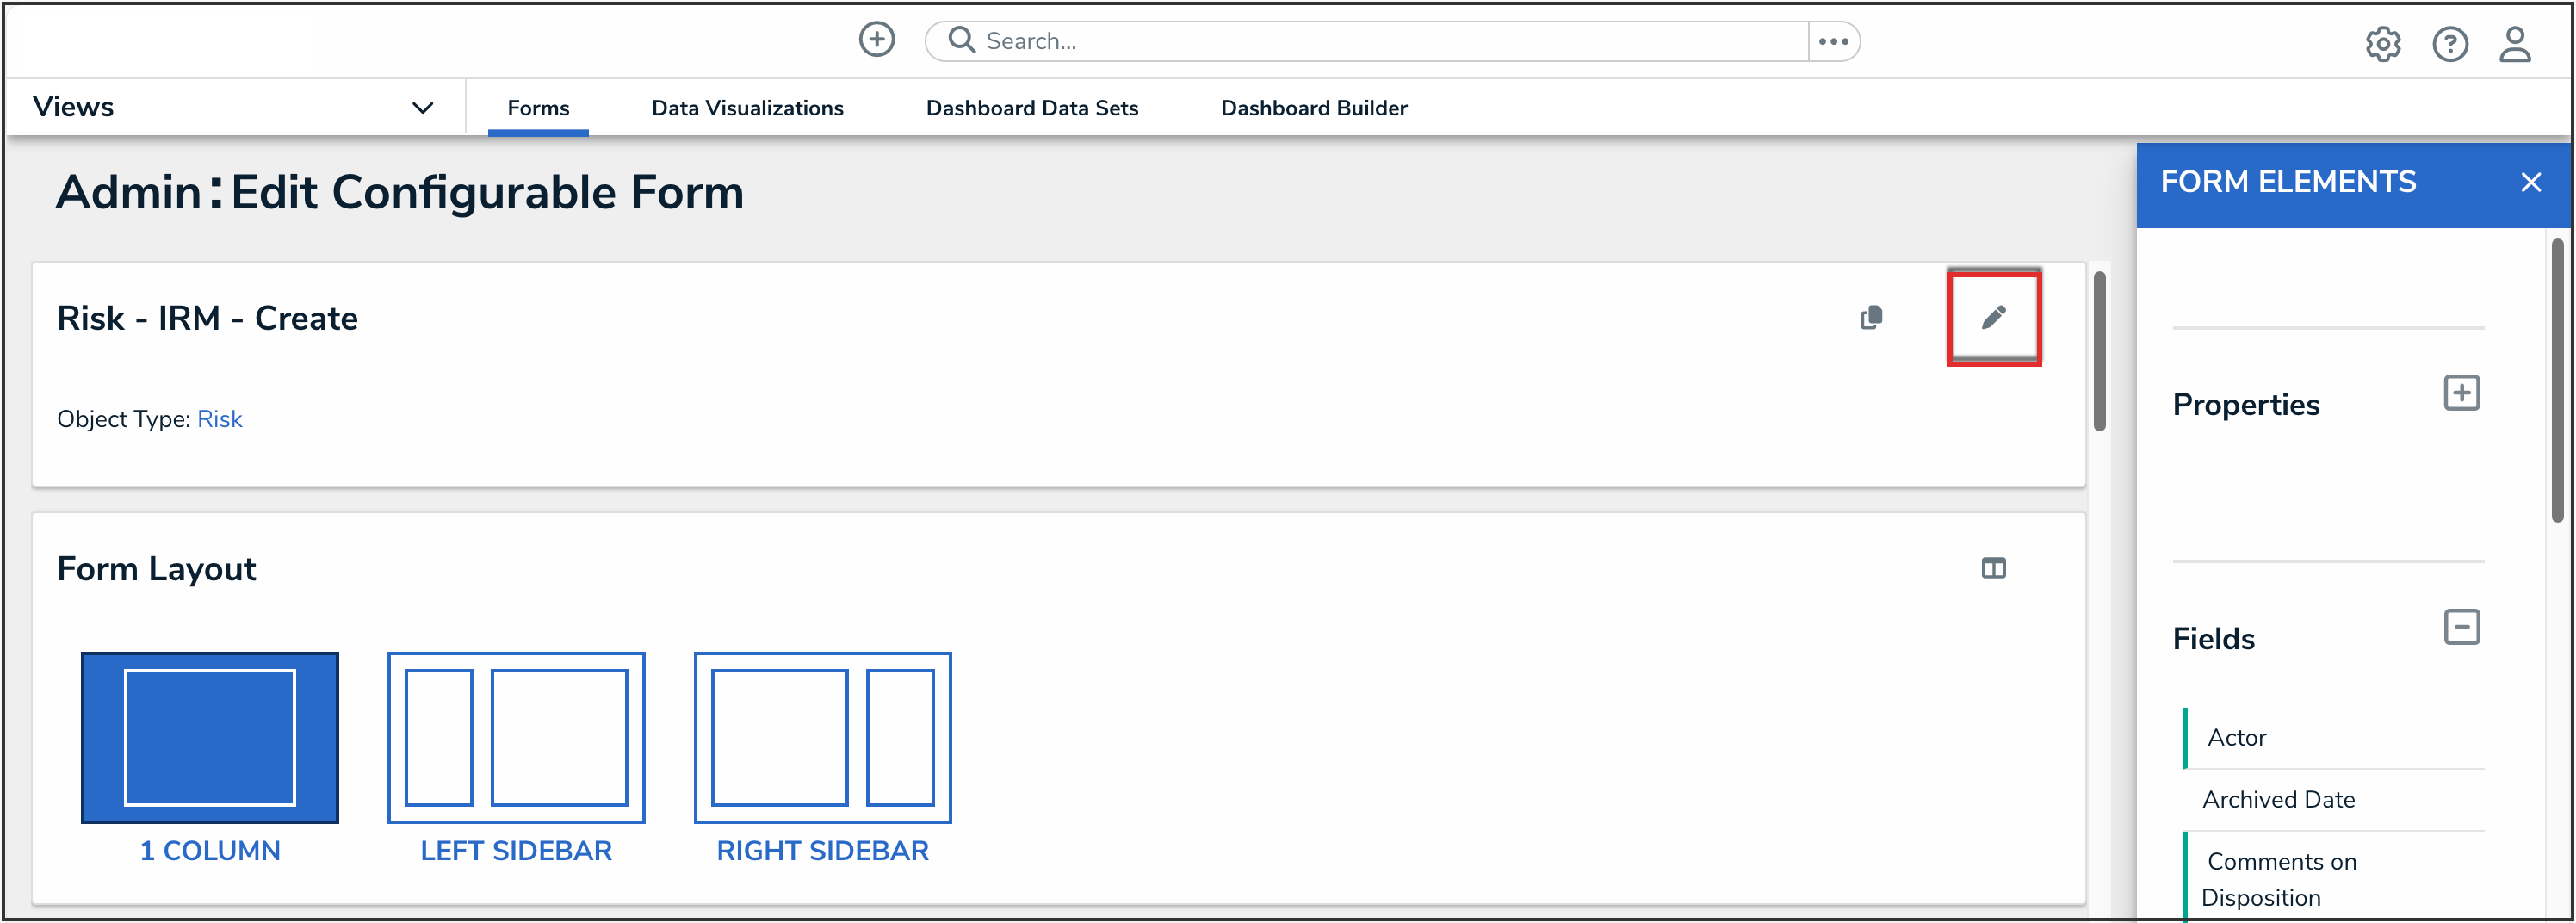
Edit Icon
- Enter a number in the Priority field.
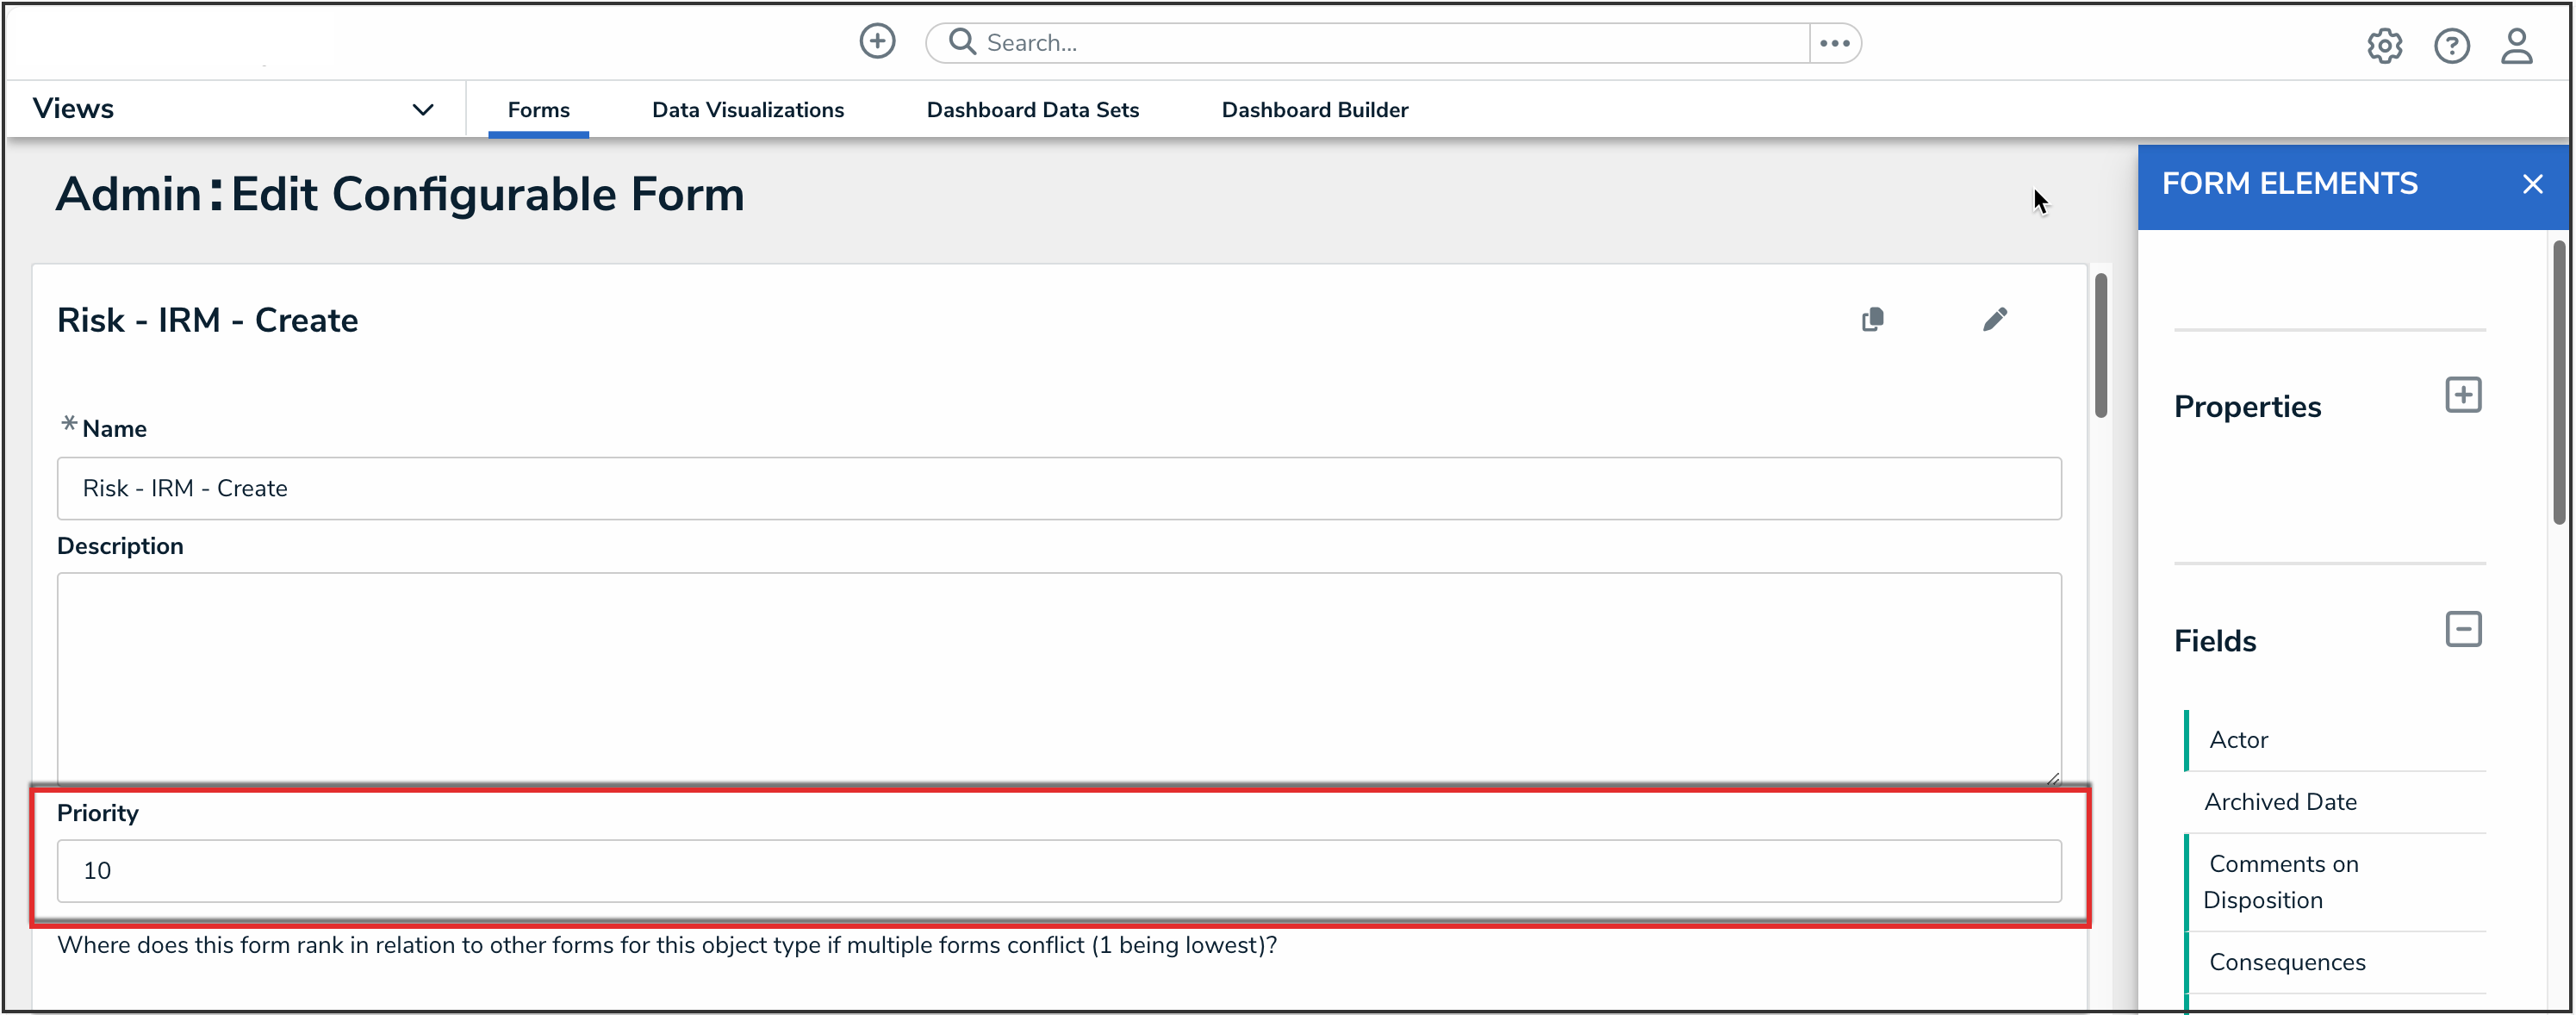
Priority Field
- (Optional): Repeat the steps above to assign other conflicting forms a priority. If the form you wish to display to the user has been assigned a higher priority than all other conflicting forms, it's not necessary to assign lower priorities to those forms.
 Note:
Note:
Entering Impersonation mode for the user after assigning a priority will still display the blue banner to indicate that a potential form conflict exists. However, clicking the ellipsis will display the priorities assigned to the conflicting forms and allow you to edit them as needed.
Important Notes
- The Priority field accepts up to nine numeric characters, with a range of -999999999 to 999999999.
- The higher the number entered, the higher the form's priority, with negative numbers being lower (e.g. -1 is a lower priority than 0). For example, if you assign one conflicting form a 1 priority and the other conflicting form a 2 priority, the form with a 2 priority would be displayed before the form with a 1 priority.
- By default, all forms are assigned a 0 (none) priority.
- If the form you wish to display to the user has been assigned a higher priority than all other conflicting forms, it's not necessary to assign lower priorities to those forms.
- Entering Impersonation mode for the user after assigning a priority will still display the blue banner to indicate that a potential form conflict exists. However, clicking the ellipsis will display the priorities assigned to the conflicting forms and allow you to edit them as needed.


