Overview
An Administrator can edit or delete a Trigger, Transition, or Action if it requires further attention.
User Account Requirements
The user account you use to log into Resolver must have Administrator permission to access the Object Types tile.
Related Setup/Information
Please see the Add a Condition to a Transition article for more information on adding a Condition to a Transition.
Navigation
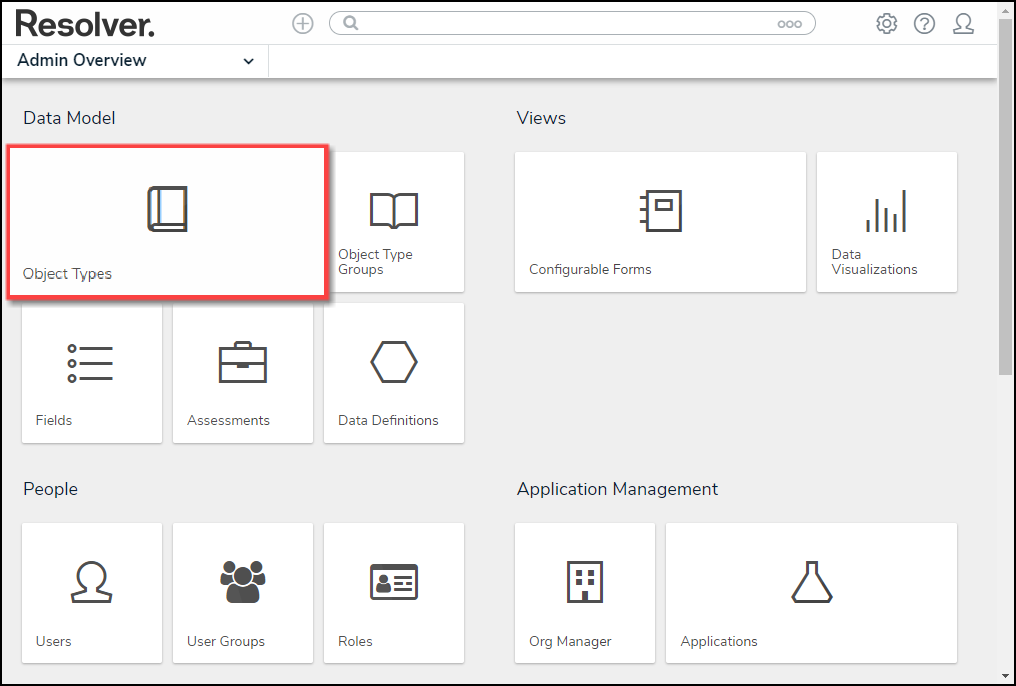
- From the Home screen, click on the Administration icon.
![]()
Administration Icon
- From the Admin Overview screen, click the Object Types tile under the Data Model section.
Object Types Tile
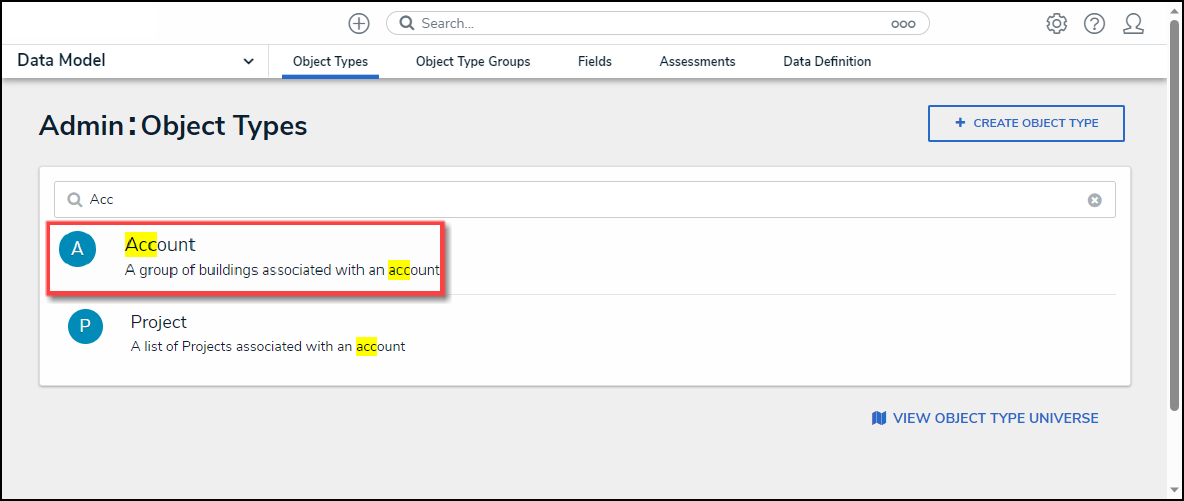
- From the Admin: Object Types screen, enter an object type name in the Search field to narrow the search results list.
- Click an Object Type Name from the search results lists.
Form Name Link
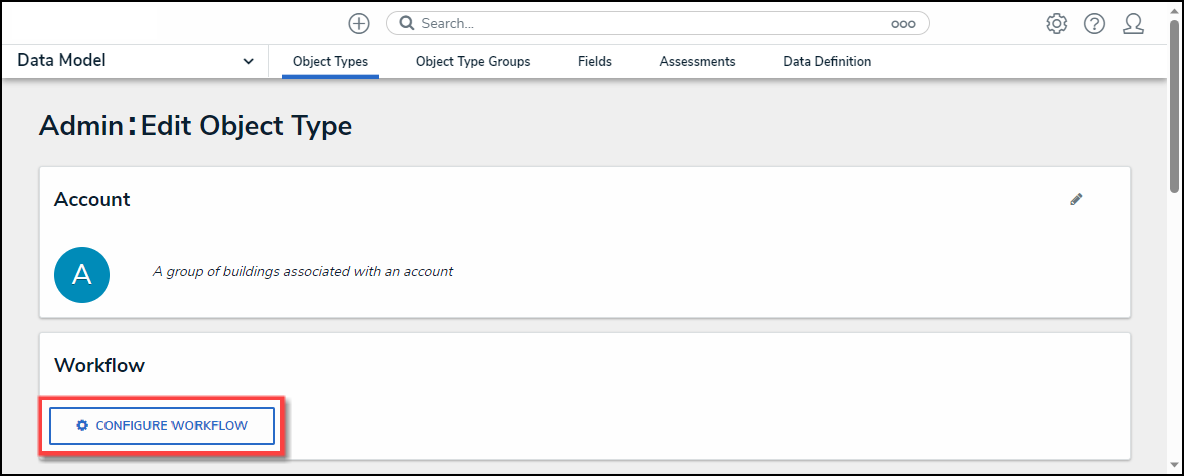
- From the Admin: Edit Object Type screen, click the Configure Workflow button.
Configure Workflow Button
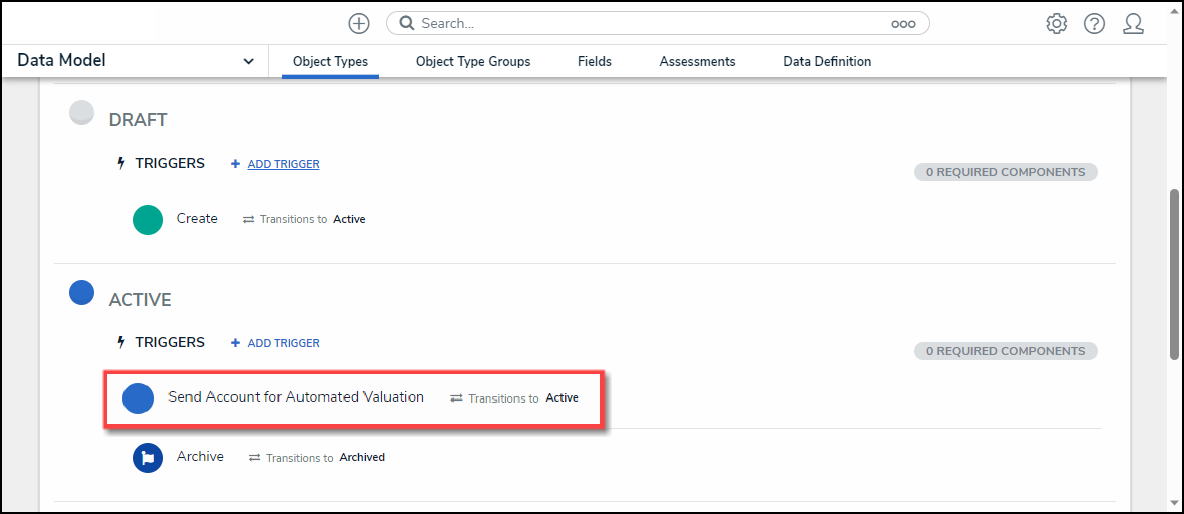
- From the Admin: Edit Workflow screen, click a Trigger from the States section.
Trigger
Editing/Deleting a Trigger
- From the Edit Trigger pop-up, click the Edit icon.
![]()
Edit Icon
- Apply edits to the following fields:
- Type: Select a new Type from the Type dropdown list.
- Button: The Button Trigger type adds a button to configurable forms, which moves an Object from its current state to another state (e.g., clicking the Submit for Review button on a form will move the object to the In Review state).
- Timed: The Timed Trigger type moves an Object to a specified state and can perform actions nightly (e.g., create a trigger that notifies users of an overdue deadline or reminds them to launch an assessment on a particular day).
- The Timed Trigger type cannot be added to the Creation state. Read more here: Timed Triggers & Nightly Emails Schedule.
- If a state contains multiple Timed Triggers with conditions, you must create separate Transitions for each Trigger.
- Type: Select a new Type from the Type dropdown list.
 Note:
Note:
A button or timed trigger cannot be edited/changed to Consume an Orchestrated Event.
- Consume Orchestration Event: The Consume Orchestration Event Trigger type uses an existing state or Object Type’s Send Orchestration Event action to automatically Transition an object to another predefined state (e.g., Closing an audit object will also automatically close all issue objects in an Open state).
- The Consume Orchestration Event Trigger type also cannot be added to the Creation state.
 Note:
Note:
A Consume Orchestrated Event cannot be edited/changed.
- Show in Workflow Control: The toggle switch bypasses conditional logic requirements that may prevent the Trigger from appearing on the form.
- Name: Enter a new Trigger Name.
- Description: Enter a new Trigger Description.
- Color: Enter a new 6-digit hex code or click the field to select a color from the Color Palette dropdown.
- Icon: Select a new icon from the Icon dropdown menu.

Edit Trigger Pop-up
- Click the Delete button to delete the trigger and its Transitions, Conditions, and Actions,
- Click the Done button to save changes.
Editing/Deleting a Transition
- From the Edit Trigger pop-up, click the Edit icon.
![]()
Edit Icon
- Apply edits to the following fields:
- Name: Enter a new Transition Name.
- Destination State: Select a new Destination State from the Destination State dropdown menu.
- Bypass Required Fields: Enabling the toggle switch allows the Transition to occur when required fields on the form are empty.
- Continue Working with Object Once Transition is Complete?: Select the Yes radio button if a Transition to the same form or another form is required when a user Triggers a form Transition, or select the No radio button if no Transition is required.
 Note:
Note:
The Continue working with object once transition is complete? radio buttons will not appear on the Create state.
![]()
Edit Trigger Pop-up
- Click the Done button to save changes.
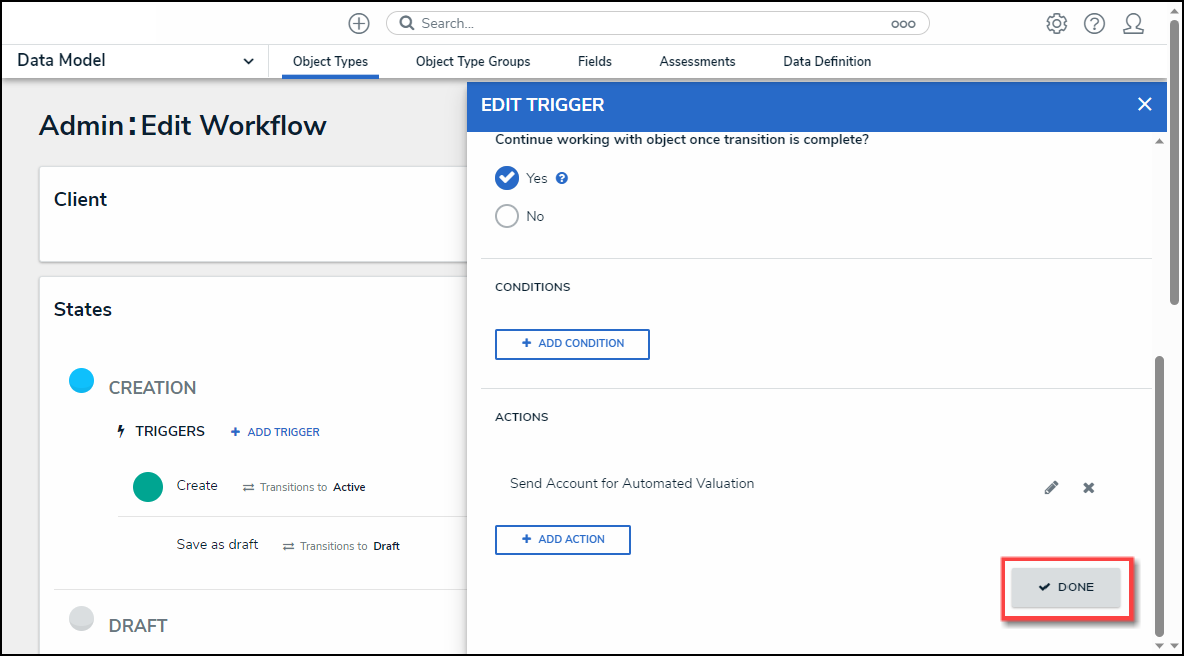
Done Button