Users in the Compliance Team user group must scope an assessment to define which compliance frameworks, topics, sub-topics, or requirements should be assessed (e.g., topics from the Anti-Money Laundering Framework). Assessments can be scoped at the time of assessment creation or from the Determine Applicability activity.
 | It's recommended you scope an assessment immediately after launch. However, you can access and scope it later in Compliance Management > Review Control Self Assessment. |
To scope an assessment:
- Log into a user account from the Compliance Team user group.
- Click the relevant Compliance Assessment and click Applicability Scoping.
- Select one or more compliance frameworks as the focus of your assessment by clicking + Add.
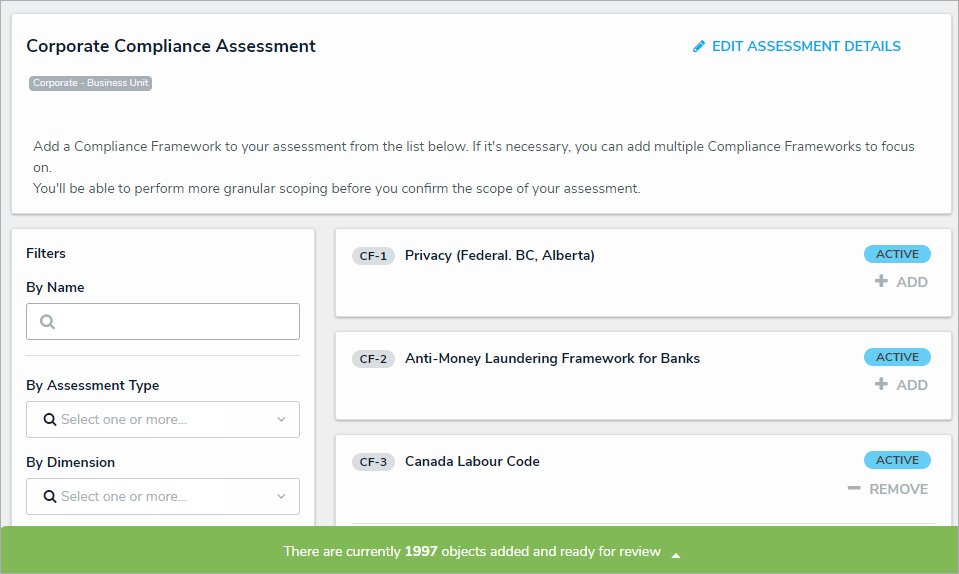 A list of available compliance frameworks.
- If needed, refine the frameworks further by using one or more of the following default filters in the left-side Filters pane:
- Name: Filters which frameworks are displayed based on their Name. When entering keywords in this field, press Enter on your keyboard to apply the filter.
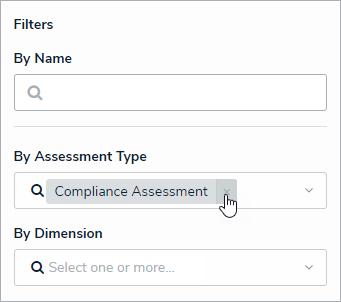
- By Assessment Type: Filters results by object type or assessment type.
- For example, in the screenshot below, selecting Compliance Assessment in the By Assessment Type: Filters to only display frameworks on which an assessment was previously completed through the Compliance Assessment type.
- Selecting the Library option in this filter will hide any instances.
- If no instances exist for the object, the Assessments section will be hidden automatically.
- By Dimension: Filters by assessment context (e.g., Business Unit).
- By Description/Unique ID: Filters objects and instances by their Description and Unique ID properties.
- By State: Filters objects and instances by workflow state, including states from other assessment workflows.
- Other: Uses additional filters based on plain text fields, select lists, and multi-select lists added to the focus object type in the assessment. When entering keywords in a text field filter, press Enter on your keyboard to apply the filter.
- To remove any unneeded filters, click the X beside the filter in the Filter Selection field.
 Removing unneeded filters from the Filter Selection field.
 - Click Add to Scope beside an object to add it to the assessment.
- To add an instance to the assessment, click the Assessments link below an object, then click Add. For more information about an instance, hover your cursor over the ellipsis beside the record.
 Clicking the Assessments link below an object will display any instances, which can then be added to the assessment.
If an object has not been previously assessed, it will not have any instances and the Assessments link will be hidden. - Remove any unneeded objects or instances by clicking Remove From Scope beside that object or instance.
- Click the green banner at the bottom of the page to display the Assessment Navigation form.
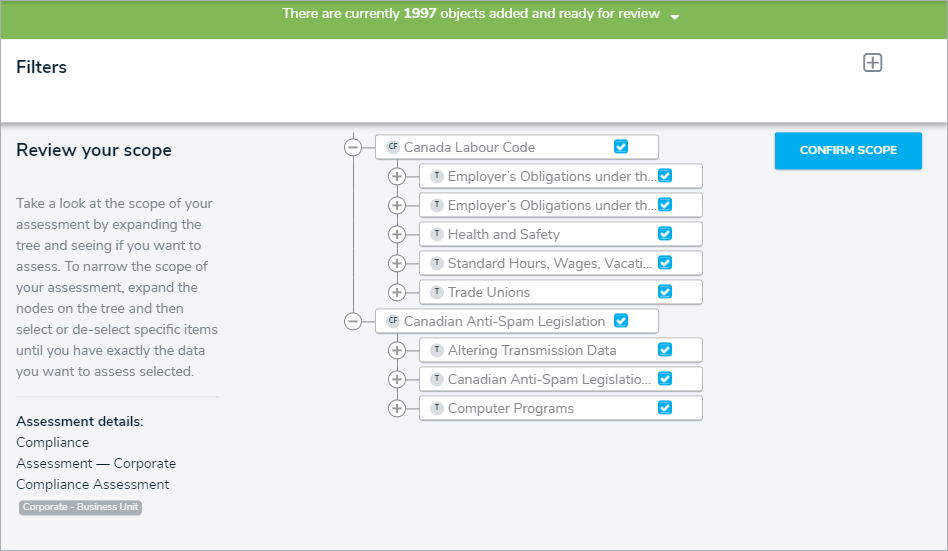 The Assessment Navigation form.
- Click the
 icons in the tree to expand its nodes and display any relationships or references to the scoped topics and sub-topics.
 - Click the topics and sub-topics names in the tree to review them and any applicable requirements in the palette.
- Deselect the checkboxes beside objects you wish to remove from the scope.
- By default, all objects and their relationships or references are selected (i.e., they are in- scope).
- Deselecting an object in an upper node will automatically deselect the objects in the nodes immediately below it.
Instances cannot be deselected from the scoping form. To remove instances from the scope, click the green banner at the top of the page, then click Remove From Scope beside the instances in the Assessments sections.
- To filter which objects are displayed in the tree, click the
 icon.
icon.- Select an object type in the Select object type to filter tree with dropdown menu to show the object type's available plain text, select list, and property filters.
- To hide the filters, click the
 icon.
icon.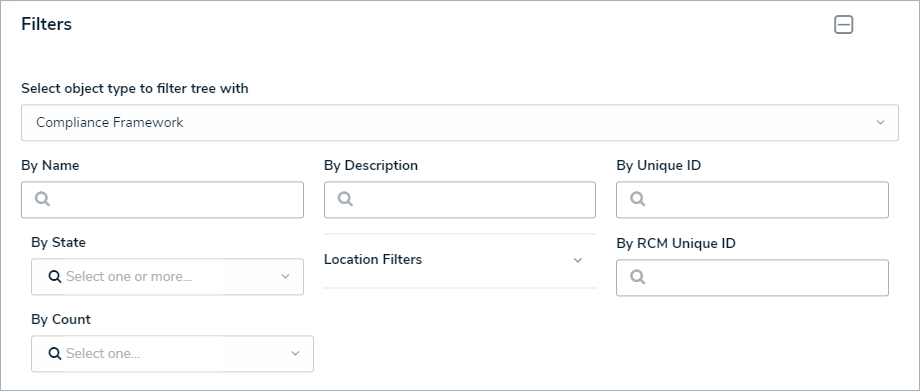 The Filters menu.
- Click Confirm Scope, then click Review Objects to decide whether to display the Review Objects page.
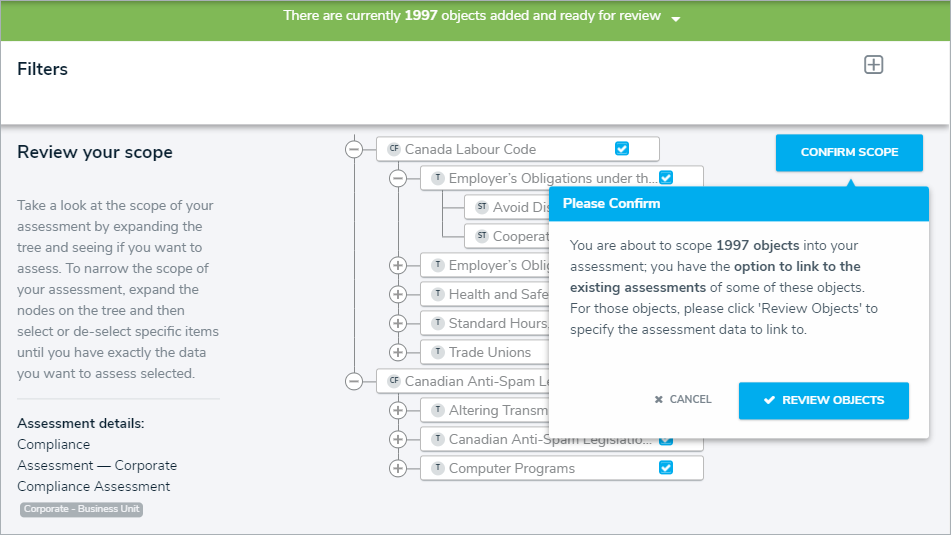 The Please Confirm dialog.
- Optional: To link to all the applicable objects of a particular assessment, click Assessments on the Global Assessments Selection section, then check Link to Existing next to the assessment you wish to use objects from.
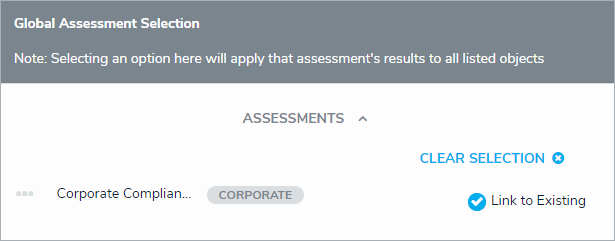 The Review Objects page.
- Optional: If you would like to use the version of only one object currently being used by another assessment, click Assessments on the applicable object then check Link to Existing.
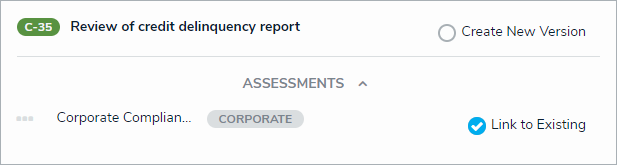 An object that has a version being used in another assessment.
- Click Confirm to launch the assessment.
- If you created the assessment then accessed it later from a view, the form selected for that view will be displayed after clicking Yes. Otherwise, the form used to originally create the assessment will be displayed.


 icon.
icon. icon.
icon.


