Only Core Administrators can add users to Incident Management. Note that adding users is different from adding persons in the Library application. Persons are added to incidents and investigations and can include witnesses, suspects, and related parties. Persons cannot log into the application, whereas users can.
 | The Core Administrator can create users only. It is not to be confused with the Administrator (Incident Management), who can view incident objects and manage library objects. |
 | Only users with administrative rights can add users to Resolver Incident Management. Users with administrative rights enabled in their profiles can access the Admin page by clicking the gear icon in the top bar on any page. If you don't have administrative access enabled, this icon will not be visible. |
 | Enabling Admin or All Access account status for new users is not recommended. Admin will give users Administrative privileges, including the ability to cause irreparable damage to your app. All Access will give users the ability to see all objects and object types in your app. |
To create a new user:
Log into a user account that has access to Administration.
- Click the
 icon in the top bar > Users in the People section.
 - Click Create User to show the Create User page.
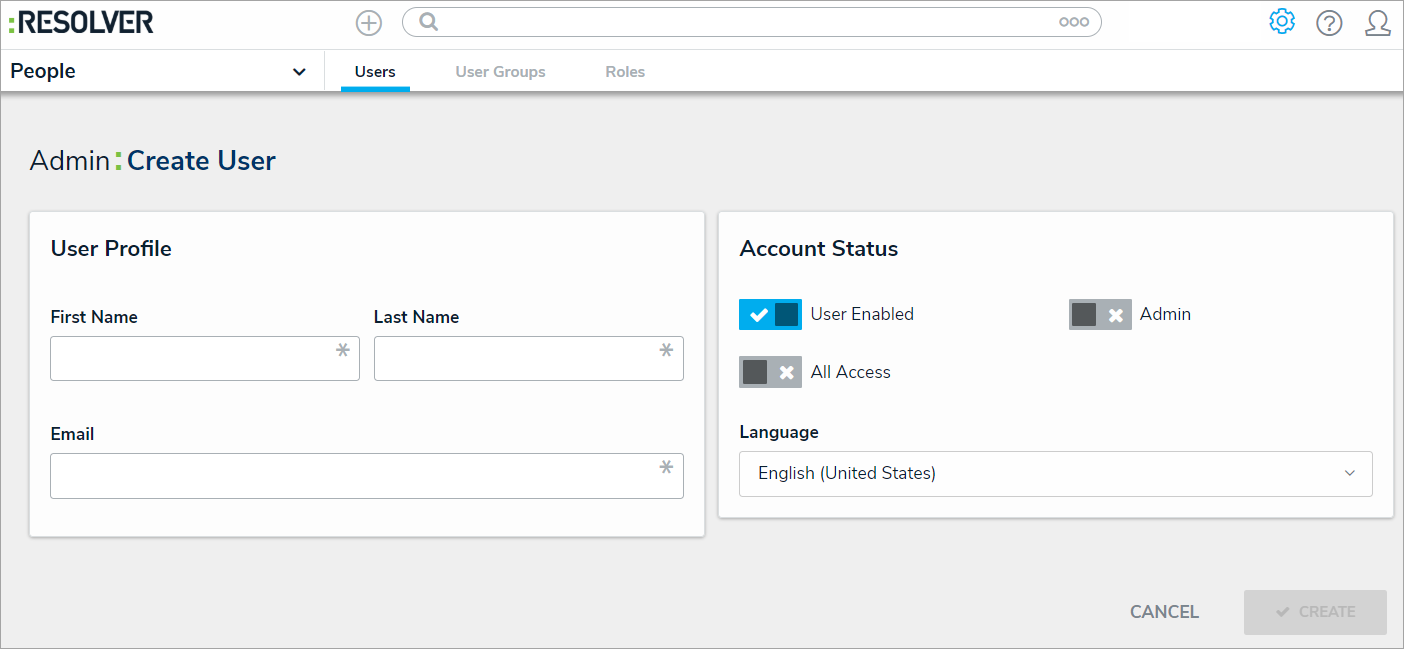
 The Create User page.
- Enter the user’s name in the First Name and Last Name fields.
- Enter the user’s email address in the Email field. This is the address that will receive the email with further instructions on creating a password to sign into Core. This email address is also used to authenticate the user when he or she logs in and therefore must be unique.

Because the user’s email address is used to authenticate the user when he or she logs in, ensure the email address is correct before clicking Create as you will be unable to modify the address later. - Optional: Click the
icon next to User Enabled to make this user account inactive. By default, the user account is active. Enabling Admin and All Access privileges is not recommended.
- Click Create. The new user will receive an email at the email address entered in step 5 with instructions on creating a password and signing into Incident Management.
 | More information on supported translatable languages can be found here: Languages Overview article. If you wish to use a language settings that is not listed on the Supported Language Translations article, please reach out to your Customer Success Manager. |
 icon in the top bar > Users in the People section.
 icon next to User Enabled to make this user account inactive. By default, the user account is active. Enabling Admin and All Access privileges is not recommended.