Overview
A Form View is a list of objects or assessment objects. Admins can specify which objects and forms are displayed based on the object type and workflow state.
User Account
The user account you use to log into Resolver must have Administration permissions.
Related Information/Setup
For more information on Activity Views, please refer to the Views Overview article.
For more information on Assessments, please refer to the Assessments section.
For more information on Workflows and Workflow States, please refer to the Workflow section.
Navigation
- From the Home screen, click the Systems icon.
![]()
Systems Icon
- From the Admin Overview screen, click the Applications tile under the Application Management section.
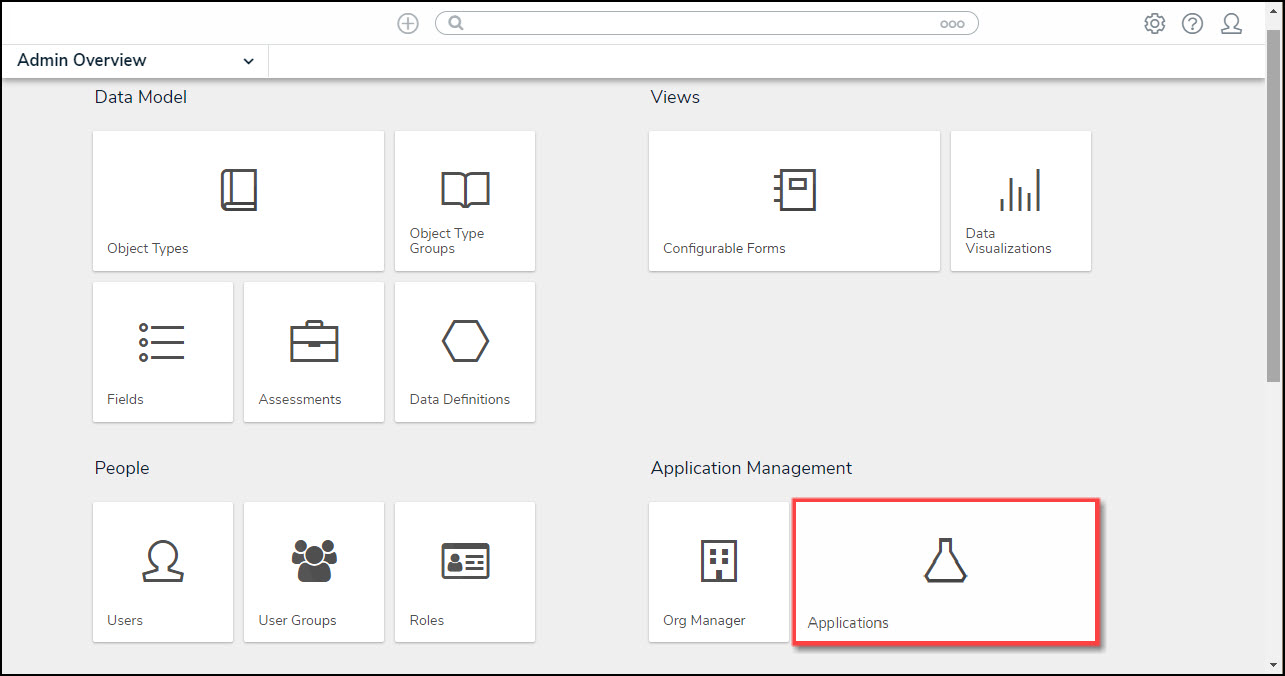
Applications Tile
- From the Admin Applications screen, click an Application.
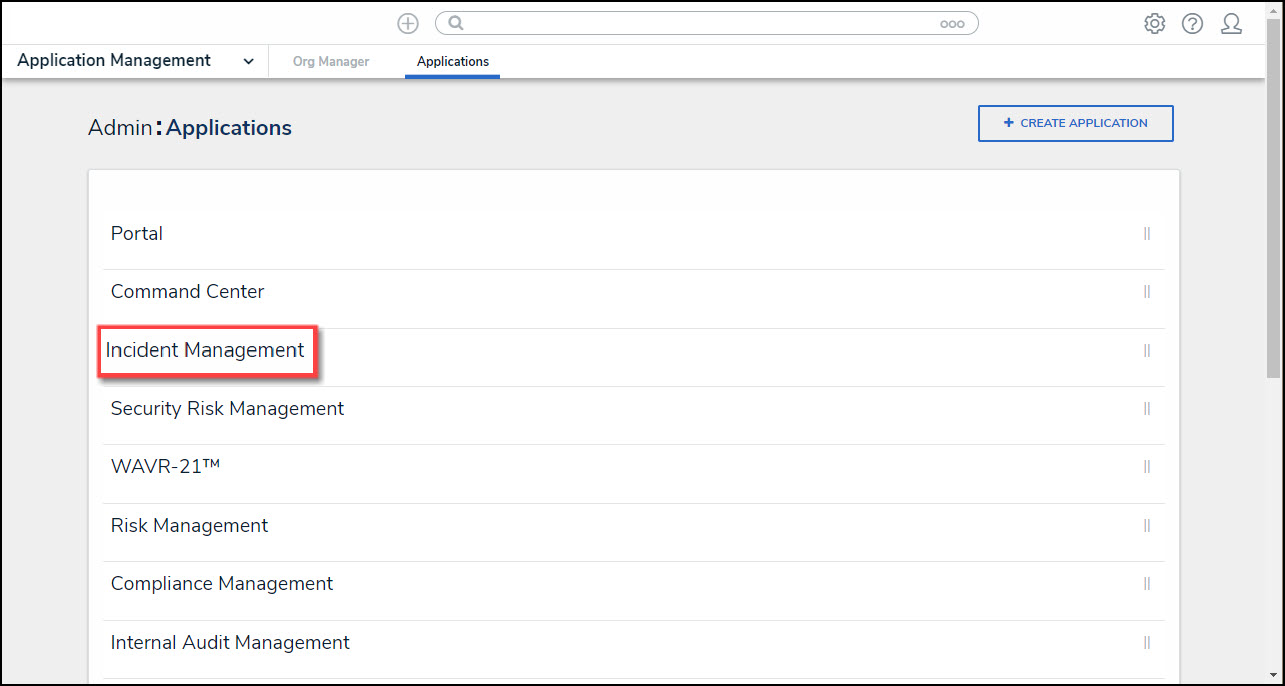
Click an Application
From the Admin Edit Application screen, click an Activity.

Click an Activity
From the Admin Edit Activity screen, click the + Add Views button under the View section.
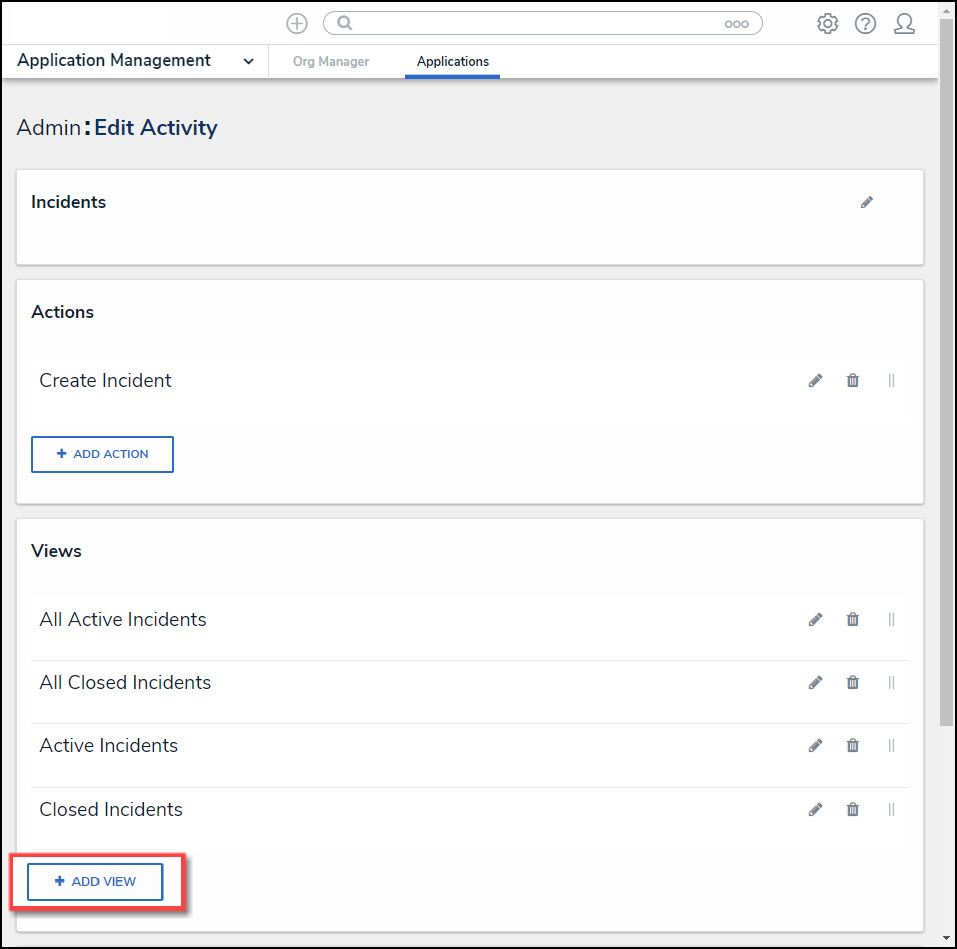
+ Add View Button
Create a Form View
- From the Views section, enter the following information in the fields provided:

View Section
- Name: Enter the Name of the Activity View in the Name field. The Name will appear as a header below the Activity View.
- (Optional) Description: Enter a description in the Description field, which appears when a user has opened the Activity View. If necessary, apply Markdown formatting to the text. Click the Expand icon beside Basic Markdown Formatting to view popular formatting styles.
![]()
Expand Icon
- Object Type or Assessment: Select an object type or assessment from the Object Type or Assessment dropdown menu to specify which Objects will be available in the Activity View.
- Workflow States: Select one or more assessment or object type states from the Workflow States dropdown menu to specify which objects or instances will be displayed based on their current states. Workflow State options are based on the option selected in the Object Type or Assessment dropdown.
- View Action: Select Form from the View Action dropdown menu.
- Define Form to Show: Select a previously created Form from the Define Form to Show dropdown menu.
- Display Options: Select a Display Option from the Display Options dropdown menu:
- Show view title when empty: Shows the Activity View's activity title when the view has no data to display.
- Hide view title when empty: Hides the Activity View's activity title when the view has no data to display.
- Sorting Options: Currently, two Sorting Options are available for Activity Views within the system, Property and Unique ID. Users can select whether to sort an Activity View by Unique ID Ascending or Descending by selecting a corresponding radio button. By default, the Unique ID Sorting Option is set to Ascending.
- Click the Create button to add the Activity View to the system.
- Repeat the above steps to add another Activity View to the system.
- Click the Reorder icon, continue to hold the mouse button and drag and drop the Activity View to rearrange the Activity View order.
![]()
Reorder Icon
- Click the Edit icon to edit an Activity View.
![]()
Edit Icon
- Click the Delete icon to delete an Activity View. A Confirmation screen will appear. Click on the Yes button to delete the Activity View from the system.
![]()
Delete Icon