Create & Modify Roles
Last Modified on 02/27/2025 10:20 am EST
The enabled triggers and permissions in the following steps are recommended; however, you can adjust these triggers and permissions as needed.
To avoid creating duplicate data, it's recommended that admins perform a search to confirm the following roles don't already exist in their organization. For more detailed information on roles and permissions, see the Roles section and Workflow Permissions article in the Resolver Core Administrator's Guide.
Create a New Role
To create a new role:
- Click the
 icon in the top bar > Roles in the People section.
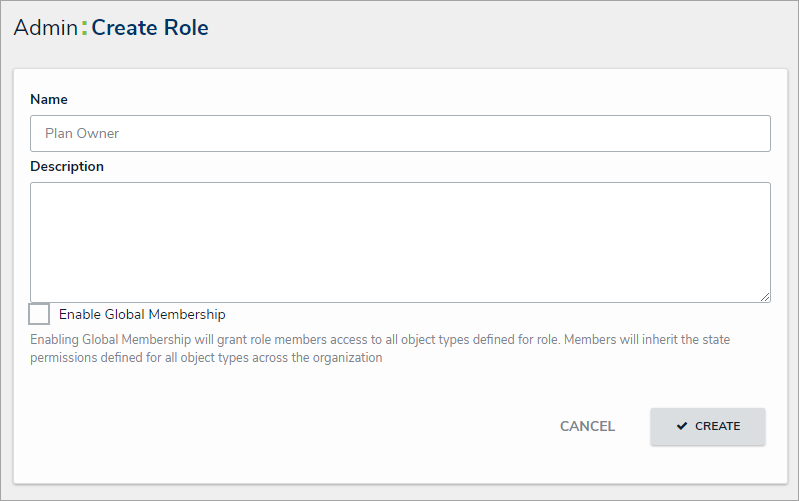
- Click Create Role to display the Create Role page.
- Enter Plan Owner in the Name field.
- Ensure the Enable Global Membership checkbox is not selected.

The Create Role page.
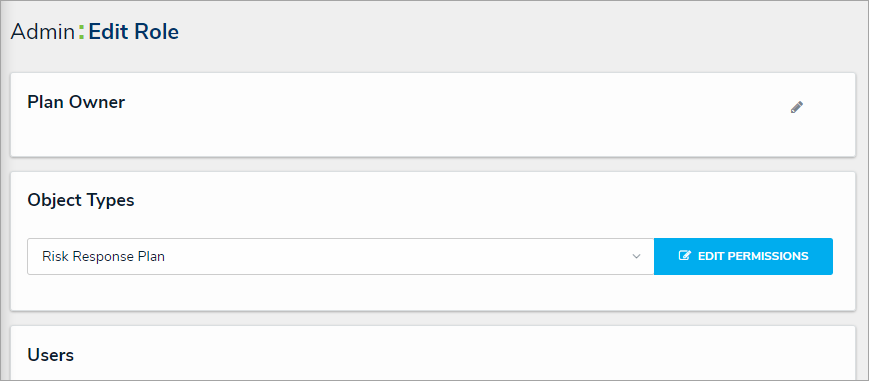
- Click Create to display the Edit Role page.
- In the Object Types section, begin typing, then select Risk Response Plan.

The Edit Role page.
- Click Edit Permissions.
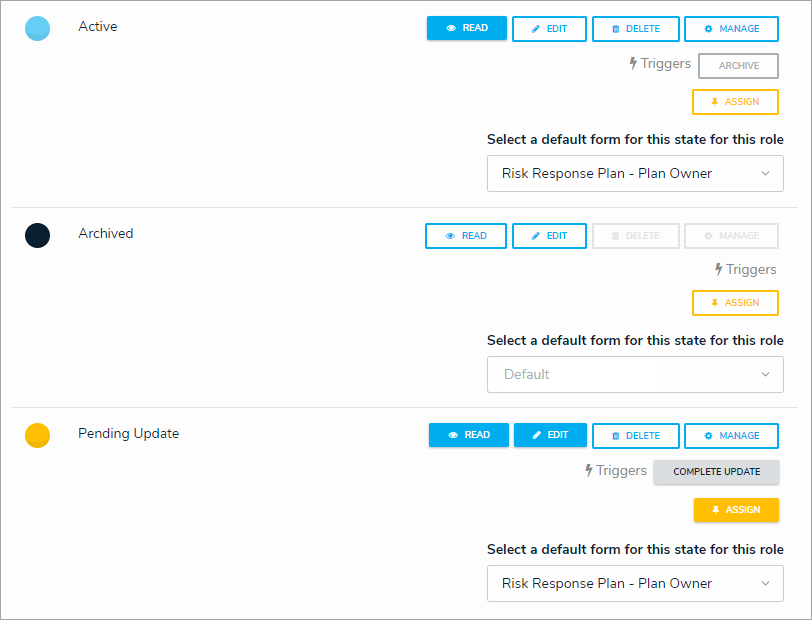
- On the Active state:
- Enable Read permissions.
- Select the Risk Response Plan - Plan Owner form.
- On the Pending Update state:
- Enable Read, Edit, and Assign permissions.
- Enable the Complete update trigger.
- Select the Risk Response Plan - Plan Owner form.
 Workflow permission.
- Click Done to return to the previous page.
- Add the appropriate users and/or user groups to the role through the Users and Groups sections on the Edit Role page. See the User Management and User Groups sections in the Resolver Core Administrator's Guide for more information.
Modify Existing Roles
To modify the permissions on existing roles:
- Click the
 icon in the top bar > Roles in the People section.
- Select the Risk Team role.
- Select the Risk Response Plan object type in the Object Types section, then click Edit Permissions.
- Enable the All Triggers, Create, Read, Edit, and Manage permissions at the top of the page for all workflow states.
- Select the Risk Response Plan - Risk Team form for all workflow states.
- Repeat steps 1-3 for the Risk Owner role.
- Enable the All Triggers, Create, Read, Edit, and Manage permissions.
- Select the Risk Response Plan - Risk Team form for all workflow states.
 icon in the top bar > Roles in the People section.

