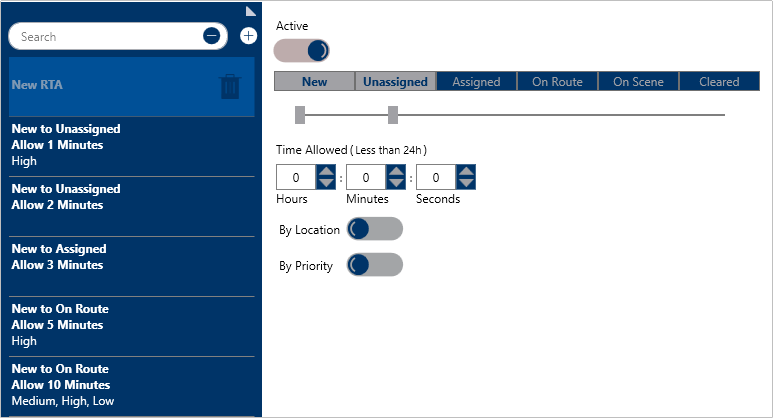
 A new RTA.
To create an RTA:
Click Settings >
 RTA.
RTA.Click the
 Create icon in the pane to the left.
If this RTA should be inactive, click the
 icon under Active. Inactive RTAs will appear with the
  icon.
icon. Click and drag the first notch in the slider to identify the status that will trigger the RTA.
Click and drag the second notch in the slider to identify the dispatch status the dispatcher should achieve within the RTA.
 The sliders in the RTA settings that specify a dispatcher has a set amount of time to change a dispatch status from New to On Route.
Under Time Allowed, type or use the
 arrows in the Hours, Minutes, and/or Seconds fields to specify the amount of time the dispatcher has to modify the dispatch status.
To create an RTA for a specific location:
Click the
 icon next to By Location.
Enter the name of a previously saved location or indoor location in the Search locations field or click a pin on the map to select a location or indoor location. To create a new location, click the
 icon, click an area on the map, then enter the location name in the Location Name field.
 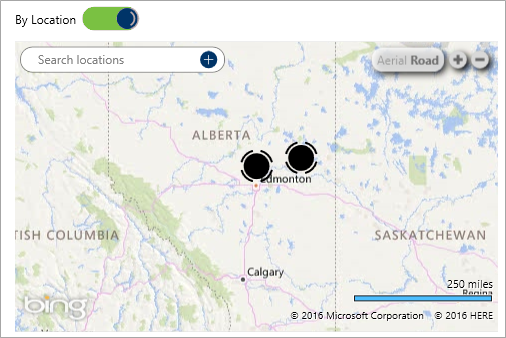 The By Location section. The map is revealed after clicking the By Location icon.
To create an RTA for a specific priority or priorities:
Click the
 icon next to By Priority.
Select the checkboxes next to the priority or priorities you want to create the RTA for (e.g. High, Medium, Low).
 RTA.
RTA. Create icon in the pane to the left.
 icon under Active. Inactive RTAs will appear with the
  icon.
icon. 
 arrows in the Hours, Minutes, and/or Seconds fields to specify the amount of time the dispatcher has to modify the dispatch status.
 icon next to By Location.
 icon, click an area on the map, then enter the location name in the Location Name field.
 icon next to By Priority.