Overview
States represent the data collection and review stages (e.g. Create, Triage, Review, Investigate, Close, etc.). States allow you to control where an object is created or viewed in an application, required fields that must be completed during certain stages, which state the Object will transition (Triggers) and narrow search results.
A default workflow (Creation, Draft, Active, and Archived states) is automatically added to the Object Type when creating an Object Type. These states can be deleted or supplemented with additional States as needed (except for the Creation state, which cannot be deleted and allows only limited configuration).
User Account Requirements
The user account you use to log into Resolver must have Administrator permission to access Object Types.
Related Setup/Information
See the Edit or Delete a State article for more information on marking fields, properties, or roles as required and changing the State's name or color.
See the Add a Trigger & Transition to a State article for more information on adding triggers, transitions, or actions to a state.
Navigation
- From the Home screen, click on the Administration icon.
![]()
Administration Icon
- From the Admin Overview screen, click on the Configurable Forms tile under the Views section.
Configurable Forms Tile
Creating a New State
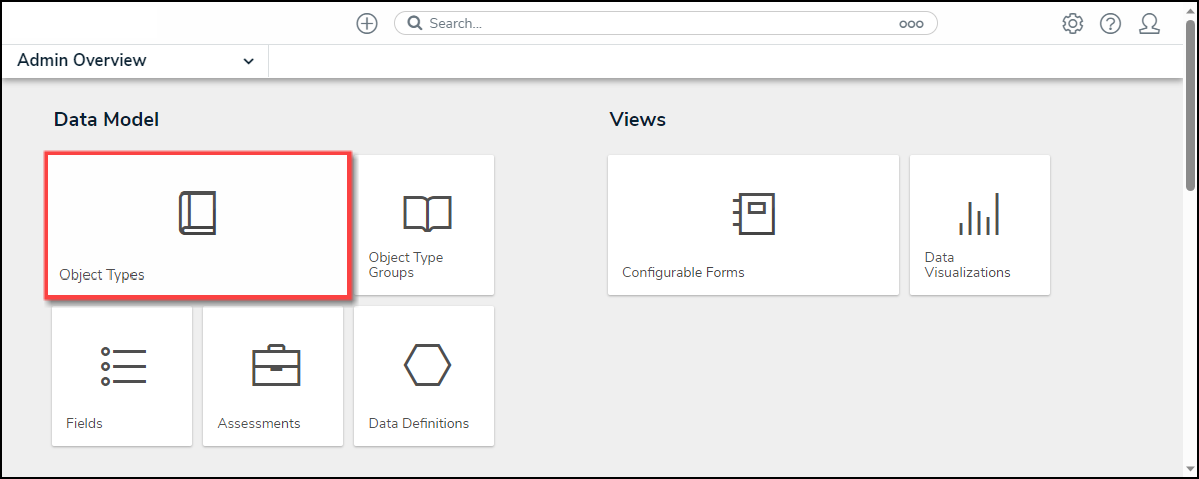
- From the Admin: Object Types screen, enter an Object Type Name in the Search field to narrow the search results list.
- Click on an Object Type Name from the search results lists.
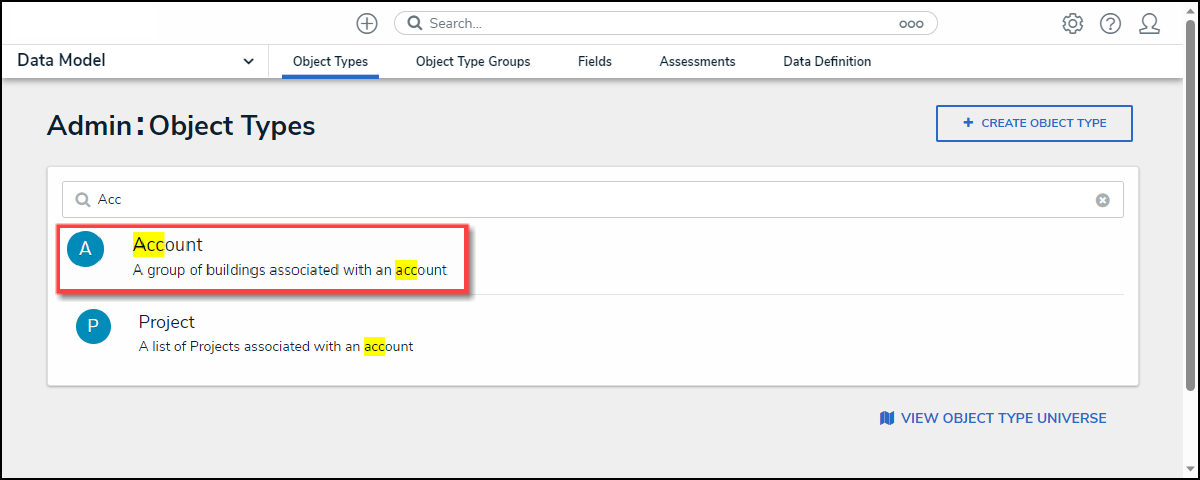
Object Type Name Link
- From the Admin: Edit Object Type screen, click the Configure Workflow button.
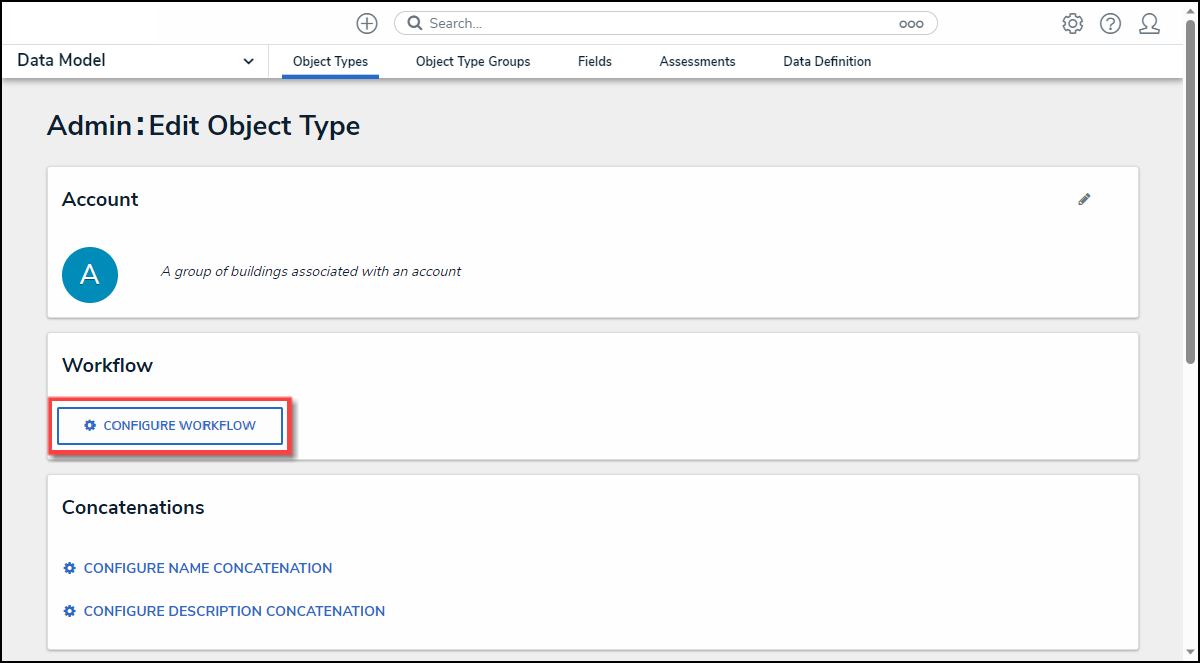
Configure Workflow Button
- From the Admin: Edit Workflow screen, click the + Add State button.
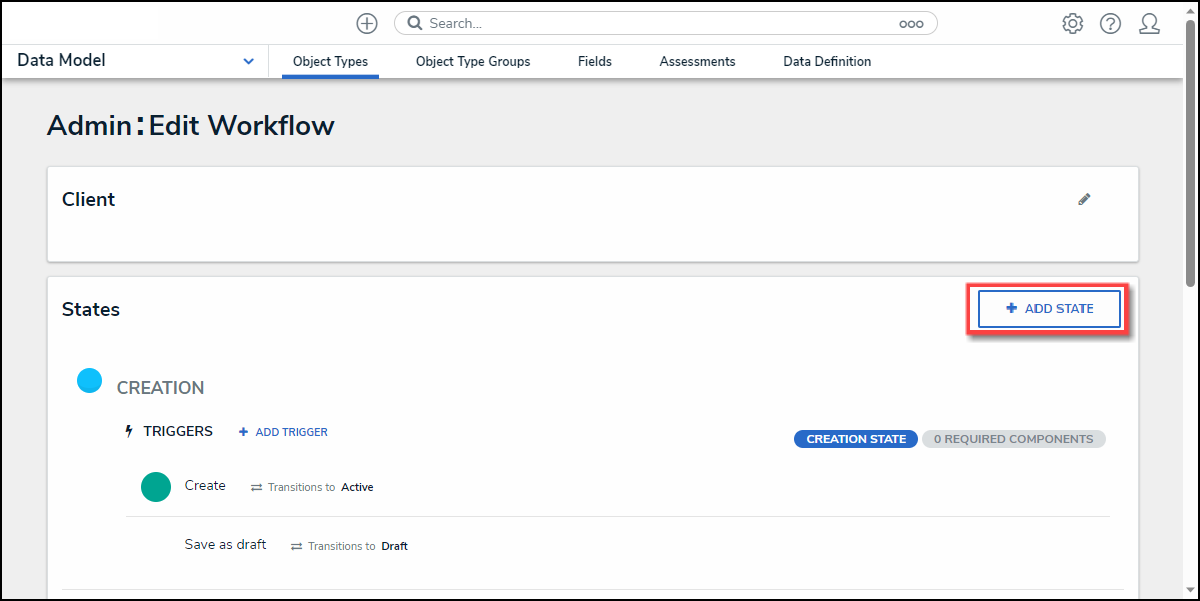
+ Add State Button
- Enter the State's Name in the Name field.
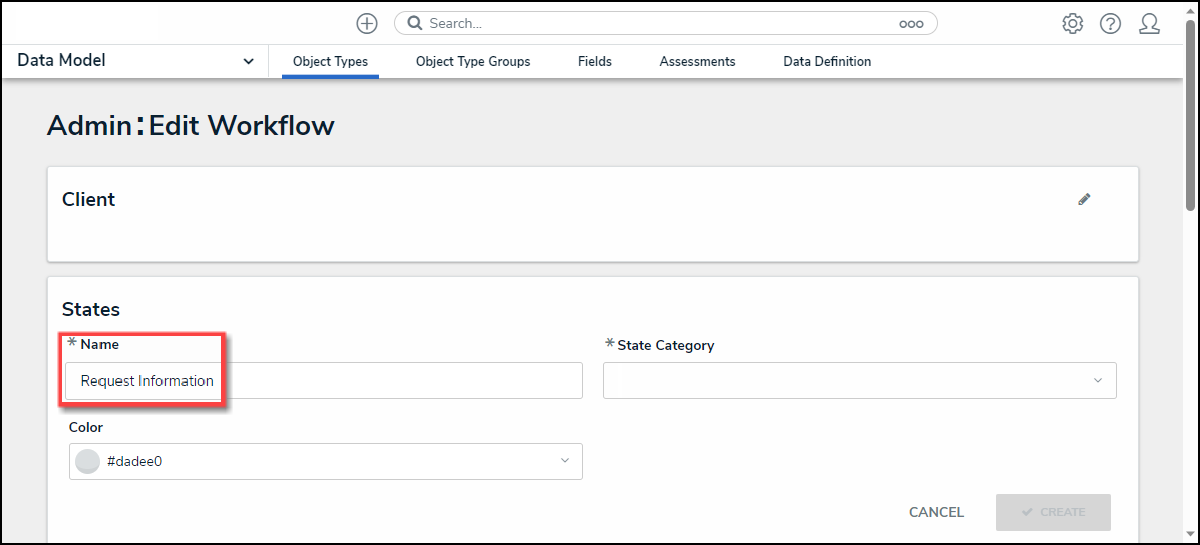
Name Field
- Select a Category from the State Category dropdown menu.
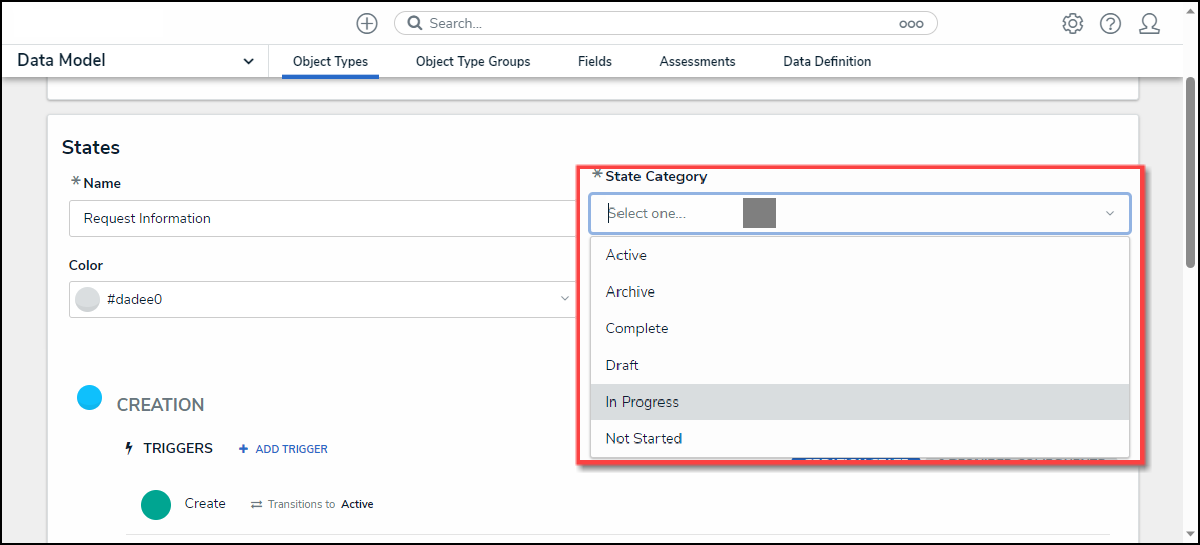
State Category Field
- (Optional) Select a Color Code from the Color dropdown pallet or enter a 6-digit hex color code into the Color field.

Color Field
- Click the Create button to create the new State.
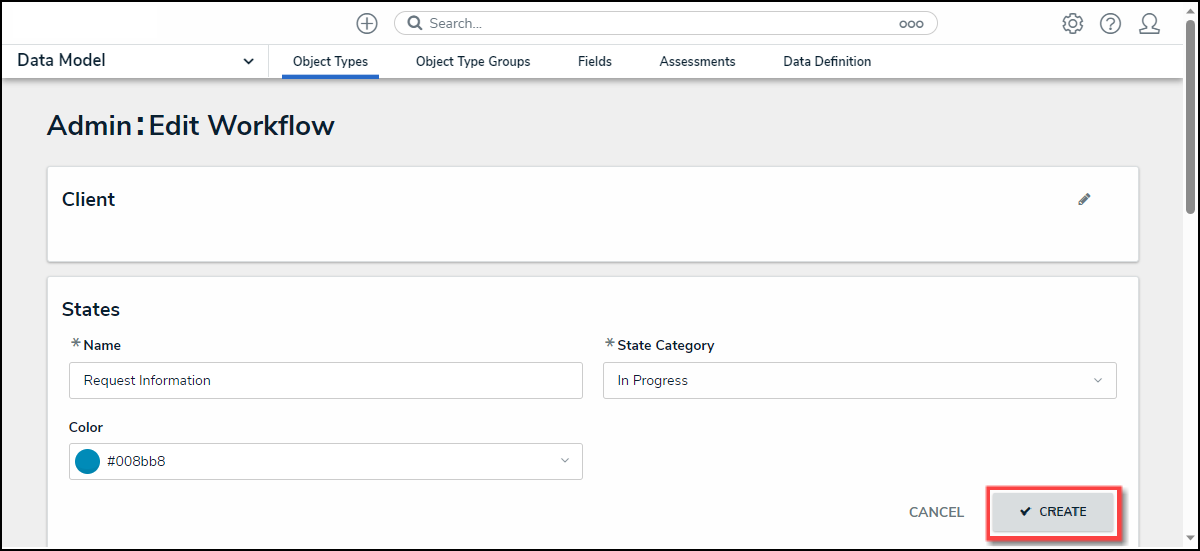
Create Button
- The new State will appear at the bottom of the list on the Admin: Edit Object Type screen.
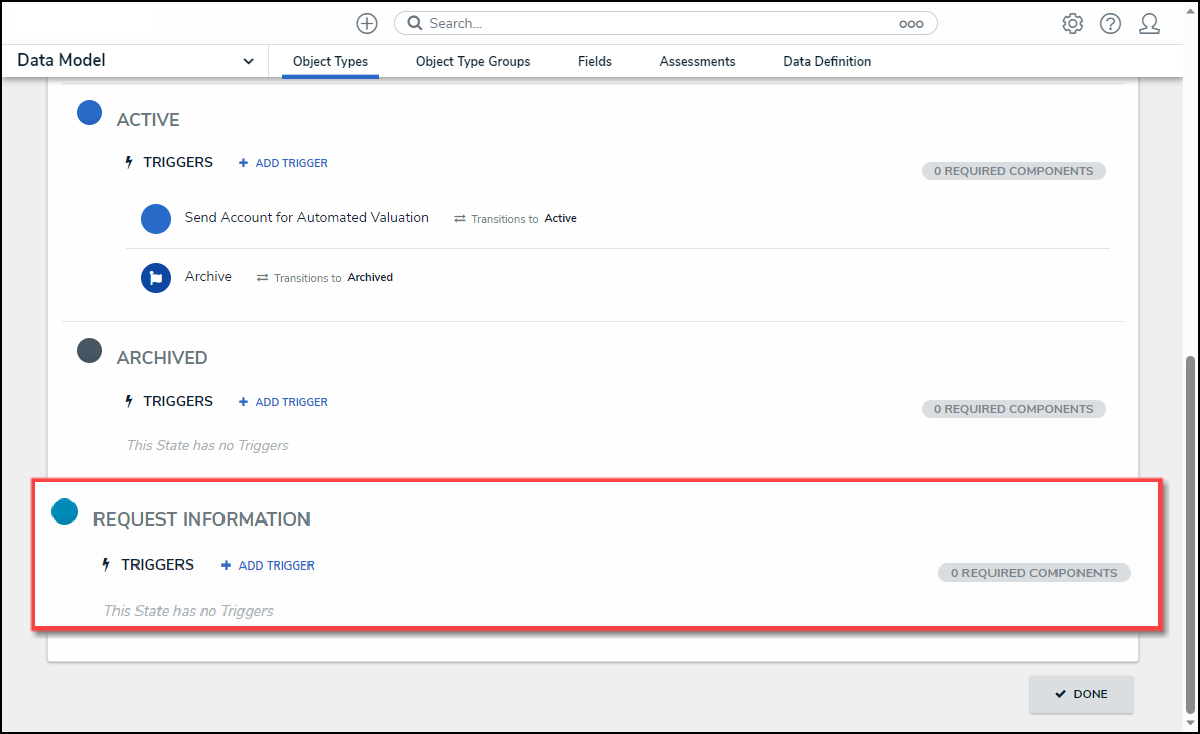
New State