Indoor location points are saved locations within a larger location (a master location) and are designed to help dispatchers indicate the exact area of an activity for officers, as well as other dispatchers who may be viewing the location on the Map panel. Generally, the master location is a building while the indoor location point can be more general (e.g. the inside of the building) or more specific (e.g. a particular staircase or room) as you need it to be.
Each master location and indoor location point must be saved with an image, such as a map, floor plan, or blueprint to on which administrators place location pins to mark the indoor location points. These pins allow dispatchers to see where an indoor location point is saved within a master location and click those pins to move through any additional indoor levels as needed. Dispatchers can also place temporary pins on a location’s image that indicate the exact location of a dispatch. These temporary pins are viewable in the Map and Dispatch Details panels.
 | Master locations are created in the Command Center app and are mapped to Location objects, but indoor location points are created and saved in Dispatch. As such, when a dispatch is closed and moved to Command Center as an activity, indoor locations are not mapped to any Location objects, but they're noted in the Location Details field on an activity. |
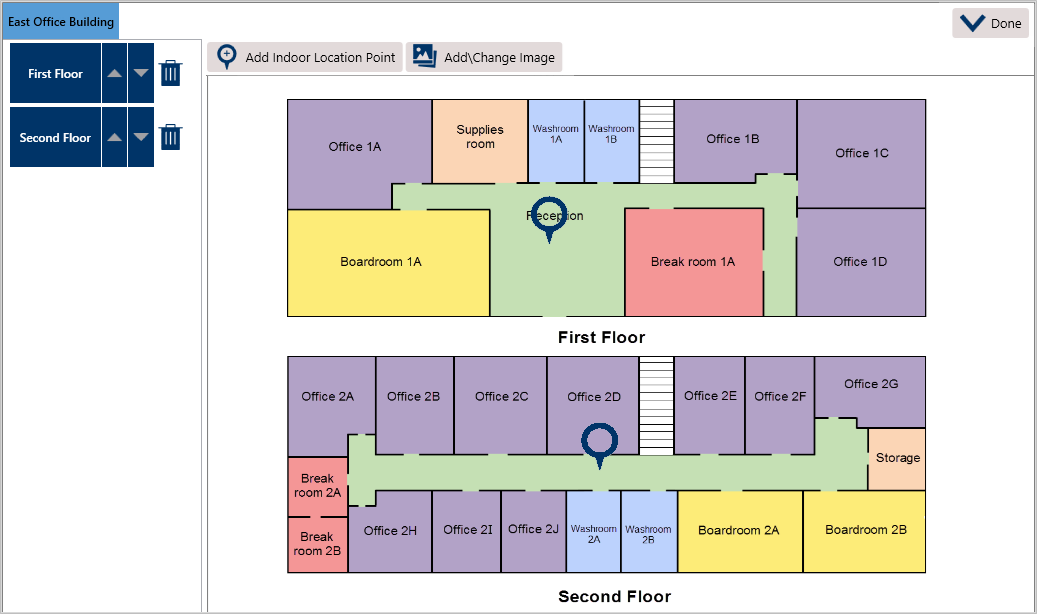 An indoor location point in the Locations settings. Clicking the blue tabs on the top left will display a previous location and clicking an indoor location name to the left or a pin on the image will display the indoor location, where you may continue to create more indoor location points as necessary.
An indoor location point can be selected for a dispatch, task, RTA, officer alert, or alarm alert, either by searching for it in the various panels or by opening a master location and selecting one of its indoor location points. When viewing locations with indoor location points in the panels, any pins placed by an administrator in the settings will appear as  icons which, when clicked, will reveal the indoor location point’s floorplan.
If dispatchers are creating or editing a dispatch and are not selecting an indoor location through search function, they must double-click an area on the indoor location’s floorplan to place a temporary pin ( ). This pin will indicate the exact location of a dispatch, which will appear on the Map panel when viewing an indoor location point’s details.
 A temporary pin placed on an indoor location point in the Create Dispatch panel.
 The indoor location point and temporary pin as it appears in the Map panel. The color of the temporary pin is determined by the color of the dispatch’s priority, if any.
Instructions
To create an indoor location point:
Click Settings >
 Locations.
Enter search criteria, such as the location’s name or address, in the Search locations text field in the pane to the left, then click to select that location as the master location.
Up to 250 locations are displayed in left-hand pane in the Locations settings. To find a specific location, use the search function. Click Add Indoor Location.
If not already uploaded, locate the image file of the master location (such as a photo of the exterior of the building or a blueprint) and click Open to upload it.
You must upload a photo, map, floor plan, or blueprint of each location, including the master location, when creating indoor location points. Click Add Indoor Location Point.
Click on an area in the uploaded image to place a pin for the new indoor location. To change the position of a previously placed pin, click and drag that pin to a new location on the image.
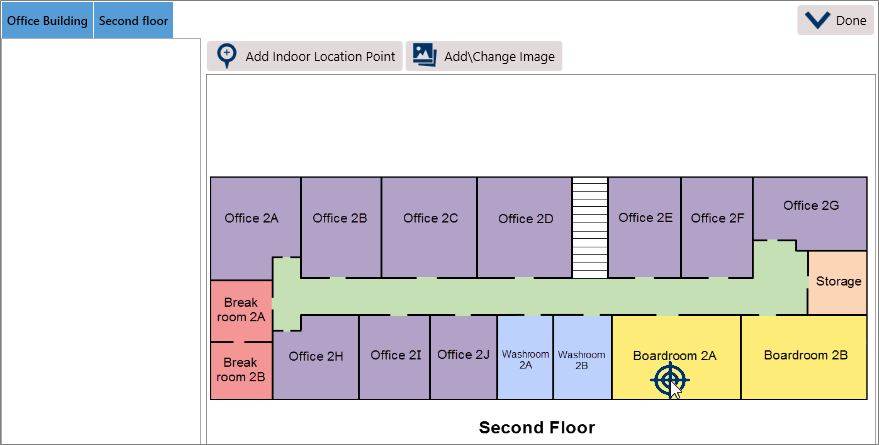 Using the cursor to select an indoor location point.
Enter a name in the Location Name field.
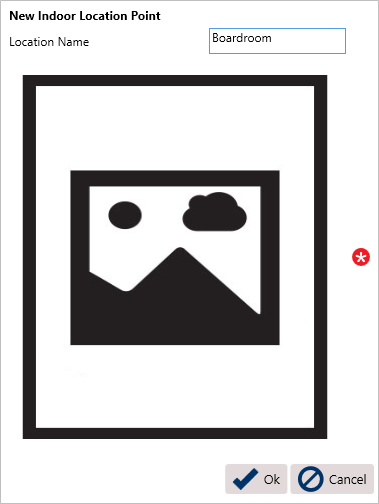 The screen that appears after placing a pin to create a new indoor location point.
Click the
 icon to upload an image of the location.
Click OK.
Optional: Enter notes about the location in the Notes field. If you want these notes to display as a warning when a dispatch is created, click the
 icon next to Display as Warning.
Repeat steps 1-10 as needed to continue creating more indoor locations points.
Click Done when finished.
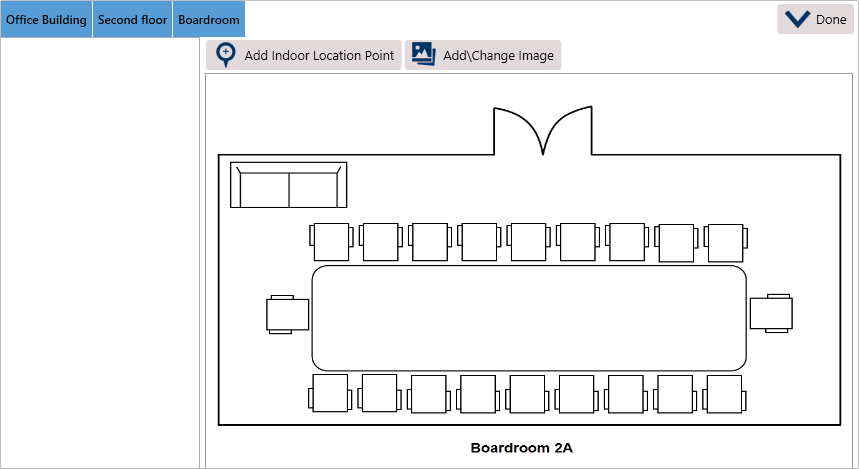 The new indoor location point.
 Locations.

 icon to upload an image of the location.
 icon next to Display as Warning.