Overview
When a state is created, it will appear on the Admin: Edit Workflow screen. An Administrator can edit the state's name, color, category, properties, components, and roles.
An Administrator can also delete a state from a workflow. Before a state can be deleted, all transitions on all states that move an object to that state must be deleted first. For example, all transitions that move an object to the Archived state must be deleted before the Archived state can be deleted from the workflow.
The Creation is the first state in every object type’s workflow and is automatically created. It cannot be deleted. The name and color cannot be edited, however, any added triggers, transitions, or actions can be edited or deleted. This state is automatically created with a trigger and transition that moves objects to the Draft state. This trigger and transition can be deleted. However, you must ensure a replacement trigger and/or transition is configured on Creation, otherwise new objects will not be created and saved.
The Draft, Active, and Archived states are automatically created when an object type is created. These states can be edited or deleted. However, because the Creation state automatically transitions to Draft, the Create trigger must transition to an alternate state if the Draft state is deleted. Failure to do so will prevent an object from being saved in the system.
User Account Requirements
The user account you use to log into Resolver must have Administrator permission to access the Object Types tile.
Related Information/Setup
Please refer to the Edit / Delete a Trigger or Transition article for more information on setting up the Bypass Require Fields toggle switch on transitions.
Navigation
- From the Home screen, click the Administration icon.
![]()
Administration Icon
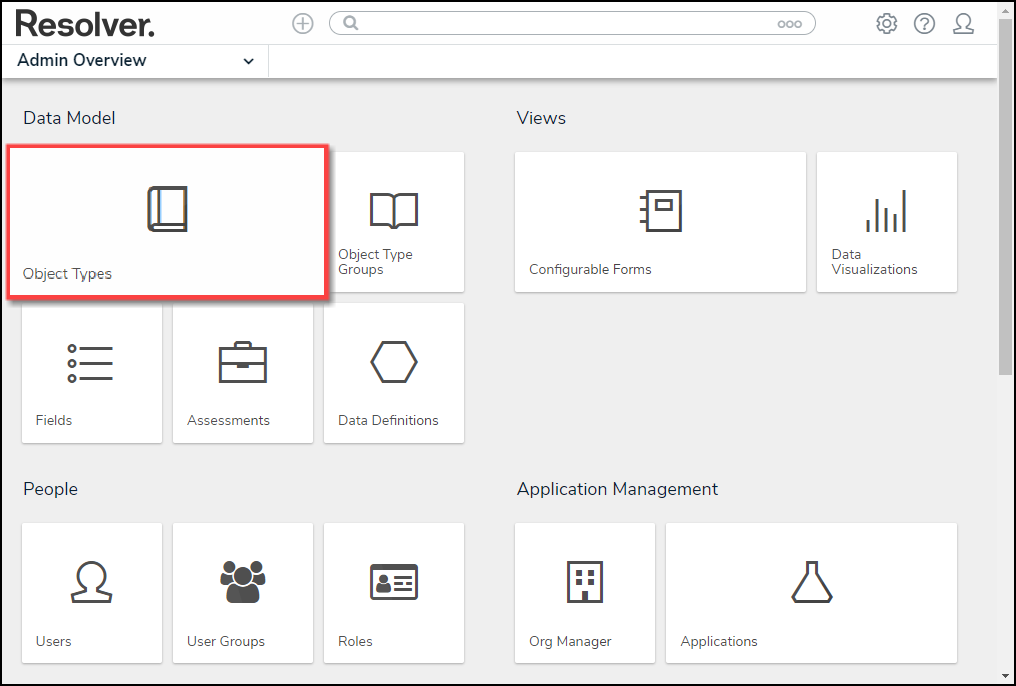
- From the Administrator Settings menu, click Admin Overview.

Administrator Settings Menu
- From the Admin Overview screen, click the Object Types tile under the Data Model section.
Object Types Tile
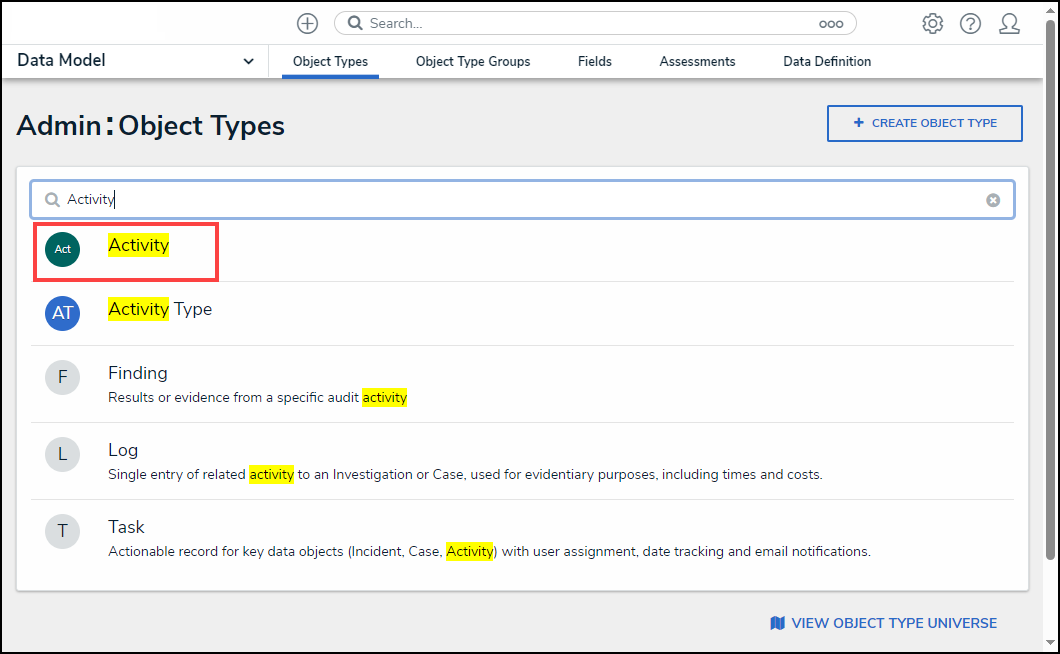
- From the Admin: Object Types screen, enter an object type name in the Search field to narrow the search results list.
- Click an Object Type Name from the search results lists.
Object Type Name
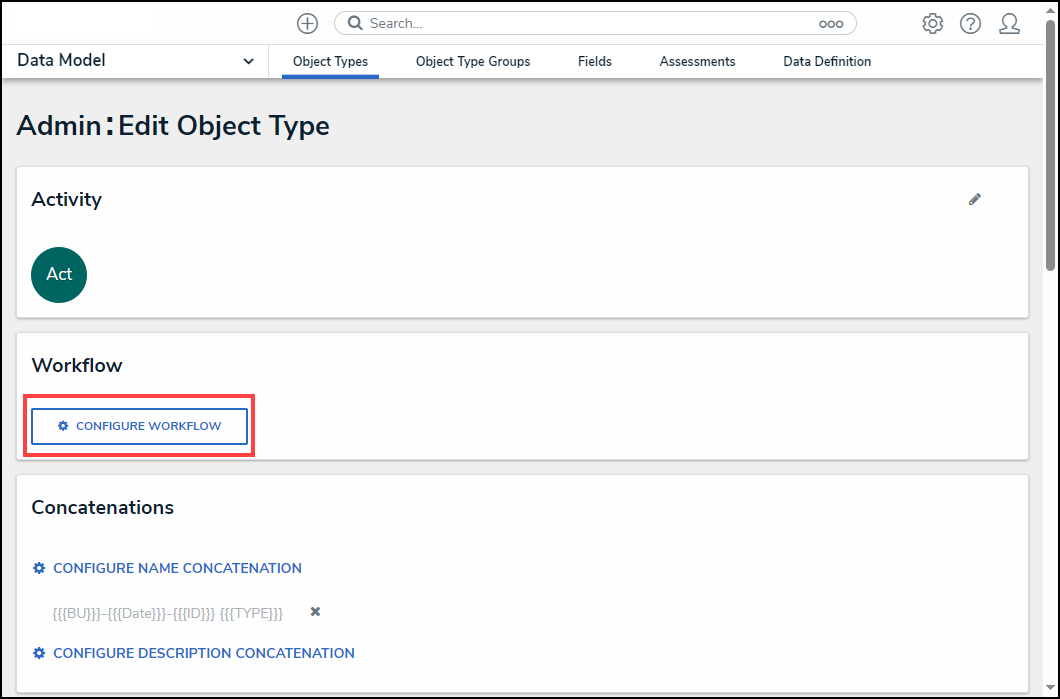
- From the Admin: Edit Object Type screen, click the Configure Workflow button.
Configure Workflow Button
Editing a Workflow State
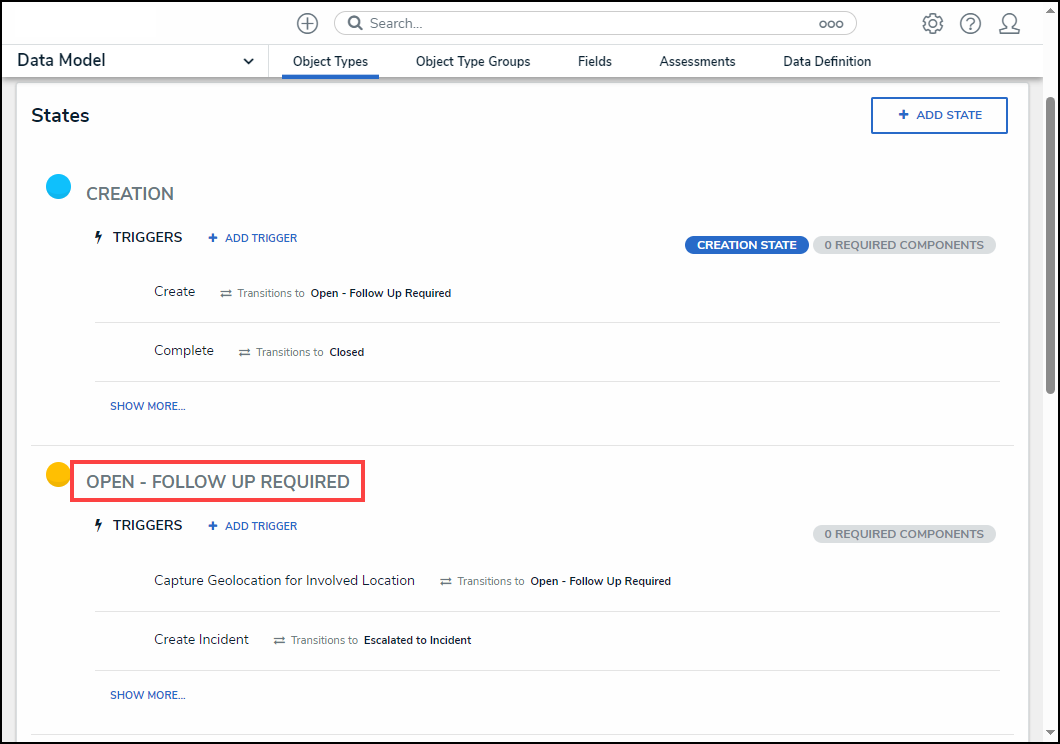
- From the Admin: Edit Workflow screen, click on a State.
State Link
- From the Edit State pop-up, click the Name field and enter an alternate state name.
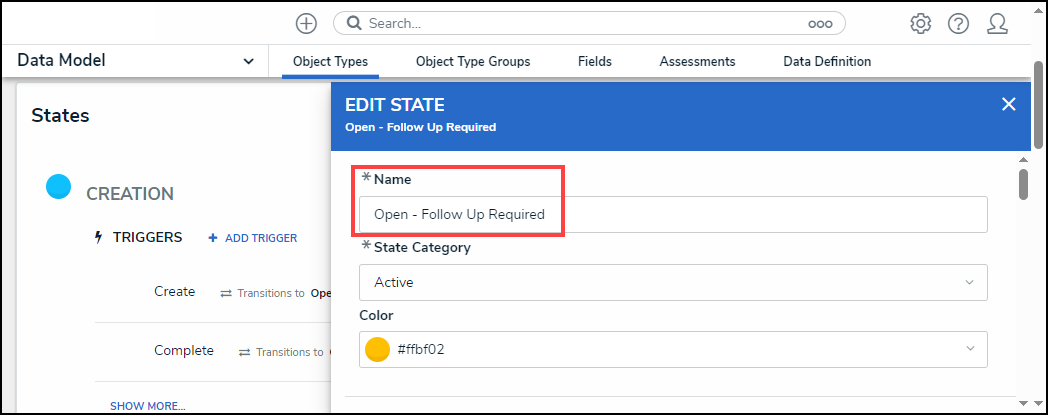
Name Field
- Click the State Category field and select a new category from the State Category dropdown menu.
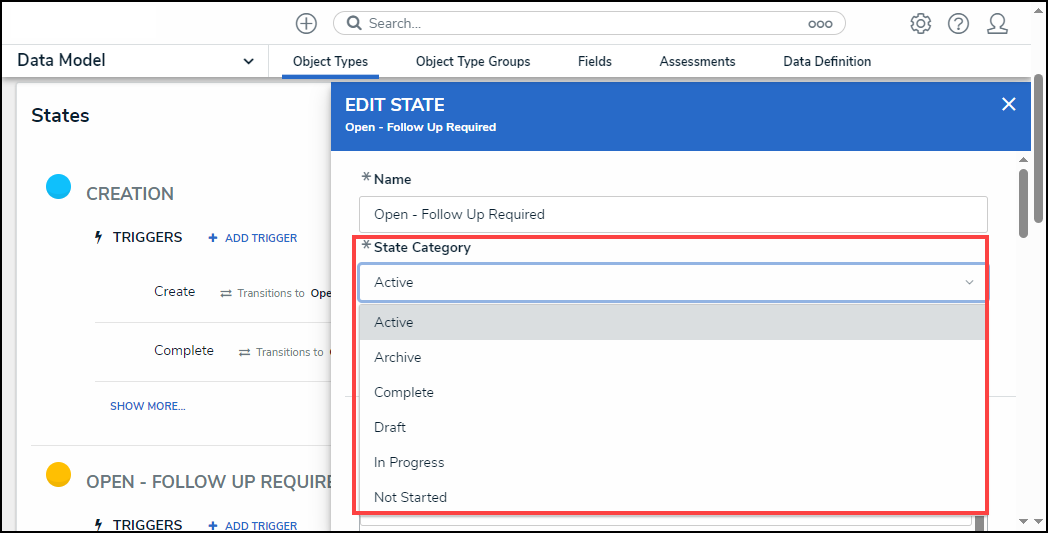
State Category Dropdown Menu
- Click the Color field and select an alternate color from the Color Palette by clicking a color swatch or entering a 6-character hex code in the Color field.
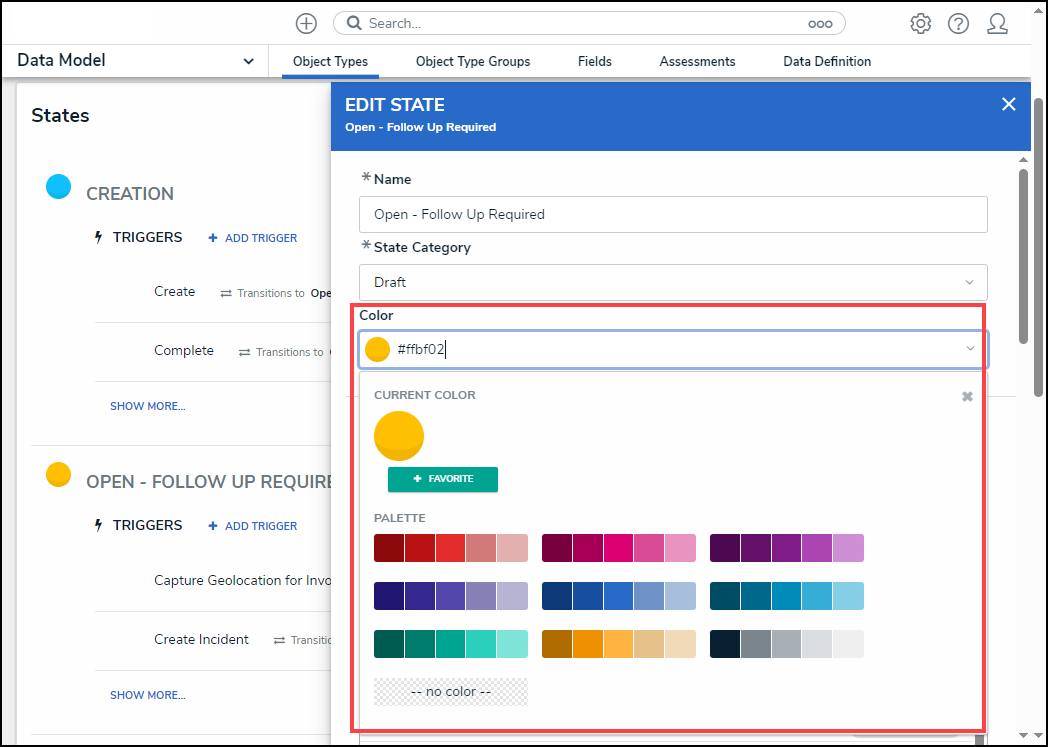
Color Palette
- From the Required Components section, select any components or roles that must be completed or access granted before the object can move to the next state from the Required Components section by clicking the Name and placing a Checkmark next to it.
 Note:
Note:
The Location property cannot be added as a required component in a workflow state.
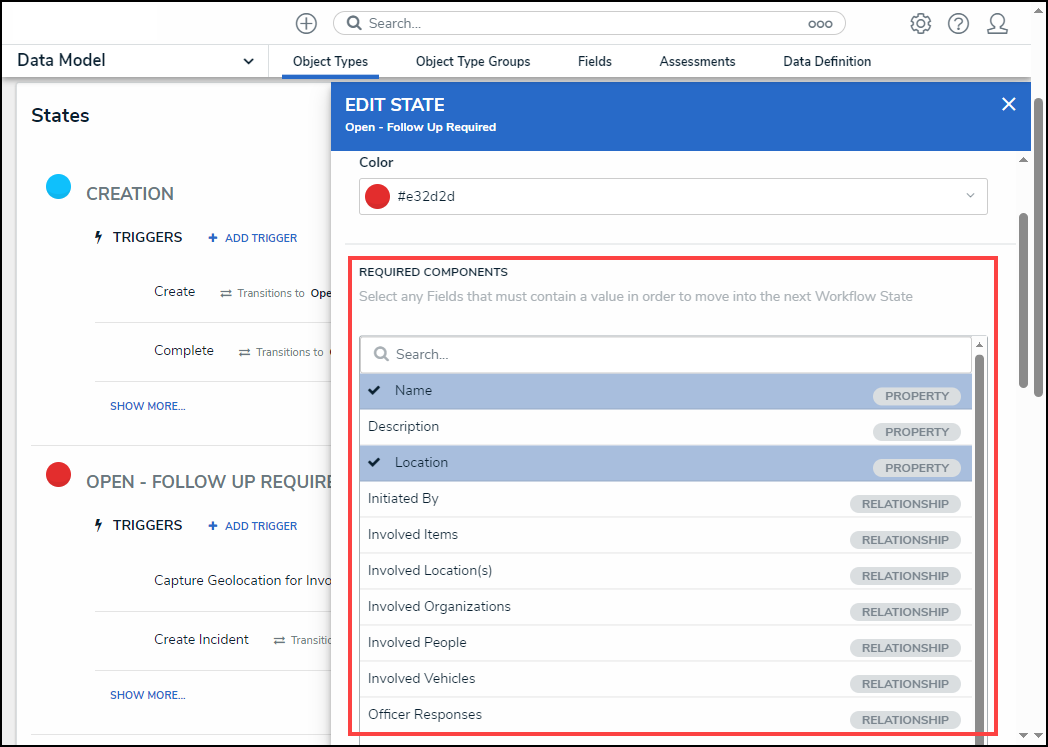
Required Components Section
- If you have selected any fields in the Required Components section, these fields must also be added to any corresponding form. If these required fields are not on a form, users cannot transition the form to the next state, as required fields must be filled out on the form to move the form to the next state. Transitions with the Bypass Required Fields toggle switch (Edit Trigger pop-up) enabled would allow users to transition the form to the next state, bypassing the required fields selected in the Required Components section.
 Related Information/Setup:
Please refer to the Edit / Delete a Trigger or Transition article for more information on setting up the Bypass Require Fields toggle switch on transitions.
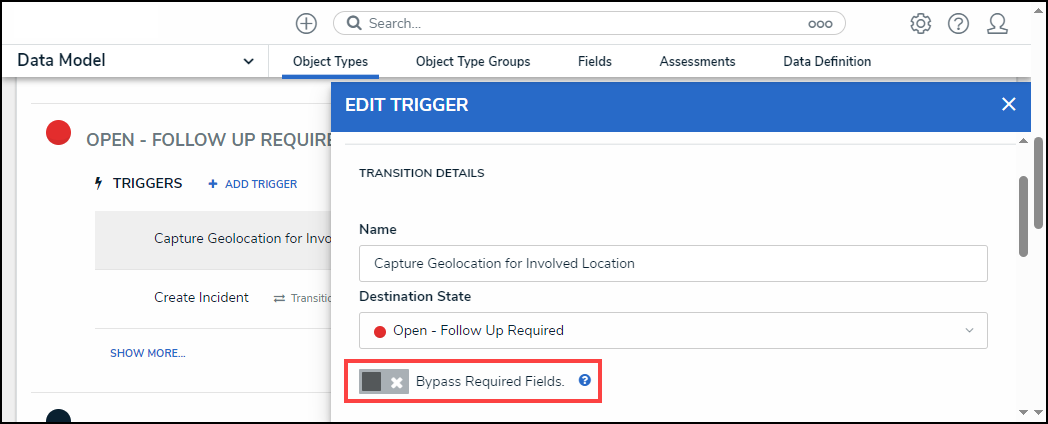
Edit Trigger Pop-up Bypass Required Fields
- The system will automatically save the changes when edits are applied to the state.
- Click the x icon to close the pop-up and return to the previous screen.
![]()
x Icon
Deleting a Workflow State
Before a state can be deleted, all transitions on all states that move an object to that state must be deleted first.
The Creation state cannot be deleted.
- From the Edit State pop-up, scroll to the bottom of the pop-up.
- Click the Delete State button.
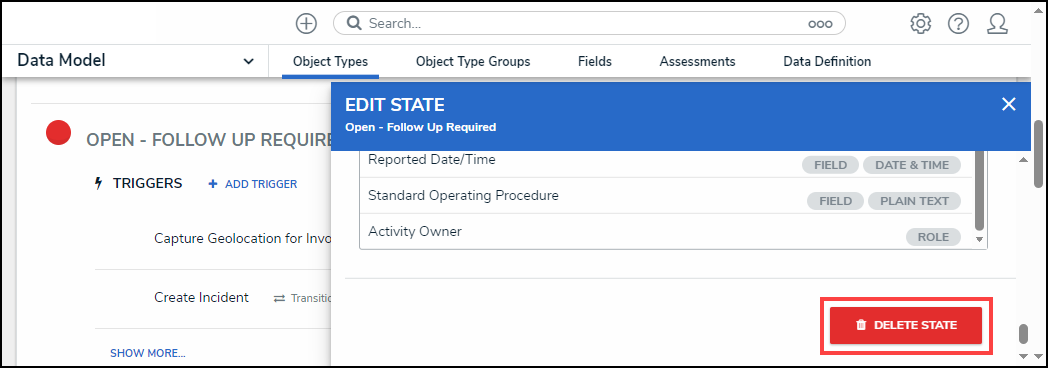
Delete State Button
- From the Confirmation pop-up screen, click the Delete button to remove the state from the workflow.
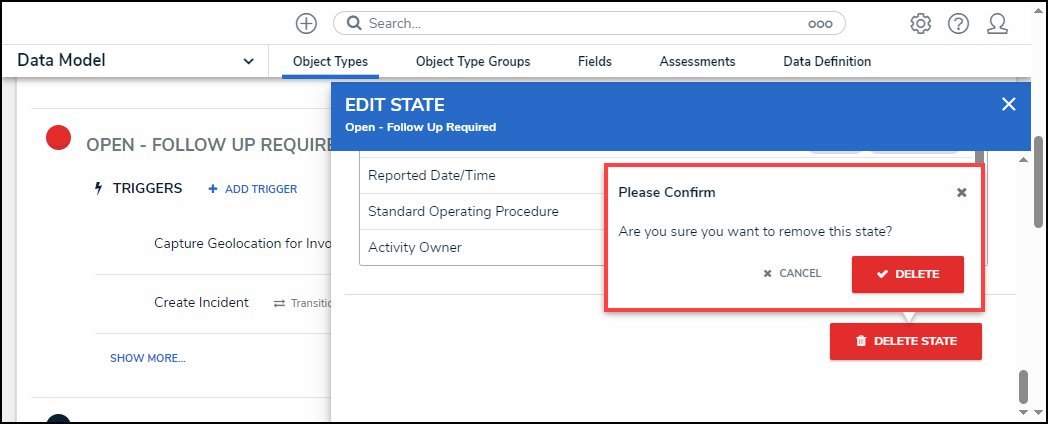
Confirmation Pop-up