To create an SOP:
Click Settings >
 SOPs.
SOPs. Click
 Create in the pane to the left.
 Enter a name for the procedure in the Name field.
Enter a description of the procedure in the Procedure Description field.
Click
 Add New Rule.
Begin typing in the Call Category textbox then select the appropriate call category OR select a call category from the first of three dropdown menus. To include additional call category criteria, make a selection from the second and third dropdown menus as needed.
Optional: Begin typing keywords to view a list of available locations in the Location field, then select a location.
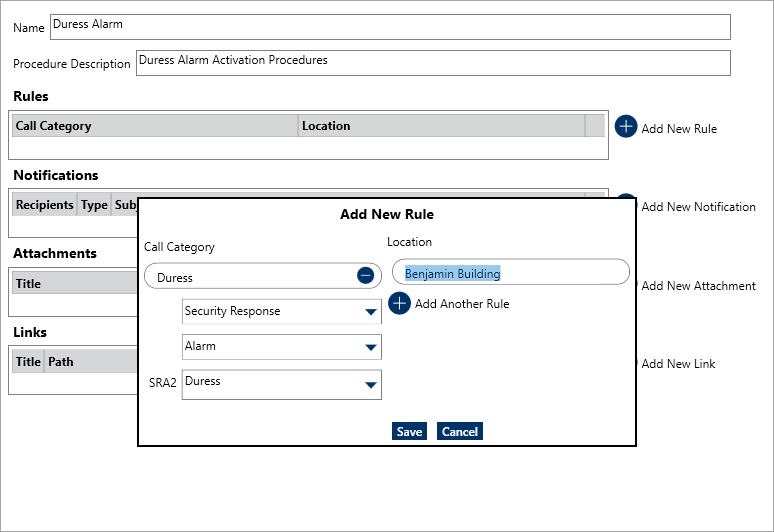 Adding a new rule to an SOP.
Optional: Click
 Add Another Rule to save the current rule and clear the fields, then add another rule as needed.
Click Save to close the Add New Rule window. Click Cancel to close the window without saving your changes.
Optional: To create an email that dispatchers can send to selected recipients once the SOP is triggered:
Click the
 Add New Notification.
Enter the recipients’ email address in the To field, separating multiple emails by semi-colons.
Optional: Enter one or more email addresses in the Cc field to include recipients who should receive a carbon copy of the email, separating multiple email addressed by semi-colons.
Enter a subject line in the Subject field.
Enter the message in the textbox.
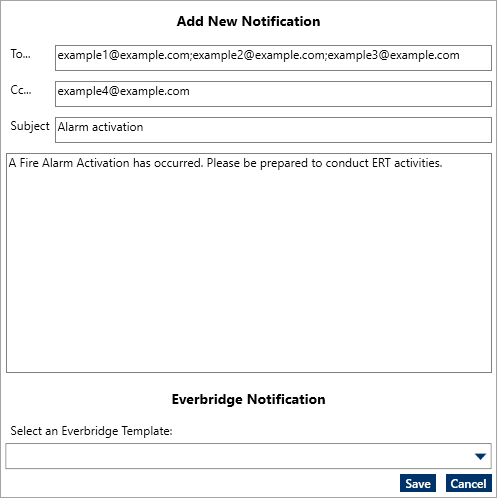 The Add New Notification window.
Click Save to close the Add New Notification window or click Cancel to close the window without saving your changes.
Optional: To add a file or image attachment to the SOP:
Click
 Add New Attachments.
Click Browse or drag a file to the Add New Attachment window.
Optional: Select the attachment type from the Type dropdown menu.
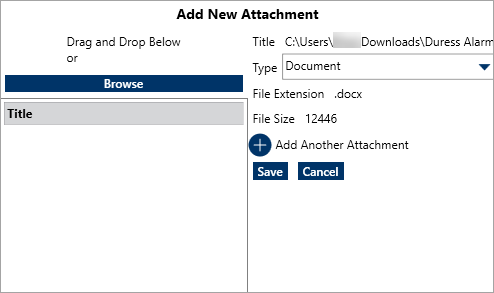 The Add New Attachment window.
Optional: Click
 Add Another Attachment to save the current file and clear the fields, then add another attachment as needed.
Click Save to close the Add New Attachment window or click Cancel to close the window without saving your changes.
Optional: To add a URL to the SOP:
Click
 Add New Link.
Enter the name of the URL in the Title field.
Click Browse to upload an HTML file saved on your computer or type or paste the link in the Browse field.
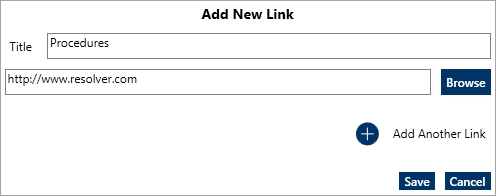 The Add New Link window.
URLs typed or pasted into the Browse field must include the http:// or https:// prefix. Optional: Click
 Add Another Link to save the current URL and clear the fields, then add another link as needed.
Click Save to close the Add New Link window or click Cancel to close the window without saving your changes.
Optional: To add a list of steps for the dispatcher/officer to complete:
Click
 Add New Check List Item.
Type a description of the step (e.g. “Secure the area until law enforcement arrives.”) in the text box.
Click
 Add Another Check List Item to save the current item and clear the text box, then add other checklist items as needed.
Click Save to close the Add New Check List Item window or click Cancel to close the window without saving your changes.
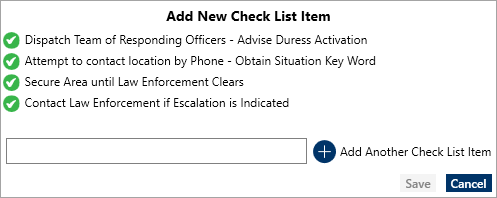 The Add New Check List Item window.
 SOPs.
SOPs.  Create in the pane to the left.
  Add New Rule.
 Add Another Rule to save the current rule and clear the fields, then add another rule as needed.
 Add New Notification.
 Add New Attachments.
 Add Another Attachment to save the current file and clear the fields, then add another attachment as needed.
 Add New Link.

 Add Another Link to save the current URL and clear the fields, then add another link as needed.
 Add New Check List Item.
 Add Another Check List Item to save the current item and clear the text box, then add other checklist items as needed.