Overview
Once multi-factor authentication (MFA) is enforced on your Org, any user who authenticates with a username and password will be required to configure MFA prior to accessing that Org.
Individual security-conscious users who authenticate with a username and password can also opt-in to MFA.
 Note:
Note:
Users are required to configure multi-factor authentication for the initial set-up and if an Administrator resets MFA.
User Account Requirements
Only Administrators can enforce multi-factor authentication on their Org.
Related Information/Setup
Please refer to the Enforcing Multi-Factor Authentication on an Org article for more information on enforcing MFA on an Org.
Setting up Multi-Factor Authentication (Enforced Org)
Once multi-factor authentication (MFA) is enforced on an Org, the next time users log in, the MFA set up page will be displayed.
- Log in to Resolver to see the Multi-Factor Authenticator Setup screen.
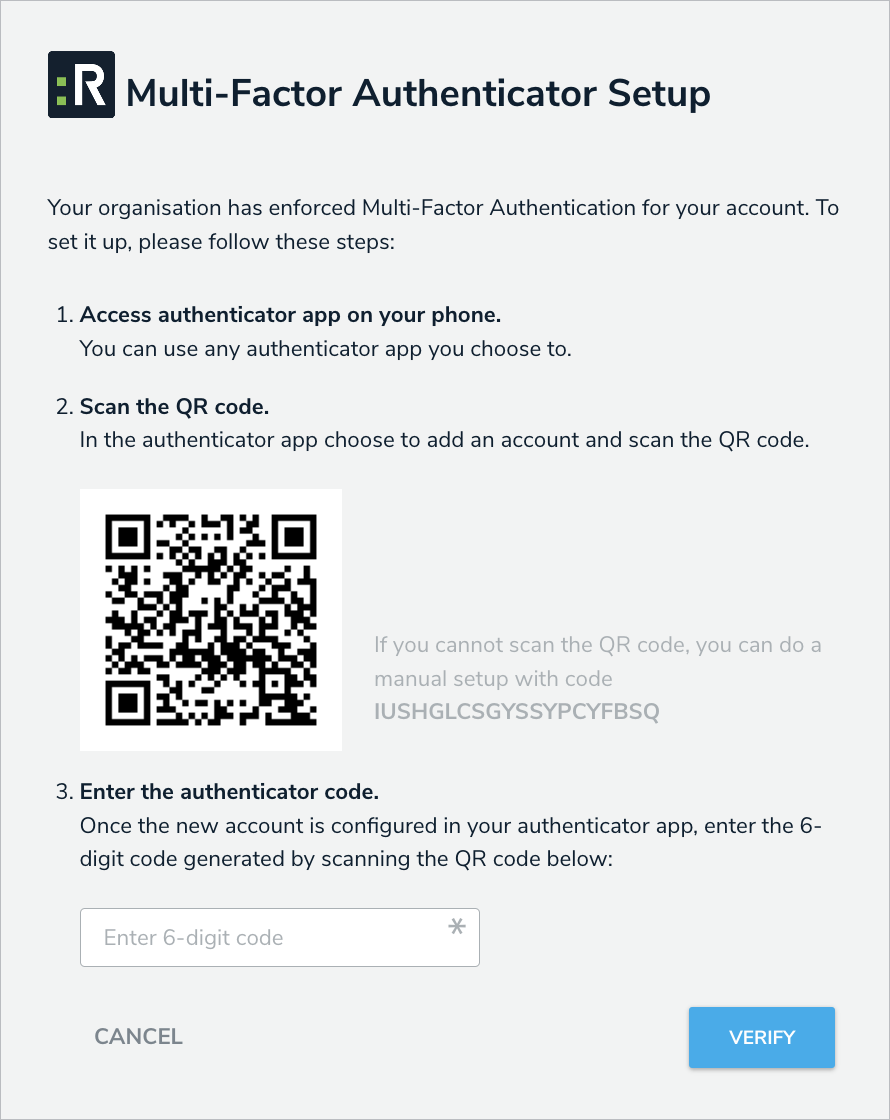
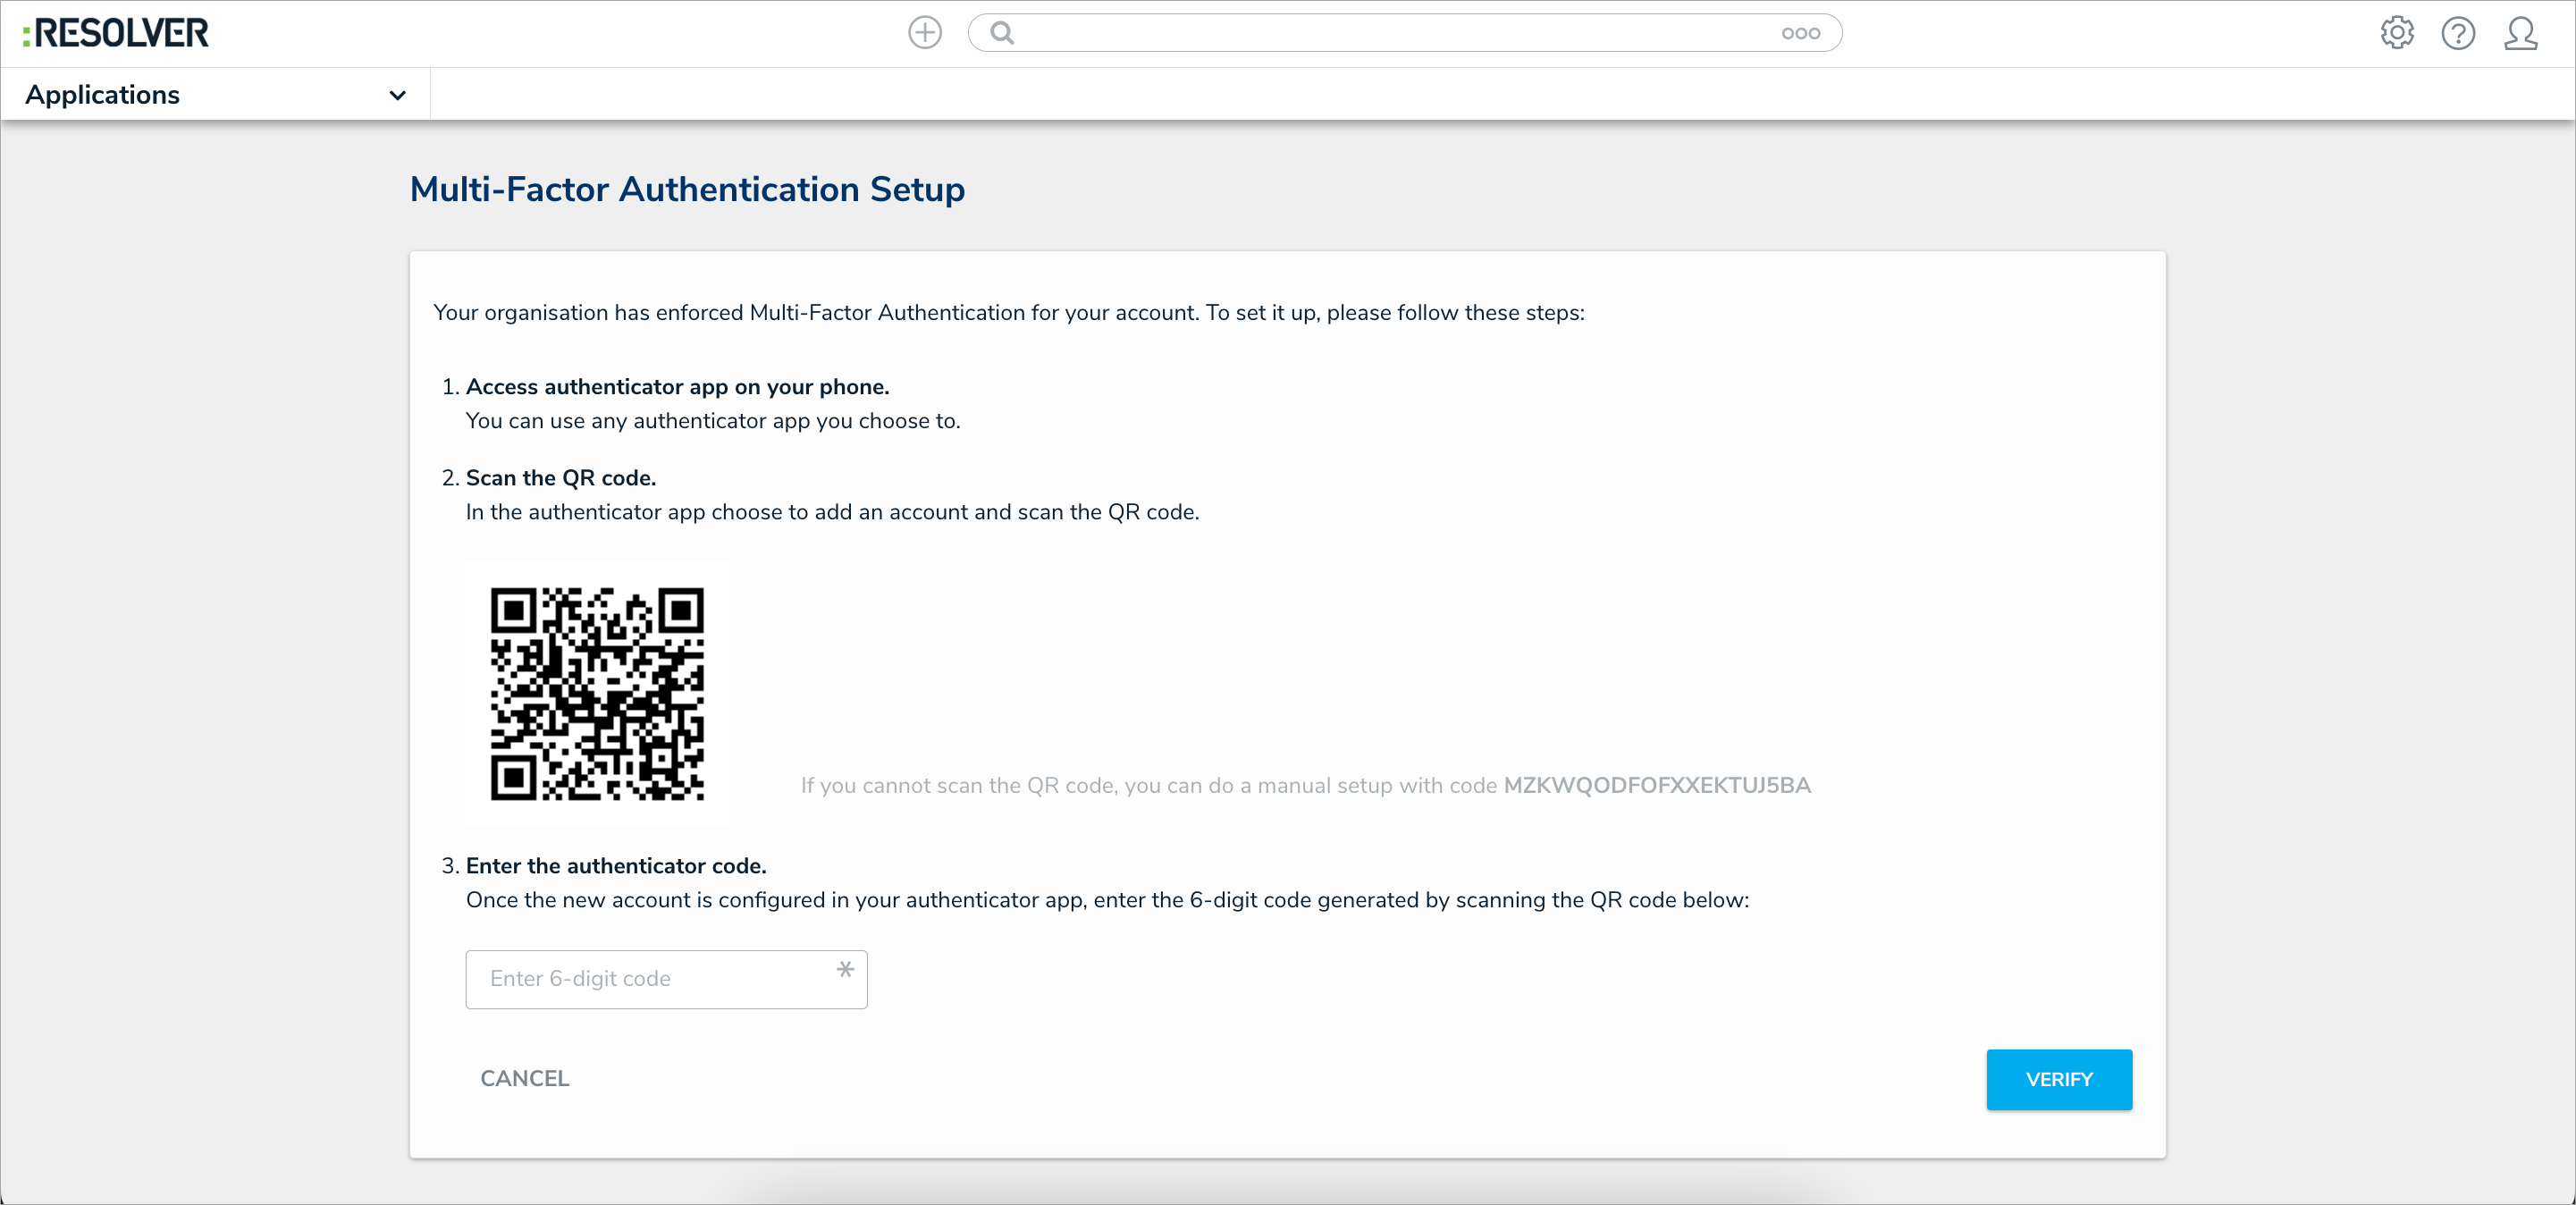
The Multi-Factor Authenticator Setup Screen
 Note:
Note:If this is an account activation, create a password prior to configuring MFA.
- Open your Authenticator App and scan the QR code to generate the one-time passcode.
Note:The Authenticator App is of your choosing. If the QR code fails to scan, complete the manual setup with the code.
- Input the passcode into Resolver and click the Verify button.
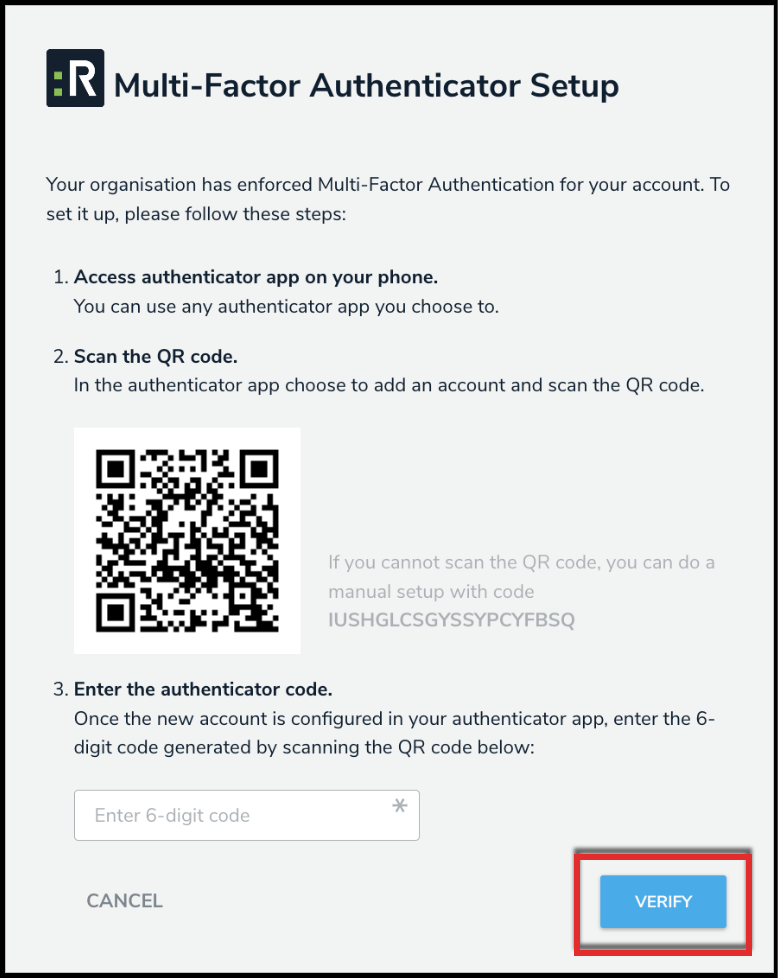
Verify Button
- A message will appear to indicate the setup was successful.
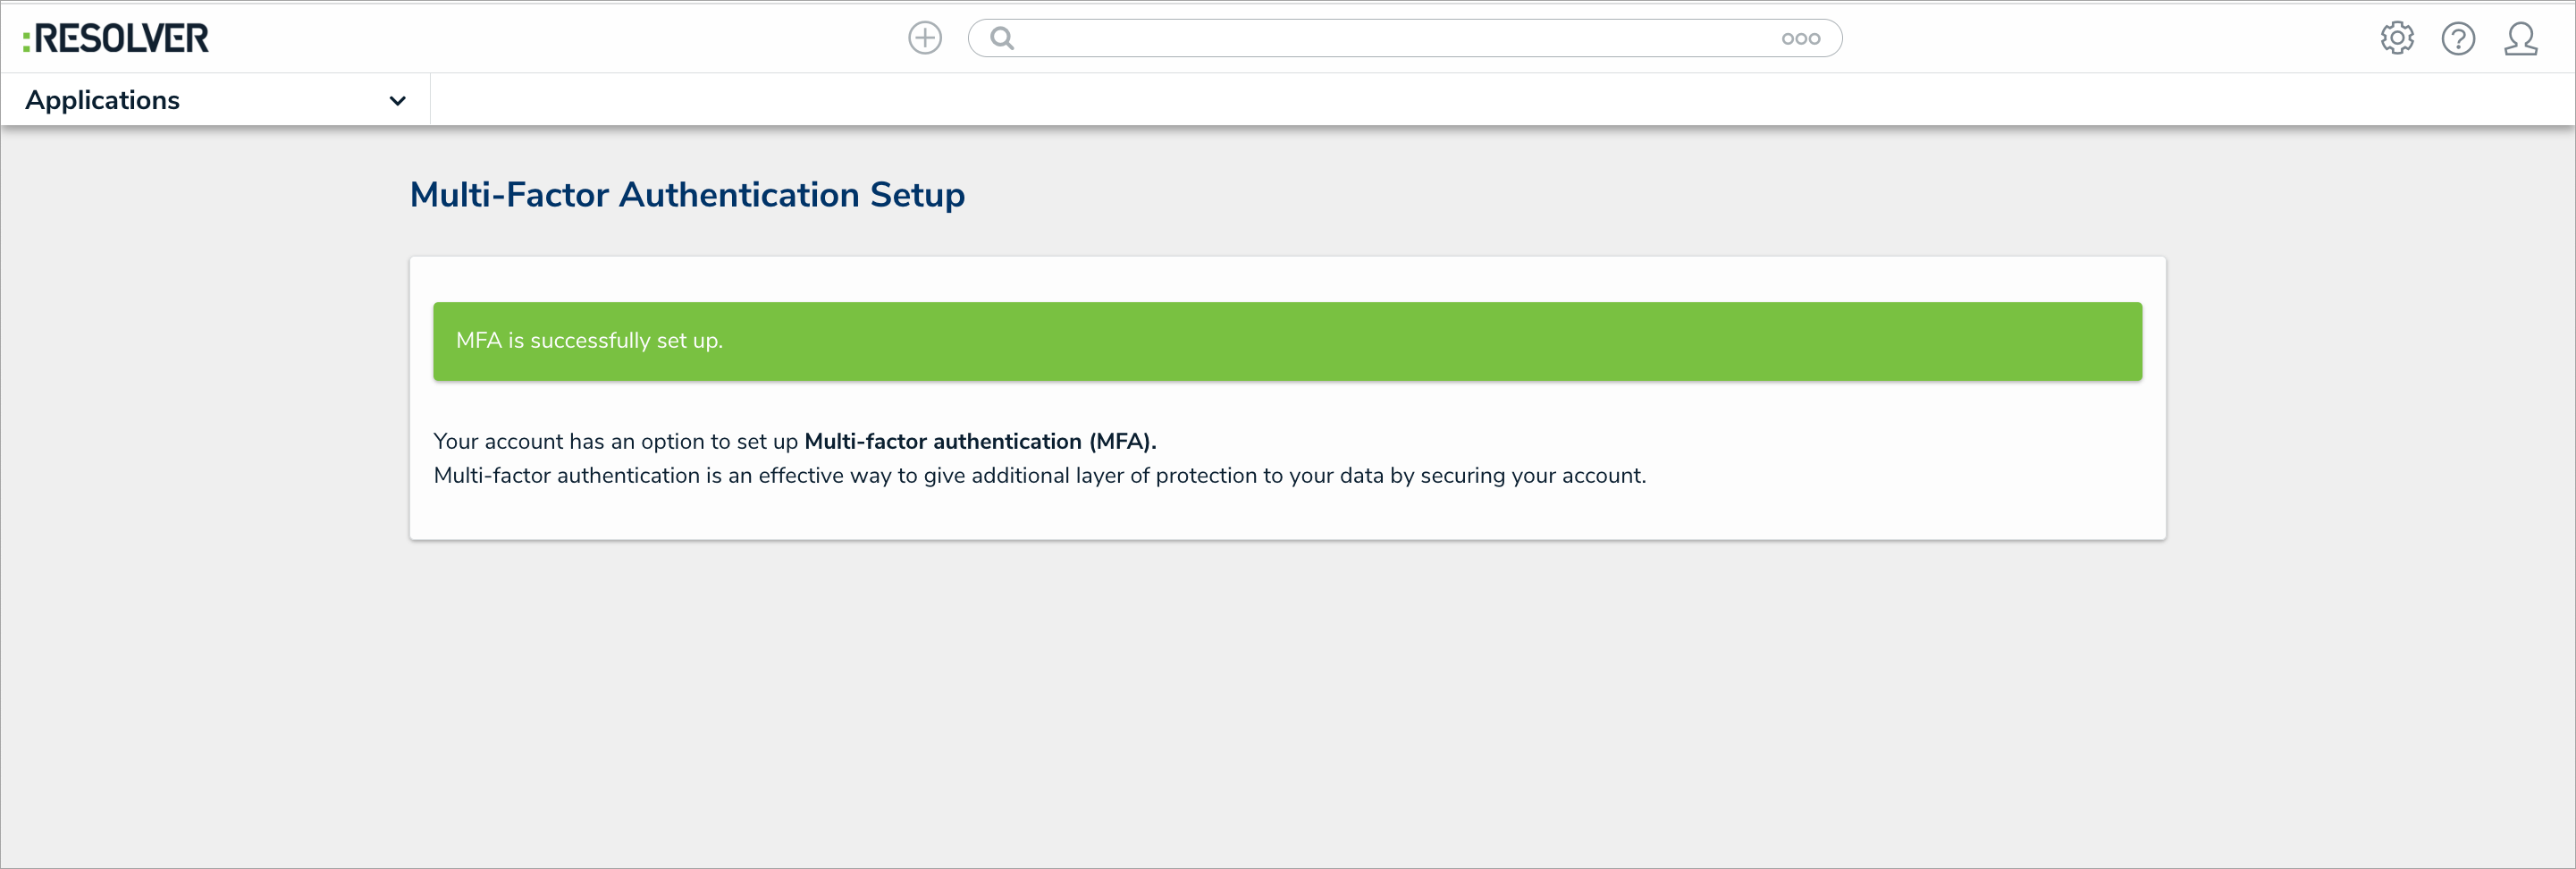
MFA Success Message
- (Optional): The next time you log in to Resolver, select the Remember this device for 30 days checkbox to save your login details for 30 days when using MFA.

Remember This Device for 30 Days Checkbox
Setting up Multi-Factor Authentication (Opt-In)
Any user can set up multi-factor authentication (MFA) on their own account provided that they do not already authenticate with SSO.
- Log in to Resolver.
Note:If this is an account activation, create a password prior to configuring MFA.
- From the Home screen, click the User Profile icon.

User Profile Icon
- Click the MFA Setup button.
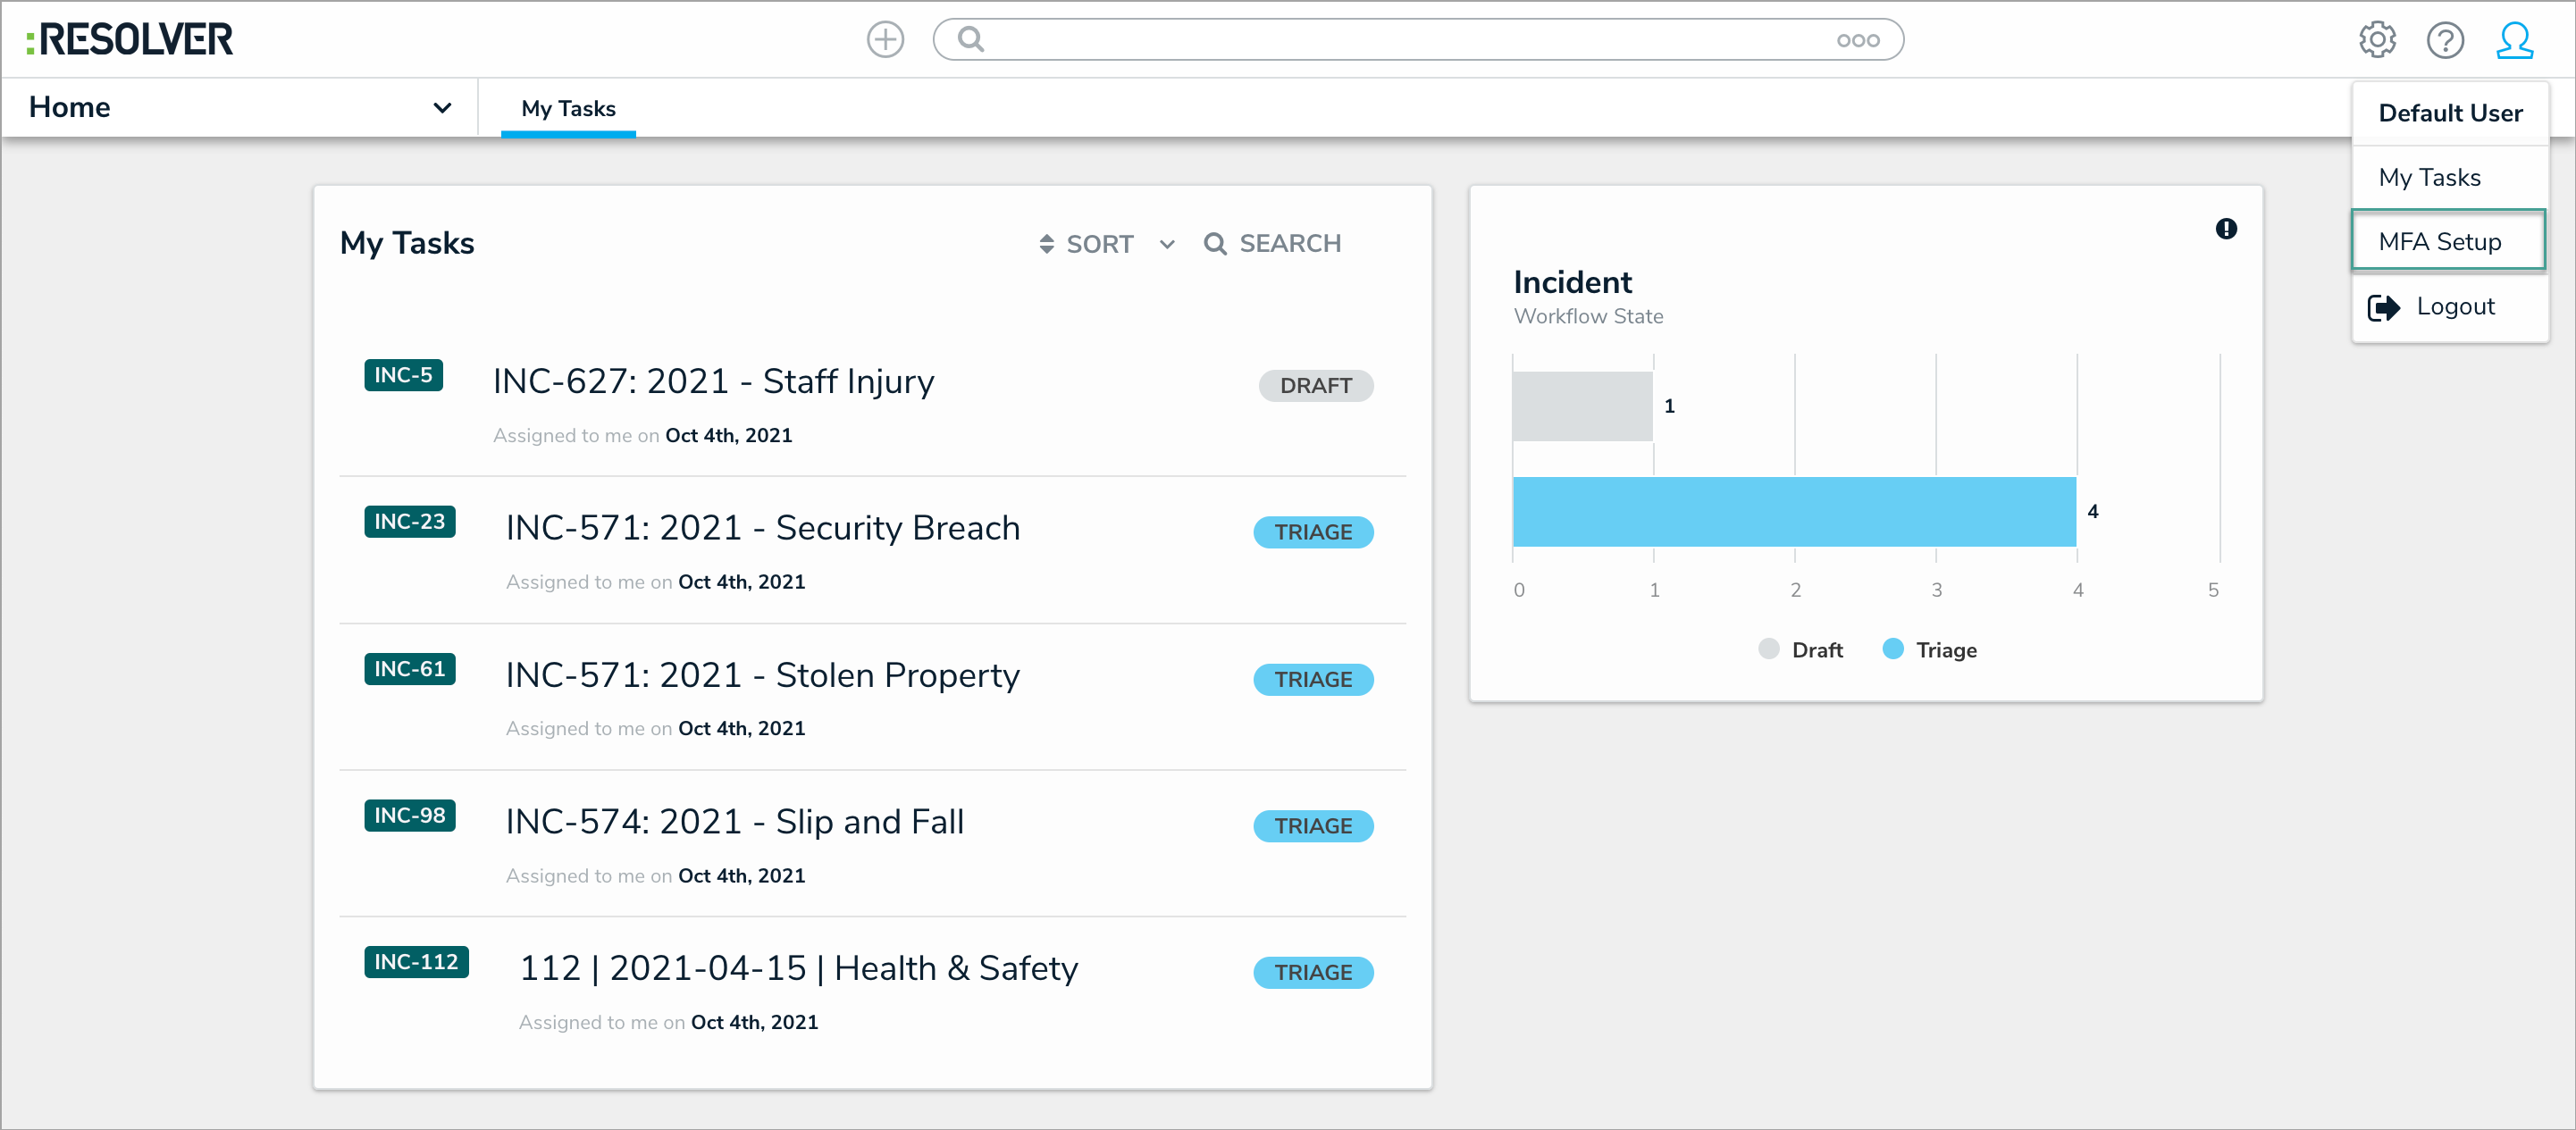
MFA Setup Button
- A QR code appears with instructions to complete the setup.
QR Code for MFA Setup
- Open your Authenticator App and scan the QR code to generate the one-time passcode.


- Input the passcode into Resolver and click the Verify button.

Verify Button
- A message will appear to indicate the setup was successful.
MFA Success Message
- (Optional): The next time you log in to Resolver, select the Remember this device for 30 days checkbox to save your login details for 30 days when using MFA.

Remember This Device for 30 Days Checkbox