Overview
This article outlines how to create new objects using the Data Import feature. In Resolver, an object refers to a record saved to a particular object type (i.e., the record category). For example, an Incident is an object type, while the Incident object itself could be a car accident, which notes what happened on-site.
User Account Requirements
The user account you use to log into Resolver must have Administrator permission to access the Data Import feature.
Related Information/Setup
Please refer to the Data Import section for more information on the Data Import feature.
Adding New Object Data on the Import Template
- On the Data Import template, click a highlighted object type tab (e.g., Risk) to open its related worksheet.

Tabs on a Data Import Template
- Tabs generate in alphabetical order, with relationship tabs labelled with the monogram of the object type they're saved on and their object type group (e.g., R - Control)
- An object type’s fields are where users will input data. Fields can be in text or numeric forms, a date and time picker, or take the form of select (i.e., dropdown) lists. They also allow for attachment and image uploads. Read more here: Field.
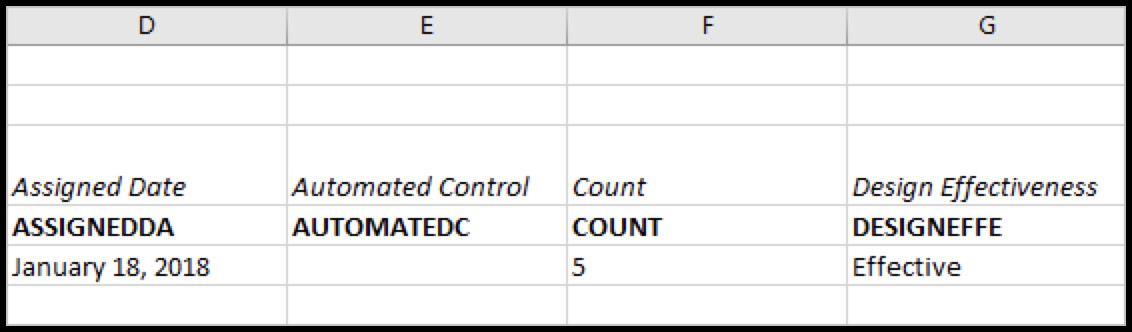
- As you enter information into the Data Import template, follow the column fields (not the row fields). Field columns begin at column D and are labelled in row 3 with the field's name and in row 4 as the field's Unique Name.
- Resolver automatically modifies the field entry to show the date and/or time based on the Date (not General) Number format selected in the Excel section’s settings.
- Date & Time data is imported in the Coordinated Universal Time (UTC) zone. As such, you may need to note a time (e.g., 12:00 pm) when importing a date, so the date won’t be recorded one day in advance, due to a time difference.
 Note:
Note:
Specific time data is not required for system/spreadsheet functionality.
- On the spreadsheet (Row 5 Column A), below the External Ref ID heading, enter a name or code to identify the object in the system.
- The External Reference ID is a required field and must:
- Be unique from all other External Ref IDs
- Have 300 characters or less
- Not contain the colon (:) character
- A suggested External Ref ID is the monogram with a sequential number (e.g., 1, 2, 3).

An Example External Ref ID
- Enter the object name on the spreadsheet (Row 5 Column B) below Name.

Name and Description Columns
- (Optional): Enter an object description (Row 5, Column C) below Description.
-
To enter data into a field linked to the object type, input the relevant information in the related Excel column (e.g., enter the External Ref ID under the object type ID).
-
Text: Enter the data as needed.
-
Numeric: Enter numbers only.
-
Date & Time: Enter a date and/or time.
-
Select List: Choose an option (e.g., Incident Severity) from the select list in Resolver, which is not case-sensitive on data imports. However, all other characters entered into the spreadsheet must match the option exactly.
-
Multi-Select List: Enter one or more of the options from the select list, separated by commas, with no spaces (e.g., high,medium,low). Multi-select list options are not case-sensitive on data imports. However, all other characters entered into the spreadsheet must match the option(s) exactly.
-
-
Attachment: Enter the expected path and file name (e.g., Reports/October 2 break in.jpg), for any imported files in the appropriate attachment field column in the spreadsheet. Read more here: Import File Attachments.

Related Excel Columns
- To assign users from a specific role to the object:
-
Make sure all relevant users have been added to Resolver and to the related role (otherwise your data import will fail).
-
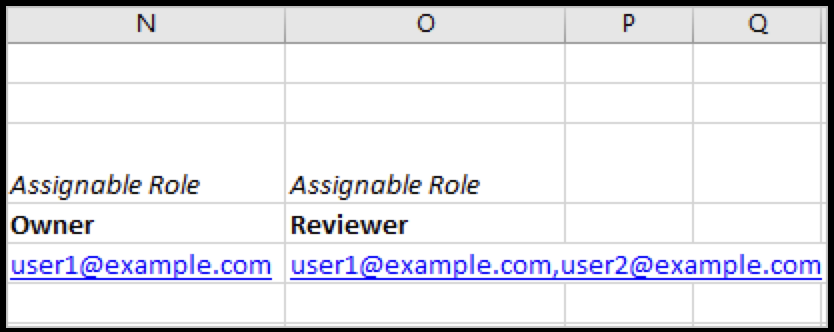
Locate a role column in the spreadsheet. Role columns appear after field columns and are labelled in row 3 as Assignable Role and in row 4 as the Role's name (e.g., Owner).
-
Enter the user’s company email address in a section below the desired column (e.g., Column N). If you're assigning multiple users, separate the users' email addresses by commas (e.g., lucian.ford2653@coreqe.com, somchai.tan_2653@coreqe.com).
-
Under the column Assignable Role (e.g., Columns N or O below), enter the relevant users’ email addresses.
-
Continue assigning users to other roles, if any.
Role Columns
-
-
To assign a workflow state to the object:
-
Locate a Workflow column in the spreadsheet to the right of any Role columns.
-
Enter the state's name (e.g., In Progress) as in the workflow (e.g., Control Status) below the Library Workflow column (e.g., Column P).
-
Repeat the steps above to continue adding data (as needed) on the worksheet.
-
To import data on a different object type (e.g., Control), select the relevant worksheet.
-

 Warning:
If you don't want to add data to another field, role, or workflow, leave the sections below the columns blank.
- Save your changes.