Overview
Before uploading the data import, you must ensure you’ve generated the Data Import Template and correctly entered the object and relationship data on the right worksheets.
When you have input the required information on your Data Import Template, you’ll be ready to upload that Excel spreadsheet with your company’s library data into Resolver, where it will become a single source of truth for your organization and team.
 Note:
Note:
An RTF (Rich Text Field) field will not be formatted when an object with an RTF field is created through the data import (.csv).
User Account Requirements
The user account you use to log into Resolver must have Administrator permission to access the Data Import feature.
Related Information/Setup
Please refer to the Data Import section for more information on the Data Import feature.
Navigation
- From the Home screen, click the Administration icon.

Administration Icon
- From the Administrator Settings menu, click the Admin Overview link.

Administration Icon
- From the Admin Overview screen, click the Data Import tile under the Tools section.

Data Import Tile
Uploading the Data Import Template
- From the Data Import screen, from the Identifier type dropdown menu, select either:
- Object Type External Reference ID: If you’ve entered the external reference object type IDs and/or the external reference relationship type IDs on the spreadsheet.
- Object ID: If you’ve entered the object type IDs and/or relationship IDs on the spreadsheet.

Identifier Type Dropdown
- (Optional): Click the Defer processing of formula recalculations checkbox to postpone formula and permission recalculations when the Data Import Template file uploads.

Defer Processing of Formula Recalculations Checkbox
 Note:
Note:
Depending on the relationships and formulas’ complexity, deferrals should usually be enabled for imports with more than 50,000 objects, as it will speed up the data import process. For further help contact Resolver Support.
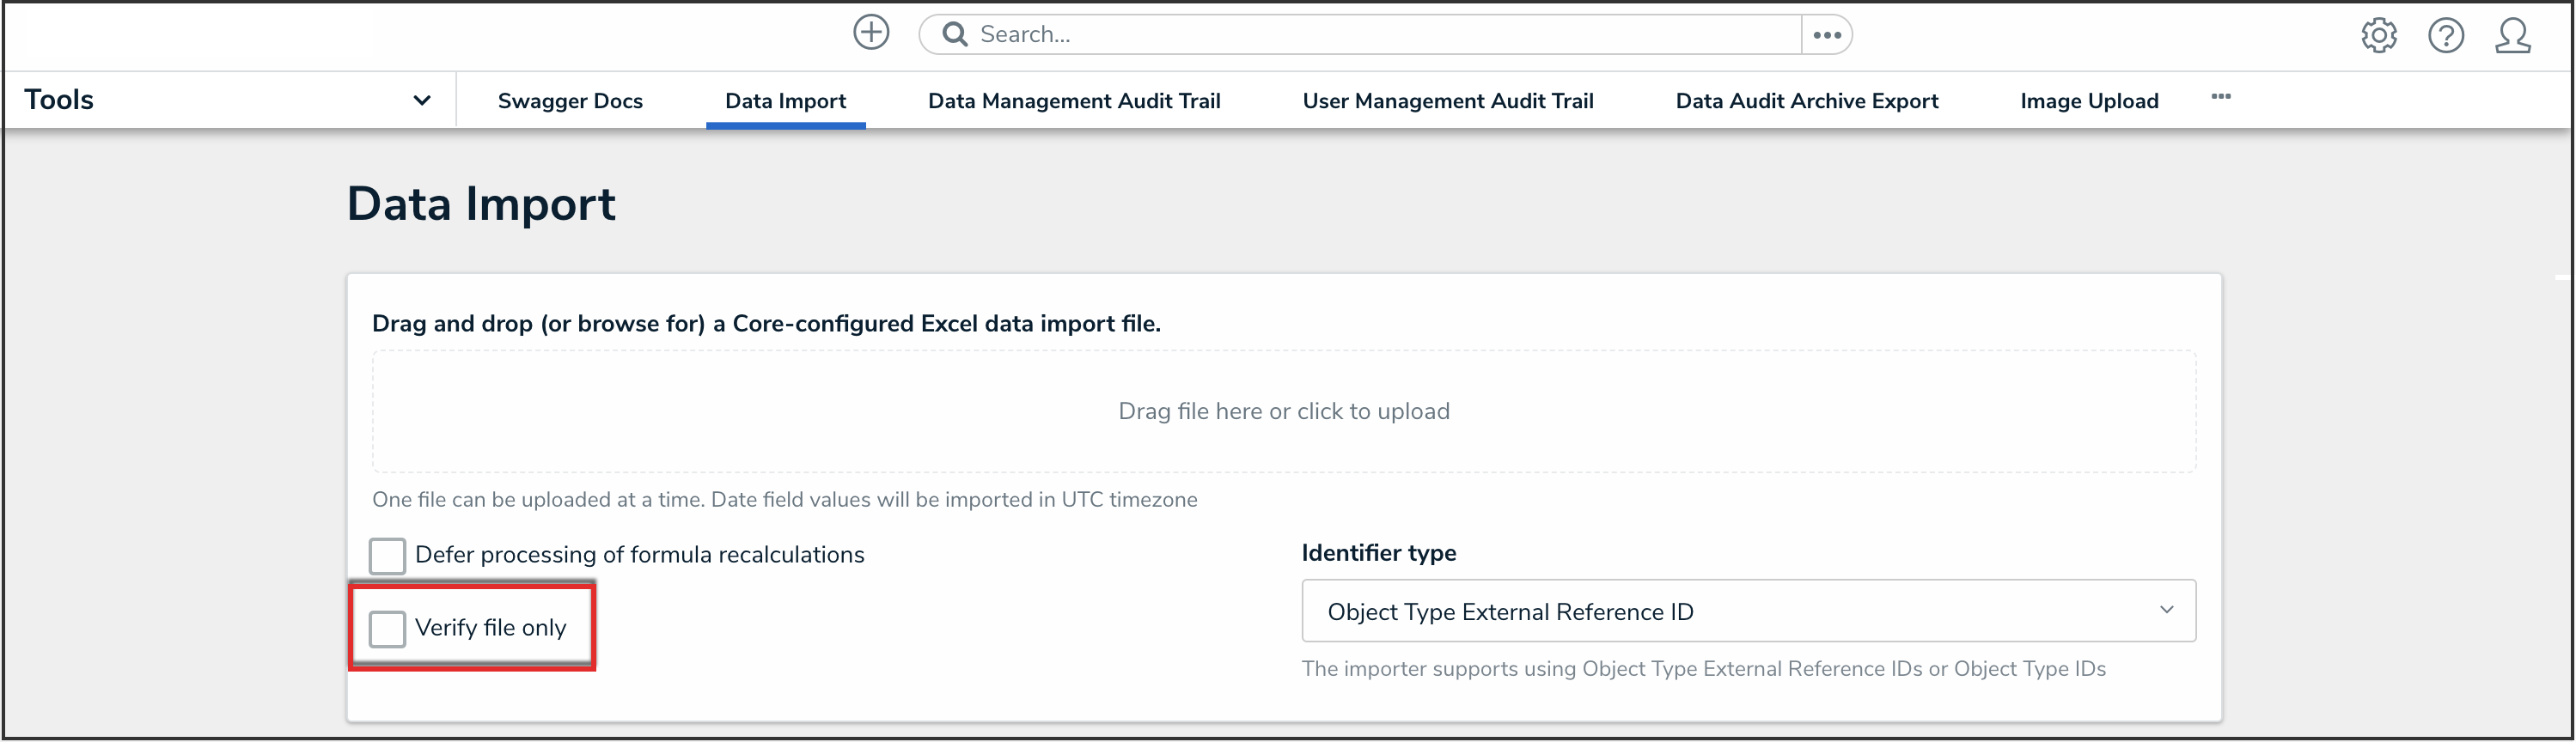
- Before uploading the file, click the Verify file only checkbox to check the data was entered correctly.
Verify File Only Checkbox
- The Verify File Only checkbox will perform a test import without altering your data. It shows you any existing Data Import Template errors and what specific fields they’re occurring on. This practice will help reduce any possible confusion and you having to review your spreadsheet line by line if errors are reported.
-
If there are no file errors detected, drag and drop the file to the upload area or click the area to find and open the file for upload.

Data Import Upload Area
 Note:
Note:
Ensure the Verify File Only checkbox is de-selected before uploading. - If needed, correct any errors on the spreadsheet, save your changes, then re-upload the file.
- When an import is successful, a confirmation message will display. This means that your library data is now uploaded into the Resolver and is ready to be used for recording, tracking, reporting, and managing your company’s information.
- An Import Summary will be included at the end of the message, providing counts for the import, including total objects processed, new objects created, updated objects, attachments, roles assigned, and relationships created.
- The message will also indicate if any rows were skipped on any worksheets within the file due to missing external reference IDs. If there are multiple worksheets within the import file, a message will be displayed for each sheet with skipped rows. The message will indicate the number of skipped rows and the name of the worksheet where they are skipped. Imports can then be corrected and attempted again to ensure all data is imported correctly.

Successful Data Import Message


 Note:
Note:

- If you're importing a large amount of data or data that includes role assignments, the import process may not complete immediately, depending on the:
- Amount of data
- Complexity of the role's permissions
- Number of roles assigned. In this case, a message displays when the import is in progress and when it's completed