Overview
Timed Triggers automate the Workflow of an object which can transition an object from State to State (e.g., notify users of an overdue date and process imported objects into Workflows). Timed Triggers are scheduled to run at midnight local time.
User Account Requirements
The user account you use to log into Resolver must have Administrator permission to create Timed Triggers.
Related Information/Setup
Please follow the link below for more information on Triggers.
- Creating a Date-Based Trigger
- Orchestration Event Action in Resolver Core
- Add a Create Object Action in Resolver Core
Navigation
- From the Home screen, click on the Administration icon.
![]()
Administration Icon
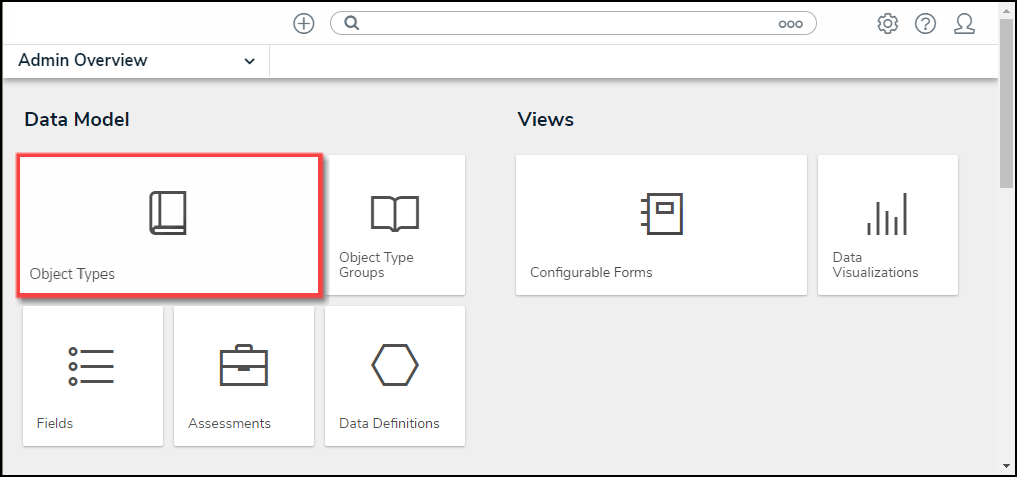
- From the Admin Overview screen, click on the Object Types tile under the Data Model section.
Dashboard Data Sets Tile
- From the Admin Object Types screen, enter an Object Type Name in the Search field to narrow the search results and click on an Object Type.

Object Type
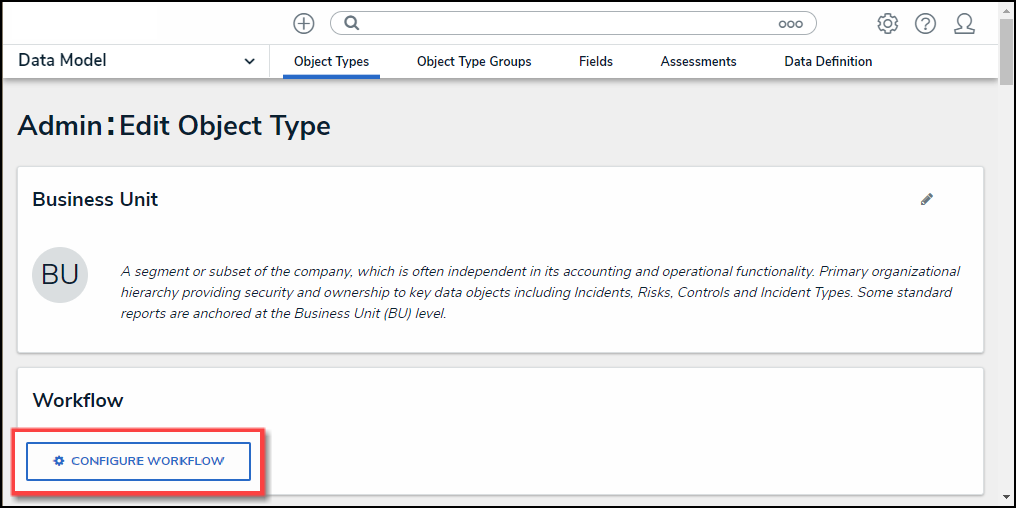
- From the Edit Object screen, click the Configure Workflow button on the Workflow section.
Configure Workflow Button
- If more than one Workflow is set up for the Object Type, click the desired Workflow from the list.

Multiple Workflows
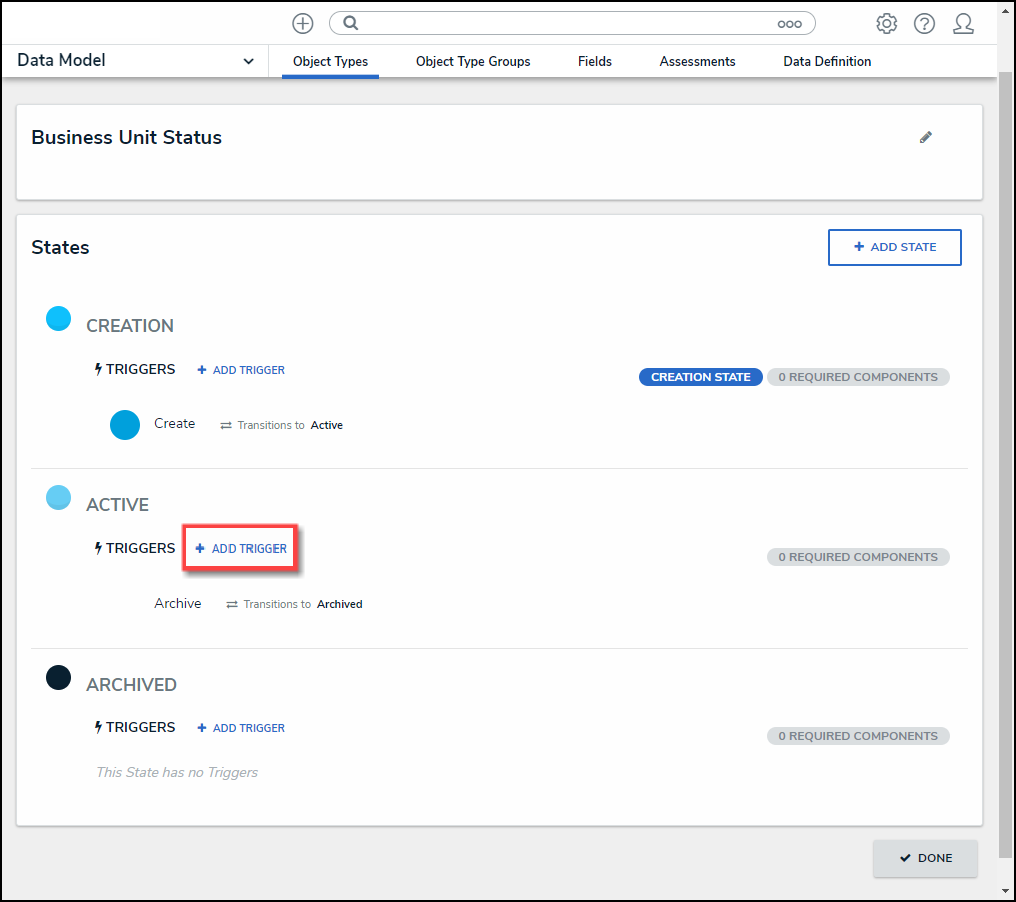
- From the Edit Workflow screen, click the +Add Trigger link under the State you want to add a Trigger.
 Note:
Note:
Timed Trigger cannot be added to a Creation state.
+Add Trigger Link
Adding a Nightly Trigger to a State
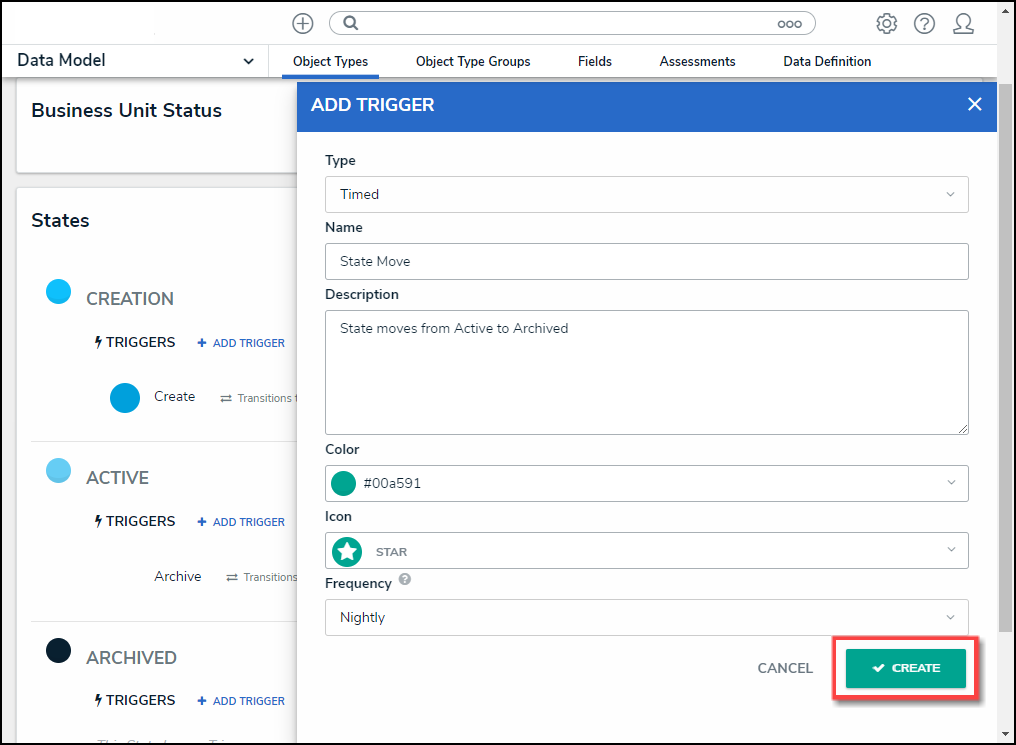
- From the Add Triggers pop-up, select Timed from the Type field dropdown menu.

Type Field
- Enter a Trigger Name in the Name field.
- (Optional) Enter a brief description outlining the Nightly Trigger in the Description field.
- (Optional) Select a color from the Color dropdown menu. The Color selected will be applied to the Icon if one is selected.

Color Dropdown
- (Optional) Select an icon from the Icon dropdown menu. The Icon represents the Trigger within the system and appears just before the Trigger Name on the corresponding screens.
![]()
Icon Dropdown
- Select Nightly from the Frequency field dropdown menu.

Frequency Field
- Click the Create button to create the Nightly Trigger.
Create Button
Note:
The Nightly Trigger will appear on the Admin Edit Workflow screen with a Clock icon indicating that the Triggers is a Nightly Trigger.
![]()
Clock Icon
Adding a Transition to a State
- The Edit Trigger pop-up will appear when you click the Create button to create the Trigger.
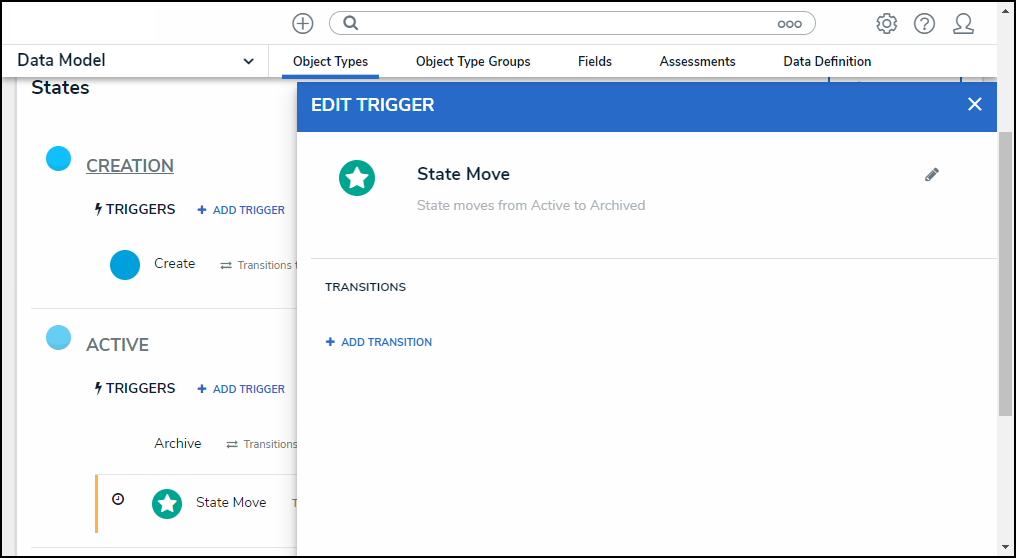
Edit Trigger Pop-up
- Click the +Add Transition link under the Transition section.
![]()
+Add Transition Link
- Enter a Transition name in the Name field.
- Select a state from the Destination State dropdown menu, indicating the State the Object Type will move to when the Transition is executed.

Destination State Dropdown
- (Optional) Select the Bypass Required Fields toggle switch to allow the Transition to move the Object Type to the indicated State if there are empty required fields on the Object Type Form.

Bypass Required Fields
- Click the Create button to create the Transition.
![]()
Create Button