Overview
The Messaging action sends an email to users within one or more selected roles once objects have successfully transitioned to the next state. To control the contents of the email, you can choose a default or custom email template and select which configurable form is displayed when the user clicks the link provided in the email to view an object. When creating this action, you must choose one of the following delivery frequencies:
- Immediate: Sends an email to users in the selected role(s) immediately following the object's transition.
- Nightly: Sends a single email to users in the selected role(s) with a list of the objects that transitioned. If additional nightly Messaging actions have been added to other workflows or object types, a single email digest with those objects will be sent to the user only if the same role and email template has been selected on each messaging action. If a different role and/or template has been selected for multiple workflows or object types, users may receive multiple nightly emails. See the Timed Triggers & Nightly Emails Schedule article for more information on when these emails are sent.
Before you can create this action on a workflow state, a transition must be created.
 Note:
Note:
The role(s) added to the Messaging action must be properly configured for the selected object type and workflow state.
User Account Requirements
The user must have Administrator permissions to access the Admin Overview screen.
Required Information/Setup
Please refer to the Add a Trigger & Transition to a State article for instructions on how to add triggers and transitions.
Please refer to the Roles and Workflow Permissions sections for more information on configuring roles and workflow permissions.
Navigation
- From the Home screen, click the Administration icon.
![]()
Administration Icon
- From the Administrator Settings menu, click Admin Overview.

Administrator Settings Menu
- From the Admin Overview screen, click the Object Types tile under the Data Model section.

Object Types Tile
- From the Object Types screen, enter an object type name in the Search field to narrow down the object types list.
- Click the object type name you want to edit.

Object Type Name
- From the Edit Object Type screen, click a workflow under the Workflow tab.

Workflow Tab
- If there are no workflows listed, click the Configure Workflow button.

Configure Workflow Button
Add a Messaging Action to a Transition
- From the Edit Workflow screen, click the trigger that you want to add the Messaging action to.

Workflow Trigger
- From the Edit Trigger pop-up, click the Configure icon under Transitions.
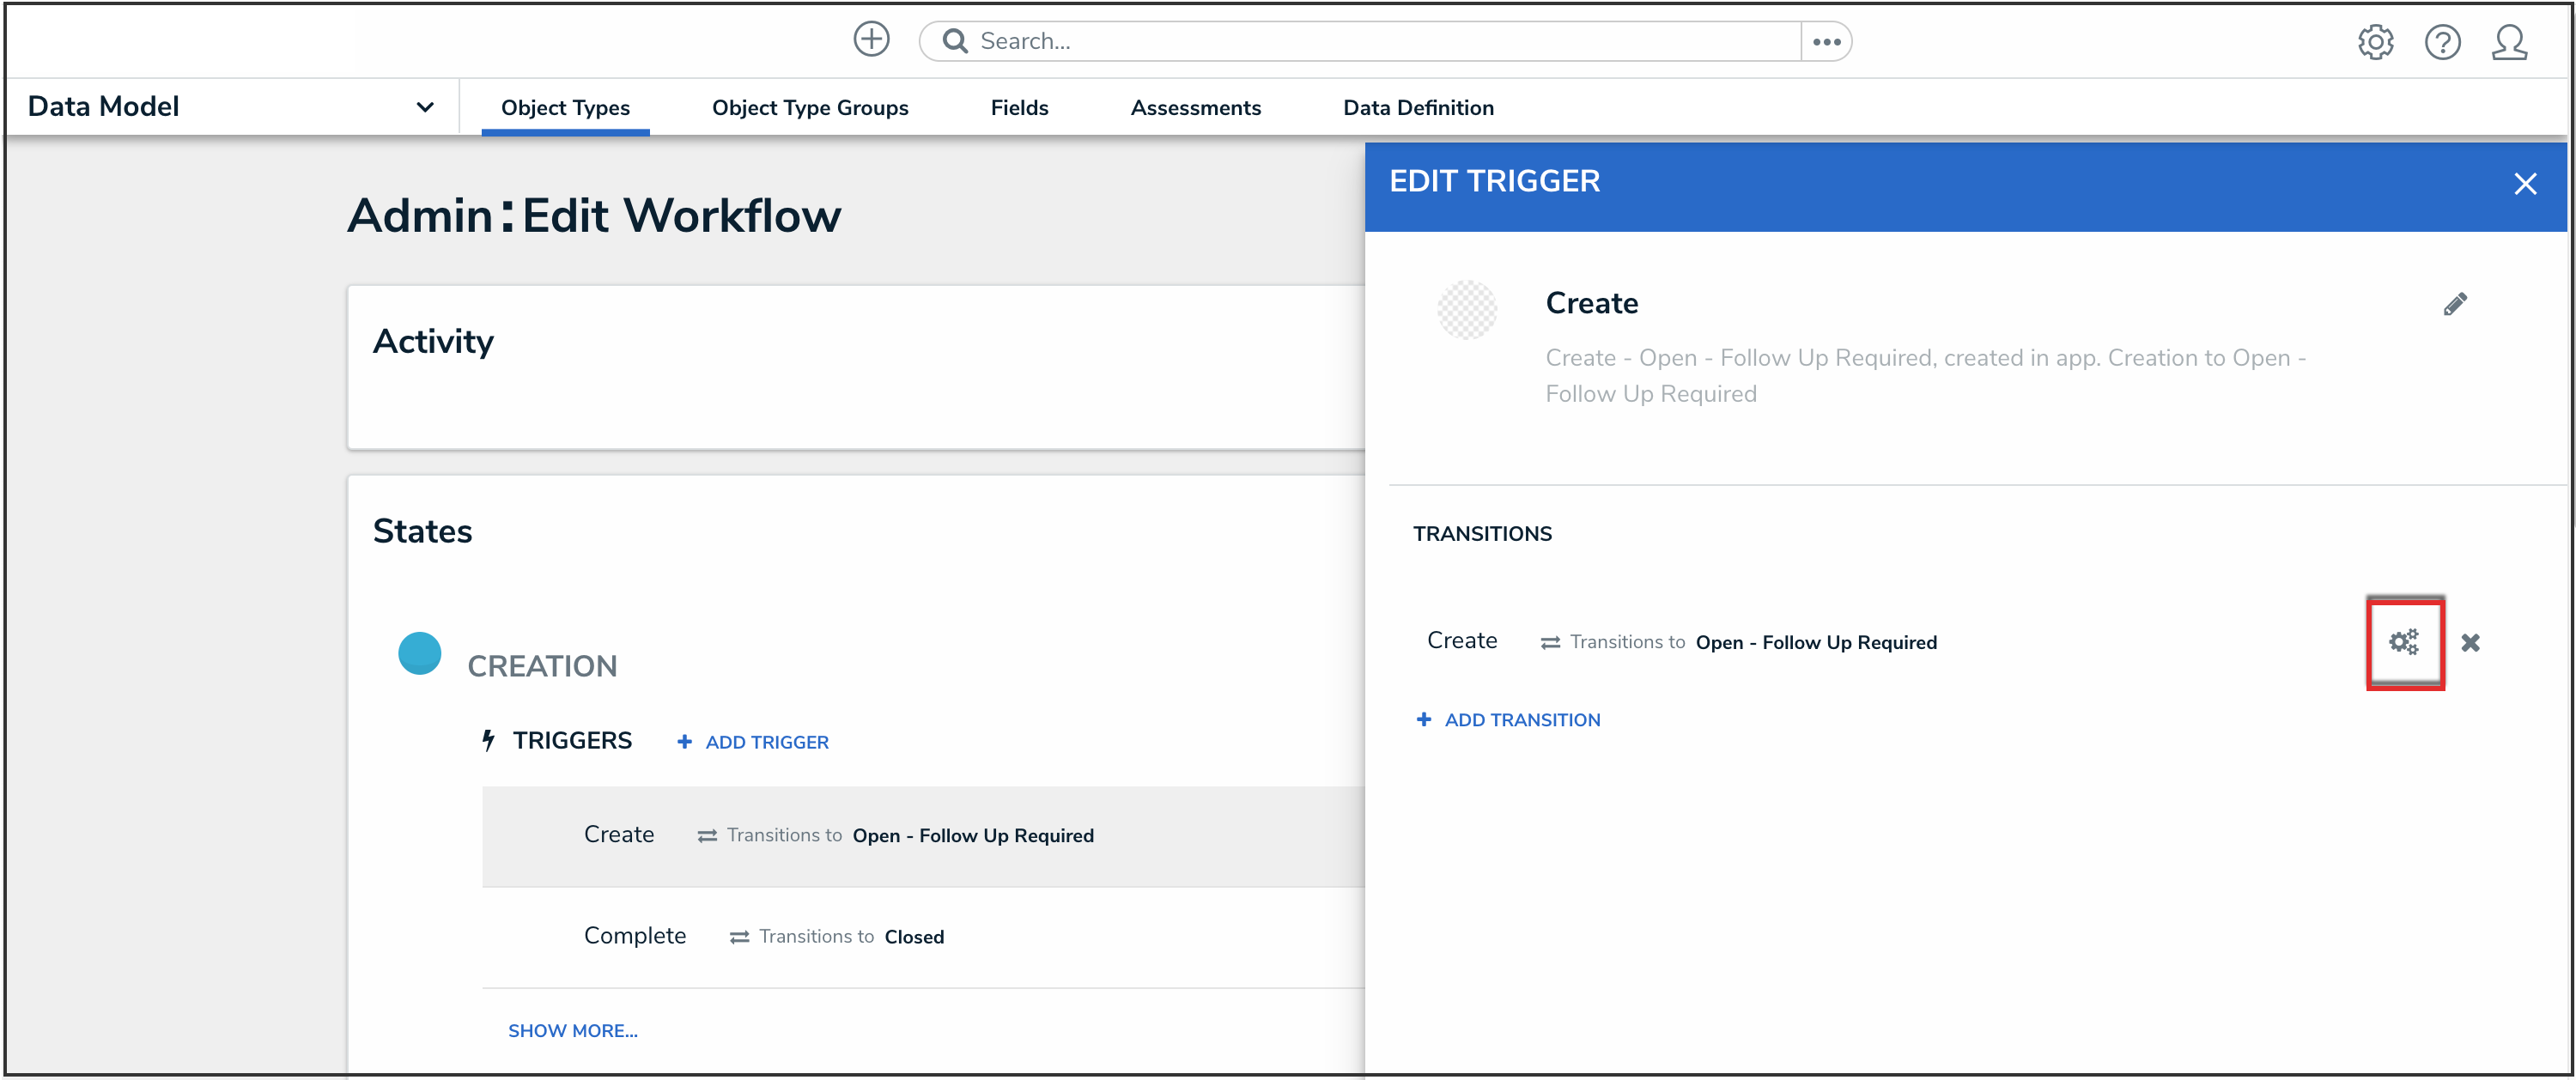
Configure Icon
- Click the Add Action button under Actions.
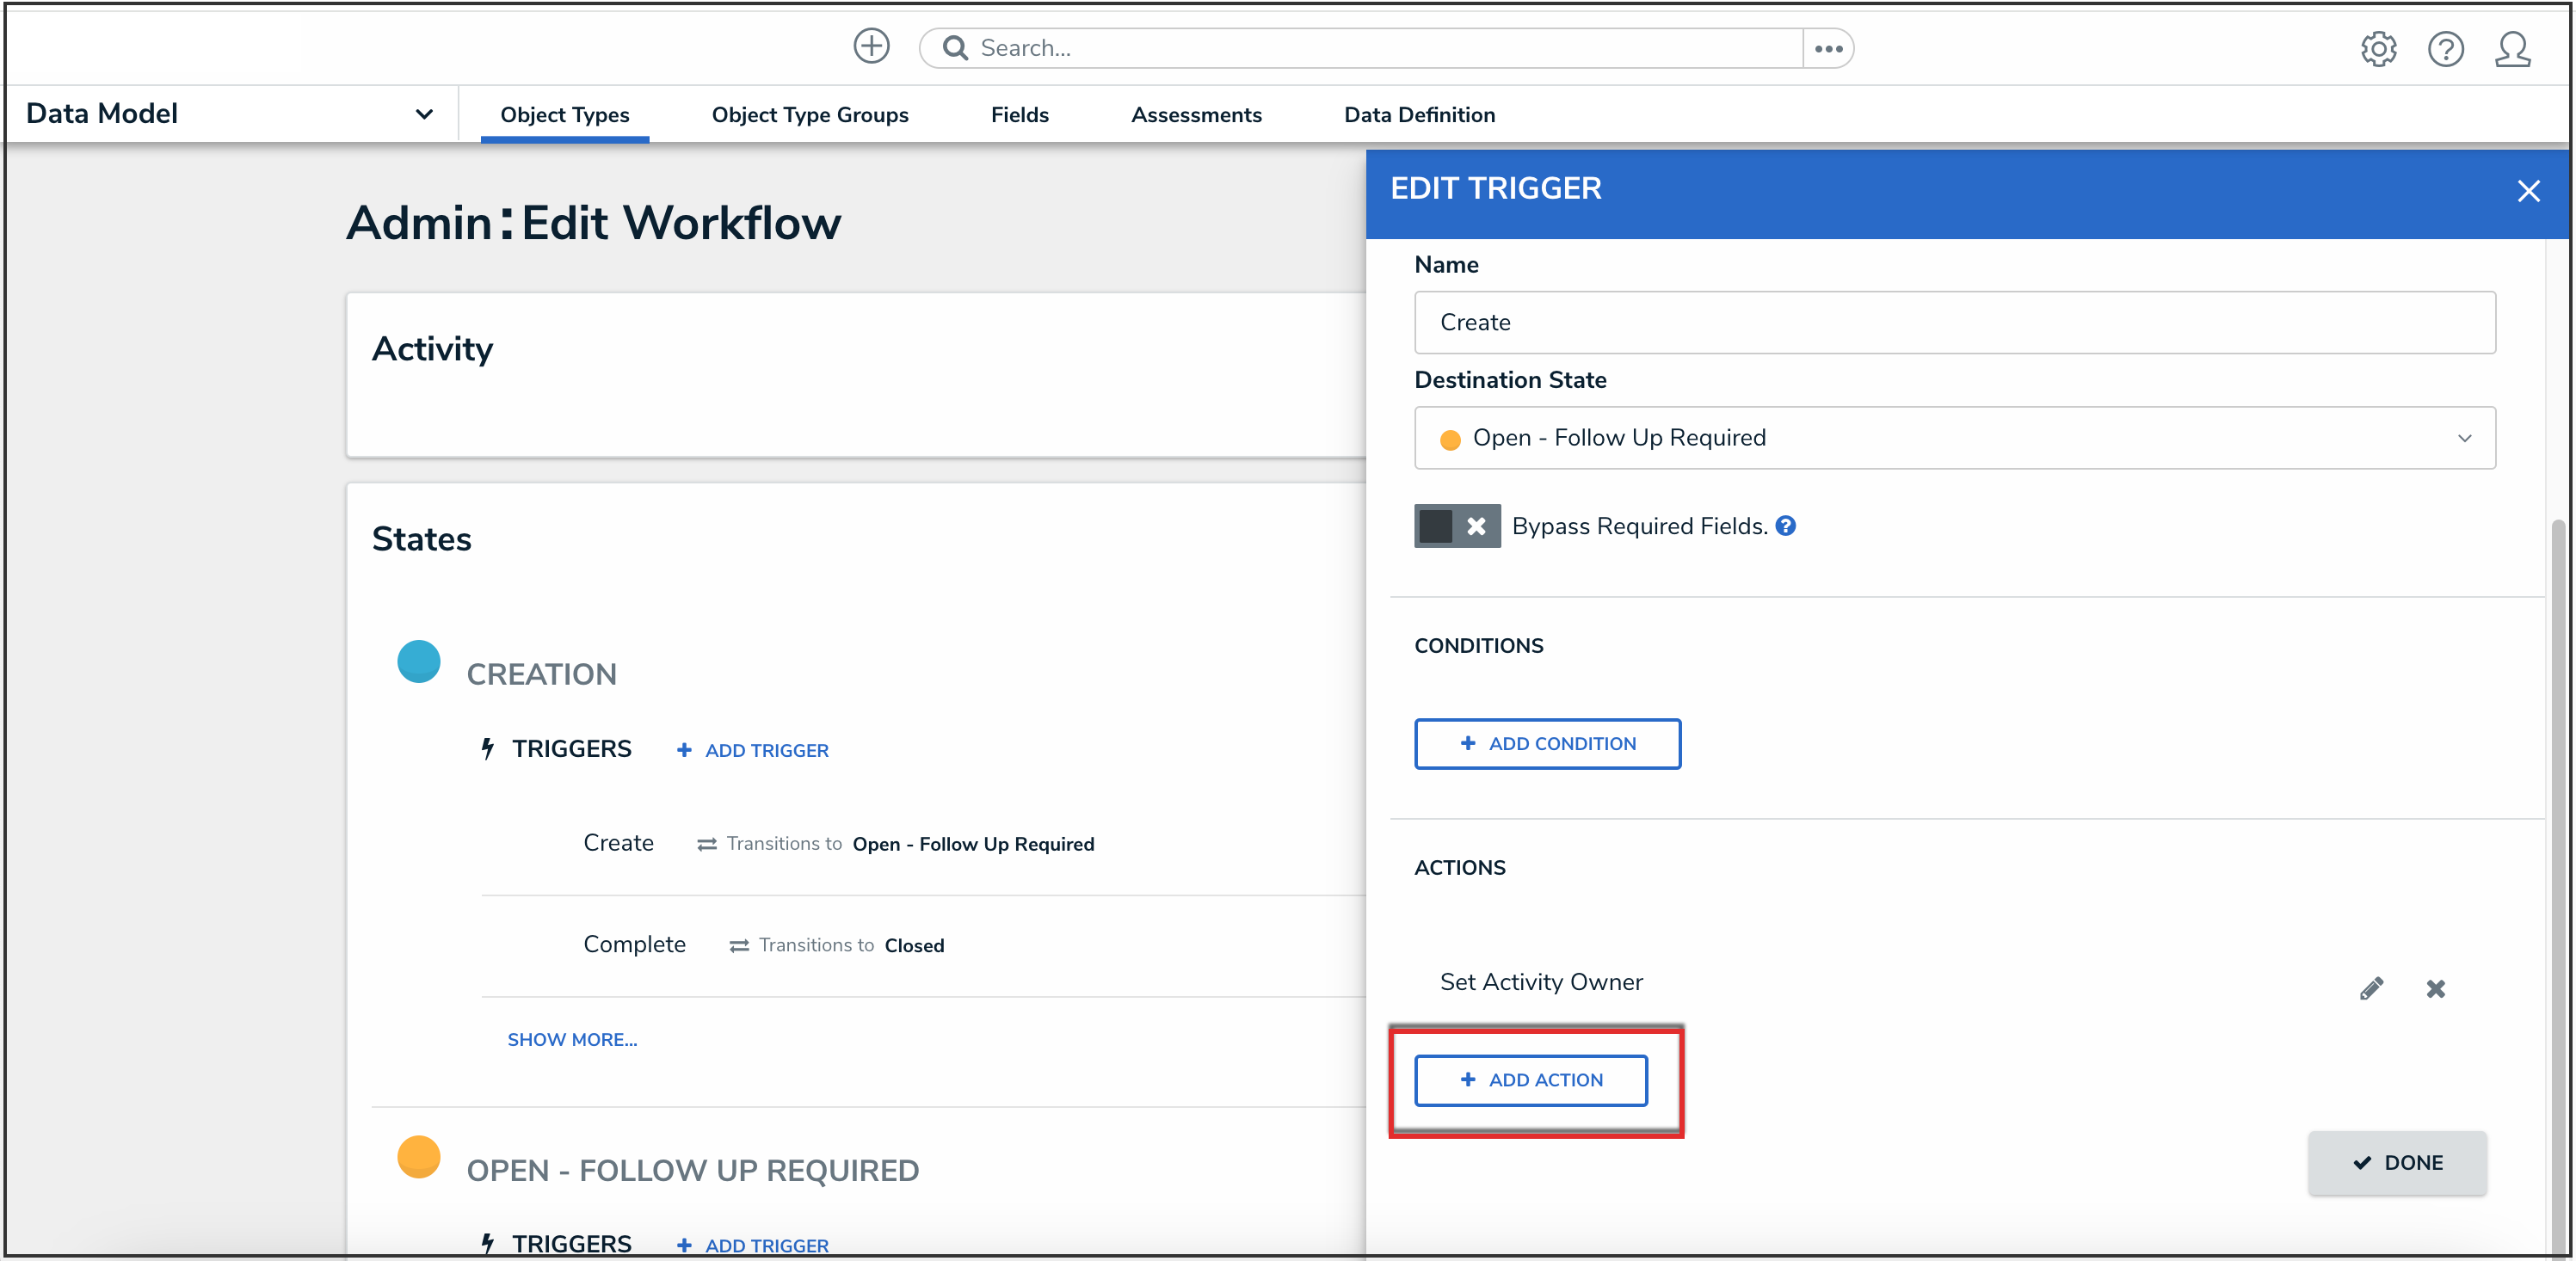
Add Action Button
- Select Messaging from the Type dropdown menu.
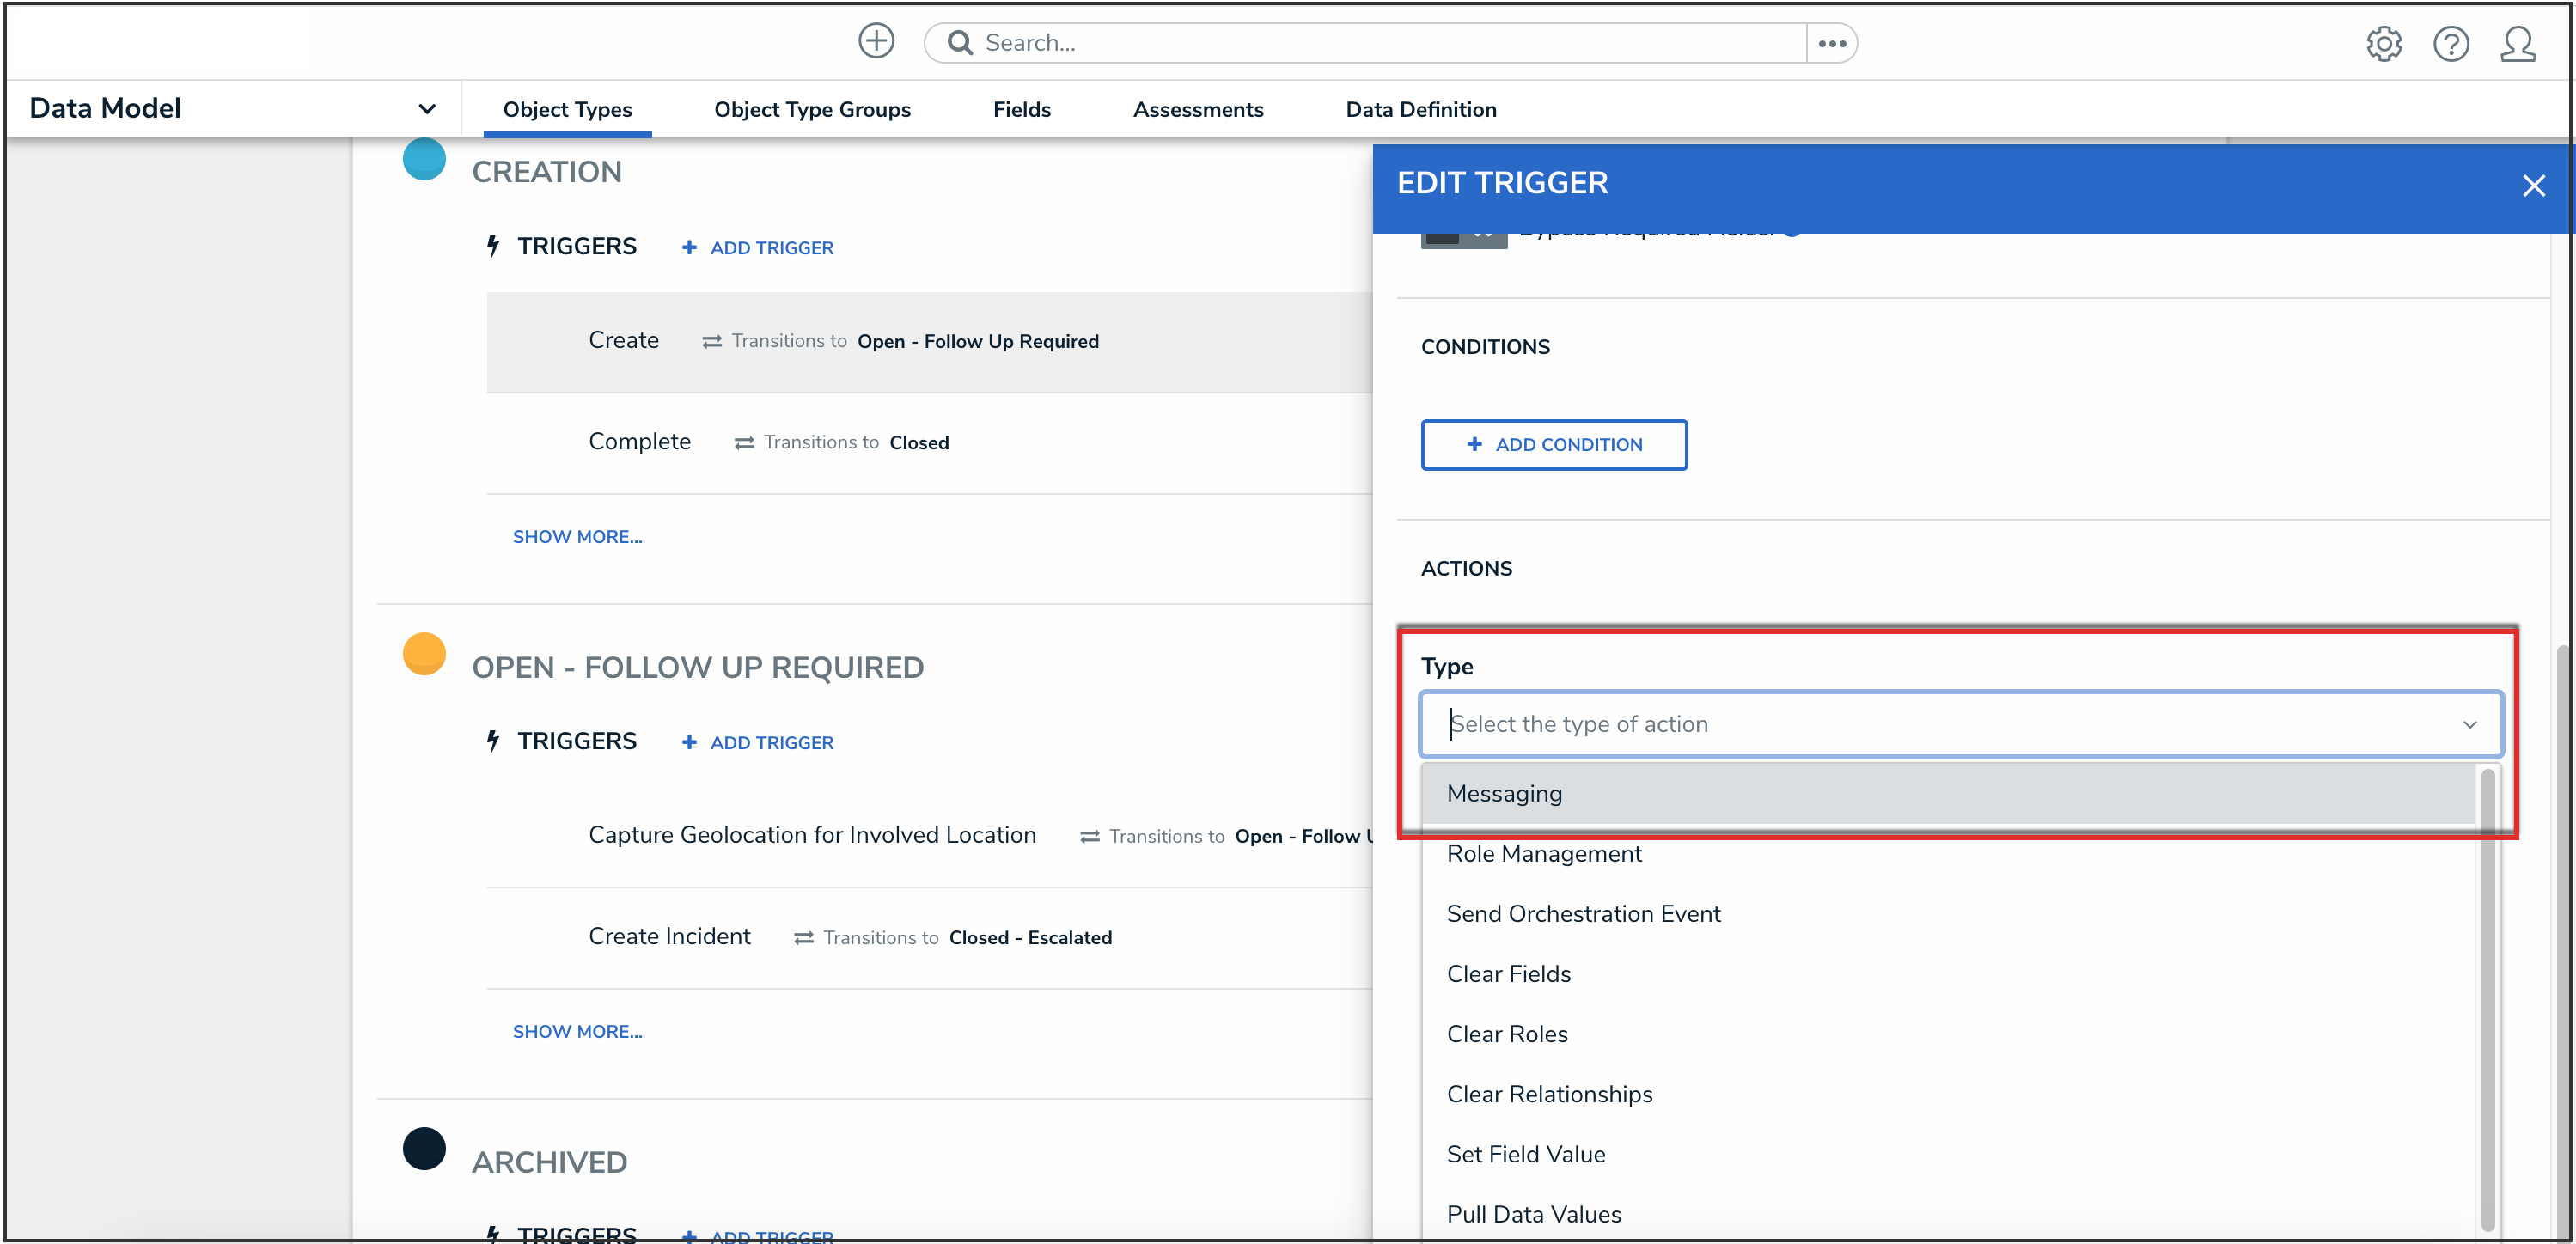
Type Dropdown
- Enter a name for the action in the Name field.
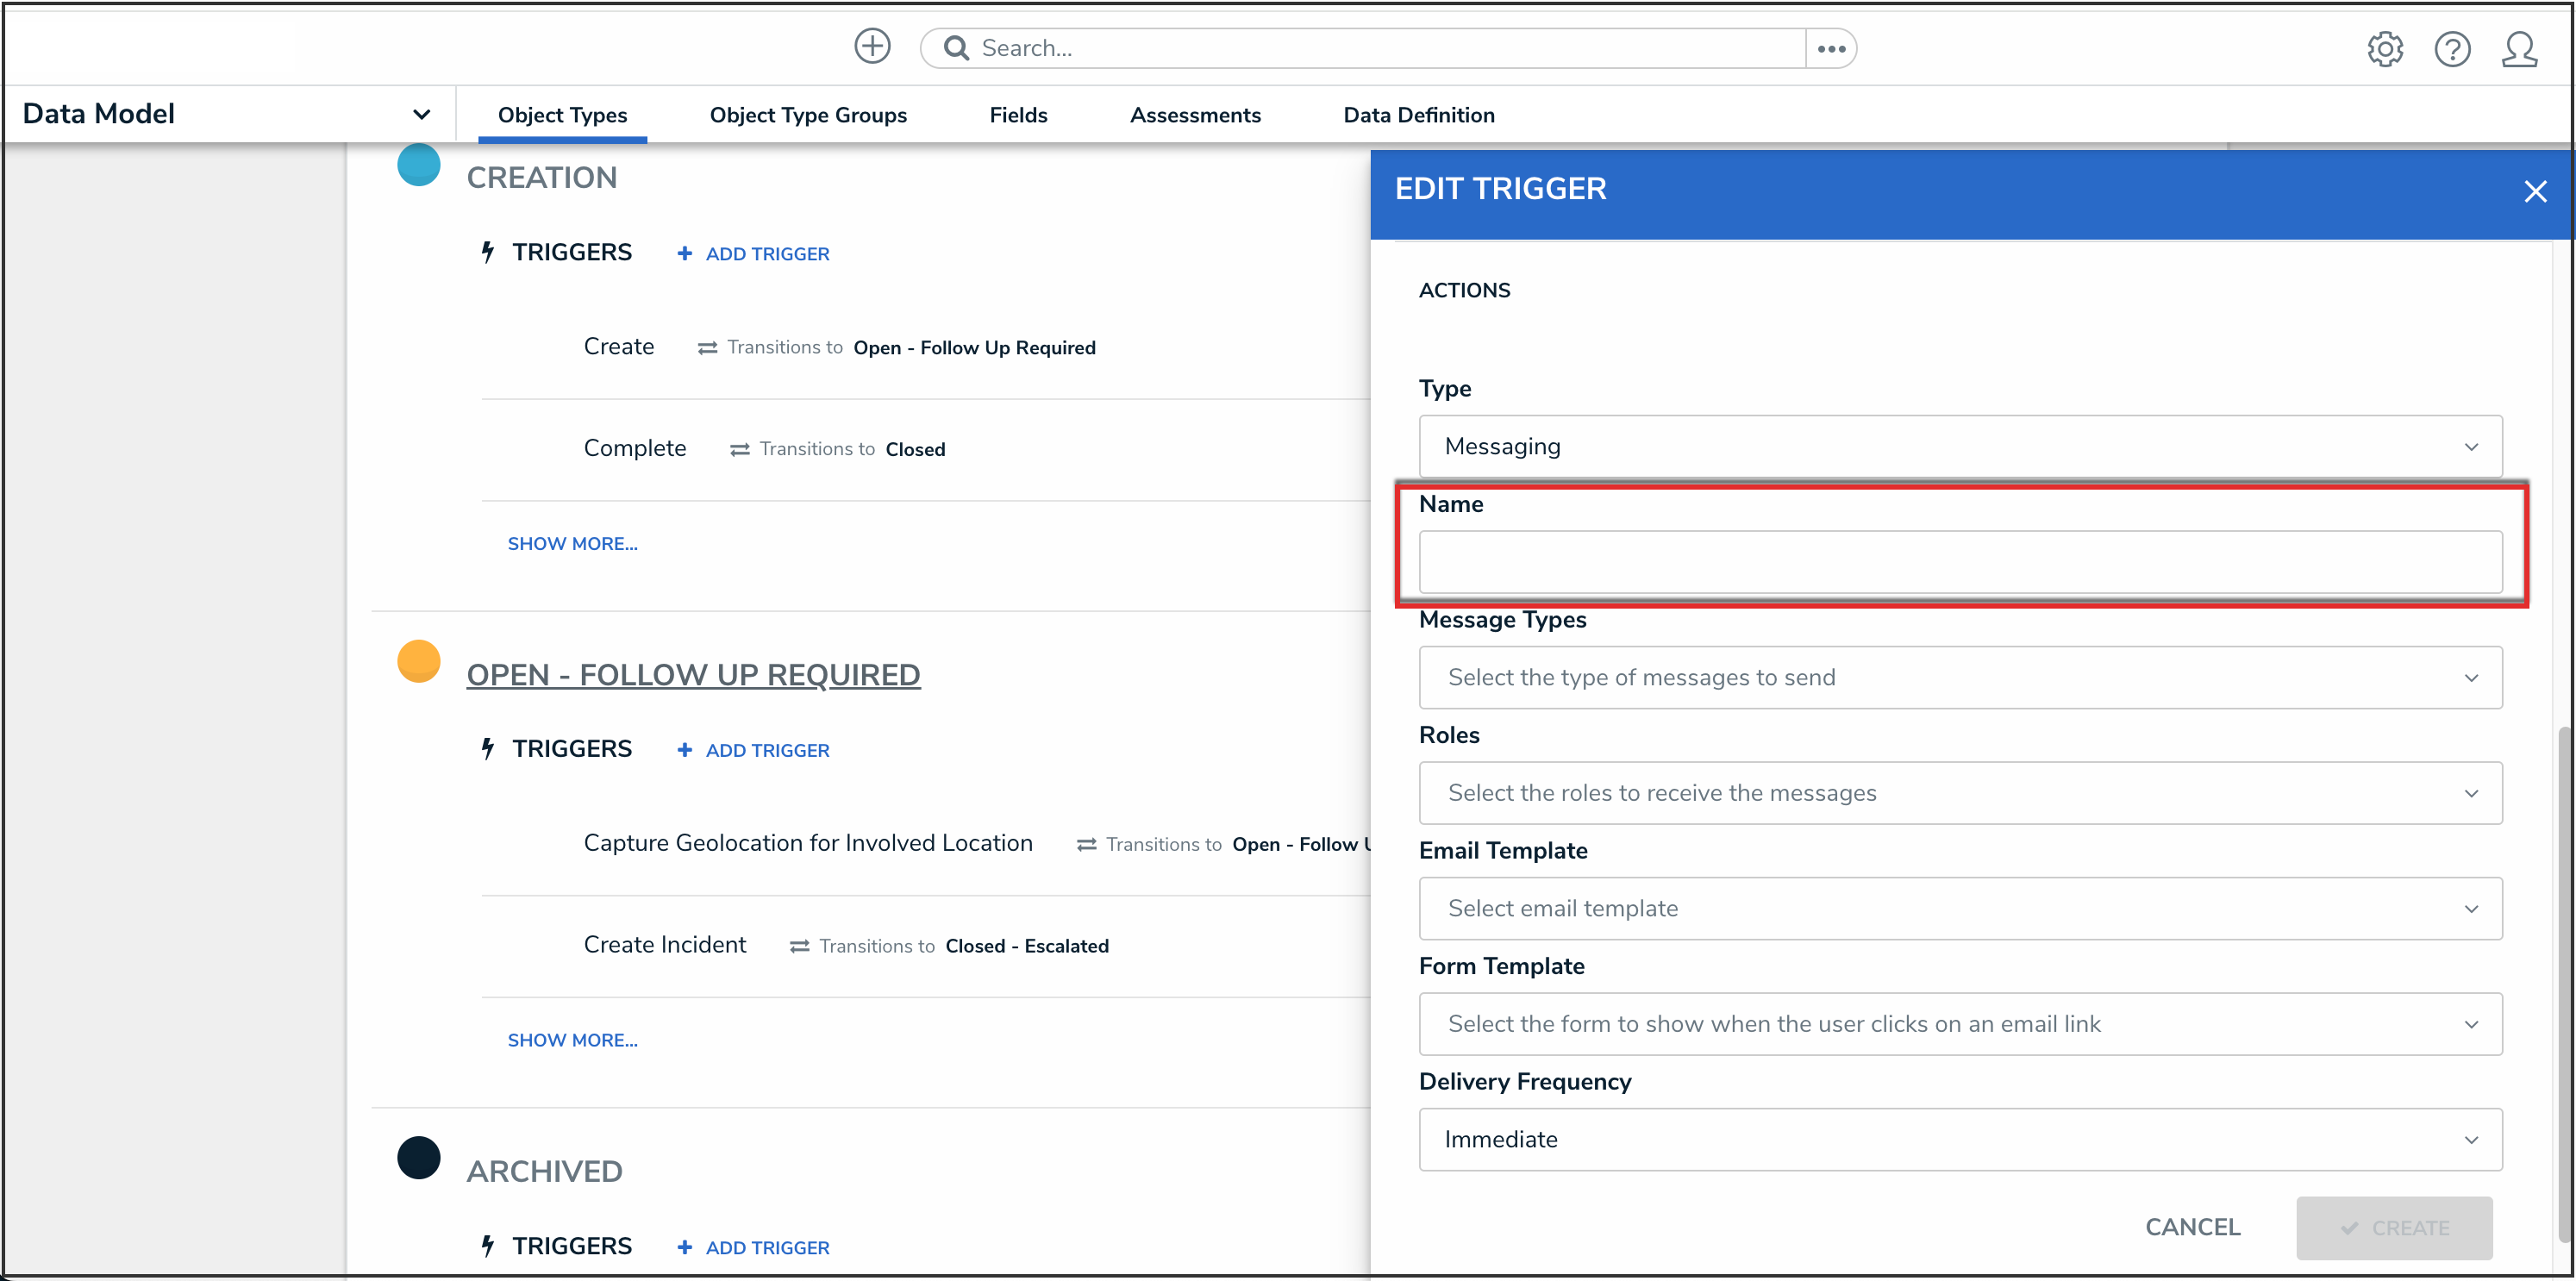
Name Field
- Select Email from the Message Types dropdown menu.

Message Types Dropdown
- Select the roles that should receive the email from the Roles dropdown menu.
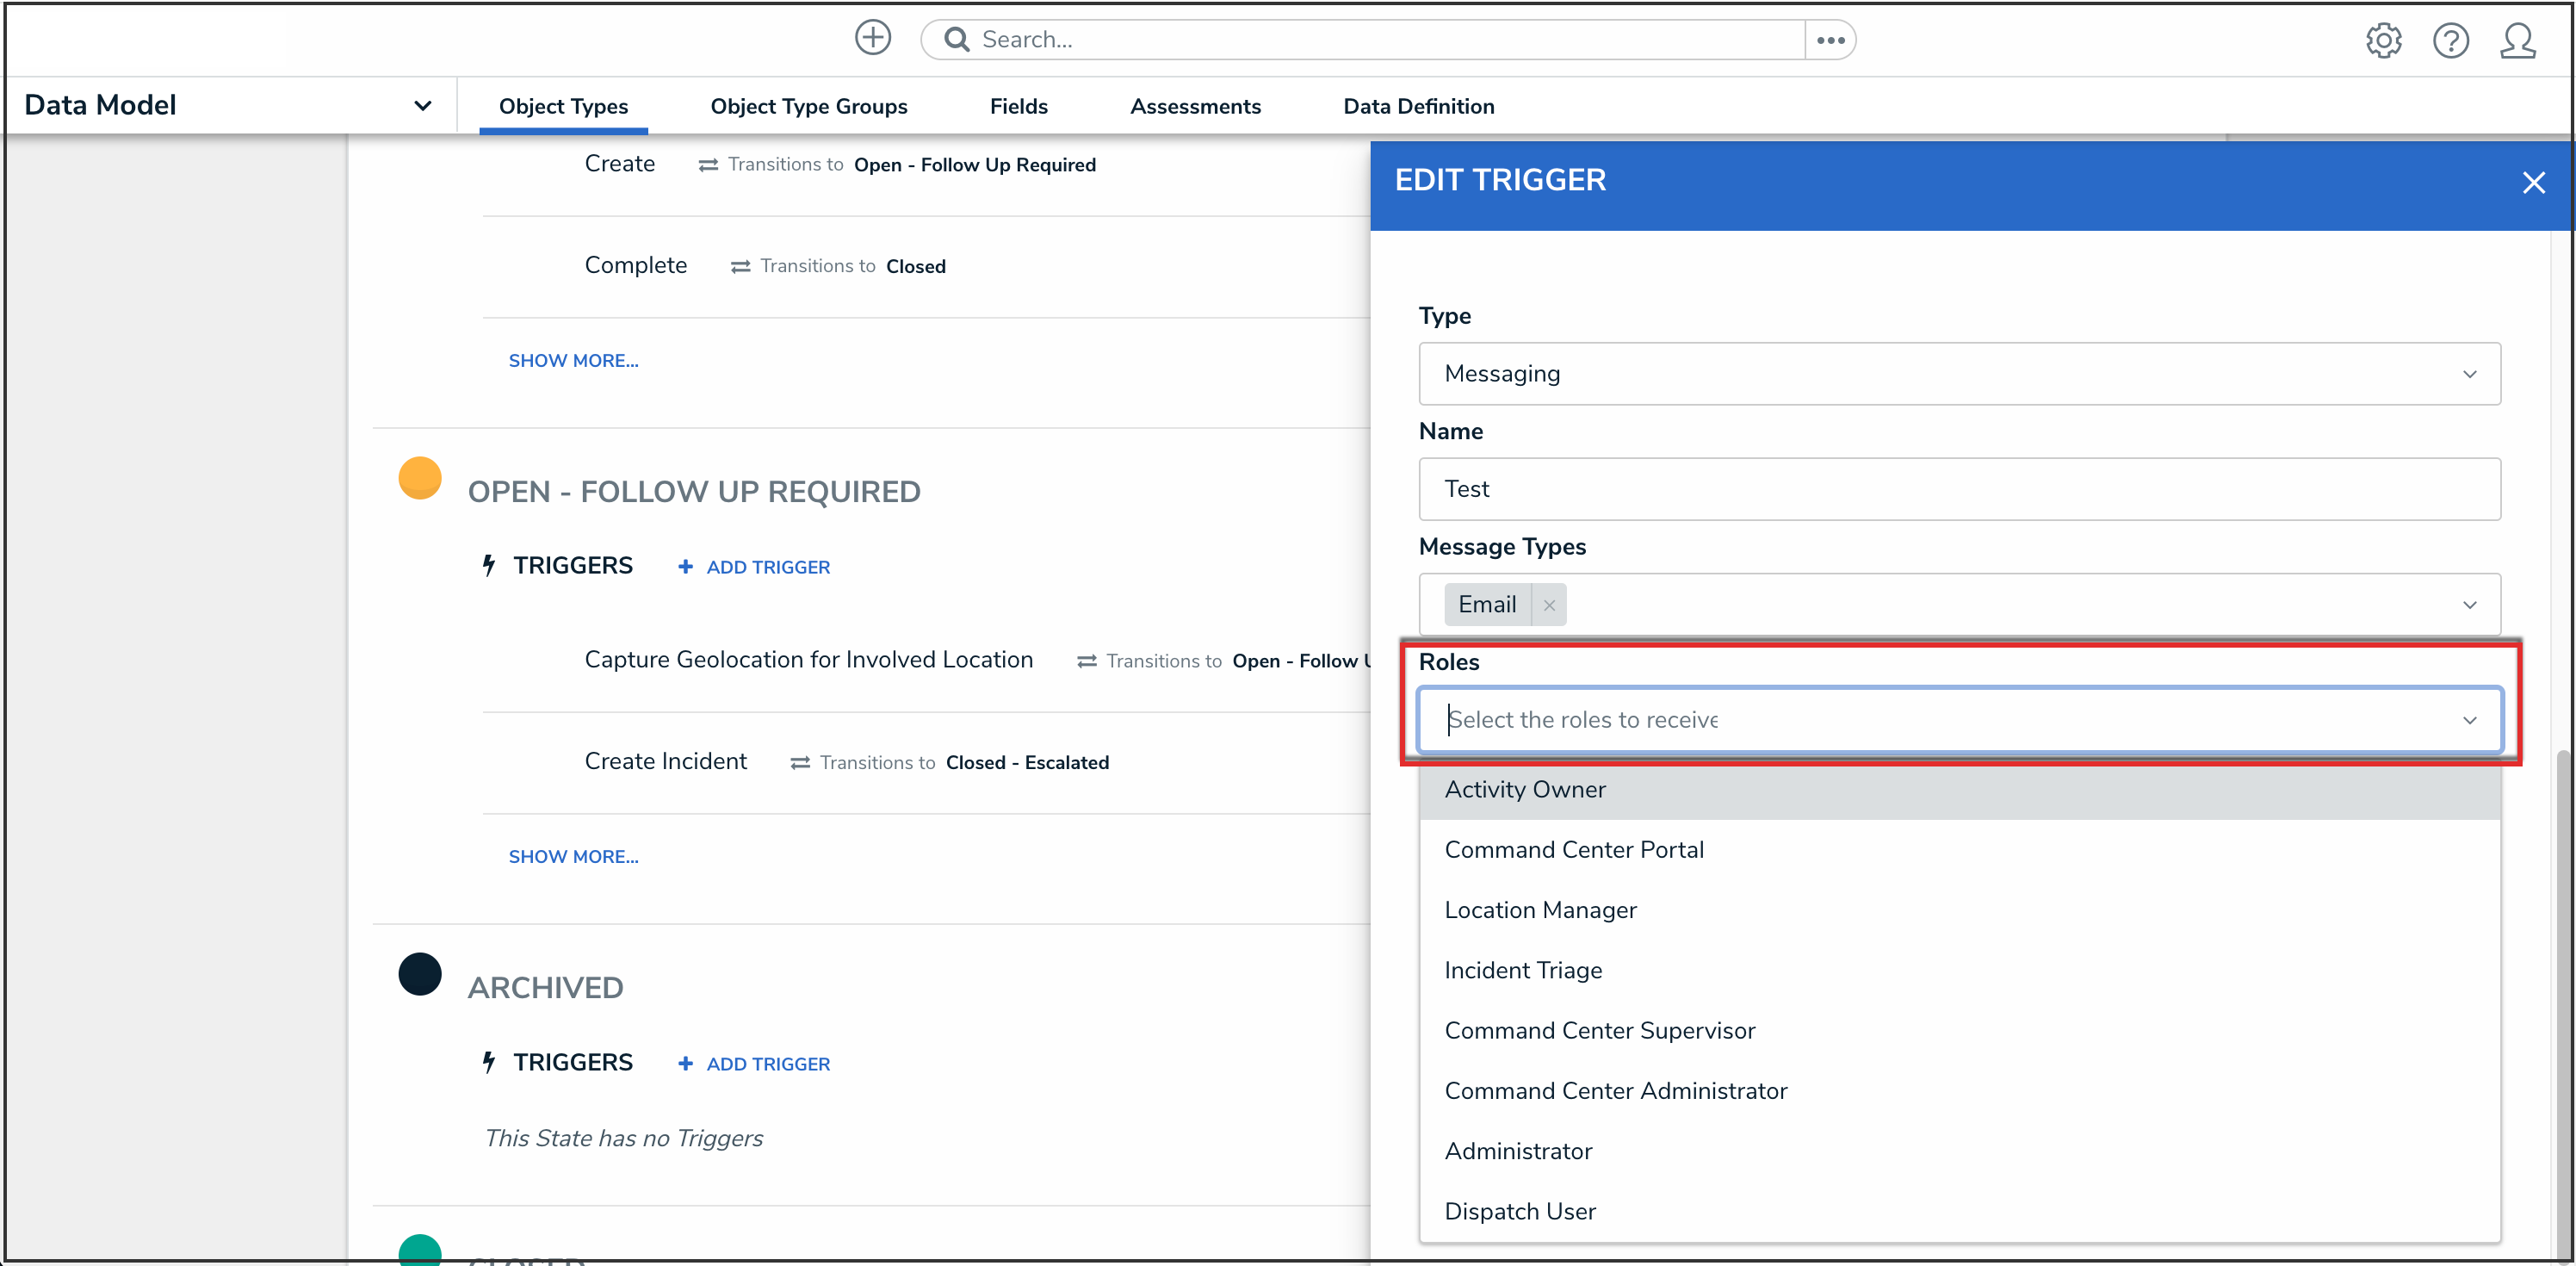
Roles Dropdown
- Select a default or custom template from the Email Template dropdown menu.
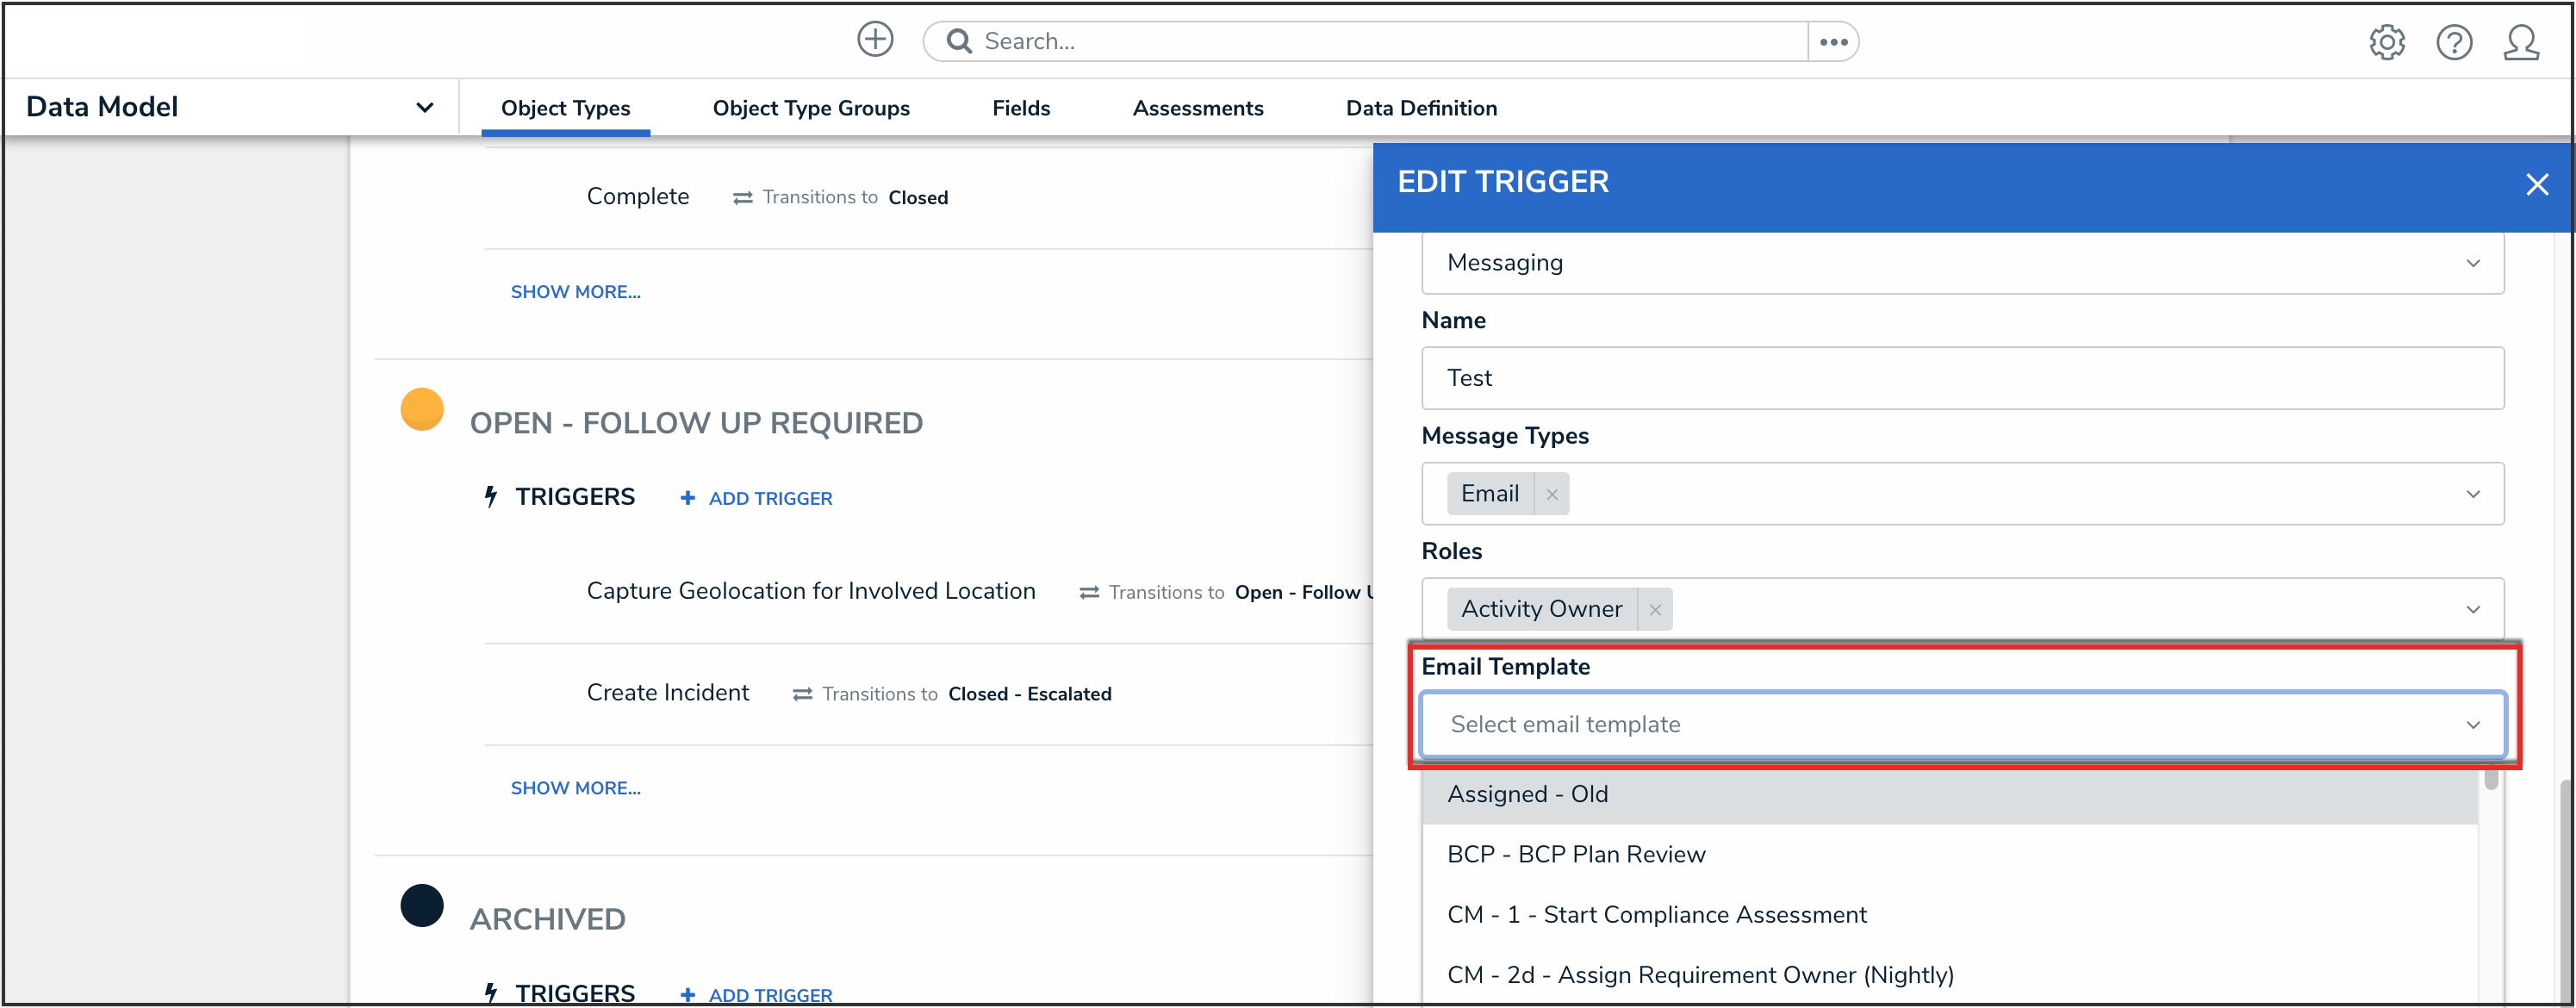
Email Template Dropdown
The default templates (which may have been renamed or edited) include:- Standard: Advises the user the one or more objects can be accessed.
- Assigned: Advises the user that one or more objects have been assigned to them.
- Select the configurable form from the Form Template dropdown menu. This is the form that will be displayed when the user clicks on an object link in the email.
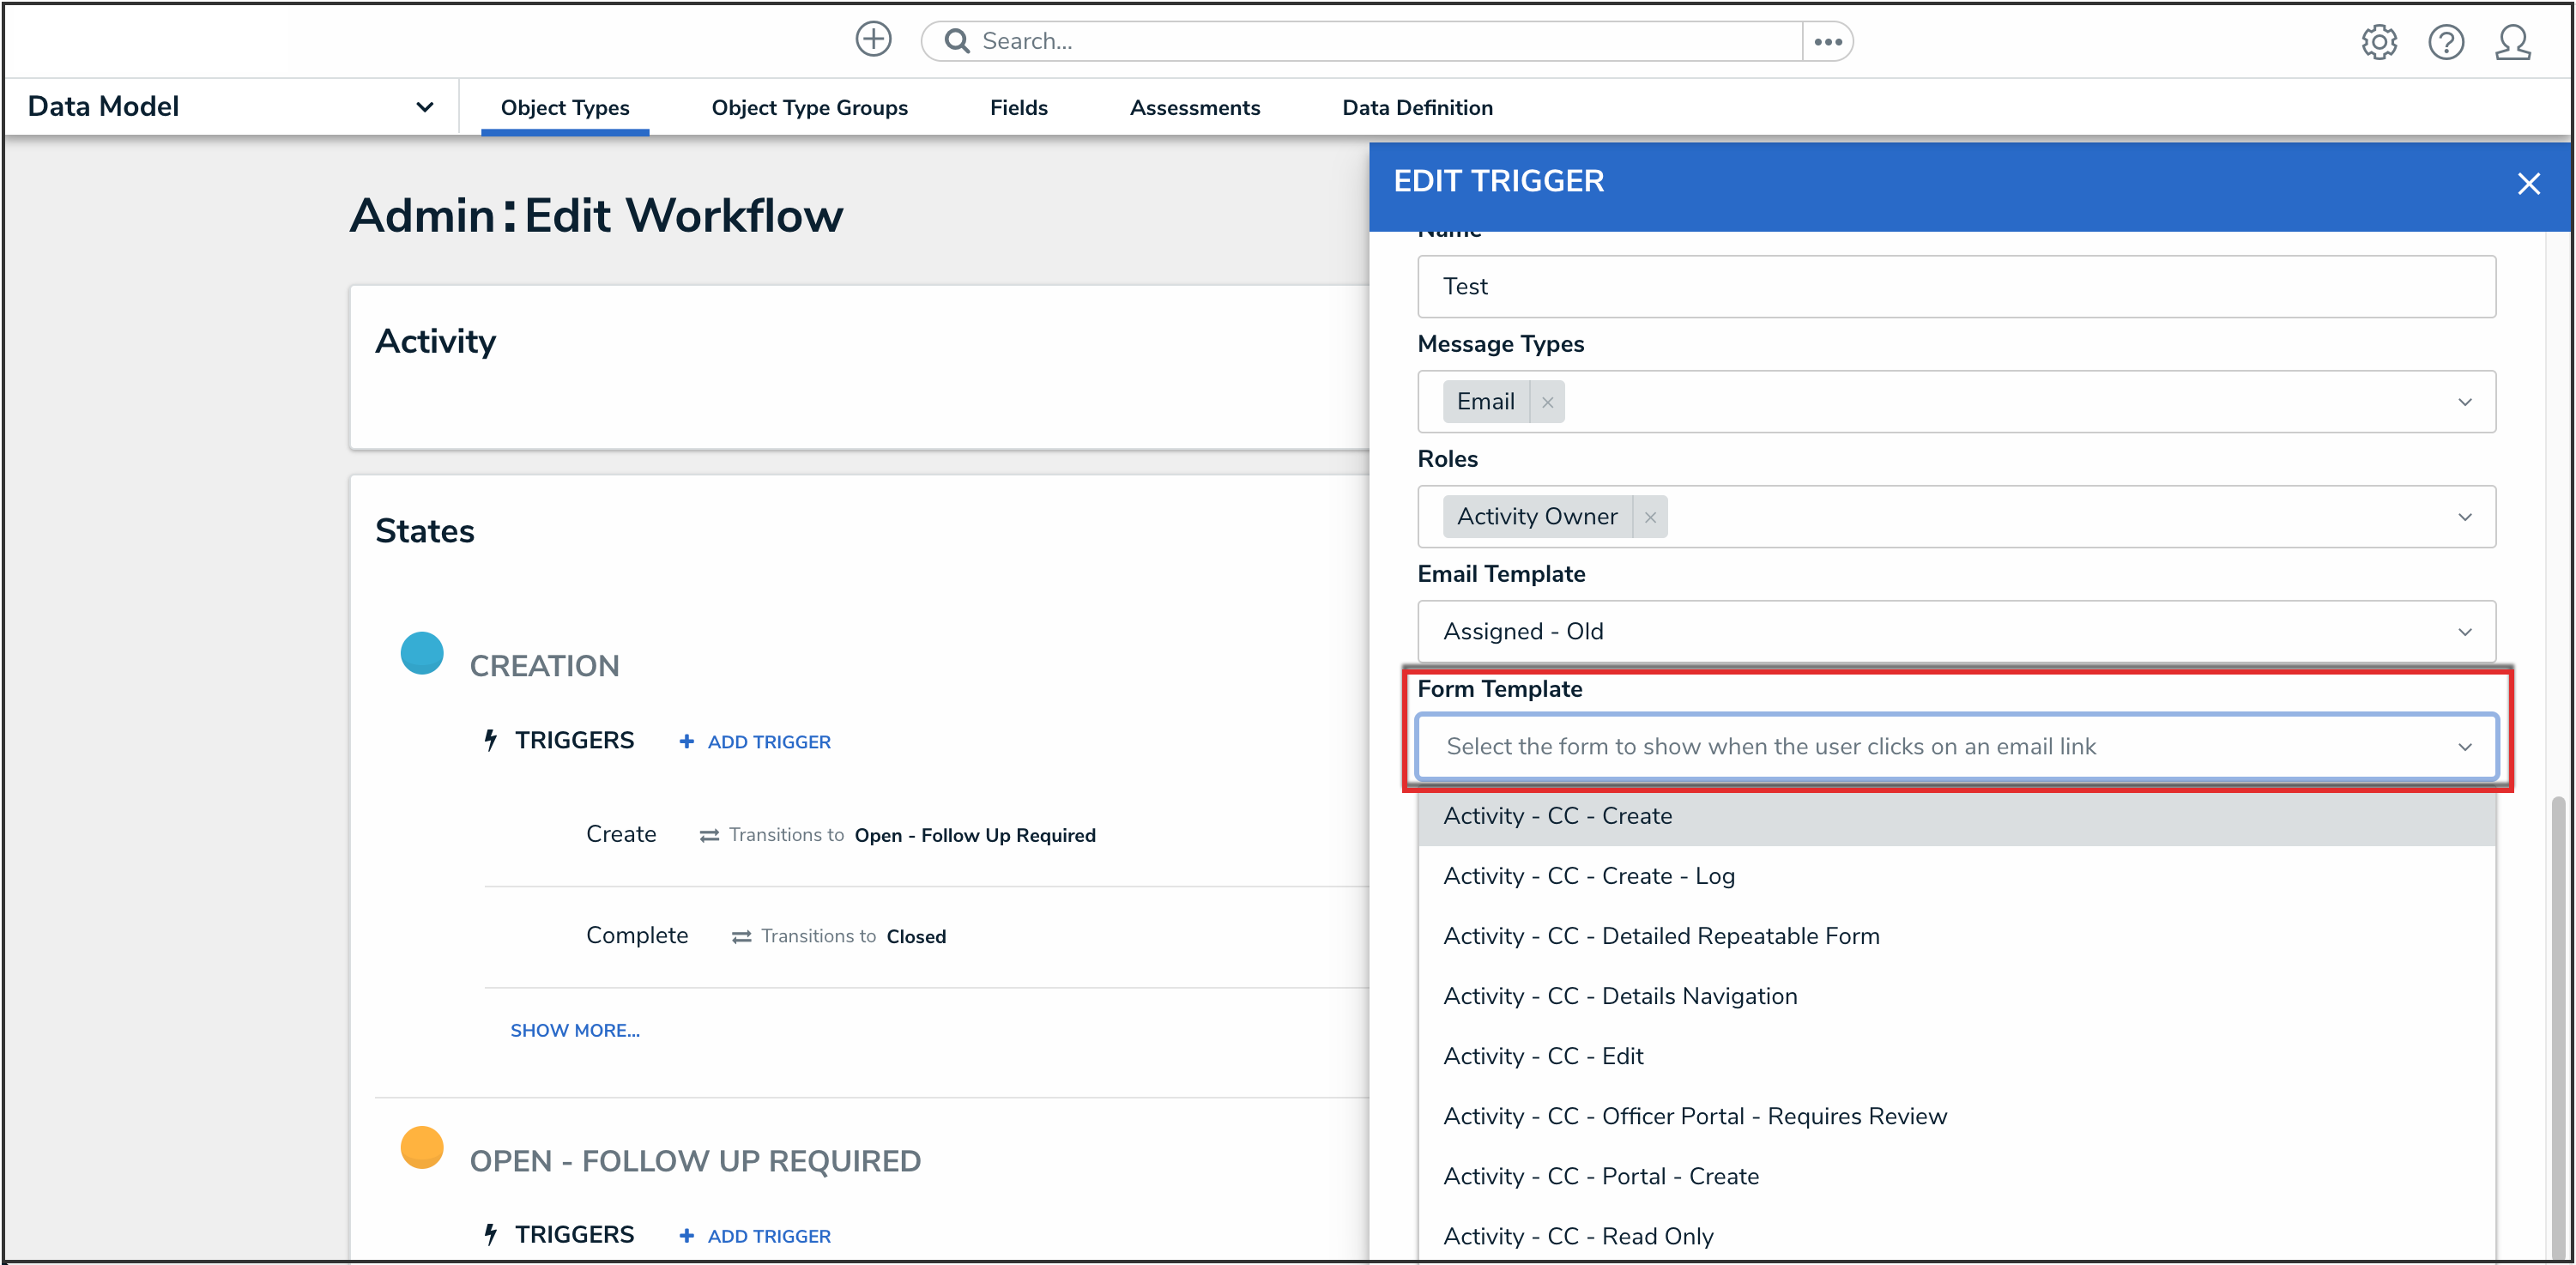
Form Template Dropdown
- Select one of the following options from the Delivery Frequency dropdown menu:
- Immediate: Sends an email to the users in the role(s) immediately following an object's transition. This is the default frequency.
- Nightly: Sends an email to the users in the role(s) at the appropriate time for your organization's environment. If additional actions with a nightly frequency have been added to other object types or workflows using the same role and email template, the user will receive a single email digest for multiple object types.


Delivery Frequency Dropdown
- Click the Create button.

Create Button
- From the Edit Trigger pop-up, click the Done button to save your changes.

Done Button