Overview
A Key Risk Indicator (KRI) is a metric that helps identify increasing Risk levels within controls designed to reduce Risk.
When a KRI is created, it is attached to a Risk and assigned to a user in the Indicator Owner User Group. The Indicator Owner is responsible for ensuring KRI's current values are up to date.
User Account Requirements
The user account you use to log into Resolver must be assigned to the Indicator Owner User Group to access the KRI function.
Related Information/Setup
Please see the link below for more information regarding the Portal screen.
Please see the link below for more information regarding the My Tasks section.
Navigation
All KRIs that require action from the Indicator Owner appear on the My Tasks page.
- From the Home screen, click the Indicator Workflow State Chart to narrow the My Tasks list to only Key Risk Indicator tasks.

Indicator Workflow State Chart
- Click an Indicator link from the My Tasks section.

Indicator Link
Alternate Navigation
- From the Home screen, click the Home dropdown menu.

Home Dropdown Menu
- Select the Portal link from the Home dropdown menu.

Portal Link
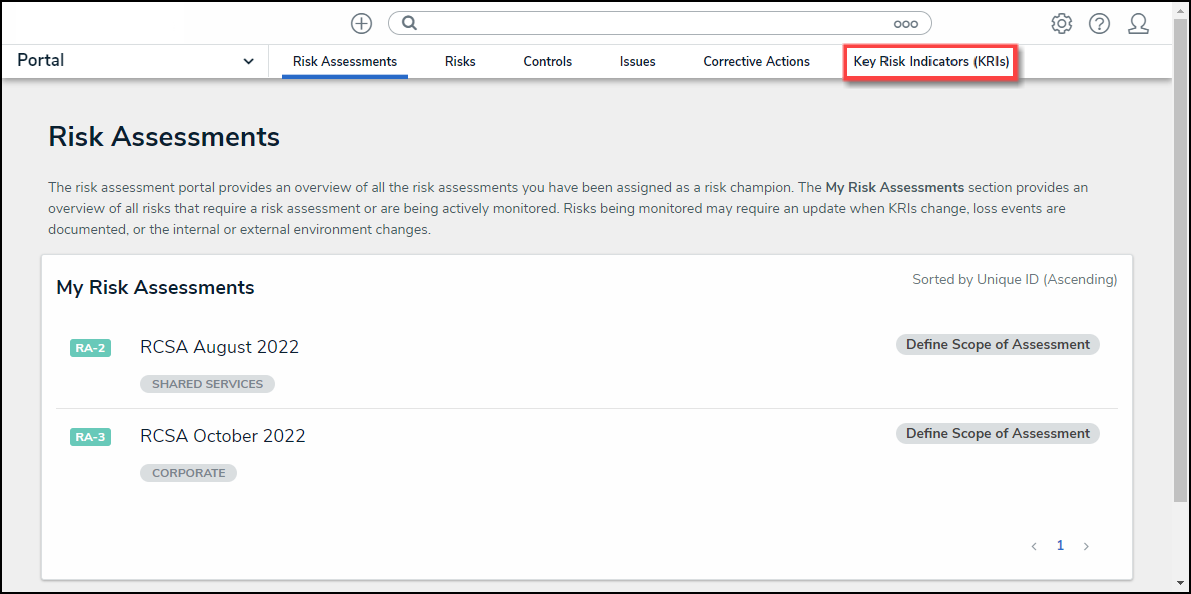
- From the Risk Assessments screen, click the Key Risk Indicators (KRIs) tab.

Key Risk Indicators (KRIs) Tab
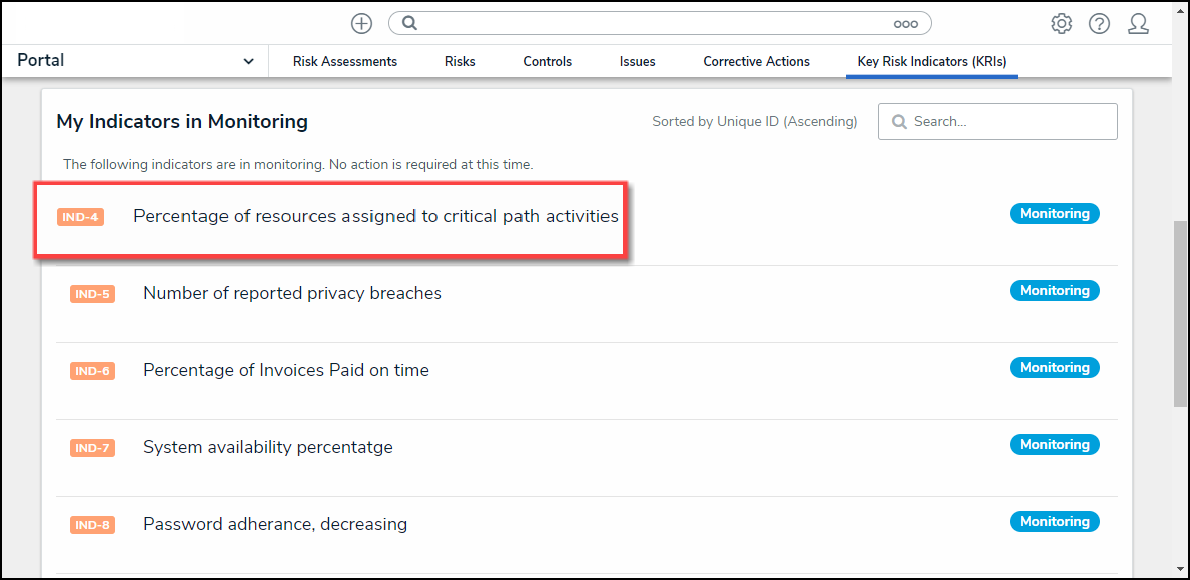
- From the Key Risk Indicator (KRIs) screen, click an Indicator from the My Indicators in Monitoring section.

Click on an Indicator
Updating a Key Risk Indicator
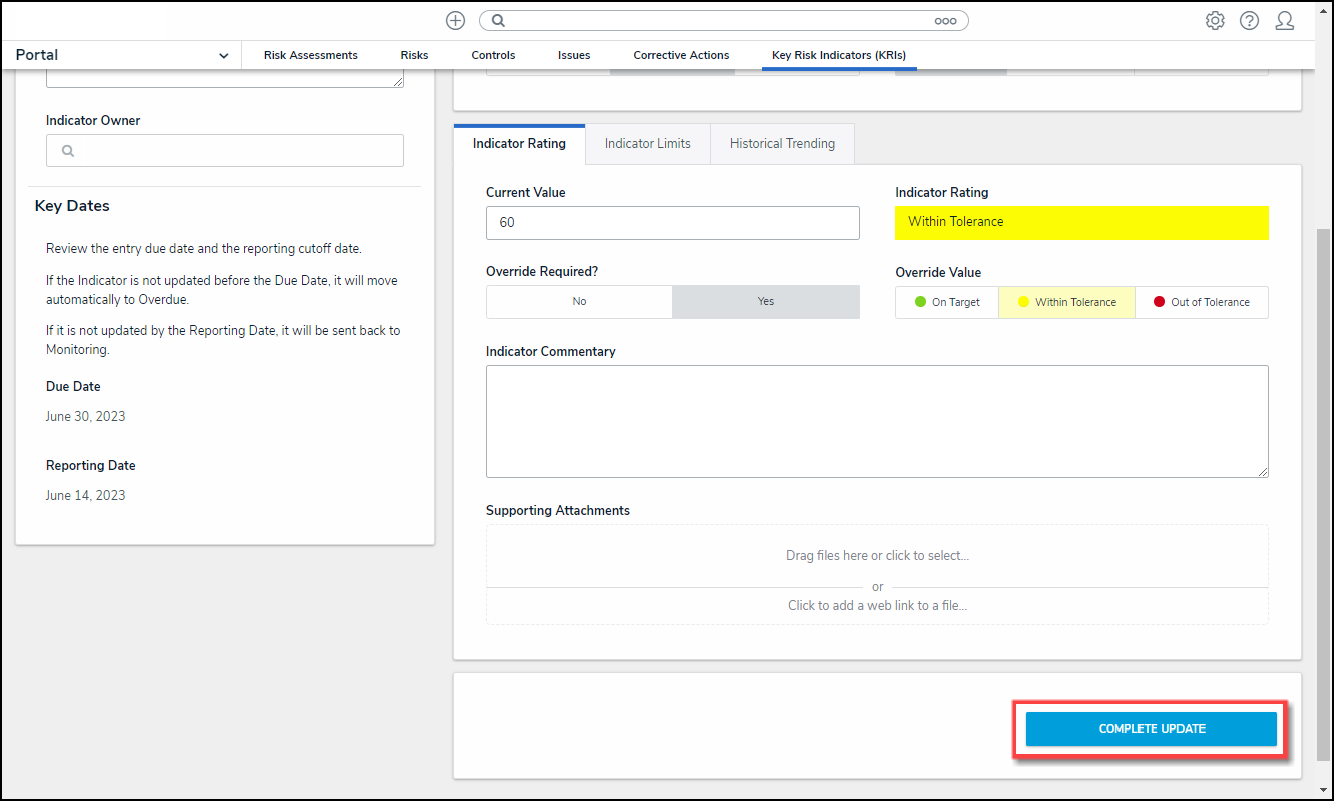
- From the Key Risk Indicator Form, enter the current value of the KRI in the Current Value field on the Indicator Rating tab.

Current Value Field
- The system will automatically generate an Indicator Rating value when a value is entered in the Current Value field.
- If the system generated Indicator Rating value is incorrect. Click the Yes button on the Override Required? field.

Override Required? Field
- The Override Value field will appear, allowing users to select a new Indicator Rating value.

Override Value Field
- Enter a brief explanation for the KRI Current Value in the Indicator Commentary field.
- (Optional) Drag and drop a supporting file into the Support Attachments field or click on the Click to select ... link to upload a file from the connected PC. Files can be up to 100 MB and have the following file types (e.g., .bat, .exe, .gif, .sh, .dll, .com).
- (Optional) Click the Click here to add a web link to a file ... link in the Supporting Attachments field to add a URL redirect to supporting information.
Add a Web Link
Instead of a Supporting File, a user can add a Supporting web link to a KRI to link to supporting data outside the system.
- Select Click to add a web link to a file on the Supporting File field.
- Enter a name used to display the web link in the Display Name field.
- Enter the URL location where the Valuation data is in the URL Link field.

Web Link Pop-up
- Click the +Add Link button to add the web link to the Project.

+Add Link Button
- (Optional) Click the Historical Trends tab.

Historical Trends Tab
- The Historical Trends tab displays the KRI's Current Value and Indicator Rating for Monthly, Quarterly, and Annual information.

Historical Trends Tab
- (Optional) Click the Risks tab to view the Risks attached to the KRI.

Risks Tab
- (Optional) Click the Objectives tab to view the Objects attached to the KRI.

Objectives Tab
- (Optional) Click the Communications tab to add comments to the KRI.

Communication Tab
- (Optional) Enter your comments and click the Post link to post the comments to the KRI. You can also use the @ symbol to tag another user. Tagged users will receive an email notification with a link to the object.

Tagging a User
Click the Complete Update button to update the KRI.

Complete Update Button