Overview
Relationships link different object types together.
Users can connect two or more objects together by adding object types to an object type group, then adding that group to a relationship on another object type (e.g., the Visitor and Employee Record object types in a People Involved relationship saved to the Incident object type).
Once a relationship is created, it will appear either as a field, table, or location map on a configurable form for the object type the relationship is saved to. Administrators can then allow users to select an existing object or create a new one on the object type(s) added to the group, which then forms a relationship between the two objects.
Example:
If you had an Incident object type and an Employee Record object type, you may want to link those object types together to track which employees created new incident objects. To do this, you create a new object type group called “Employees” and add Employee Record as the related object type. You would then use the Employee object type group to create a relationship on Incident called “Incident Report Writer.” Once that relationship has been added, users can indicate which employee is creating the incident by selecting an existing Employee Record object or creating a record from the Incident Report Writer field on the form.

References are automatically created with relationships, but they don't appear on an object type until the References element has been added to a configurable form.
 Note:
Note:
You cannot create a new object through a relationship on an object that hasn't transitioned out of the Creation state, as the object has not yet been created and saved.
User Account Requirements
Depending on the permission structure of the roles granted access to this object type, you may need to configure the inferred permissions to ensure users will have access to the object type(s) in the relationship.
Related Information/Setup
Please refer to the Relationship Graphs article to learn more about relationship graphs.
Please refer to the Add References to an Object Type article for more information about adding references to an Object Type.
Please refer to the Create a New Object Type Group article for more information on creating an object type group.
Navigation
- From the Home screen, click the Administration icon.
![]()
Administration Icon
- From the Admin Overview screen, click the Object Types tile under the Data Model section.

Object Types Tile
- From the Admin: Object Types screen, enter a keyword in the Search field to narrow the Object Types list and click the Object Type you wish to add a relationship to.

Object Type Name
- From the Edit Object Type screen, click the Relationships tab.

Relationships Tab
- Click Add Relationship.

Add Relationship Button
Adding a Relationship to an Object Type
Before a user can add a relationship to an object type, they must create an object type group that includes the object type(s) you wish to add to the relationship.
- From the Create a New Relationship pop-up, enter a relationship name in the Relationship Name field (e.g. Activity Task).
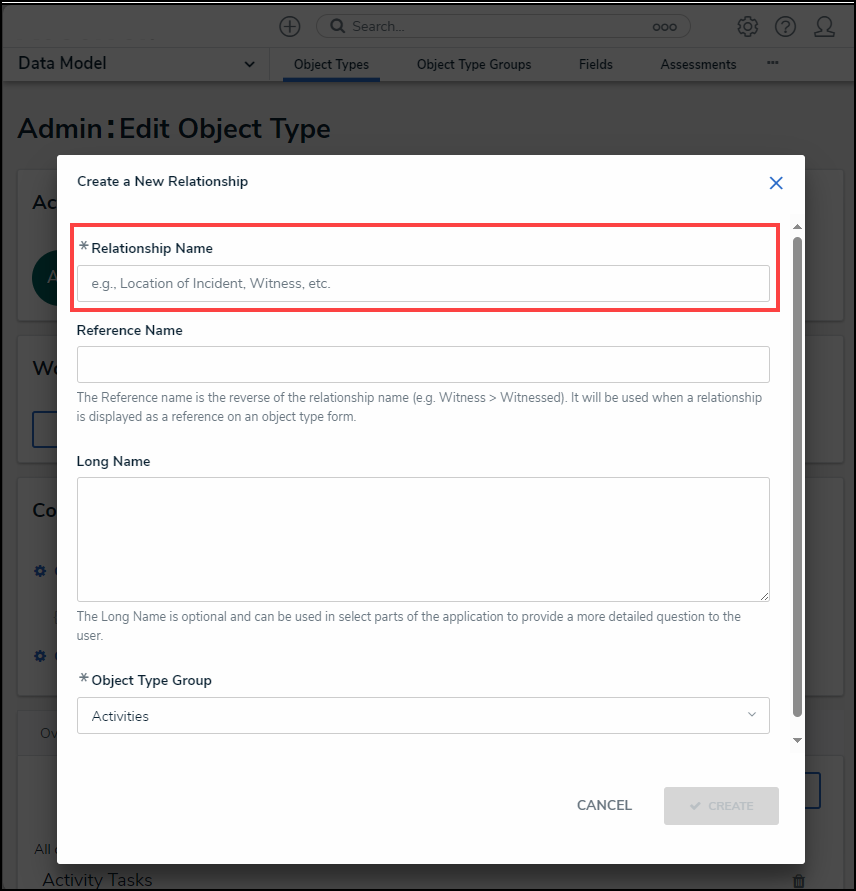
Relationship Name Field
- (Optional) Enter a reference name in the Reference Name field, which will appear as a field if references are added to a configurable form. See Add References to an Object Type for more information.

Reference Name Field
- (Optional) Provide additional information or instructions on completing the field in the Long Name field, which can be styled using Markdown formatting. If a long name is provided, you can choose to display it on a configurable form above the relationship or reference elements to provide more information to end users.

Long Name Field
- Select an object type group from the Object Type Group dropdown menu.

Object Type Group Dropdown
- Click the Create button.

Create Button