To add a location to a form:
- See the Locations Overview article to review a list of important notes and best practices.
- Create or open a standard form.
- Drag and drop the Location property from the Properties section of the Form Elements palette. This property appears on the canvas as Location and is configured to display the address field only, by default.
- To configure the property's display:
- Hover your cursor over Location on the canvas, then click the the
 icon to open the Edit Component Display window.
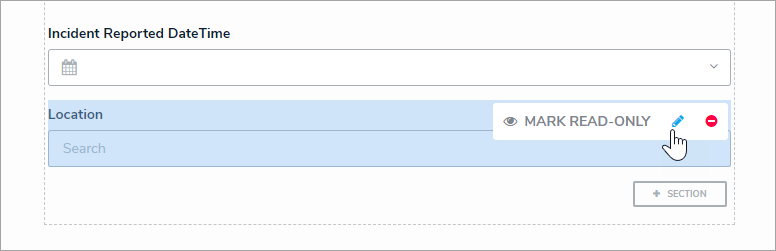 The Location property on the form canvas.
 - Select one of the following options:
- Address Only: Users can only type and view an address in a text field. If location sharing is enabled on their browser, auto-complete suggestions will appear based on their current location as the user is typing.
- Map Only: Users can only select and view a location via pins on a map. If a location hasn't been previously assigned to the object and location sharing is enabled on the user's browser, the map will be centered on the user's current location.
- Address & Map: Users can select and view a location through the both the address field and map. Selecting a location in the address field will automatically place a pin on the map and vice versa.
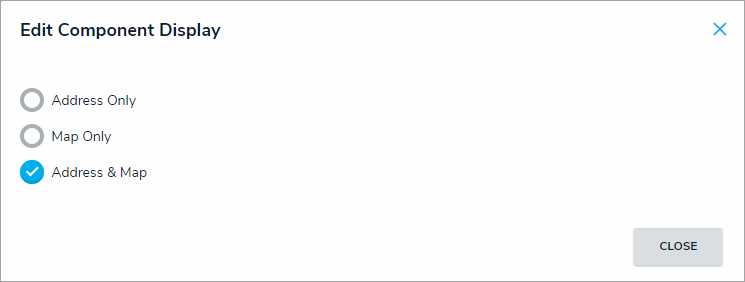 The Edit Component Display window.
- Click Close when finished.
- Hover your cursor over Location on the canvas, then click the the
- To mark the field as read-only, hover your cursor over Location on the canvas, then click Mark Read-Only. When this property is read-only, addresses are displayed but are greyed out, and the map cannot be dragged or zoomed in or out, nor can its pins be moved or deleted.
 icon to open the Edit Component Display window.

For information on viewing and selecting a location on an object, see the Add Location Data to an Object article.