Before the LDAP Sync tool can be used, it must be properly configured. Follow the steps below to install and configure the sync tool.
 | At this time, this tool should be configured with the assistance of Resolver Support. |
To configure and run the LDAP Sync tool:
Generate an API key for the desired org. Only one org can be synced at a time.
- Download and unzip the LDAP_to_Core_User_Sync.zip file provided by Resolver.
- From the extracted folder, open the Resolver.Core.Mapping.UserImport.LDAP.UI.exe file to launch the tool. Ensure the file name contains UI.
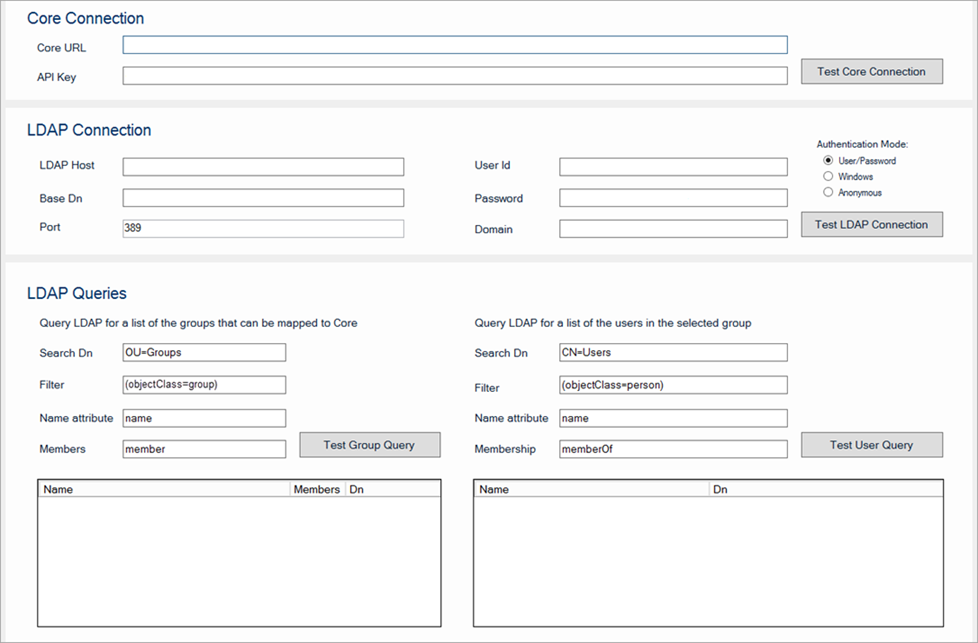 The Resolver Core LDAP Sync tool as it appears upon initial launch.
 - Enter the Core environment URL in the Core URL field (e.g. https://example.resolver.com). The URL must include the https:// prefix.
- Enter the org's API key in the API Key field.
- Click Test Core Connection to confirm the connection is valid.
- In the LDAP Connection section, enter the following information:
- LDAP Host: The DNS directory name of the LDAP server. This can be an IP address or fully qualified name (e.g. test.resolver.com).
- Base Dn: The base path suffixed to all LDAP queries. See the LDAP DNs and RDNs article on the LDAP website, or contact your LDAP administrator for more information.
- Port: The port number the LDAP server is listening on, which is 389 by default.
 The LDAP Connection section.
- Select one of the following Authentication Mode options:
- User/Password: If this option is selected, enter the current user's username and password in the User Id and Password fields. If required, enter the name of the server domain hosting the Core environment in the Domain field.
- Windows: If this option is selected, enter the name of the server domain hosting the Core environment in the Domain field.
- Confidential: If this option is selected and the directory is configured to allow confidential access, a username, password, and/or domain name is not required.
- Click Test LDAP Connection to validate if the information entered in the LDAP Connection section is correct.
- In the LDAP Queries section, enter parameters into the following fields to define which users and/or groups will be synced into Core:
- Search Dn: The path on the LDAP server that stores the details on the groups or users when combined with the Base Dn (in step 7 b. above). By default, these fields are populated with OU=Groups for group queries and CN=Users for user queries.
- Filter: Limits the query to sub-directories that match the string. User filters are combined with selected group filters to further limit returned users to members of the selected group. By default, these fields are populated with (objectClass=group) for group queries and (objectClass=person) for user queries.
- Name attribute: The attribute name on the group or user LDAP object, which is usually name. For both group and user queries, these fields are auto-populated with name.
- Members/Membership: An additional attribute filter based on user or group membership. By default, these fields are populated with Member for group queries and memberOf for user queries.
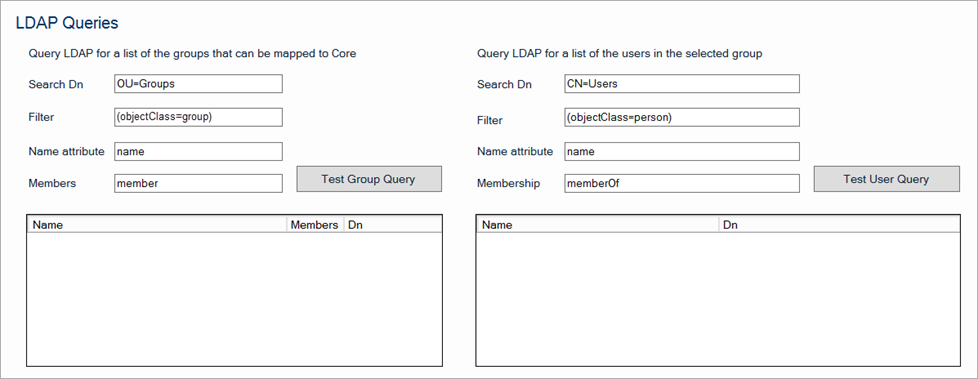 The LDAP Queries section, displaying the default values.
See the Glossary of LDAP Terms, LDAP DNs and RDNs, and LDAP Filters articles on the LDAP website for more information on the values required in these fields.
- Click Test Group Query to display the group results, then select a group. Note that user queries will not be displayed unless a group is selected.
- Click Test User Query to display the results.
Clicking Test Group Query or Test User Query displays read-only results and does not sync any data into Core. - Click Save Configuration to save the values entered in the fields, which will be displayed the next time the tool is run.
- Click the Sync button to manually push the LDAP data into Core.
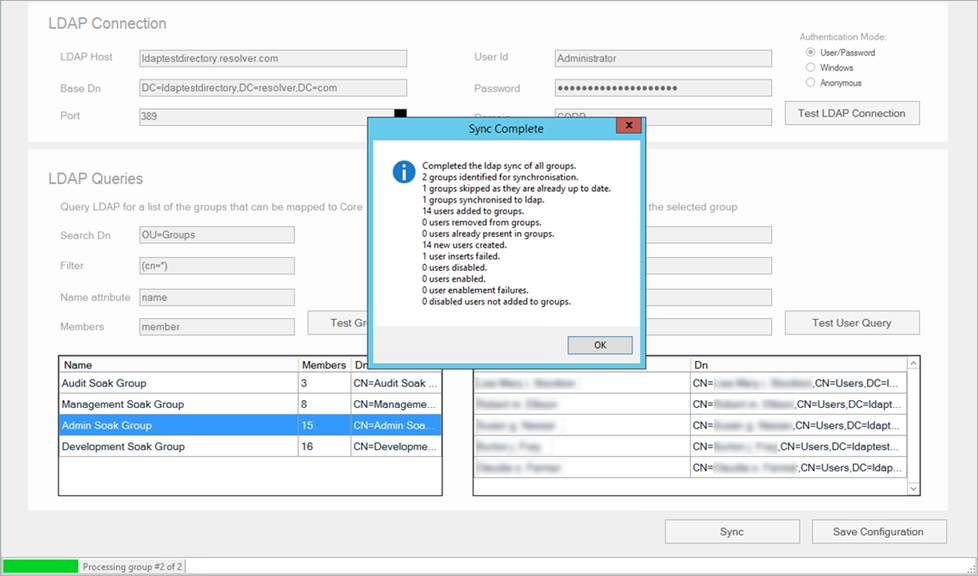 A successfully completed sync.


