Overview
Administrators can configure the following form's header settings:
- Display a Custom Name and a Custom Description.
- Allow end-users to edit the Name or Description properties (provided the appropriate Edit permissions are enabled, and the header is not marked as read-only).
- Show the object's Unique ID in the header.
Related Information/Setup
For more information on Form Headers see the Forms Header Overview article.
Navigation
- From the Home screen, click the Administration icon.
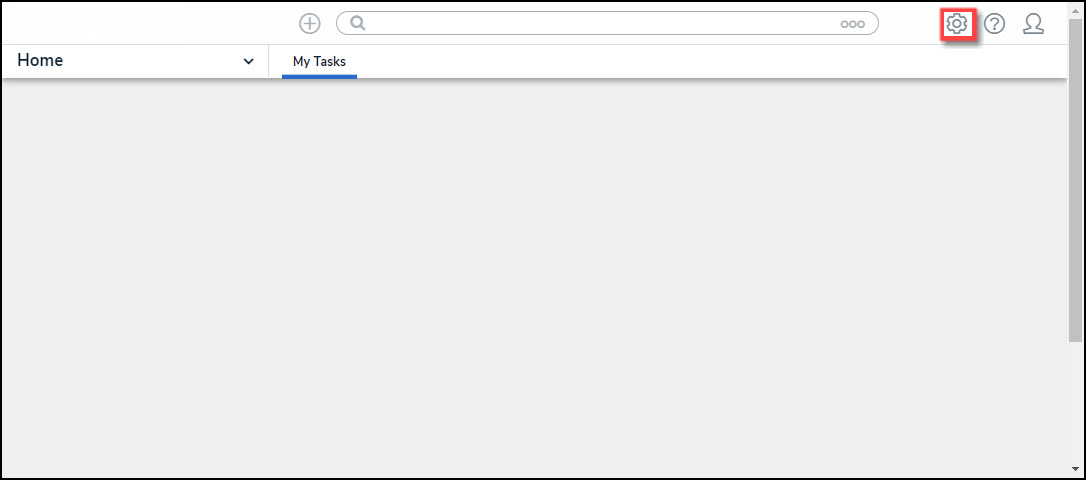
Administration Icon
- From the Admin Overview screen, click the Configurable Forms tile on the Views section.
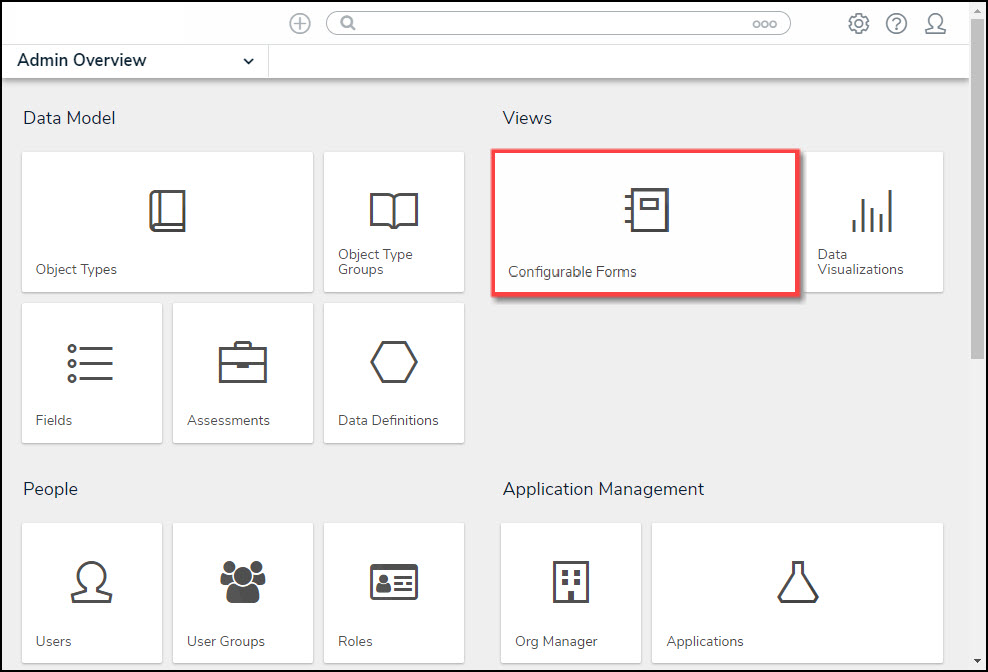
Object Types Tile
- From the Admin: Configurable Forms screen, enter a keyword in the Search field to narrow down the forms list.
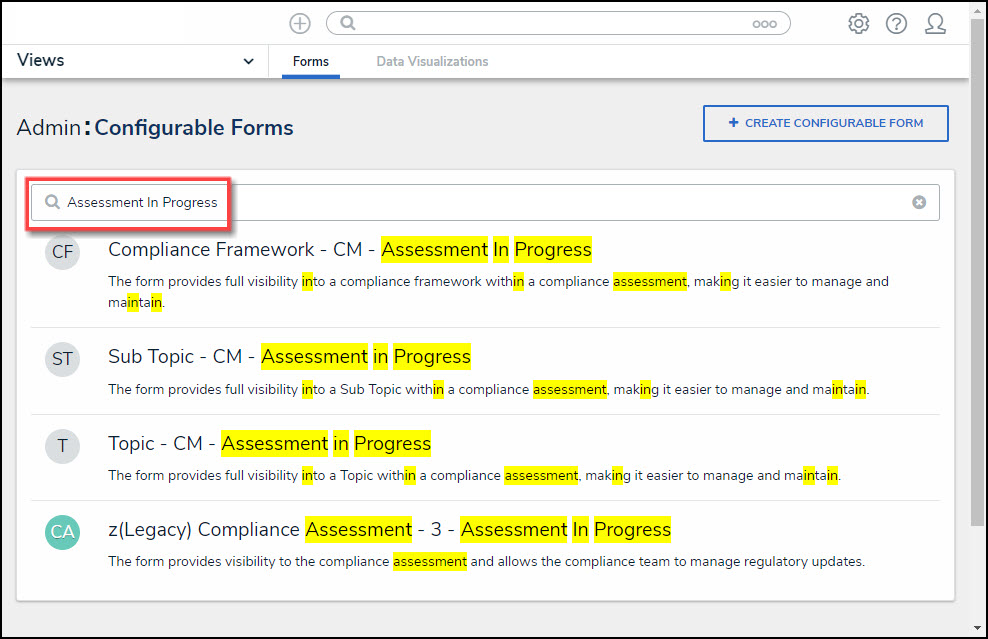
Search Field
- Click on the Name of the form you want to configure.
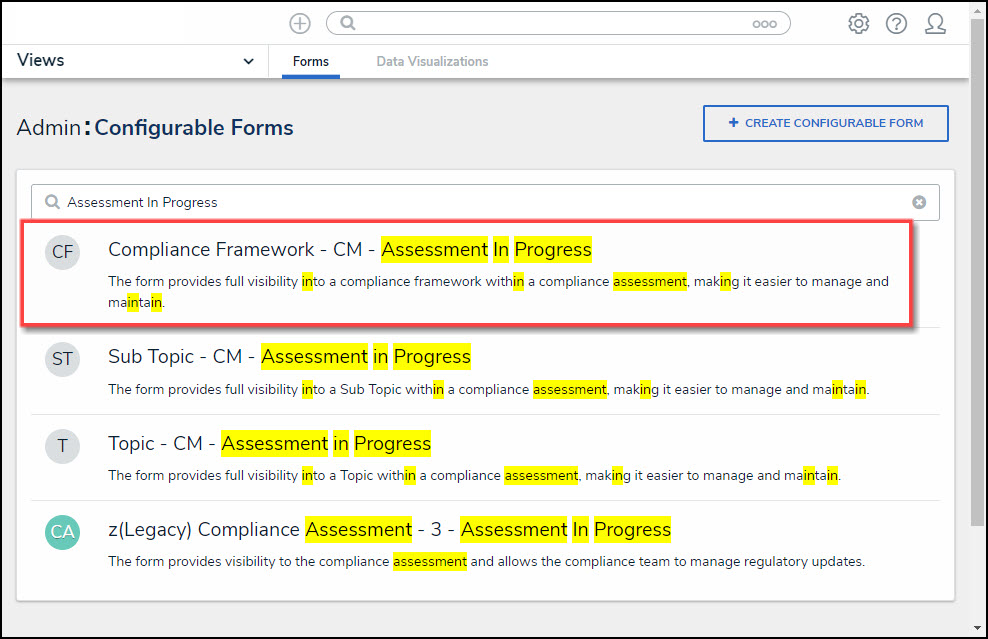
Select a Form Name
Alternate Navigation
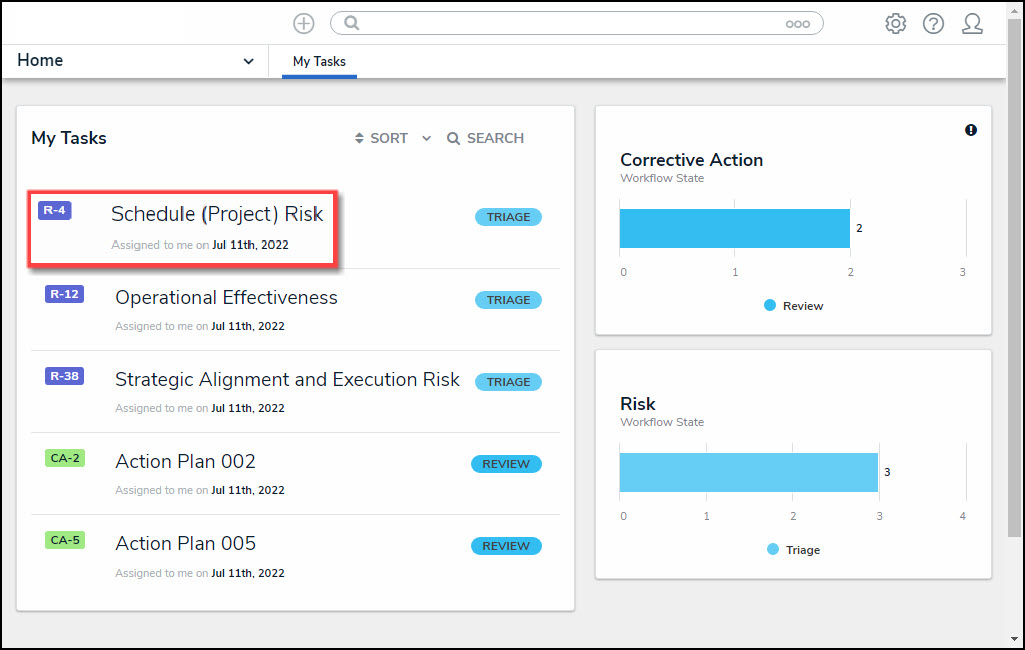
- From the Home screen, select a Task from the My Tasks list.
My Tasks List
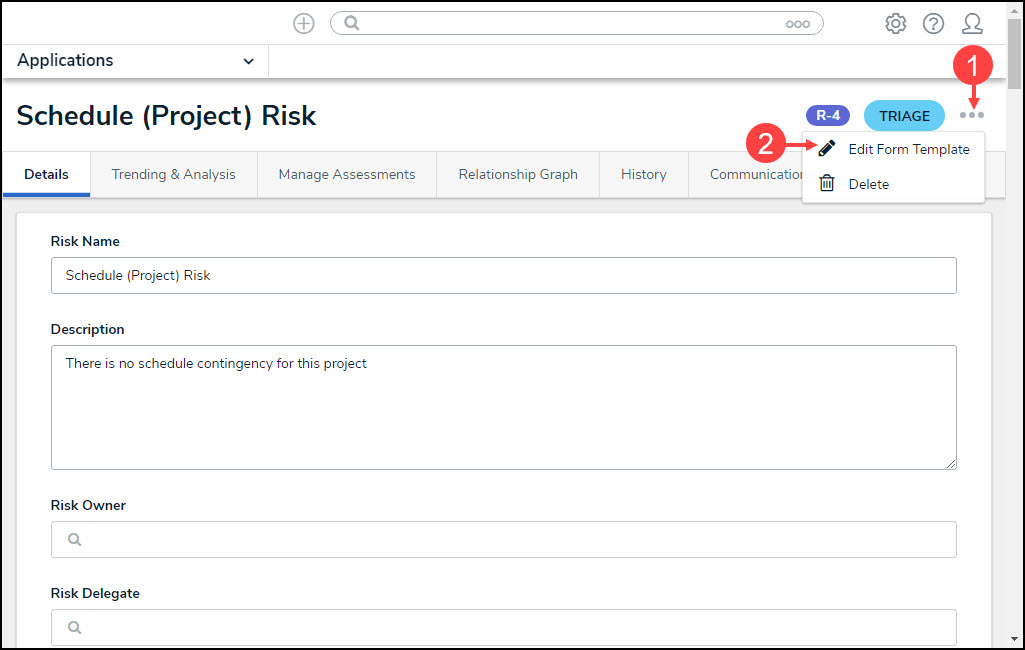
- From the Form screen, click the Options icon and select Edit Form Template from the drop-down list.
Options Icon
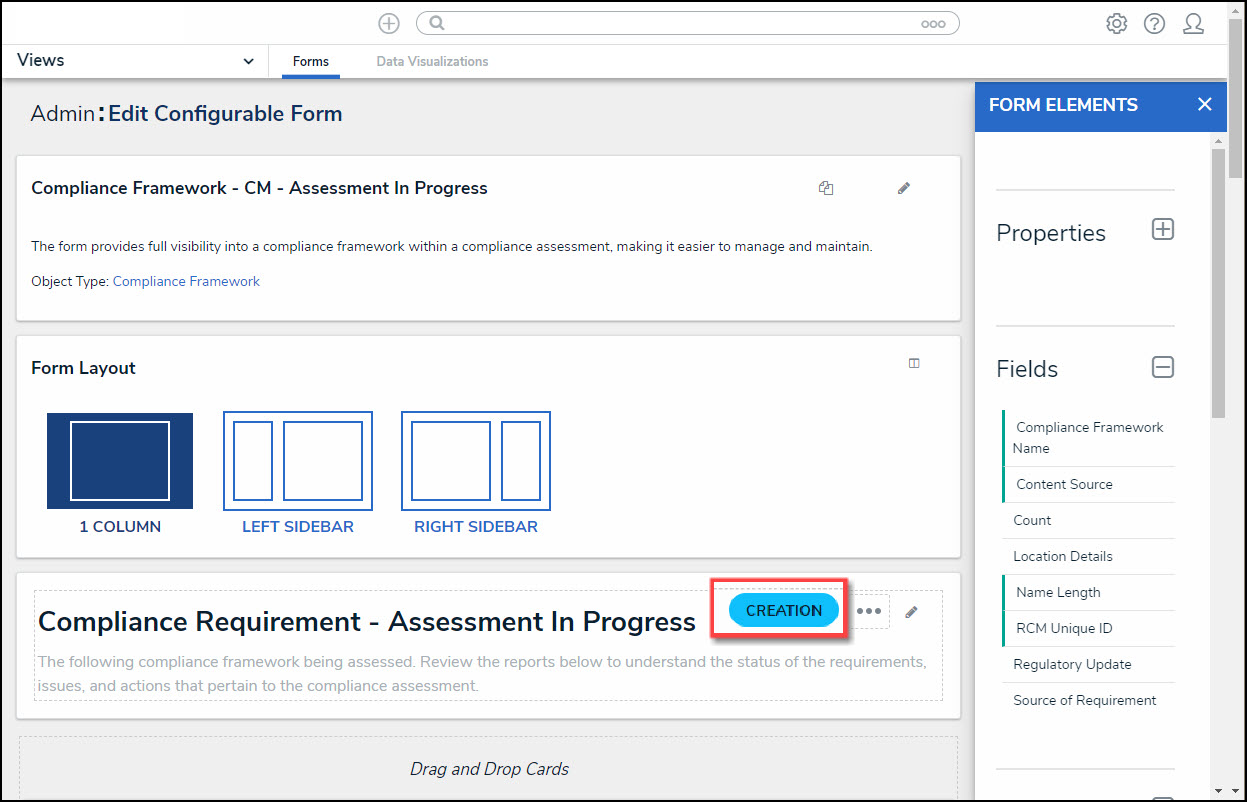
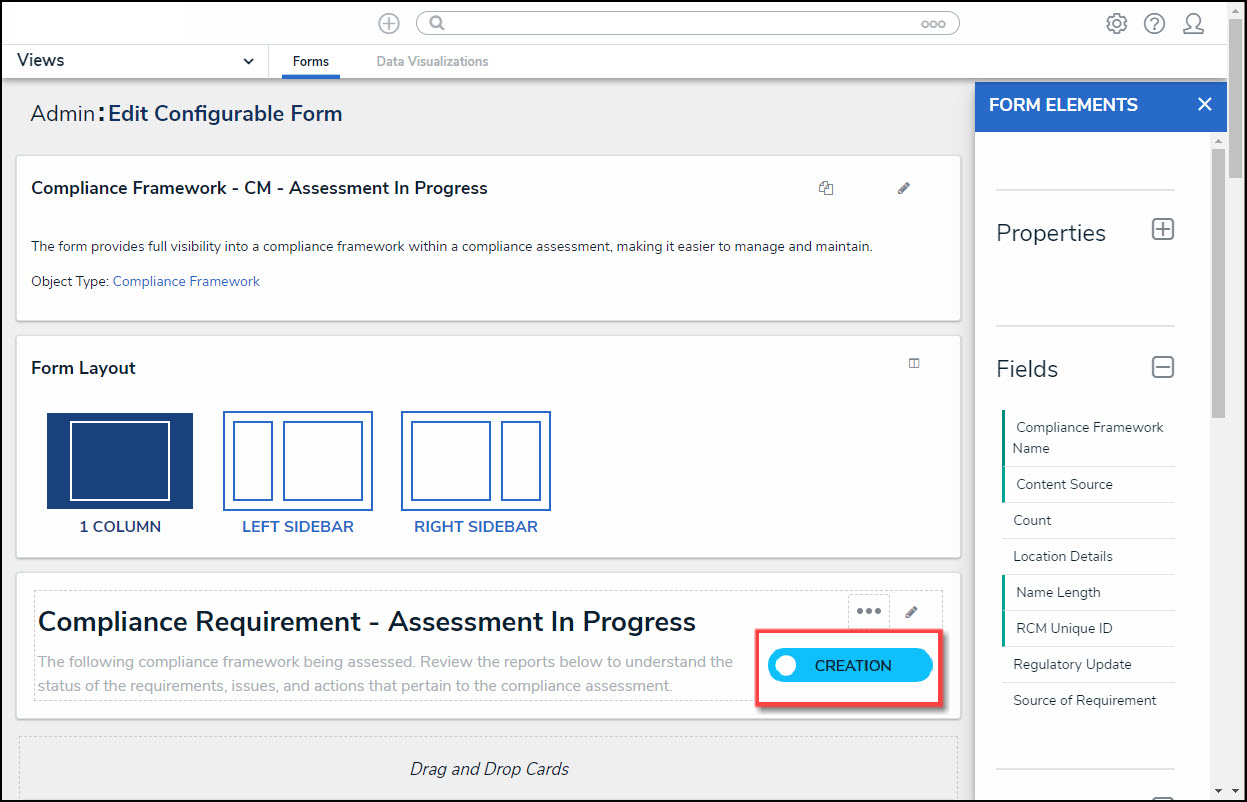
Configure a Standard Form Header
- From the Admin: Edit Configurable Forms screen, click the Edit icon on the Form Header section.
![]()
Edit Icon
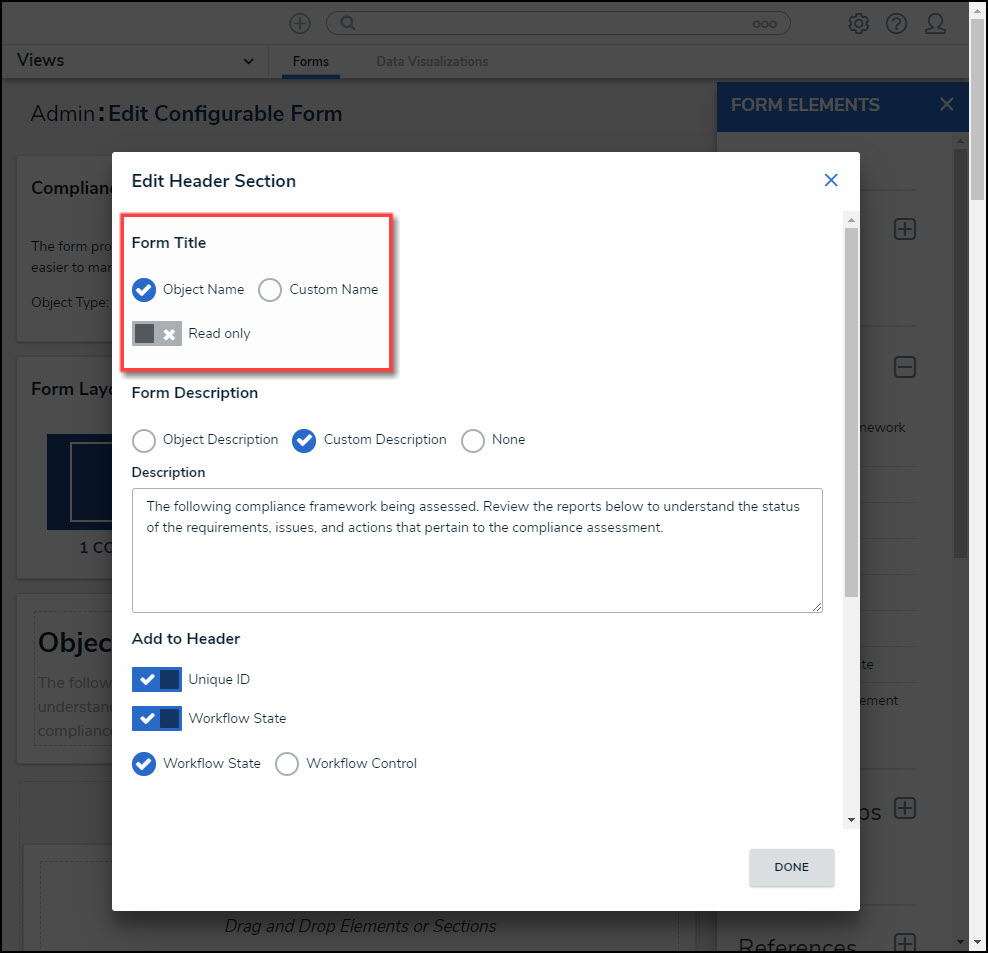
- From the Edit Header pop-up, select a Form Title radio button:
- Object Name: The Object's Name property value.
- (Optional) Read only: The Read only toggle switch will appear when the Object Name radio button is selected. The toggle marks the form title as read-only, preventing users with Edit permissions enabled from modifying the title.
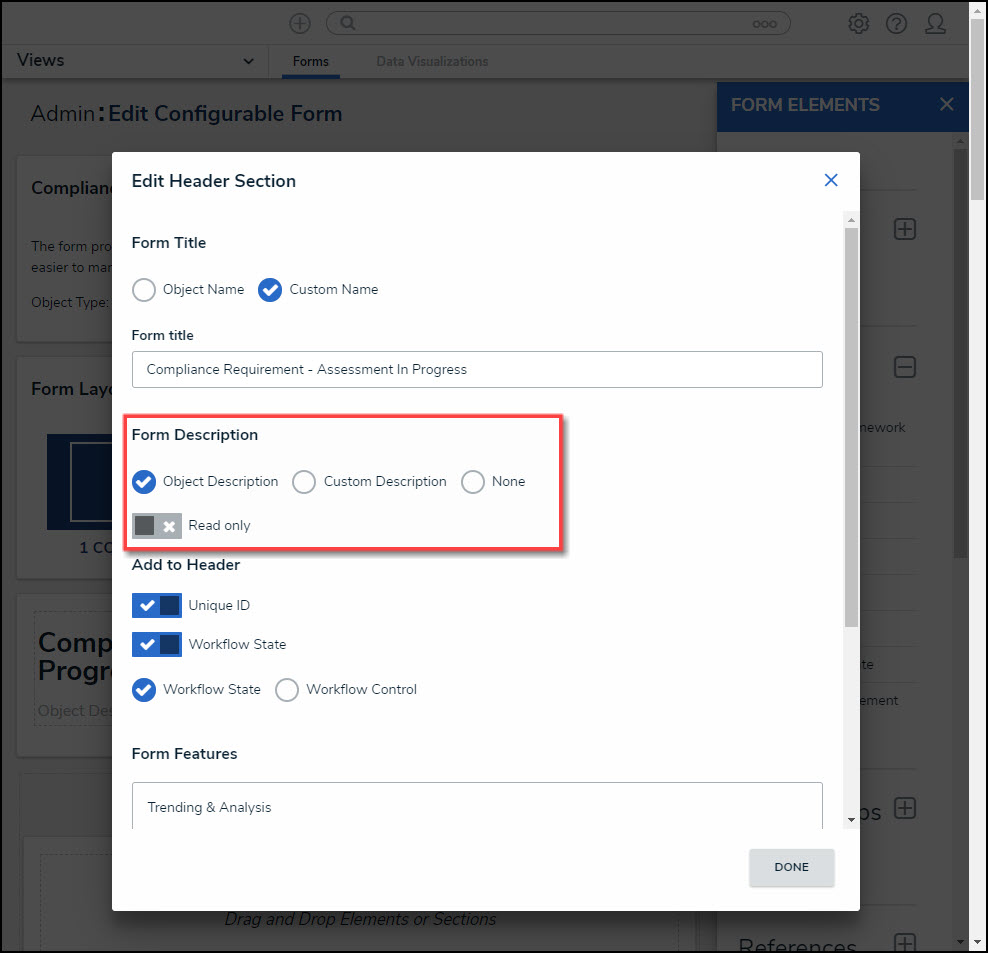
- Custom Name: The Object's name-value pulls from the Form Title field, which appears below the Custom Name radio button.
Form Features Section
- Select a Form Description radio button:
- Object Description: Uses the form subtitle as the Object's description.
- (Optional) Read only: The Read only toggle switch will appear when the Object Description radio button is selected. The toggle marks the description as read-only, preventing users with Edit permissions enabled from modifying the title.
Form Description = Object Description
- Custom Description: Uses the subtitle assigned to all Objects created through the form. End-users cannot edit this option.
- Description: The Description field will appear when the Custom Description radio button is selected. The Description field will display the Custom Description.
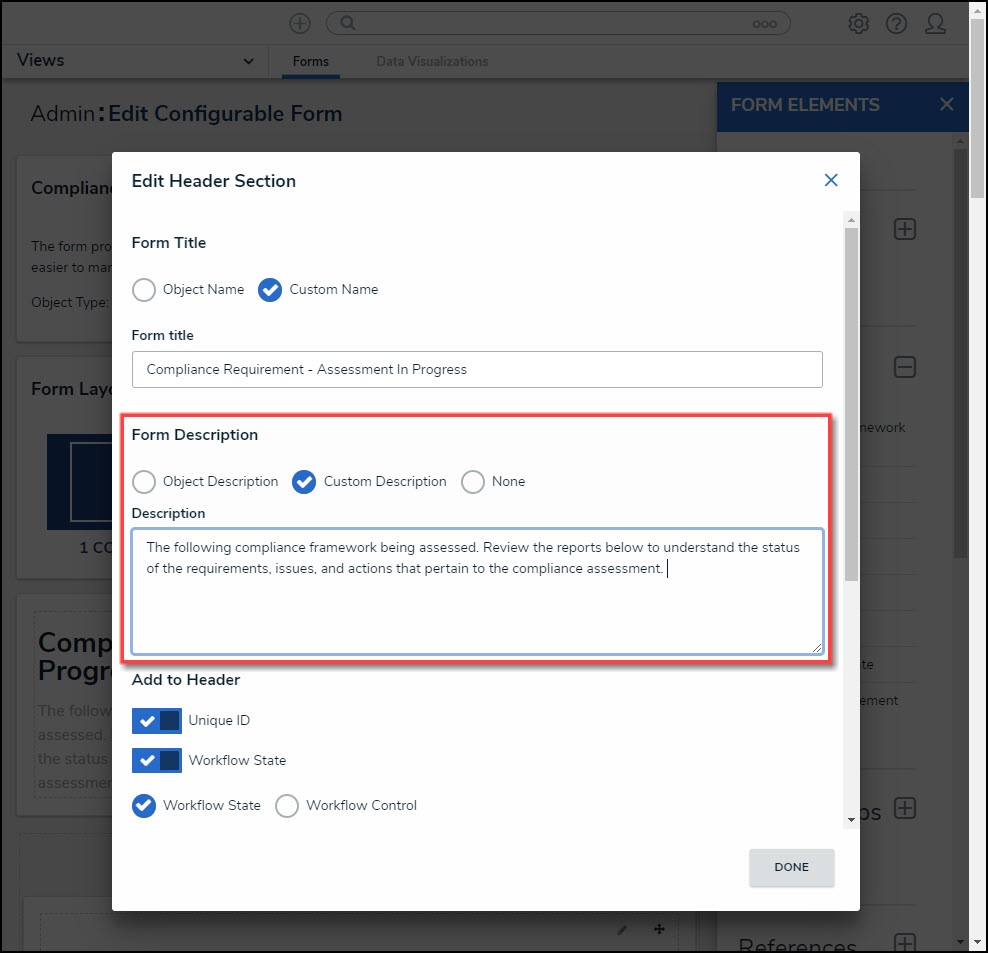
Form Description = Custom Description
- None: No subtitle appears on the form.
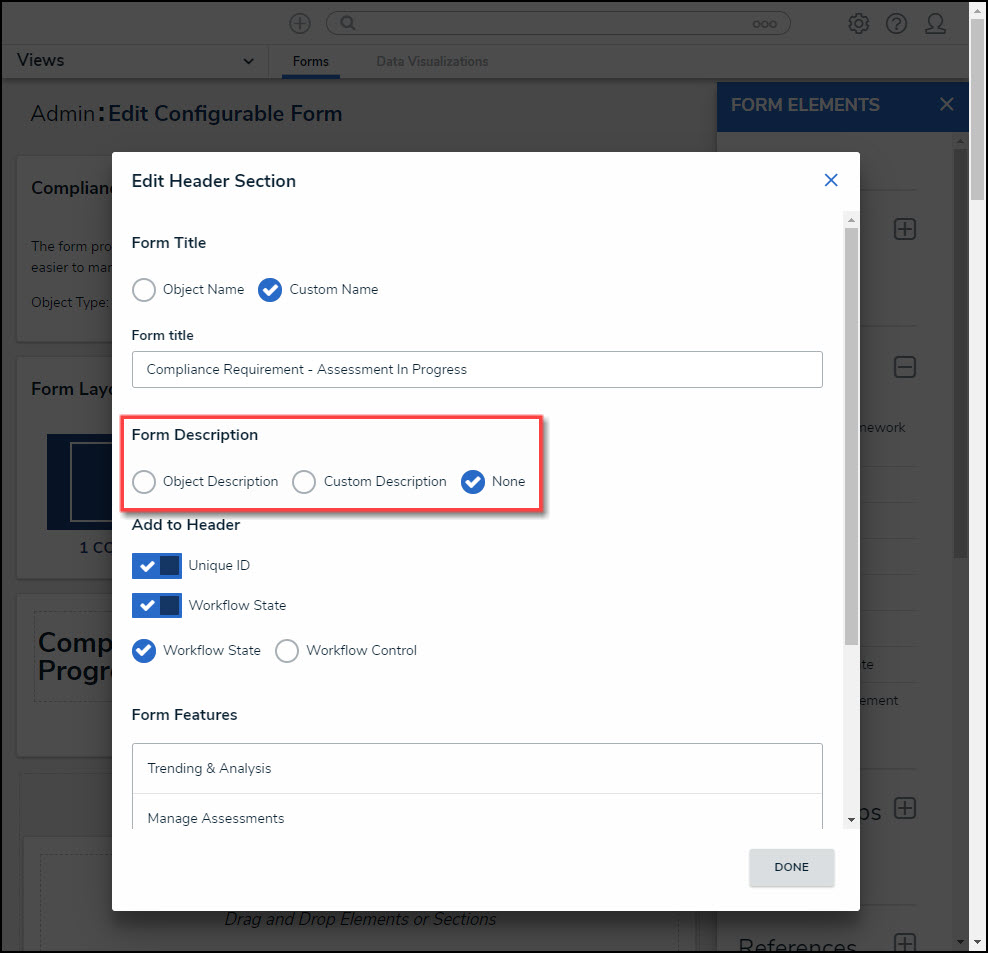
Form Description = None
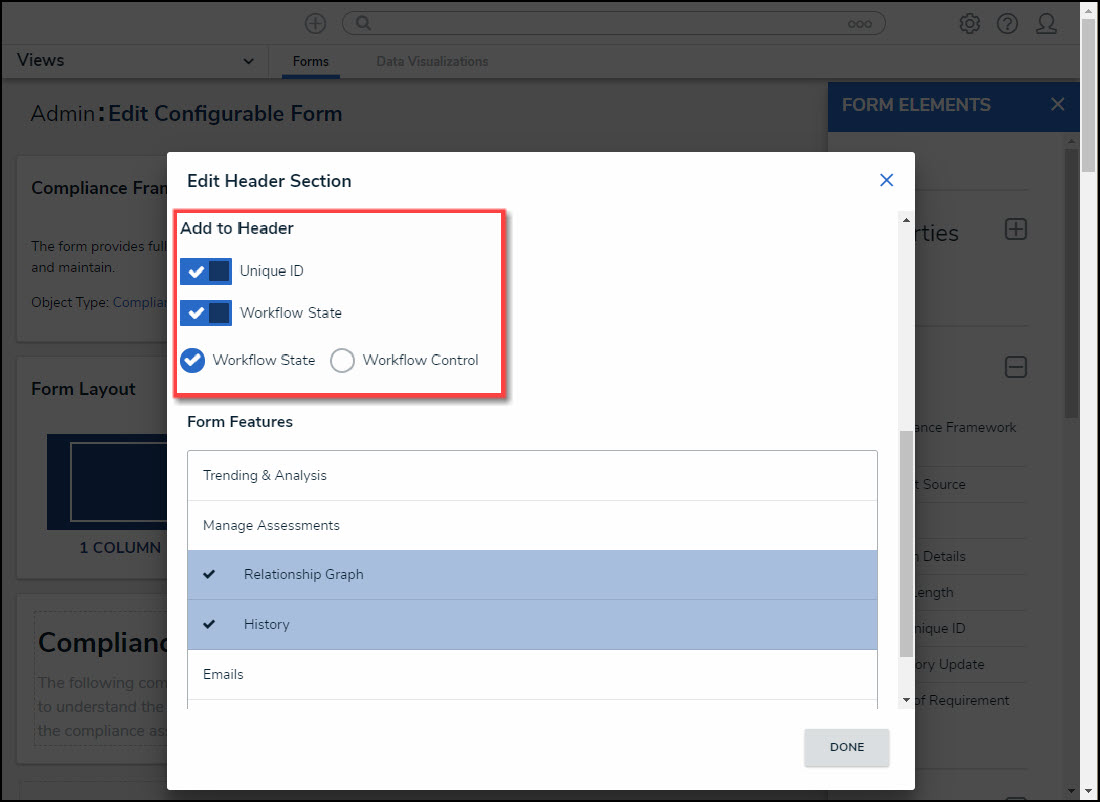
- Select Add Header options:
Add Header Options
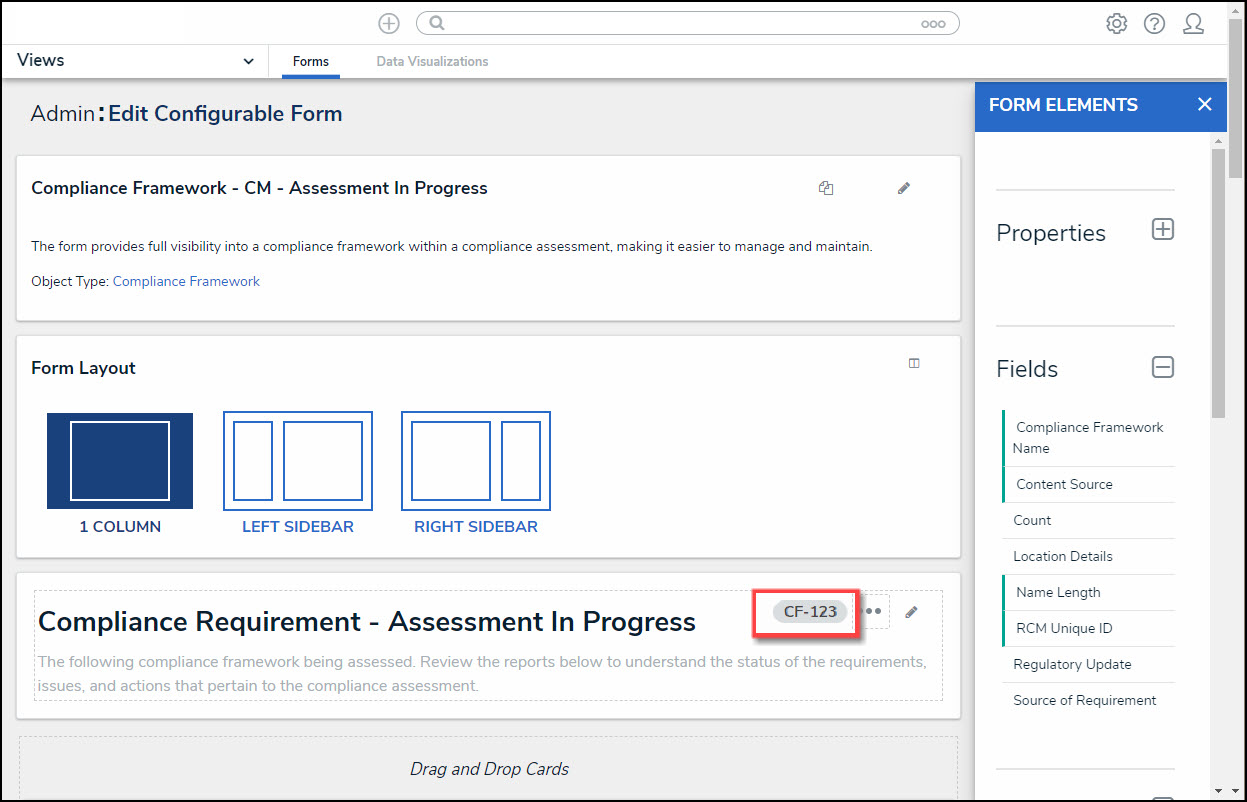
- Unique ID: Includes the Object Type's Unique ID on the Form Header. The Unique ID is a unique identifier automatically assigned to the Object Type at creation.
Unique ID Enabled
- Workflow State:
- Workflow State (Radio Button): Includes the Object Type's current state on the Form Header.
Workflow State Enabled
- Workflow Control (Radio Button): Includes the Object Type's current state and triggers on the Form Header. You can separate workflow triggers from other Action buttons within the form. Clicking the Workflow Control allows you to create a customized list of triggers available to an object's current workflow. See the Enable Workflow Control on a Form article for more information on Workflow Controls.
Workflow Control Enabled
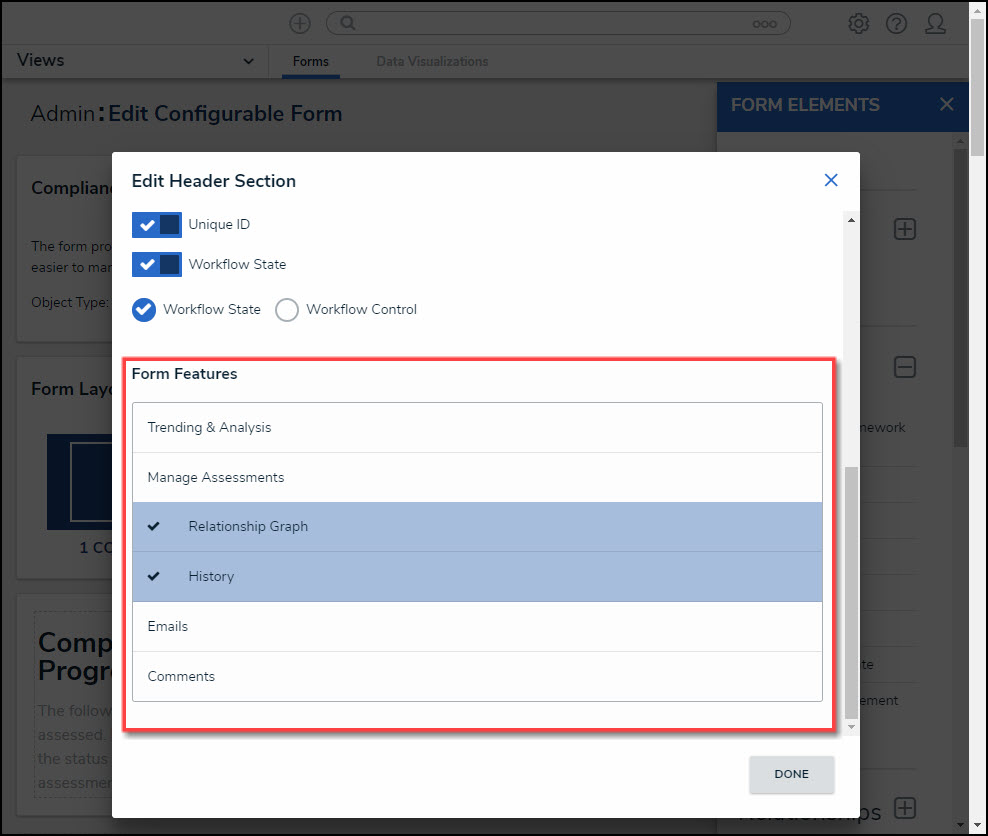
- (Optional) Select Form Features by clicking on the Form Feature Name. A checkmark next to the Form Feature indicates that the Form Feature is active. Form Features modify the available options when viewing a form.
- Trending & Analysis: The Trending & Analysis tab shows Assessment Results.
- Manage Assessments: The Manage Assessments tab allows you to push object updates syncing the assessment with the library.
- Relationship Graph: The Relationship Graph tab shows how that Object is connected to other Objects.
- History: The History tab tracks all form changes and lists the details.
- Emails: The Communication tab is where the email information will appear and tracks all form email correspondence.
- Comments: The Communication tab is where the comment information will appear and tracks all form comments.
Form Features Section
- (Optional) From the Assessment Results Table select list, you can add formulas to be listed as tables, such as:
- Residual Risk Score: Residual Risk Score measures the remaining risk after considering the effects of the controls.
- Control Effectiveness: Control Effectiveness measures effectiveness of the controls used to mitigate a risk.
- Inherent Risk Score: Inherent Risk Score measure a risk in the absences of controls.
- Click the Done button to save your changes.