Overview
From the Edit User screen, an Administrator or an User Management or Settings Management advanced permission user can edit a user's information, set the user account status and advanced permissions, and add the user to user groups and roles.
User Account Requirements
The user account you use to log into Resolver must have Administrator or the User Management or Settings Management advanced permissions to edit users.
Related Information/Setup
Please see the Languages Overview article for more information on using an alternate language setting.
Please see the Access Your Data Warehouse Settings article for Orgs that have Data Warehouse enabled.
Please see the Assigning Advanced Permissions to a User article for adding advanced permissions to a user.
Please see the Managing Portal URL Membership article for more information on managing Portal URL membership for Portal URL Access users.
Please see the Resetting Multi-Factor Authentication and Opt-Out Multi-Factor Authentication for a Specific User articles for more information on opting out of and resetting MFA for an individual user.
Navigation
- From the Home screen, click the Administration icon.
![]()
Administration Icon
- From the Administrator Settings menu, click User Management.
![]()
Administrator Settings Menu
- Enter a user's name in the Search field to narrow the search results.
- Click the name of the user you want to edit.

User Name
Editing a User
 Note:
Note:
The Edit User screen may look different if SSO or MFA is enabled on your Org.
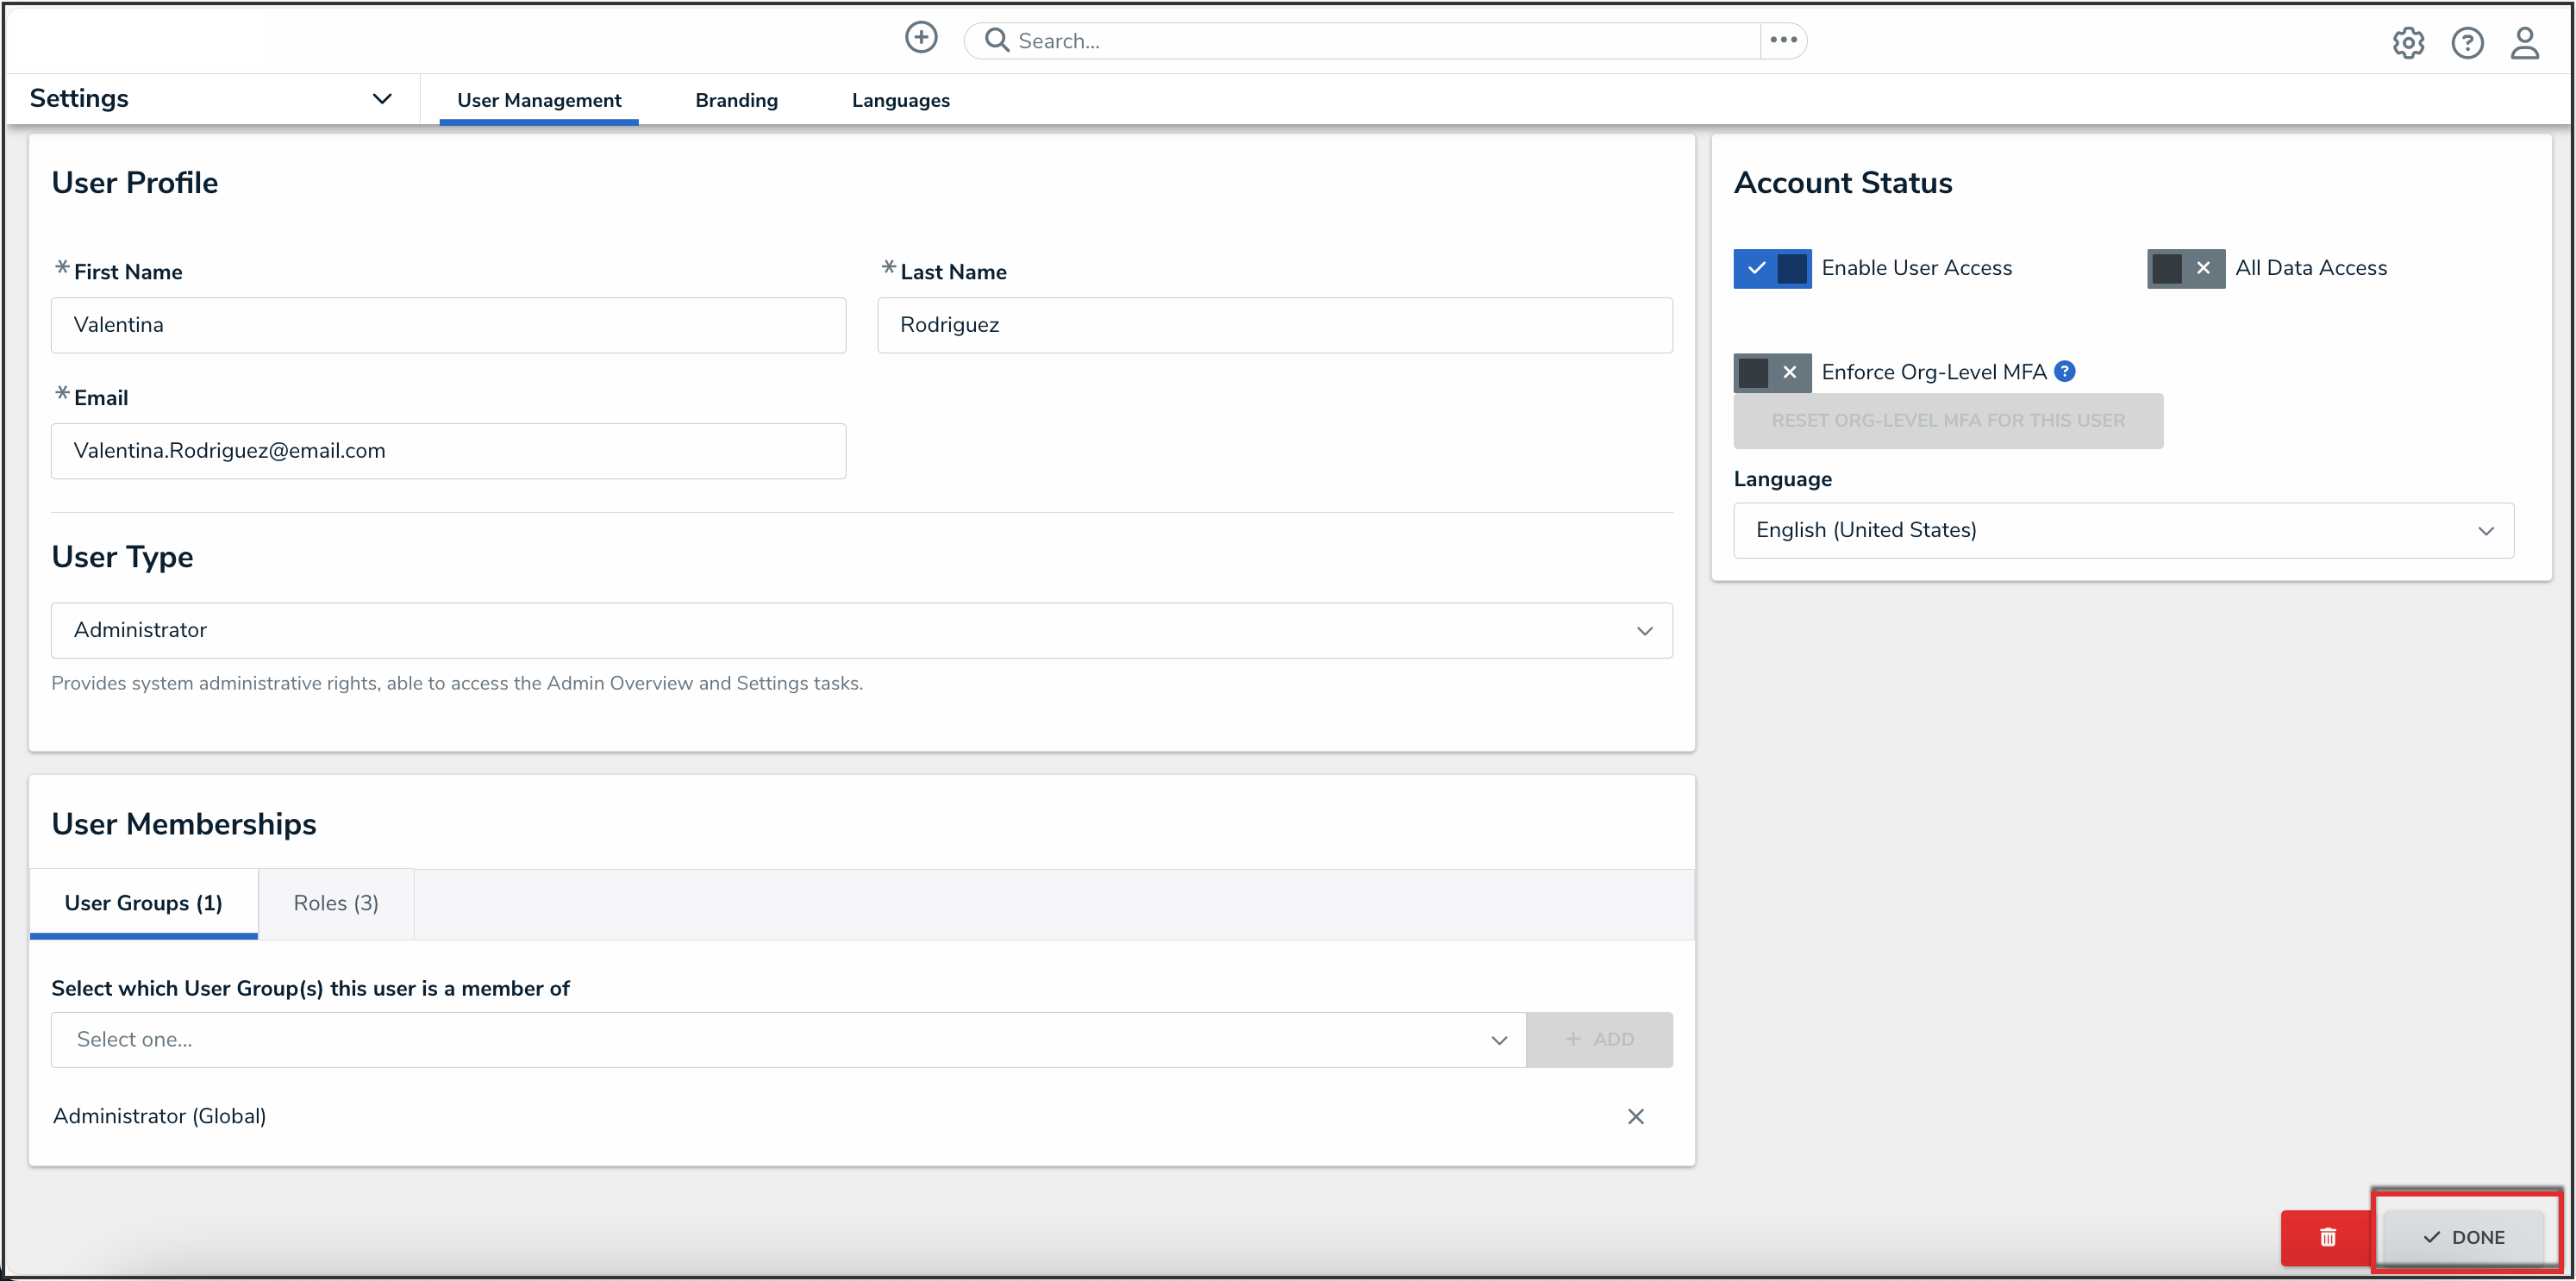
- From the Edit User screen, an Administrator can edit the following fields under the User Profile section:
- First Name: Click the First Name field to change to the user's first name.
- Last Name: Click the Last Name field to change to the user's last name.
- Email Address: Click the Email Address field to change to the user's email address.
- The following are different situation that can occur when change a user's email address:
- If the Administrator who changes the email address is a member of all the same Orgs as the user. The email address change will take effect immediately.
- If the Administrator who changes the email address is not a member of all the same Orgs as the user. The user is moved to a Pending state and must click a Verification link for the changes to take effect. The Administrator can also Resend Email Confirmation or Cancel Changes.
- If the user is logged in to the system. The user will see a system notification at the top of their screen, indicating Email Updated.
- If the user is not logged in to the system. The user will be redirected the next time they log in. The user must log in on the redirected screen using their original email address. On successful login, the user will see an Email Updated confirmation message.
- The following are different situation that can occur when change a user's email address:
- Once you make an edit to one of these fields, click the Change User Information button to save the changes.
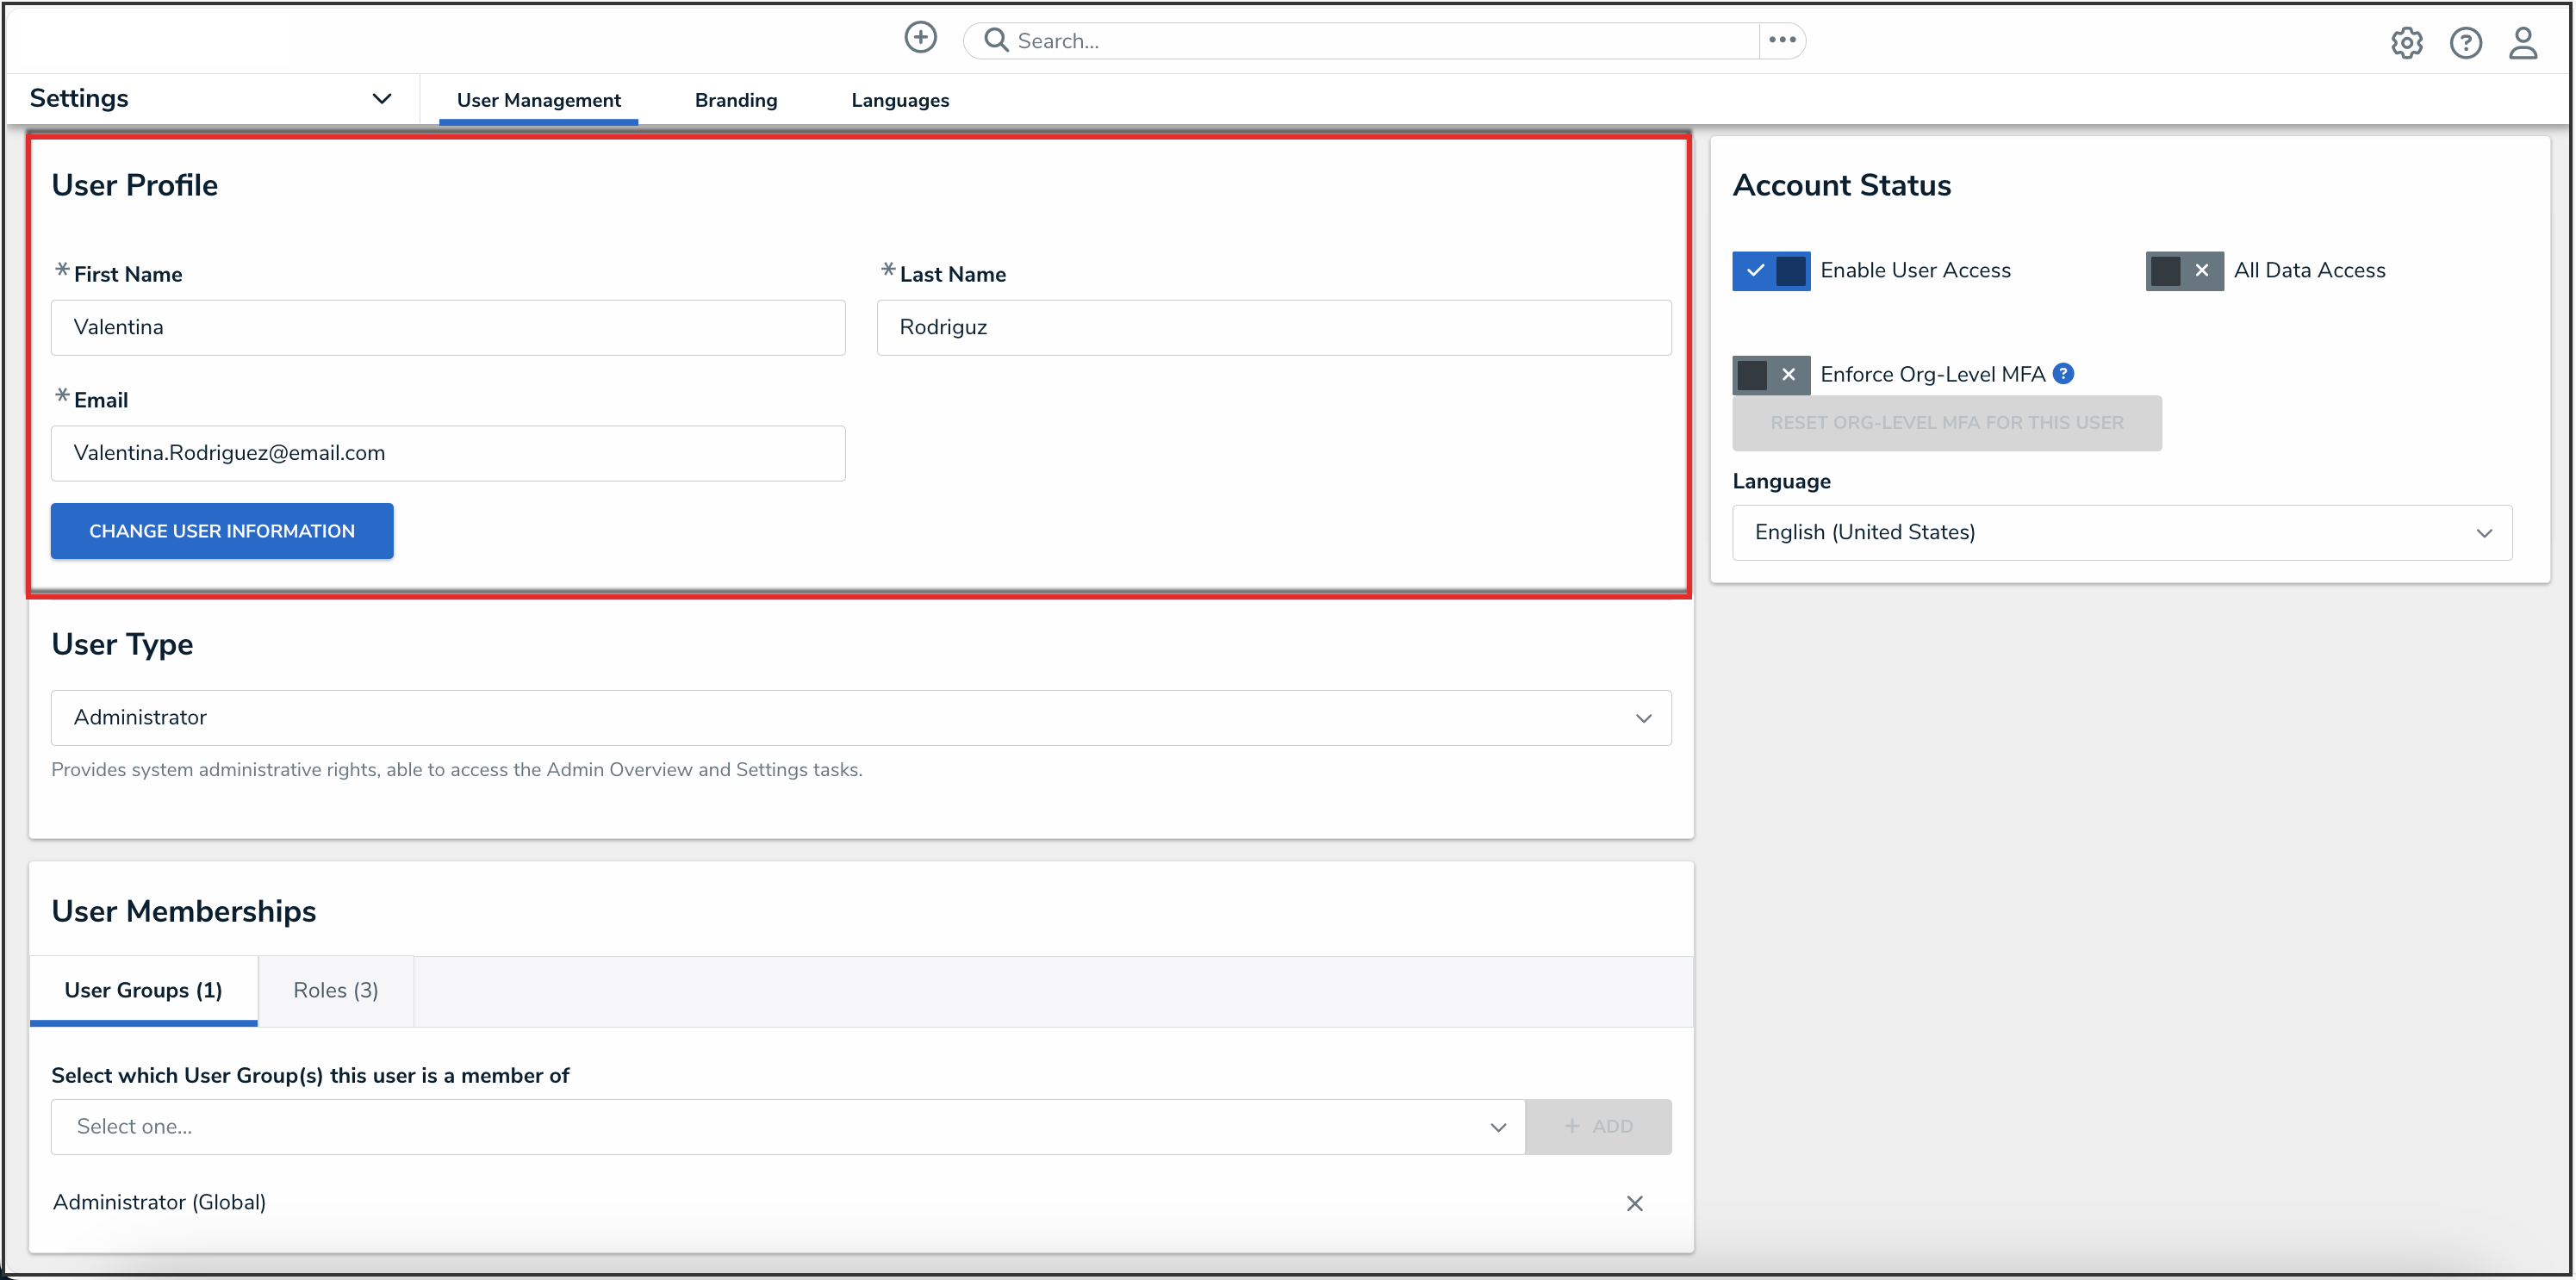
User Profile Section

- From the User Type drop-down menu, an Administrator can update the user type to one of these options:
- Standard User: The default user type, standard users are granted access to parts of Resolver based on their memberships and permissions.
- Administrator: This user type provides system administrative rights, and the ability to access the Admin Overview page and the Administrator Settings menu.
- Portal URL User: This user type enables users to be assigned to Portal URLs, and the ability to authenticate access to assigned Portals.
 Note:
Note:
The options displayed in the Account Status section and User Memberships cards will change based on the user type selected.
 Note:
Note:- An Administrator can edit the following toggle switches and fields under the Account Status section:
- Enable User Access: Select the Enable User Access toggle switch to enable (blue) or disable (grey) a user profile.
- All Data Access: Select the All Data Access toggle switch to enable (blue) or disable (grey) all access, granting the user access to all object types and objects within an organization.
 Warning:
Resolver recommends not enabling the All Access toggle switch for new user accounts. - For Orgs that have multi-factor authentication (MFA) enforced:
- An Enforce Org Level MFA toggle switch will be visible which allows Administrators to opt that user out of MFA for that Org. Please see the Opt-Out Multi-Factor Authentication for a Specific User article for more information.
- The Reset Org-Level MFA For This User button allows an Administrator to reset multi-factor authentication (MFA) for the end user. Please see the Resetting Multi-Factor Authentication article for more information.
- Language: Select a Language preference from the dropdown menu to change the system's language setting. Before you can set an alternate language setting, an Administrator needs to download a language CSV file from the system, map language translations to the user interface text, and upload the CSV file for use within Resolver.
 Note:
Note:
The default language setting in the user's browser will take precedence over Resolver for language translations.
 Warning:
 Note:
Note:
Account Status Section
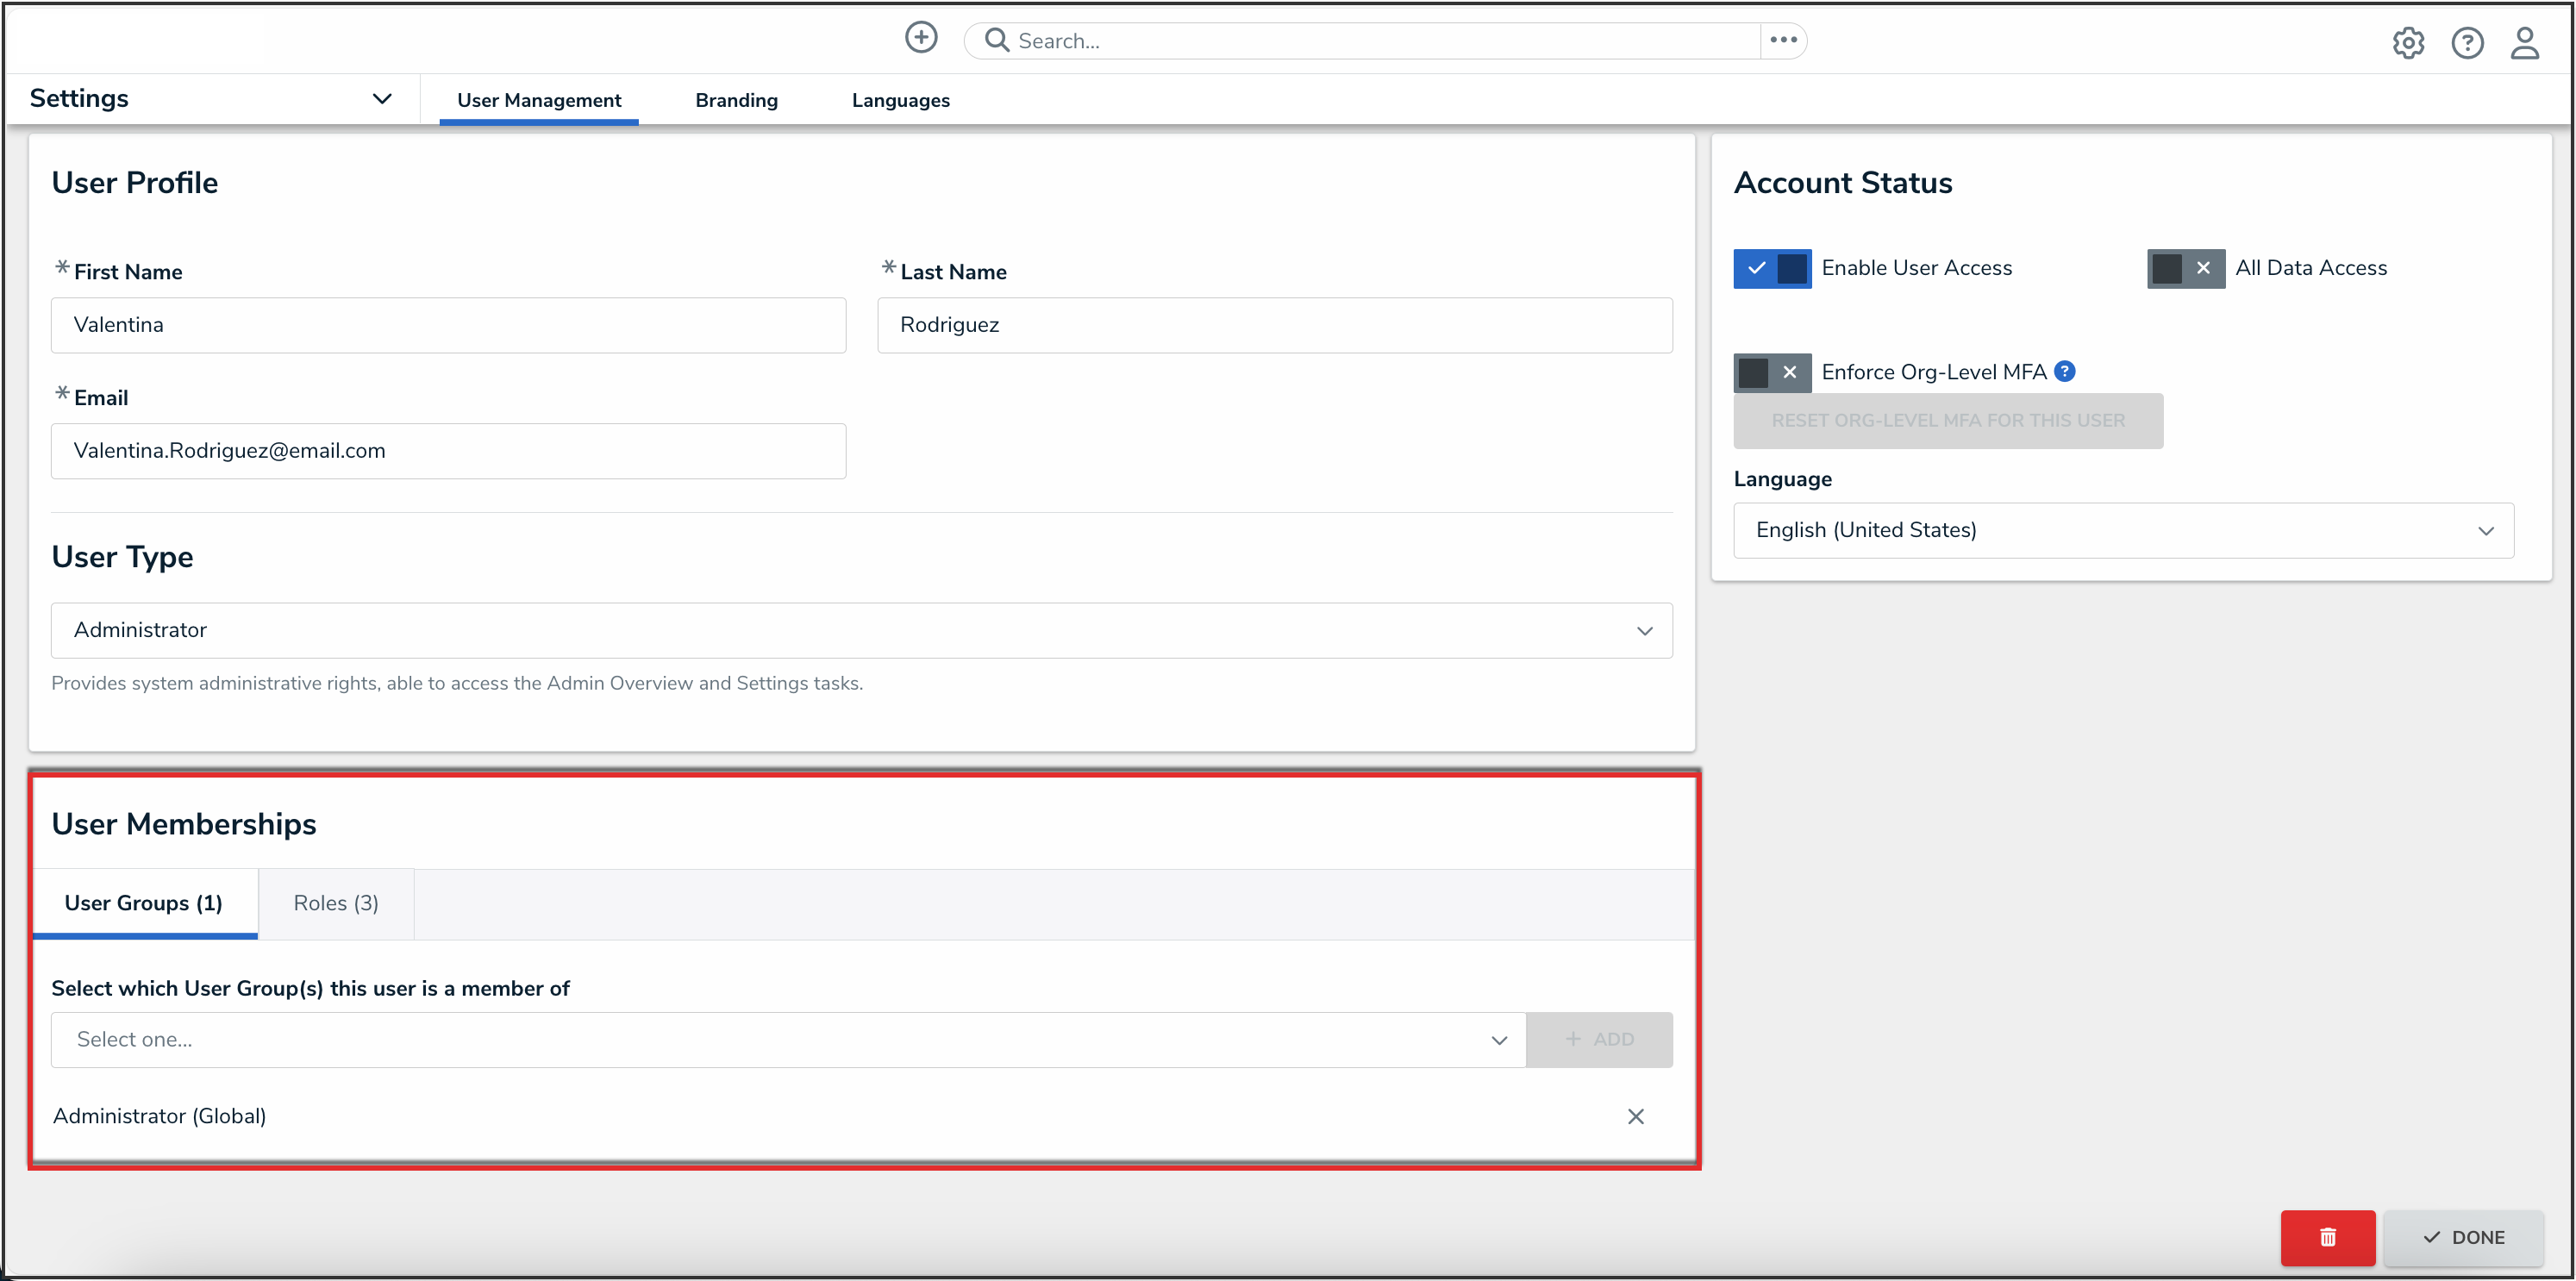
- In the User Memberships card, users will have a different view depending on which user type was selected in Step 2. Each tab in this section includes a count of how many of the designated memberships the user has.
- For all user types, the User Groups tab shows the user groups the user is enrolled in. To add a user to a user group, select the user group from the Select which User Groups(s) this user is a member of drop-down and click the Add button.
User Groups Tab
 Best Practice:
We recommend adding users to a user group via the User Memberships section to more accurately manage permissions for all the users in the same group.- Click a User Group to open the Admin: Edit User Group screen to view further details, remove, and add a user to the user group.
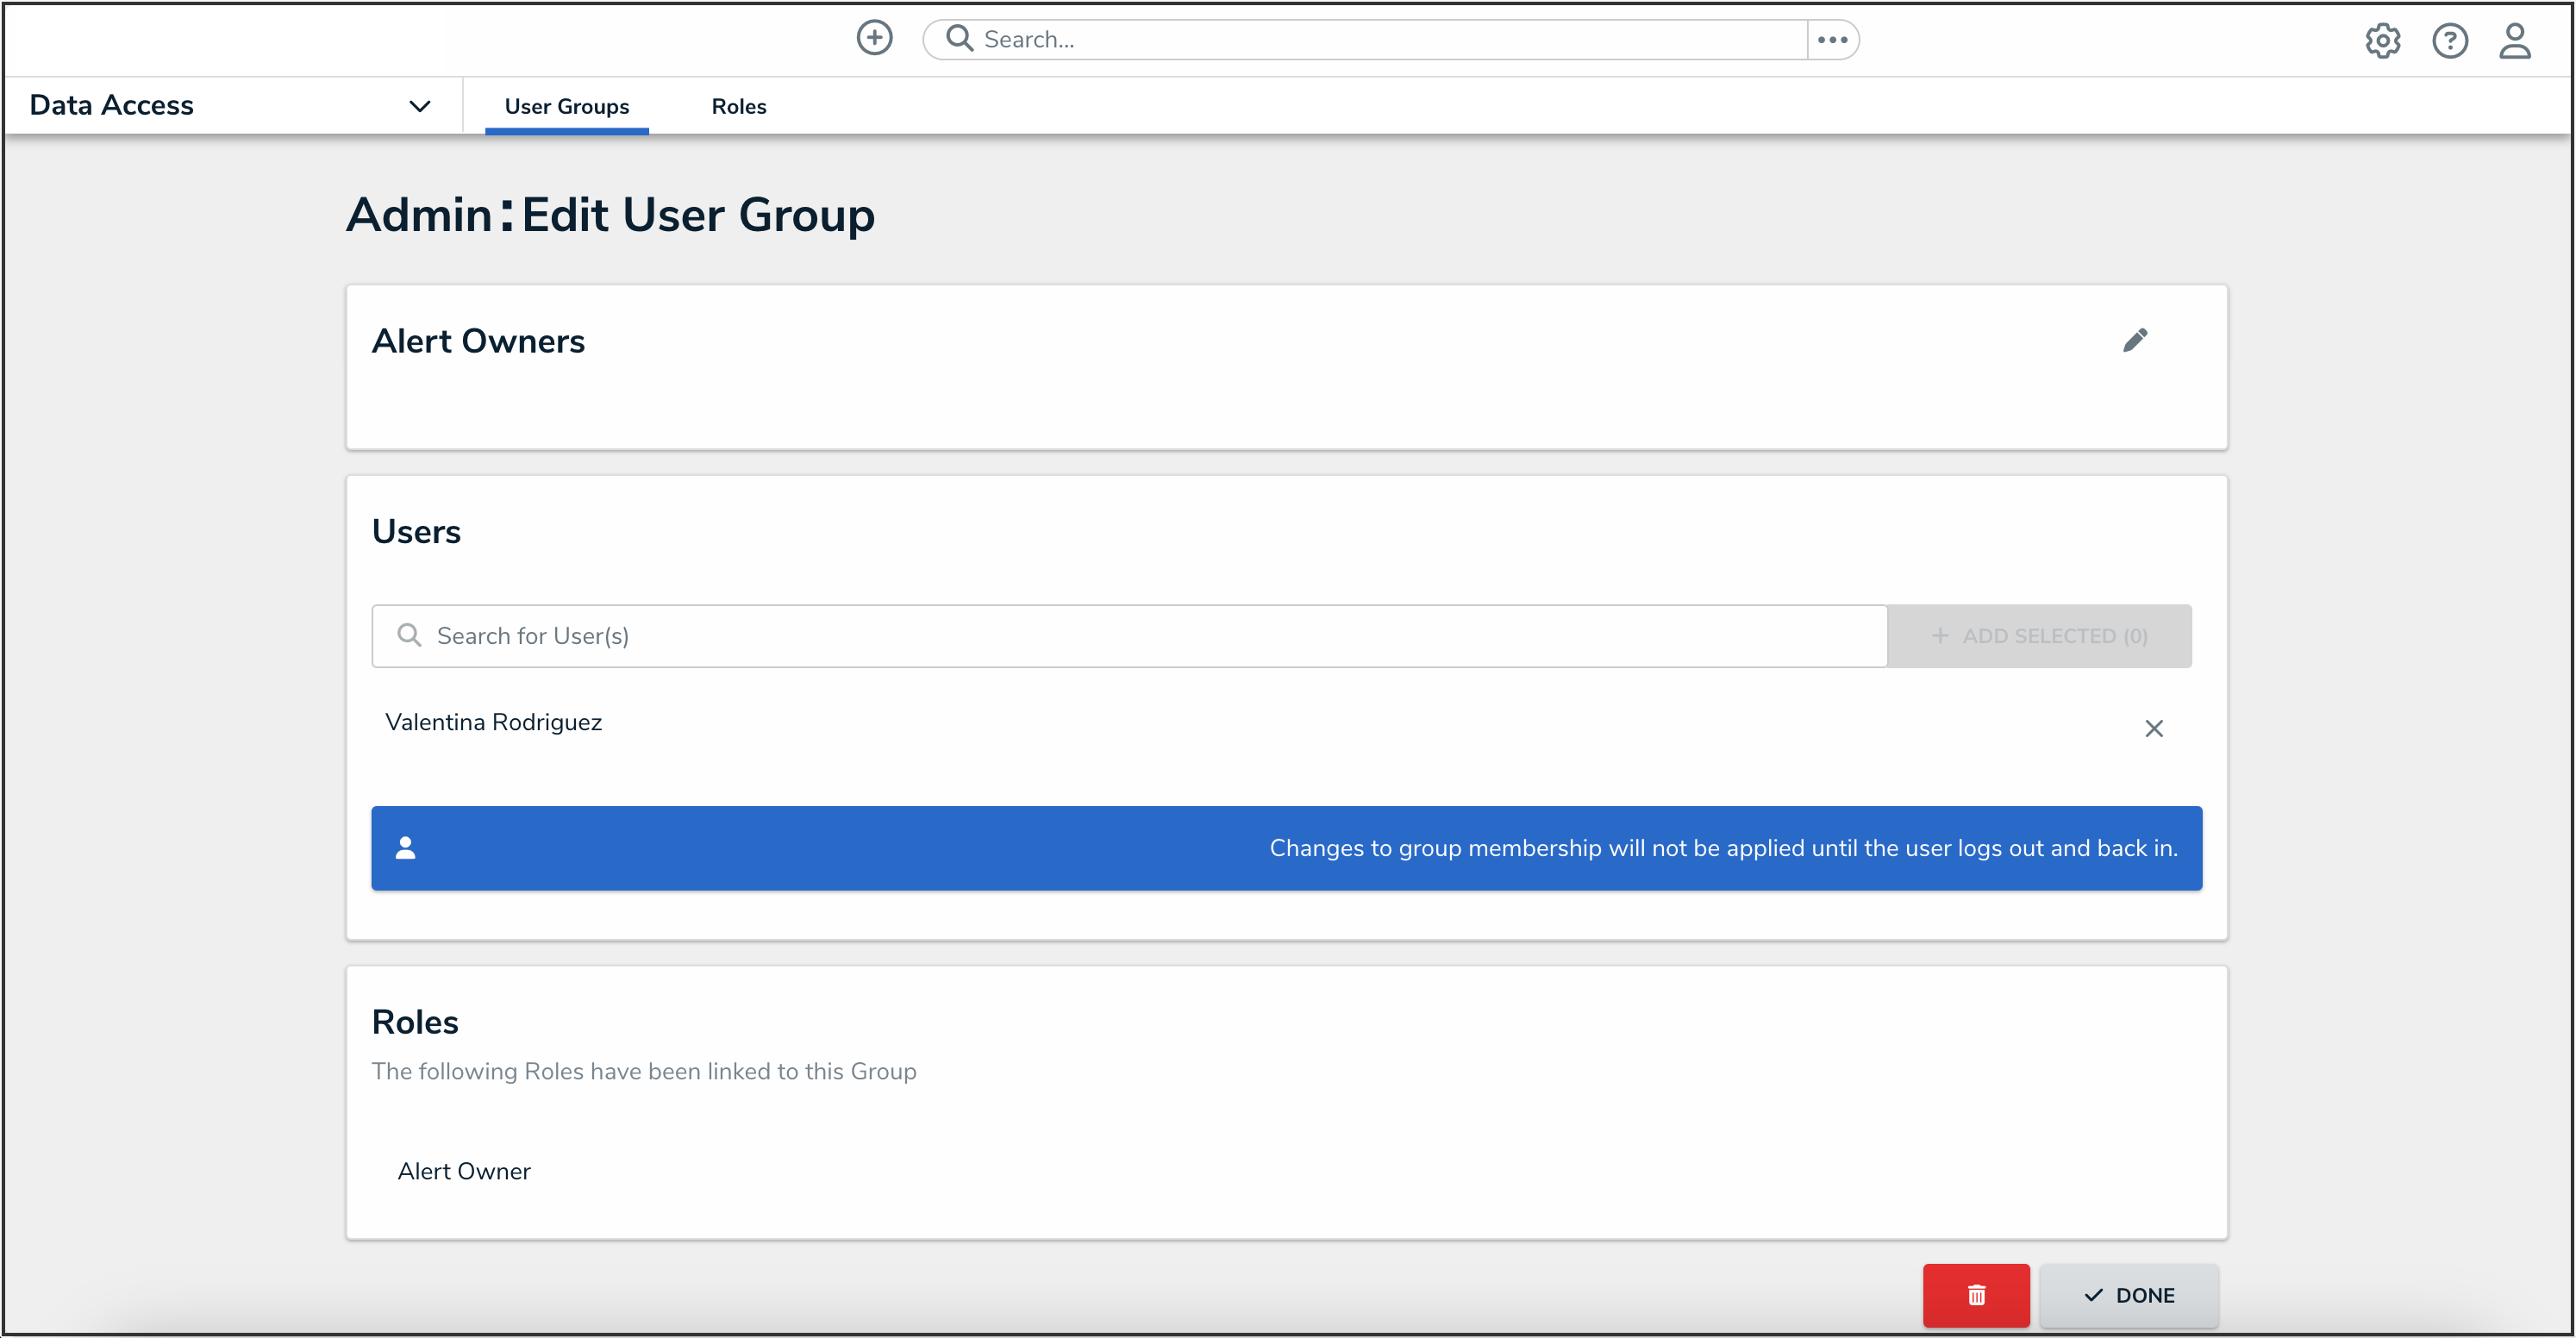
Edit User Groups Screen
- Click a User Group to open the Admin: Edit User Group screen to view further details, remove, and add a user to the user group.
- For all user types, the Roles tab shows the roles the user is enrolled in. To add a user to an individual role, select the role from the Select which Role(s) this user is a member of drop-down and click the Add button.

Roles Tab
- Click a Role to open the Admin: Edit Role screen to view further details, remove, and add a user to a role.
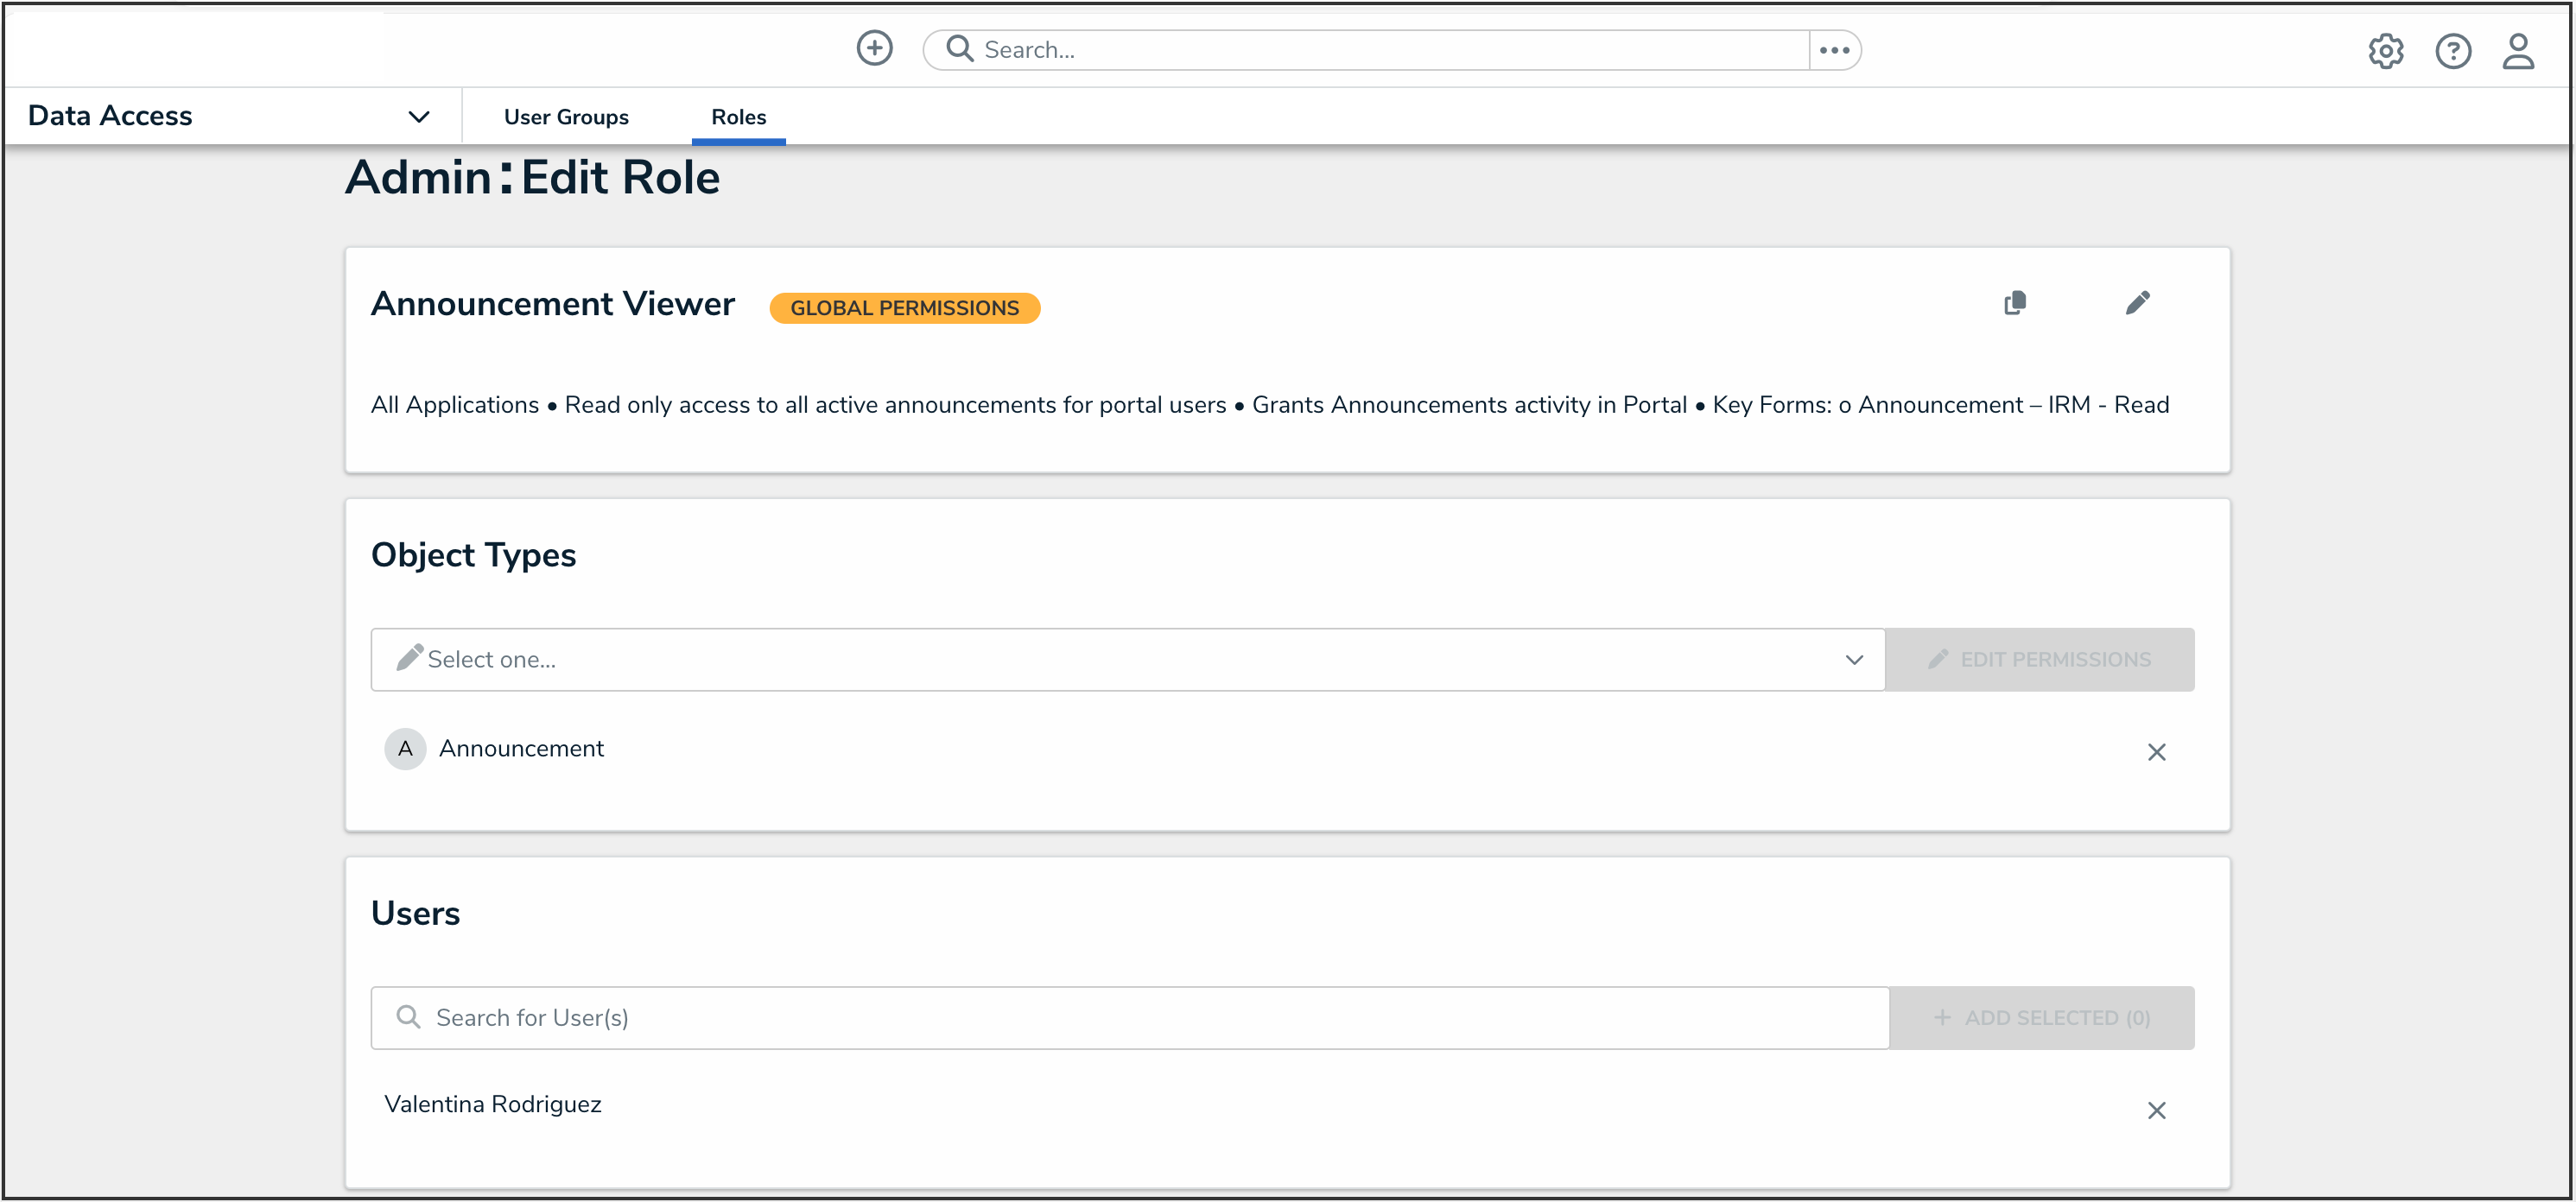
Edit Role Screen
- Click a Role to open the Admin: Edit Role screen to view further details, remove, and add a user to a role.
- For Portal URL Access users: The Portal URLs tab shows which Portal URL a Portal URL Access user is assigned to. Please see the Managing Portal URL Membership article for more information.
- For Standard users: Administrators can grant the following advanced permissions to standard users:
- Data Management: Manage reports and dashboards
- Settings Management: Manage all tasks under the Administrator Settings menu
- User Management: Create, manage, and assign user accounts, group memberships, and roles within the system
- For all user types, the User Groups tab shows the user groups the user is enrolled in. To add a user to a user group, select the user group from the Select which User Groups(s) this user is a member of drop-down and click the Add button.

 Best Practice:


- Click the Done button to save your changes.
Done Button
