Overview
Every individual you want to access your Resolver environment requires a user account. An Administrator, or a user with the User Management or Settings Management advanced permissions can create user accounts in Resolver. When a user account is created, that user must be assigned to user group and/or roles.
User Account Requirements
The user account you use to log into Resolver must have Administrator or the User Management or Settings Management advanced permissions to access the User Management screen.
Related Information/Setup
For more information regarding Administrator user privileges, please see the Administrator Overview article.
For more information on adding a user to a user group, please see the Adding a User to a User Group article.
For more information on adding advanced permissions to a user, please see the Assigning Advanced Permissions to a User article.
For more information on using an alternate language setting, please see the Languages Overview article.
For Orgs that have Data Warehouse enabled, please see the Access Your Data Warehouse Settings article.
For password requirements, please see the Password Requirements article.
Navigation
- From the Home screen, click the Administration icon.
![]()
Administration Icon
- From the Administrator Settings menu, click User Management.
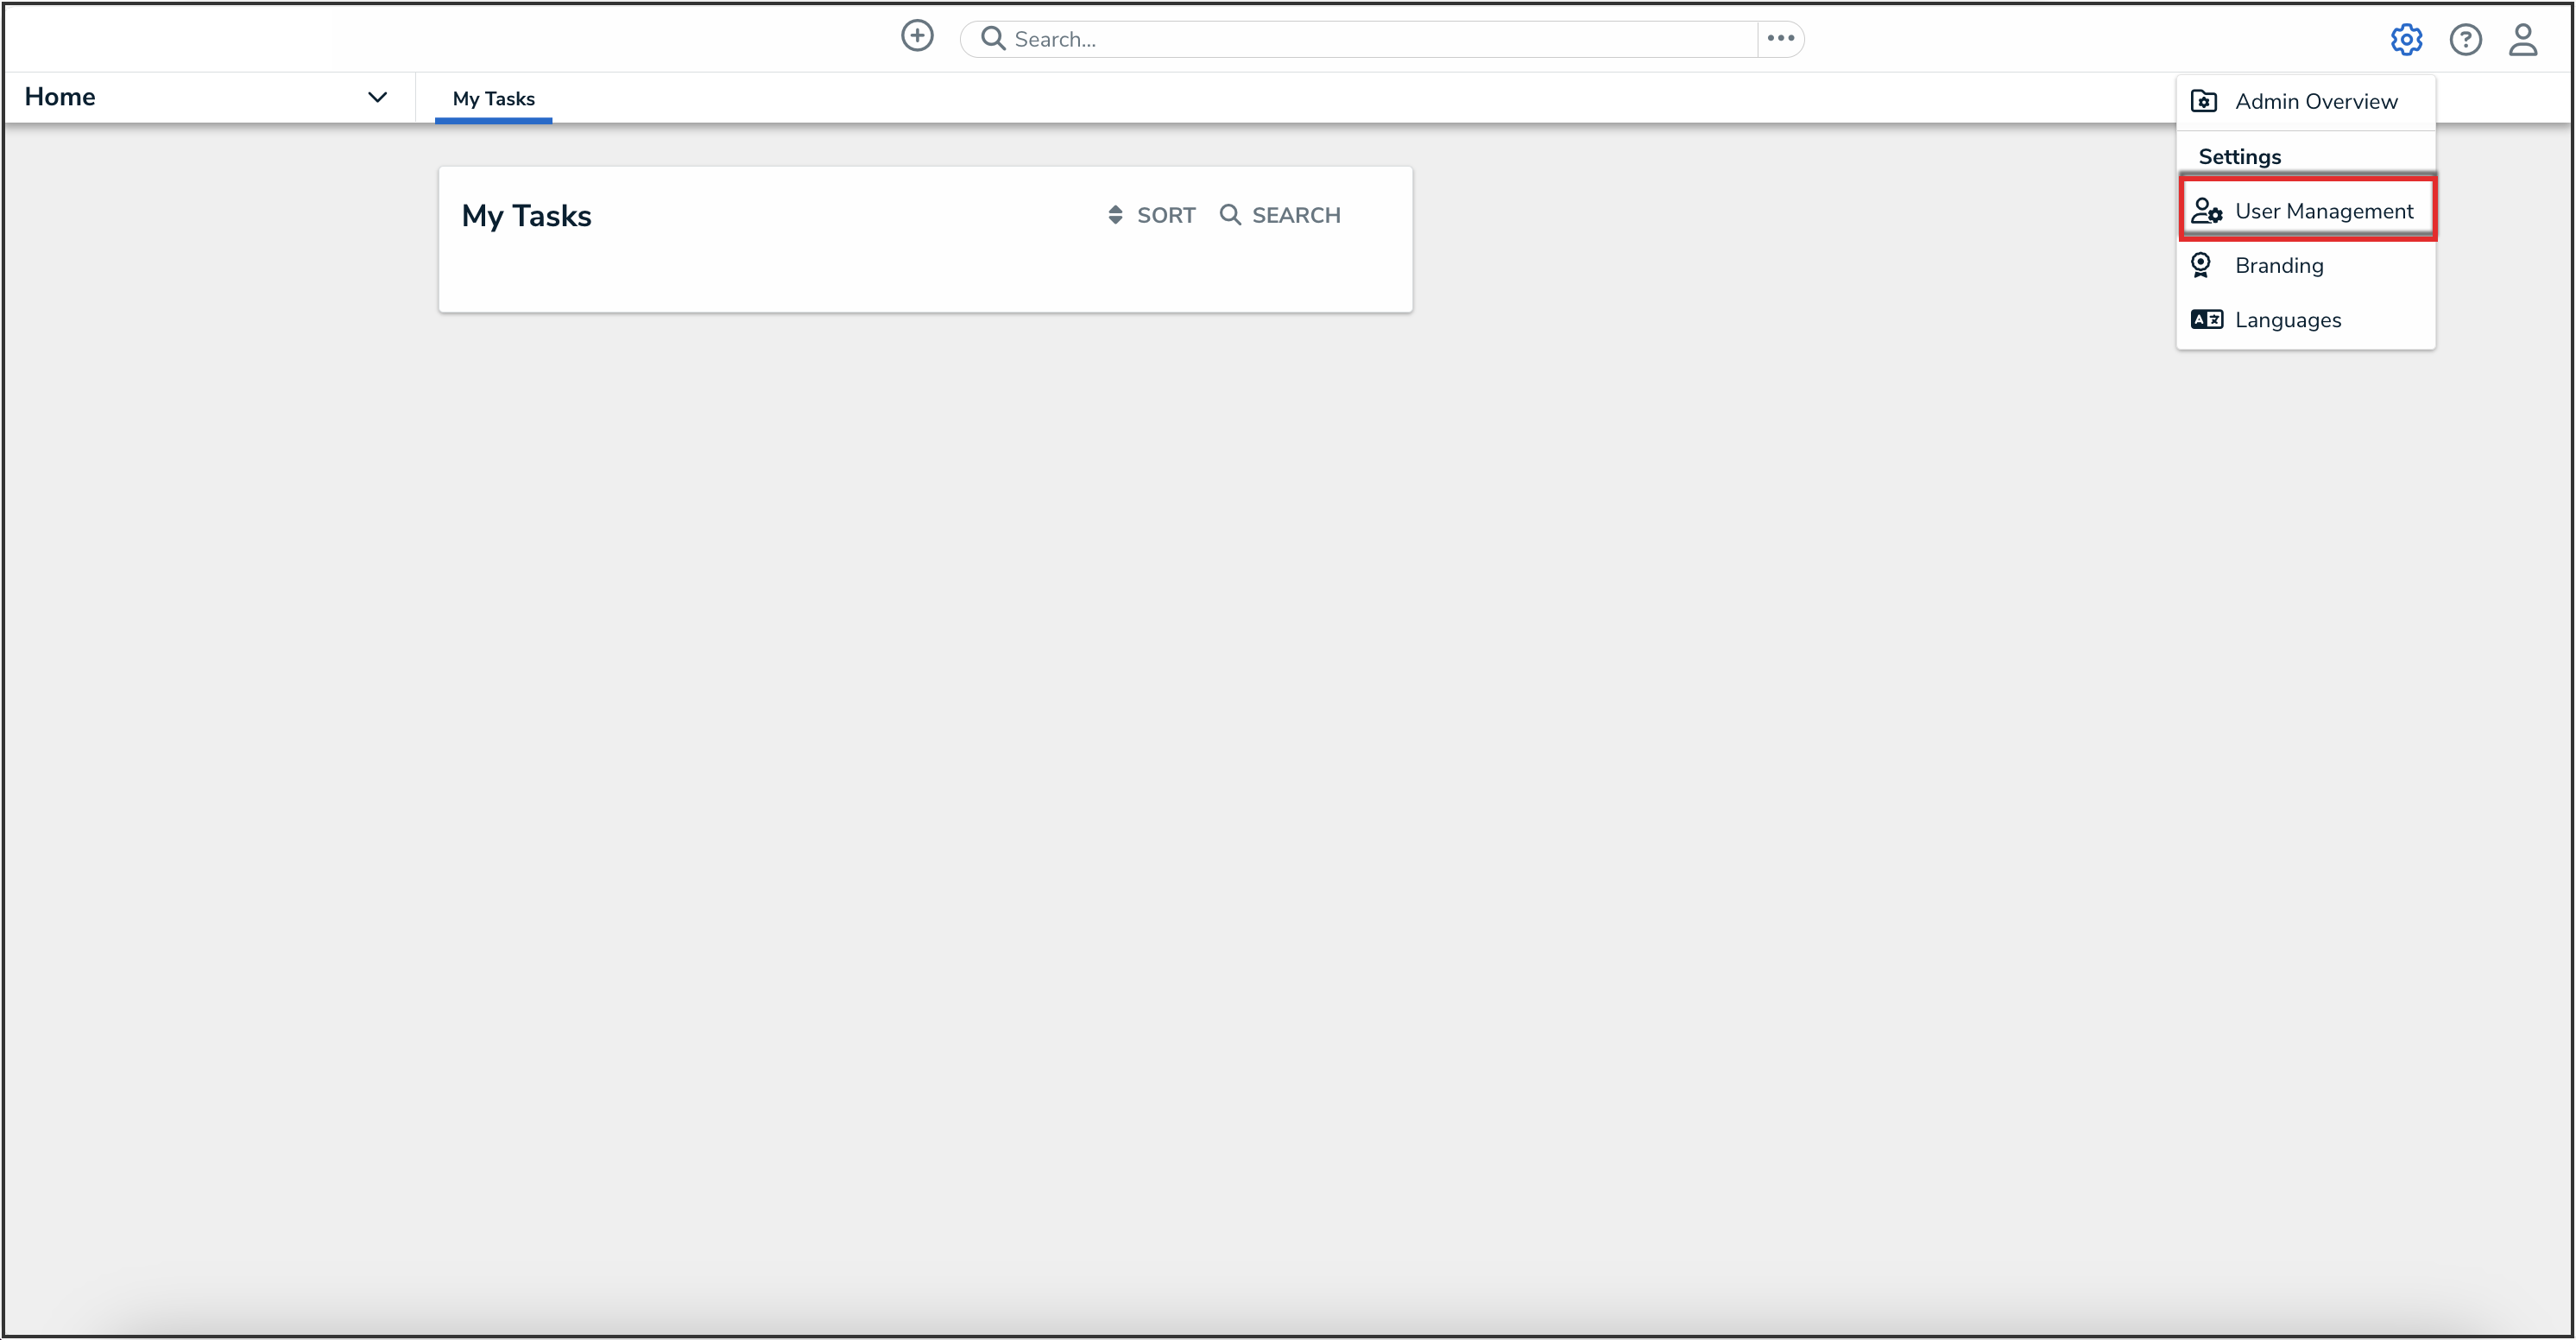
Administrator Settings Menu
Creating a New User
- From the User Management screen, click the Create User button.

Create User Button
- Enter the user’s name in the First Name and Last Name fields.
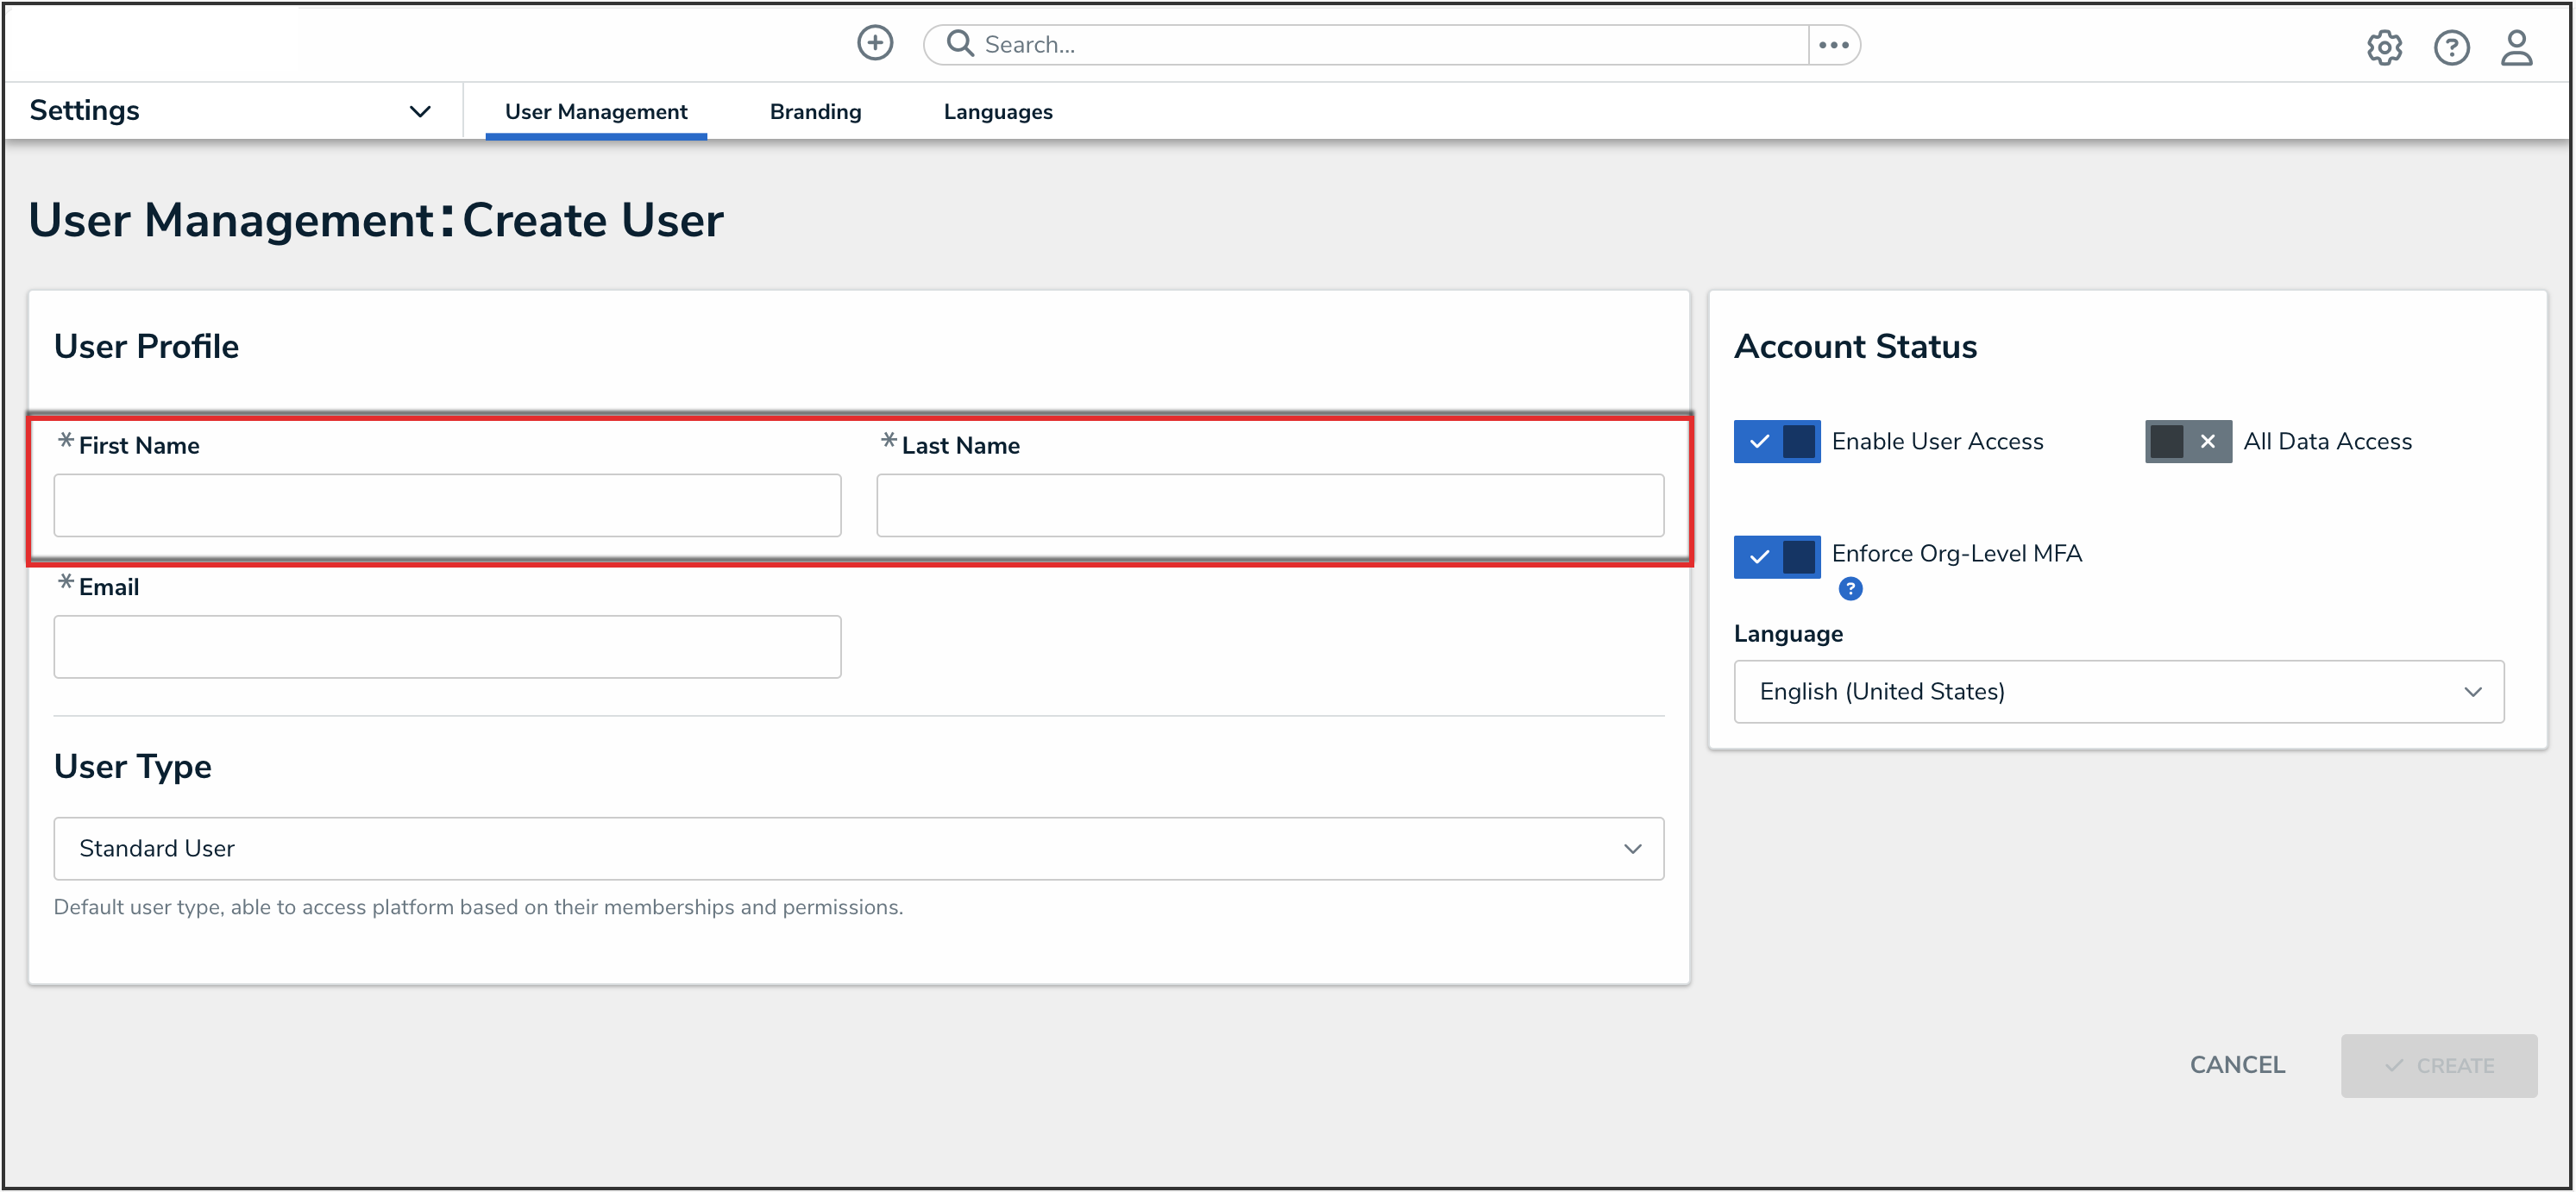
First and Last Name Fields
- Enter the user's email address in the Email field. The email address is used to:
- Receive the Resolver sign-up email containing instructions on creating a new password and signing into Resolver.
- Authenticate the user when logging in to Resolver.

Email Field
- From the User Type drop-down menu, select one of the following user types for the user:
- Standard User: The default user type, standard users are granted access to parts of Resolver based on their memberships and permissions. A user must be a Standard User to be granted advanced permissions. For more information on advanced permissions, please refer to the Assigning Advanced Permissions to a User article.
 Note:
Note:
Advanced permission users can only create Standard Users. - Administrator: This user type provides system administrative rights, and the ability to access the Admin Overview screen and the Administrator Settings menu.
- Portal URL User: This user type enables users to be assigned to Portal URLs, and the ability to authenticate access to assigned Portals.
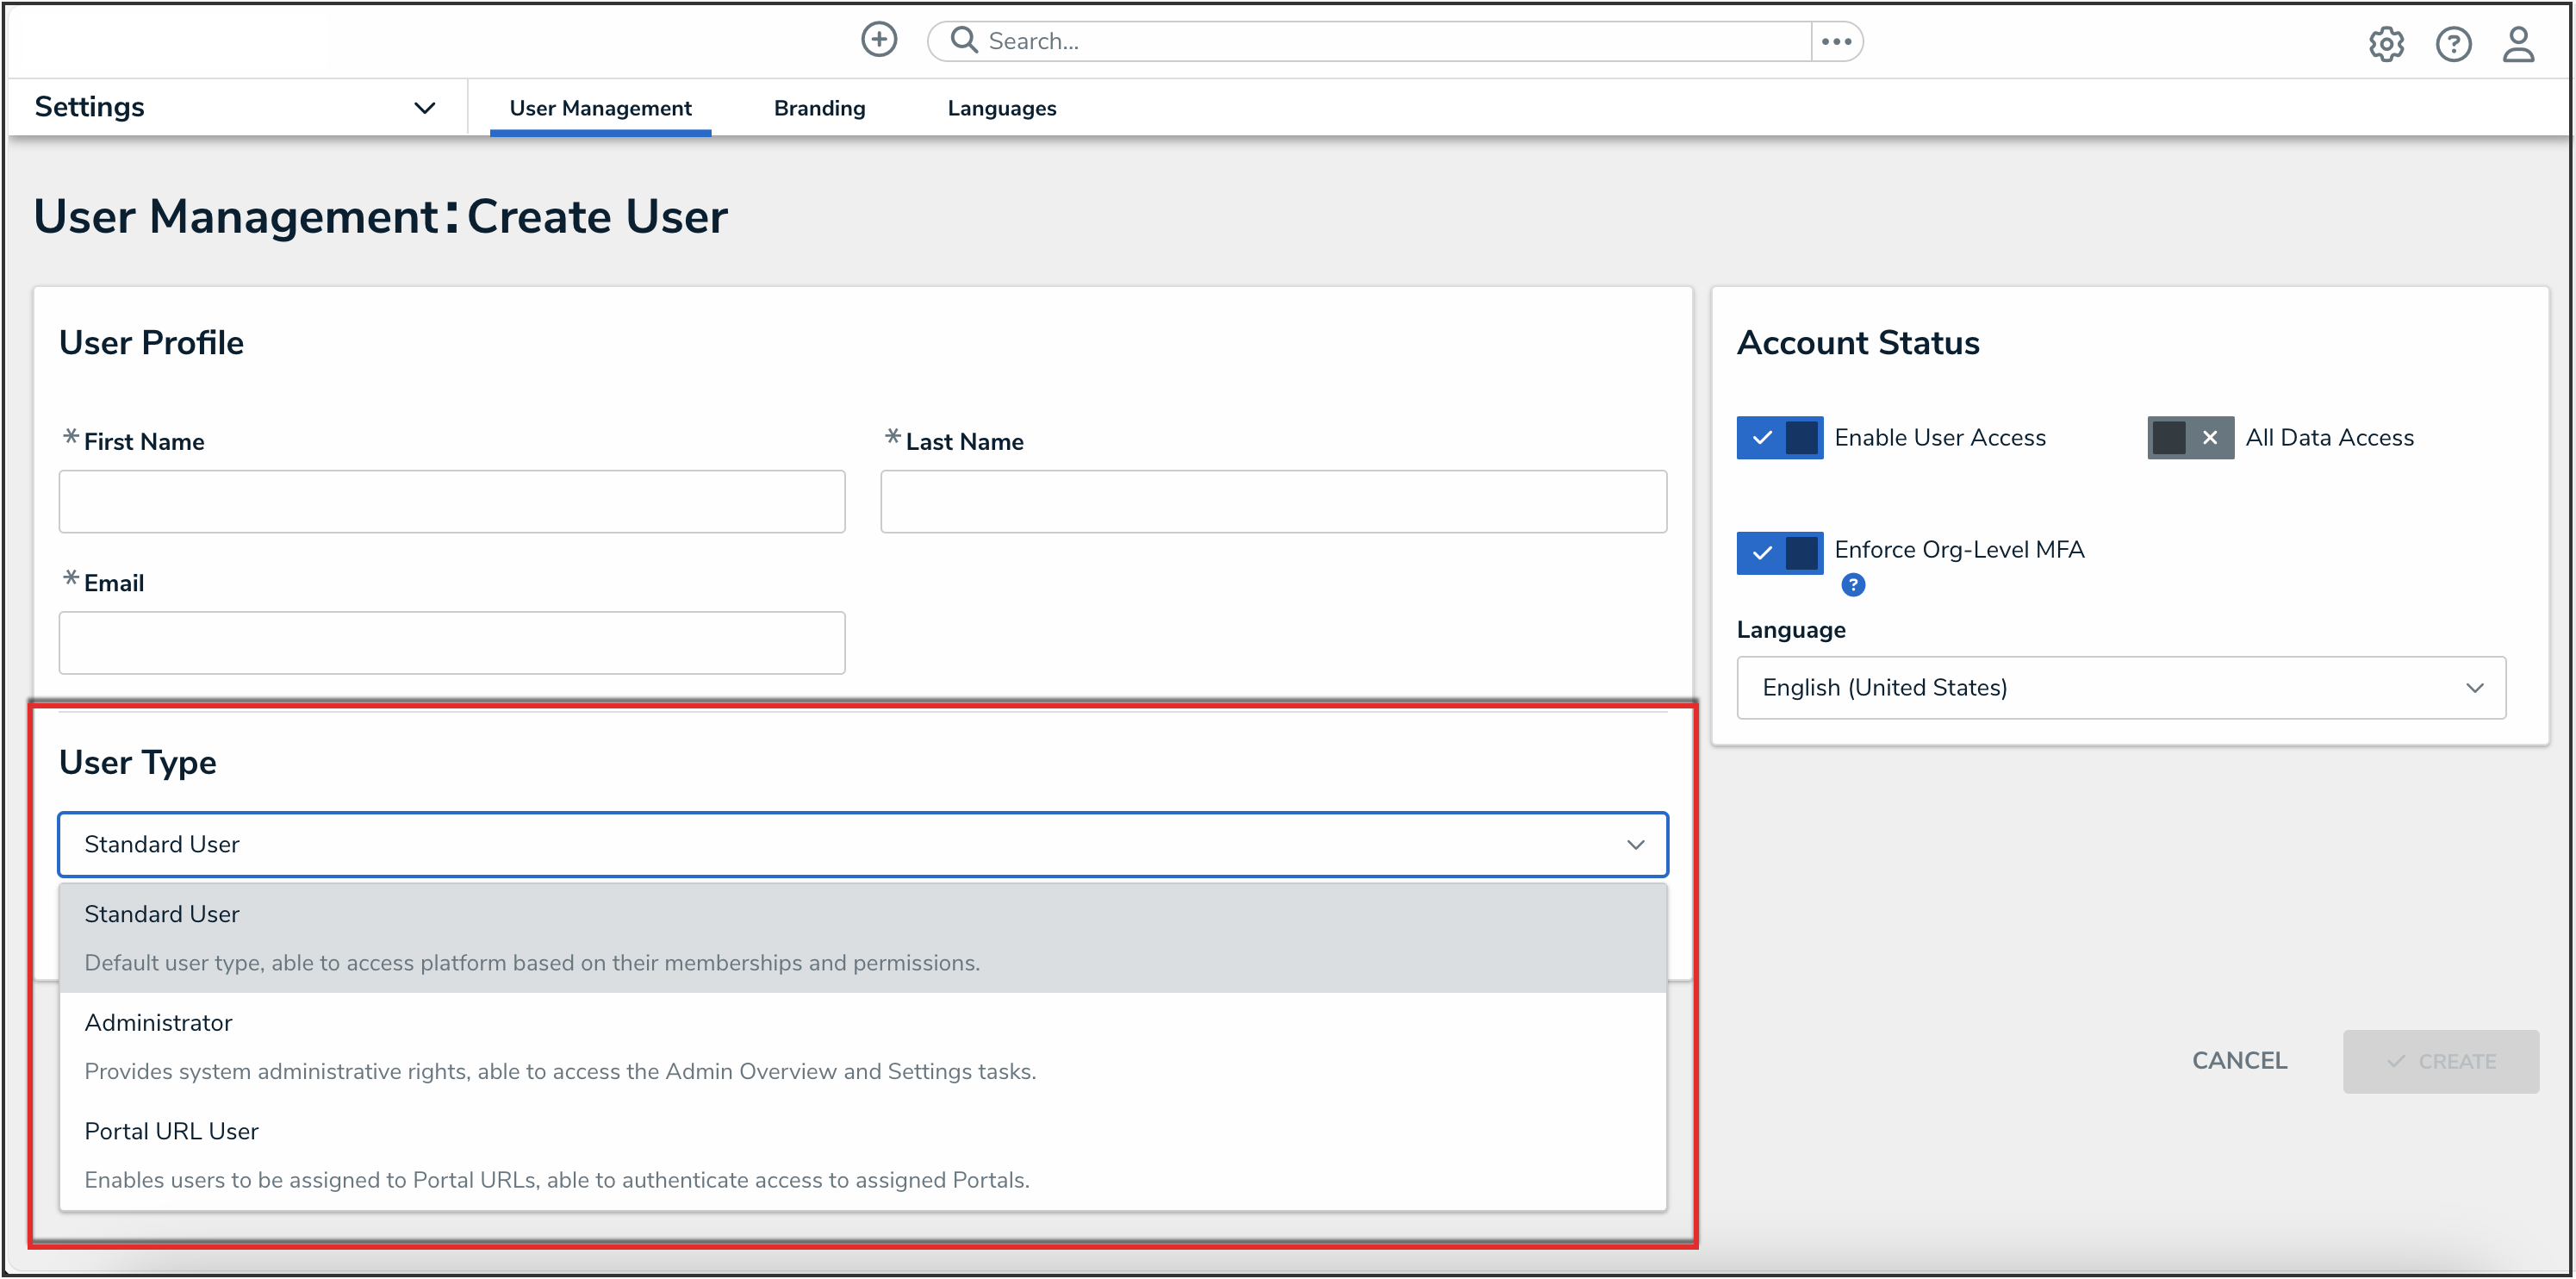
User Type Drop-down
 Note:
Note:
The options displayed in the Account Status section and User Memberships cards will change based on the user type selected. - Standard User: The default user type, standard users are granted access to parts of Resolver based on their memberships and permissions. A user must be a Standard User to be granted advanced permissions. For more information on advanced permissions, please refer to the Assigning Advanced Permissions to a User article.
- (Optional): The following toggle switches are options settings and can give users absolute access or visibility in the system:
- Enable User Access: Click the Enable User Access toggle switch to deactivate the user account. By default, the user account is enabled.
- All Data Access: The All Access toggle switch allows users to view, edit, and delete objects and object types. The All Data Access toggle switch overrides object type workflow permissions.
 Note:
Note:
Resolver recommends not enabling the All Data Access toggle switch for new user accounts.

Account Status Toggle Switches
- (Optional): Select a language from the Language field drop-down menu to change the system's language setting. Before you can set an alternate language setting, an Administrator needs to download a Languages CSV file from the system, map language translations to the user interface text, and upload the CSV file for use within Resolver.
-
Click the Create button to create the new user account.
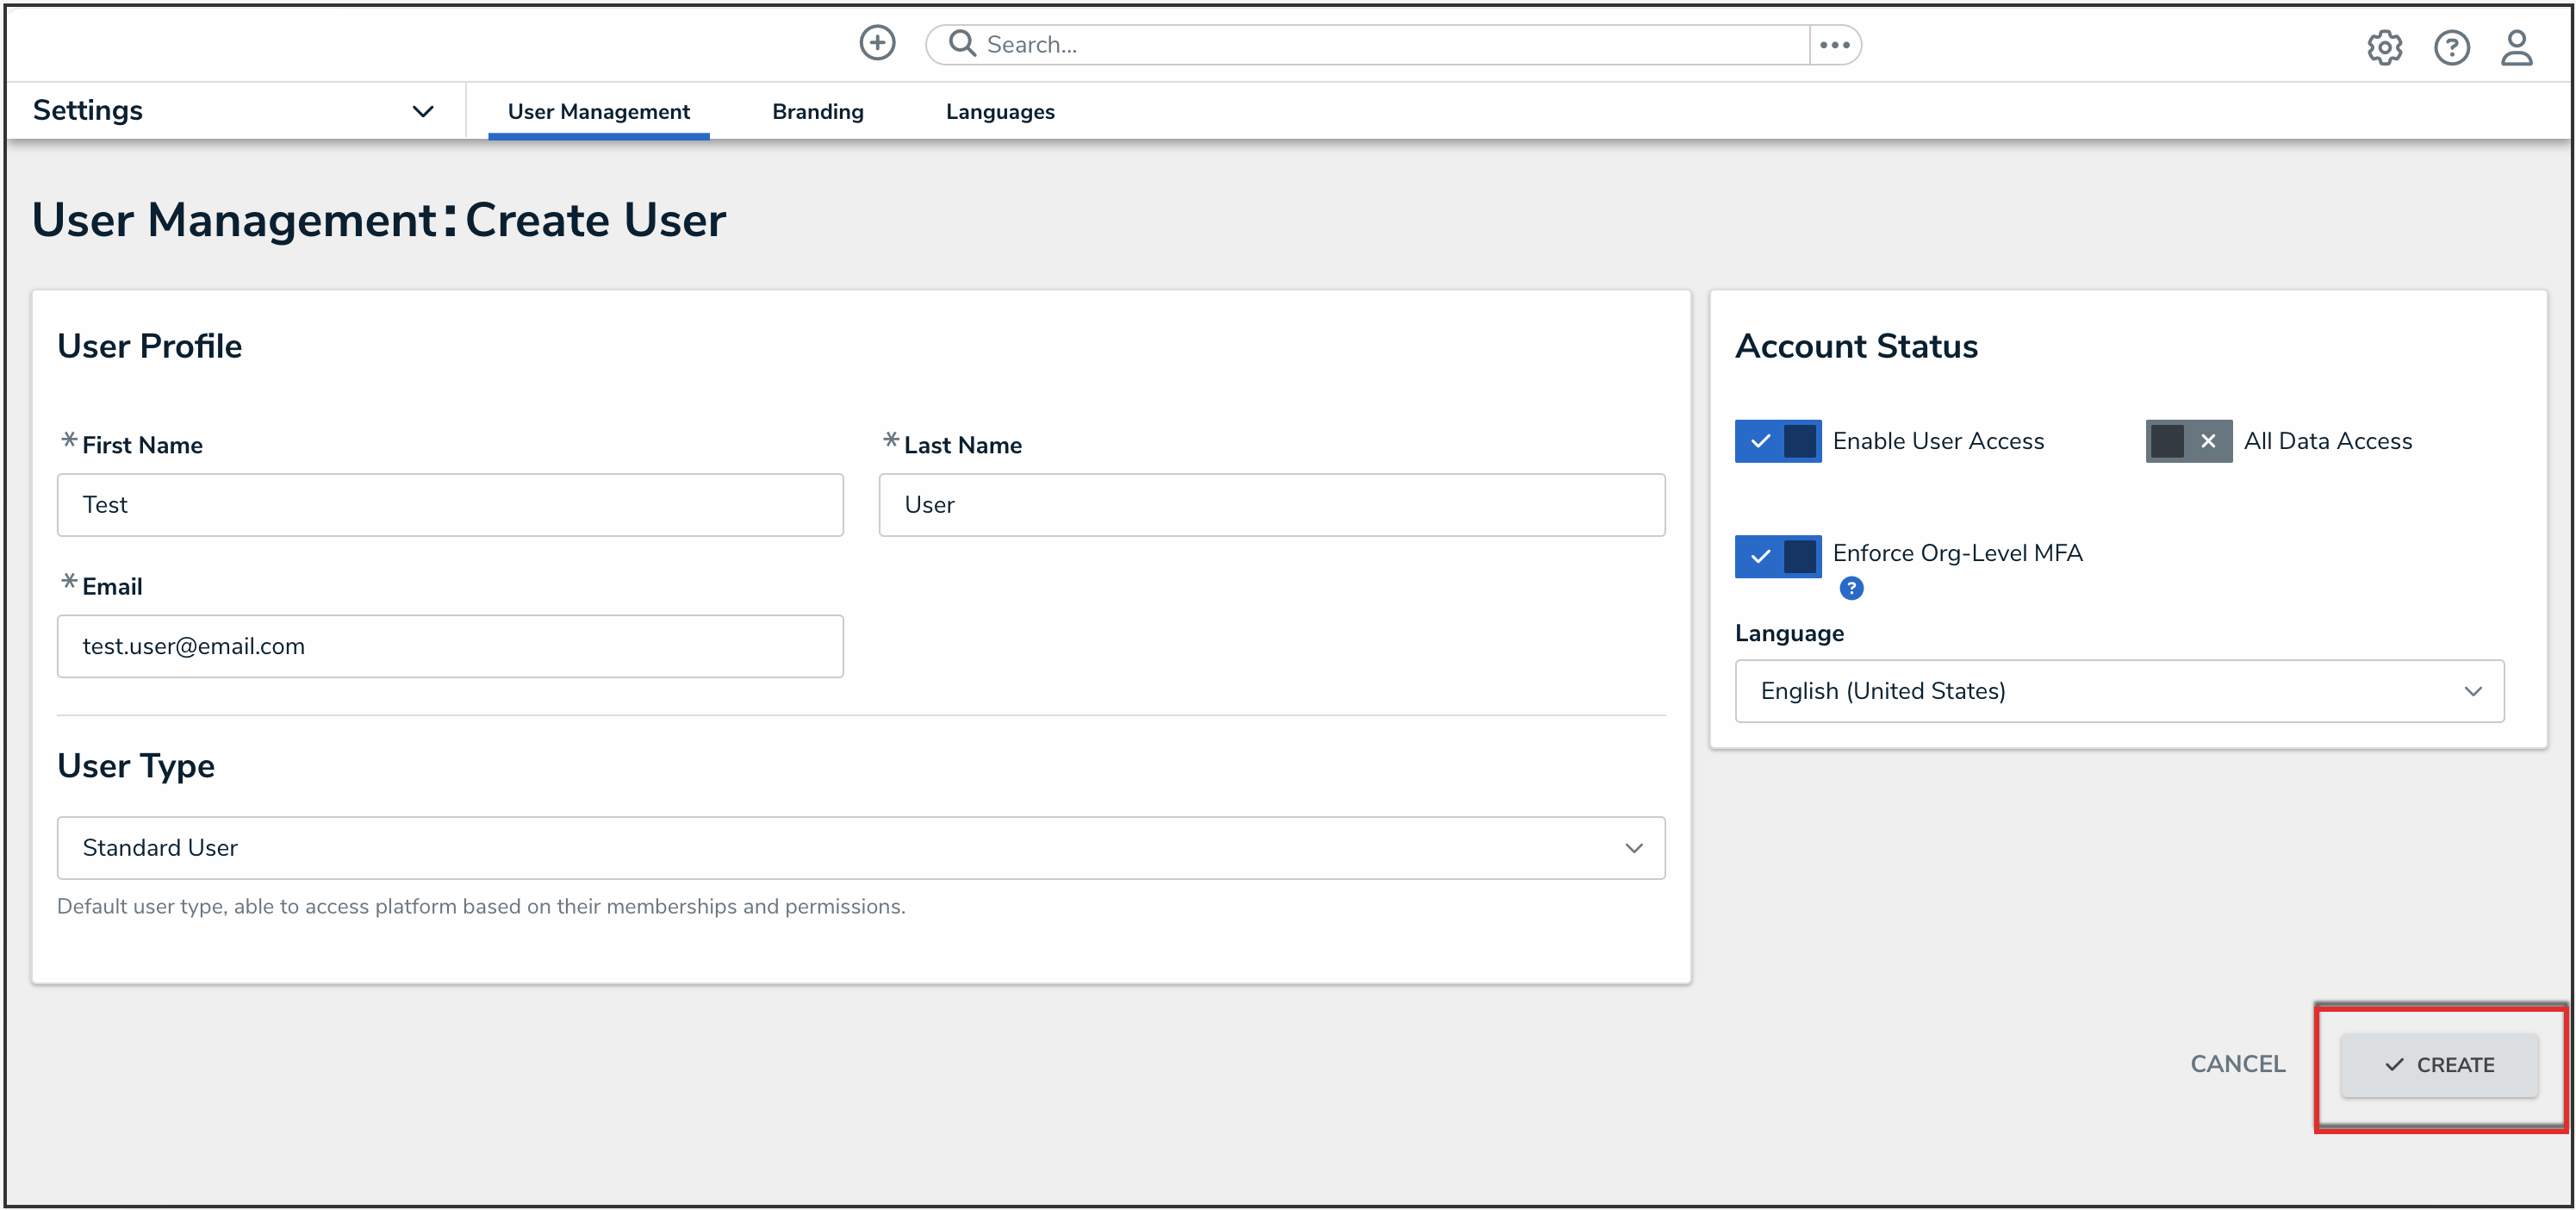
Create Button
Overview
An Administrator can add new user groups to the system. A user group organizes system users into specific groups based on their organizational role (e.g., Employee, Management, etc.). Adding users to a user group allows an Administrator to assign multiple users within a user group to a role by assigning the user group to a role instead of manually assign a role to each user.
User Account Requirements
The user account you use to log into Resolver must have Administrator permission to access the Admin Overview screen.
Related Information/Setup
Please read the User Group Overview article for more information regarding user groups.
Navigation
- From the Home screen, click the Administration icon.
![]()
Administration Icon
- From the Administrator settings menu, click Admin Overview.
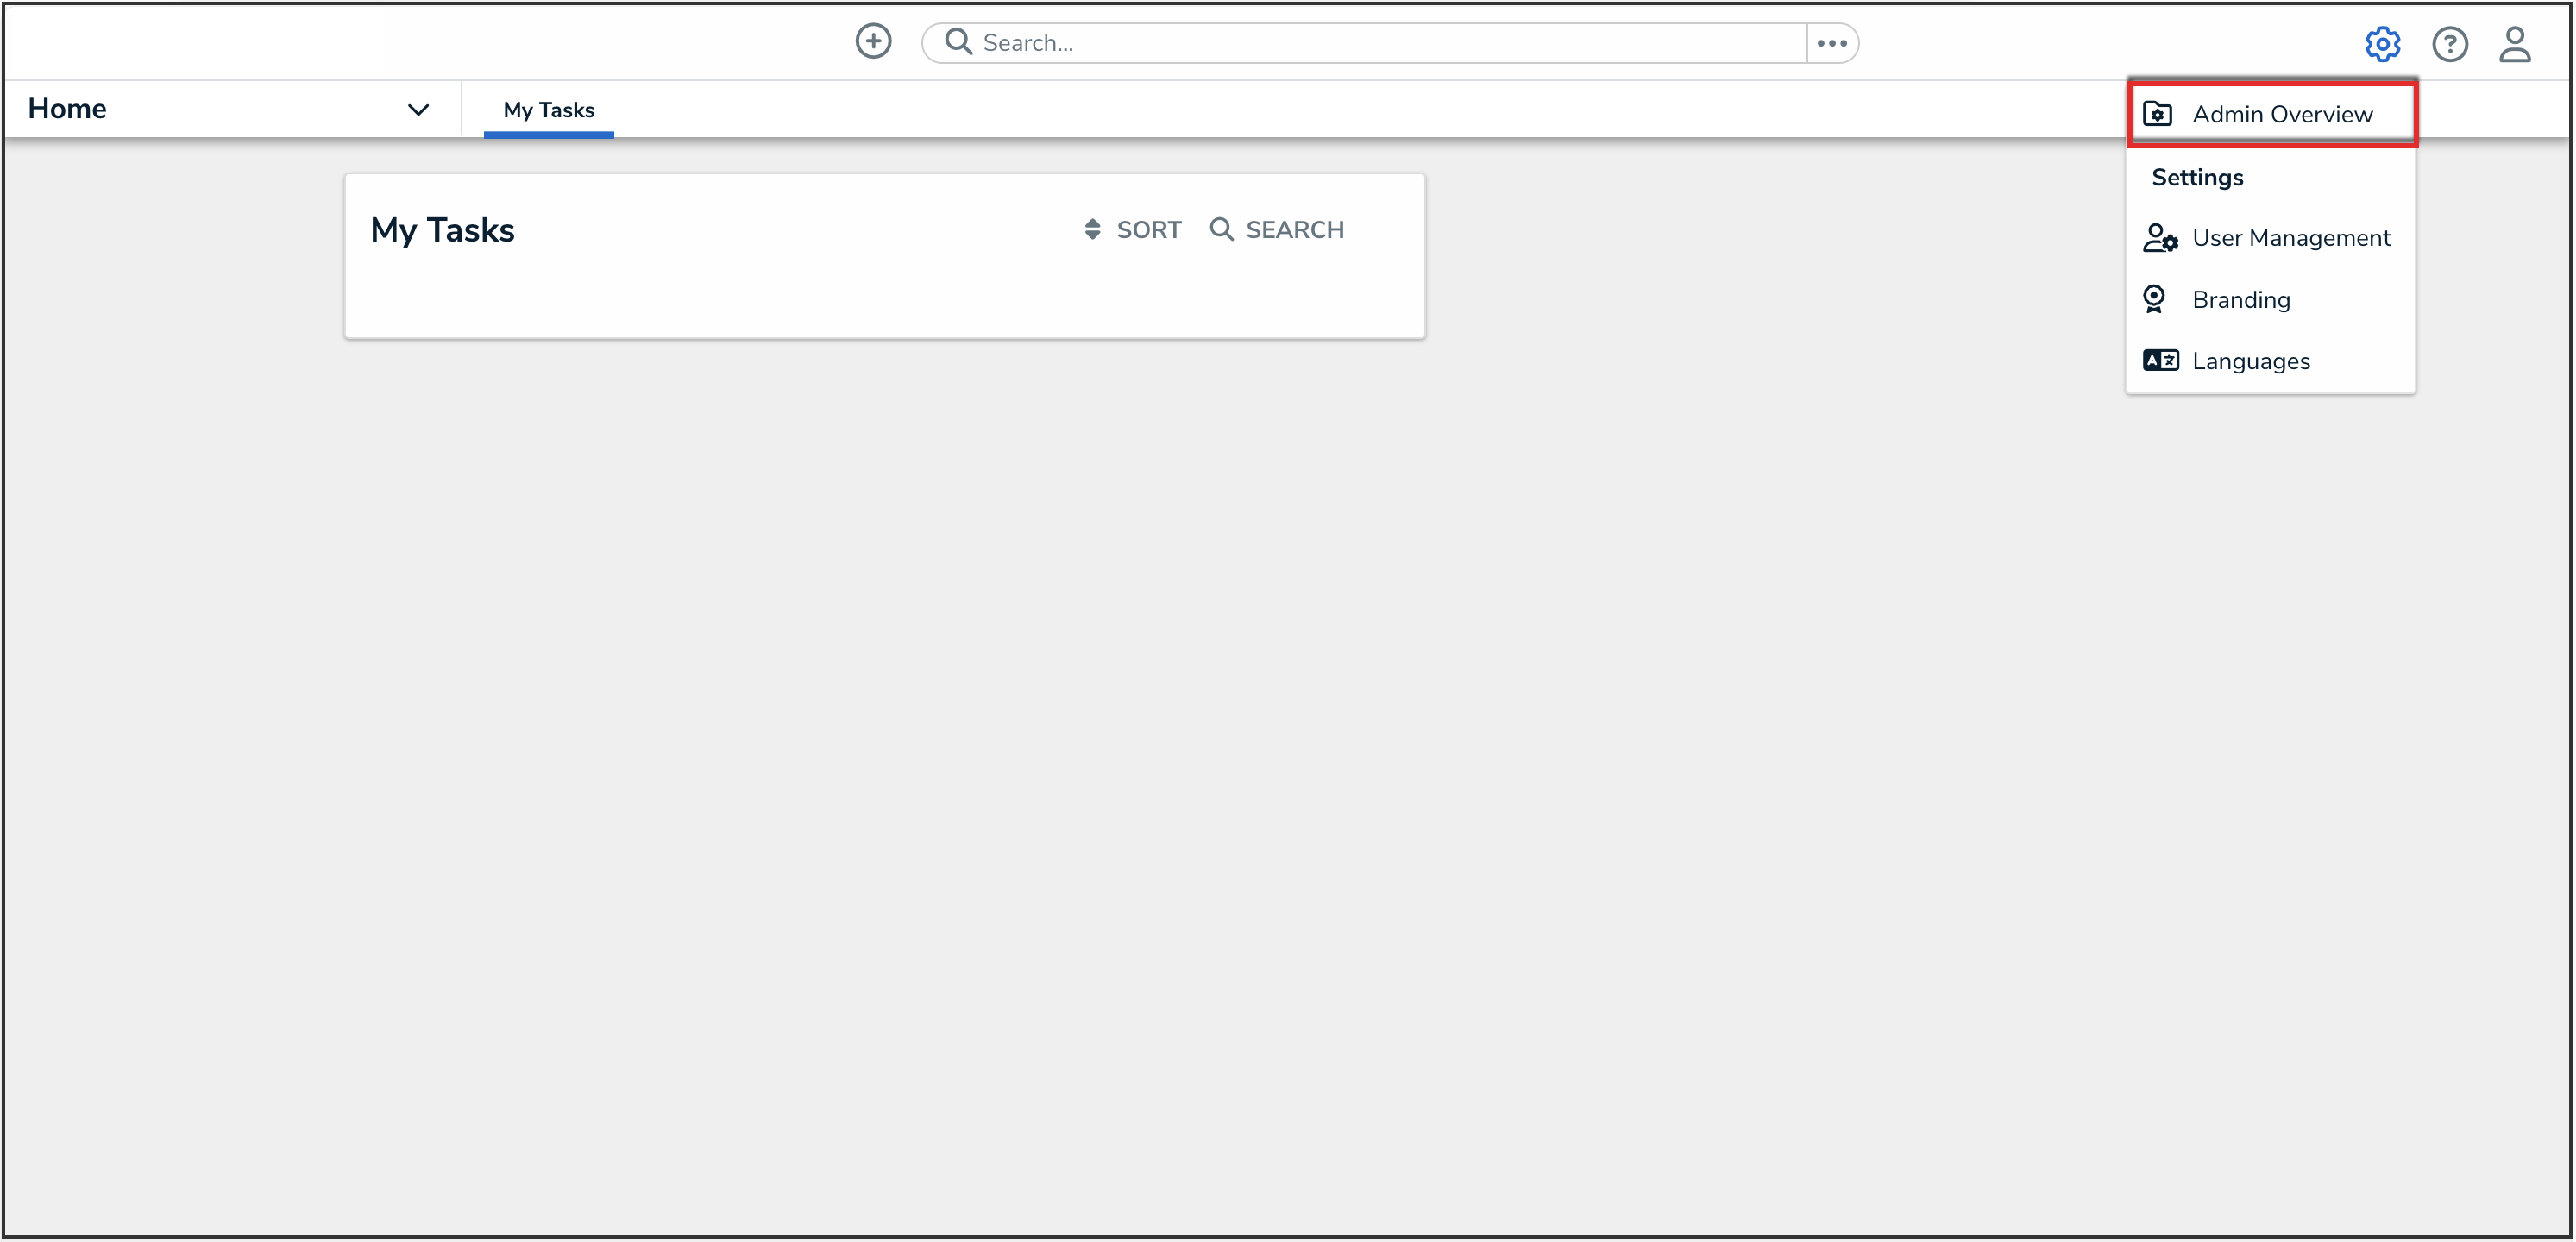
Administrator Settings Menu
- From the Admin Overview screen, click the User Groups tile under the Data Access section.

User Groups Tile
- From the Admin: User Groups screen, click the Create User Group button.

Create User Group Button
Creating a User Group
- From the Create User Group screen, enter a user group name in the Name field.

Name Field
- (Optional) Enter a brief description outlining the user group in the Description field.

Description Field
- Click the Create button.

Create Button
Overview
An Administrator must create a Confidential Portal Login before you can allow external and occasional stakeholders access to the Confidential Portal.
An Administrator must create a non-administrative user account for the login, and assign it to a role with access to the appropriate object type(s) and activity before they can create the Confidential Portal Login.
User Account Requirements
The user account you use to log into Resolver must have Administrator permissions.
Required Information/Setup
For more information on Confidential Portal Submissions, please refer to the Confidential Portal Submissions article.
To Edit or Delete a Confidential Portal login, please refer to the Edit or Delete a Confidential Login article.
An Administrator must create a non-administrative login for use with the Confidential login, please refer to the Create a New User article.
Navigation
- From the Home screen, click on the System icon.
![]()
System Icon
- From the Admin Overview screen, click the Portal Settings tile on the Communications section.

Portal Settings Tile
- From the Portal Settings screen, click the + Create Confidential User button.
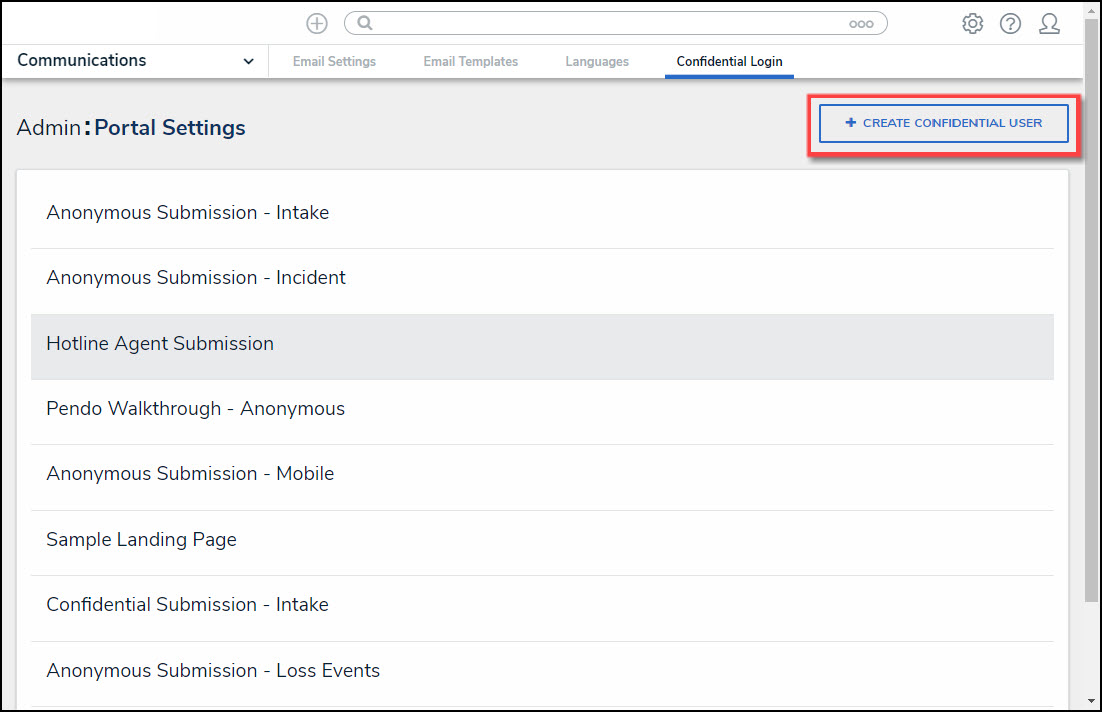
+ Create Confidential User Button
Create a Confidential Login
An Administrator must create a non-administrative user account for the login, and assign it to a role with access to the appropriate object type(s) and activity before they can create the Confidential Portal Login. For more information, please refer to the Create a New User article.
- From the New Confidential URL screen, enter a login name in the Name field.
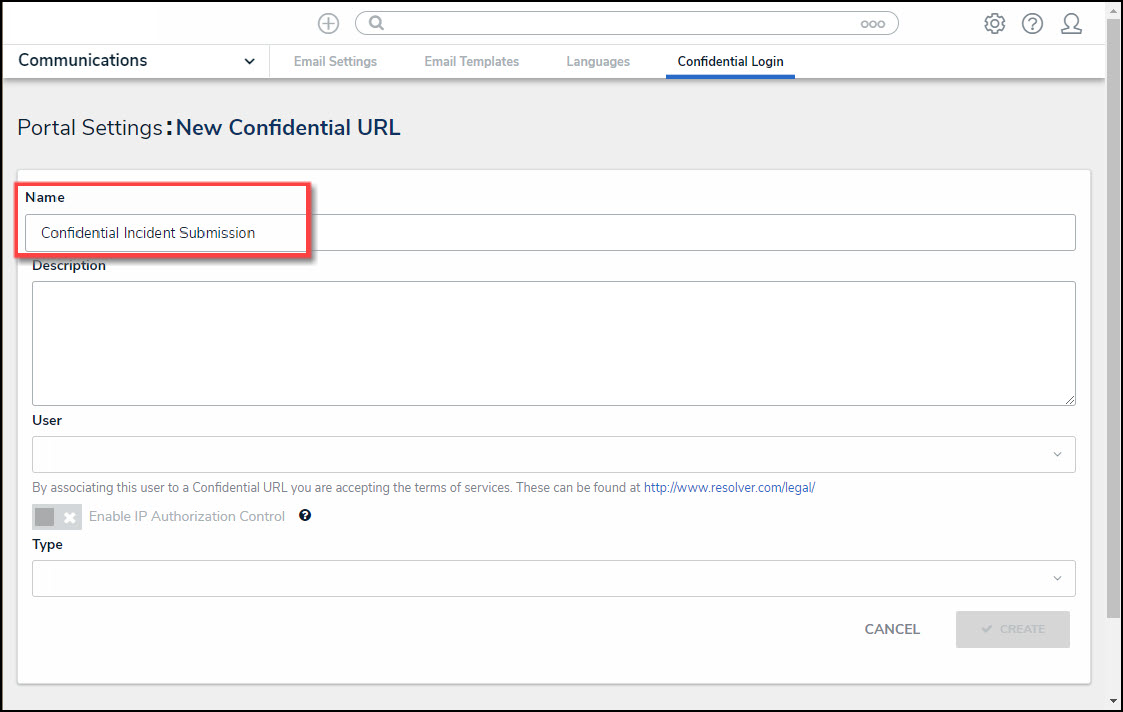
Name Field
- (Optional) Enter a login description in the Description field. This description will appear below the login’s name on the Confidential Login screen.
- Select a non-administrative account from the User dropdown menu.
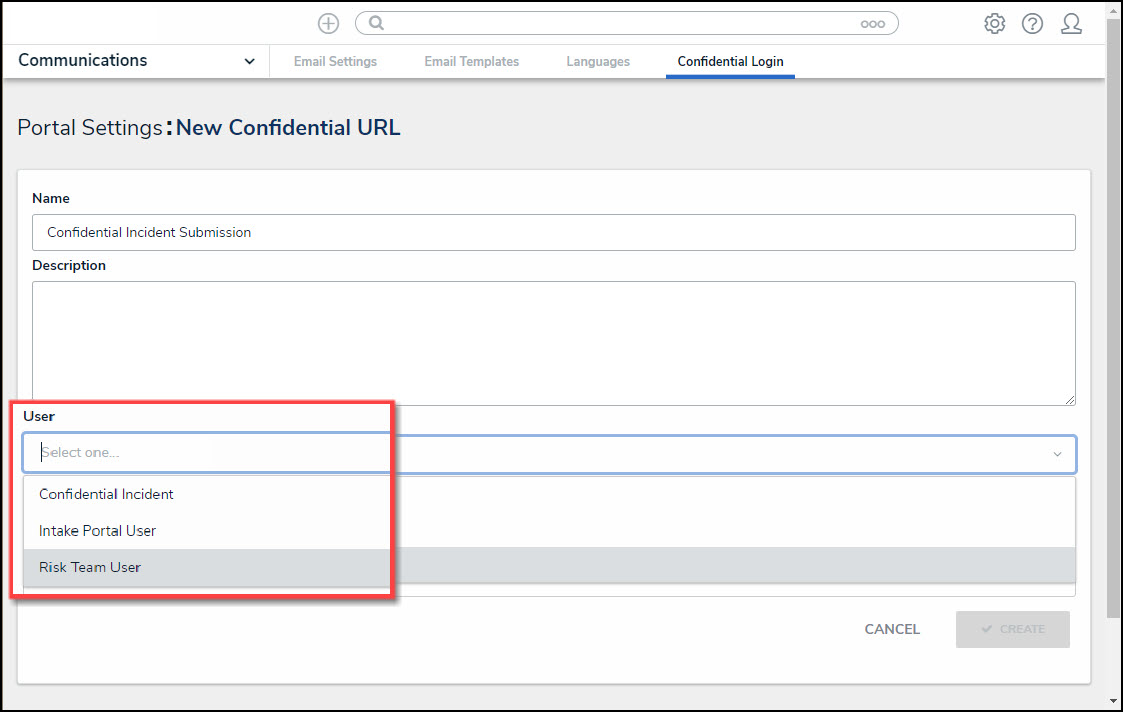
User Dropdown Menu
- (Optional) Click the Enable IP Authorization Control toggle switch to restrict who can access this URL (based on the entries in the IP allow list). The toggle switch will be greyed out if IP authorization control is not enabled for the Org. For more information, please refer to the IP Authorization Control article.
- Select one of the following Type options from the dropdown menu:
- Form: The Form type displays a configurable form only.
- Object Type: Select an Object Type from the Object Type dropdown list. The Object Type dictates which Forms will be available to select on the Forms dropdown menu.
- Form: Select a Form from the Form dropdown menu. The Form selected will appear when access the Confidential Portal.
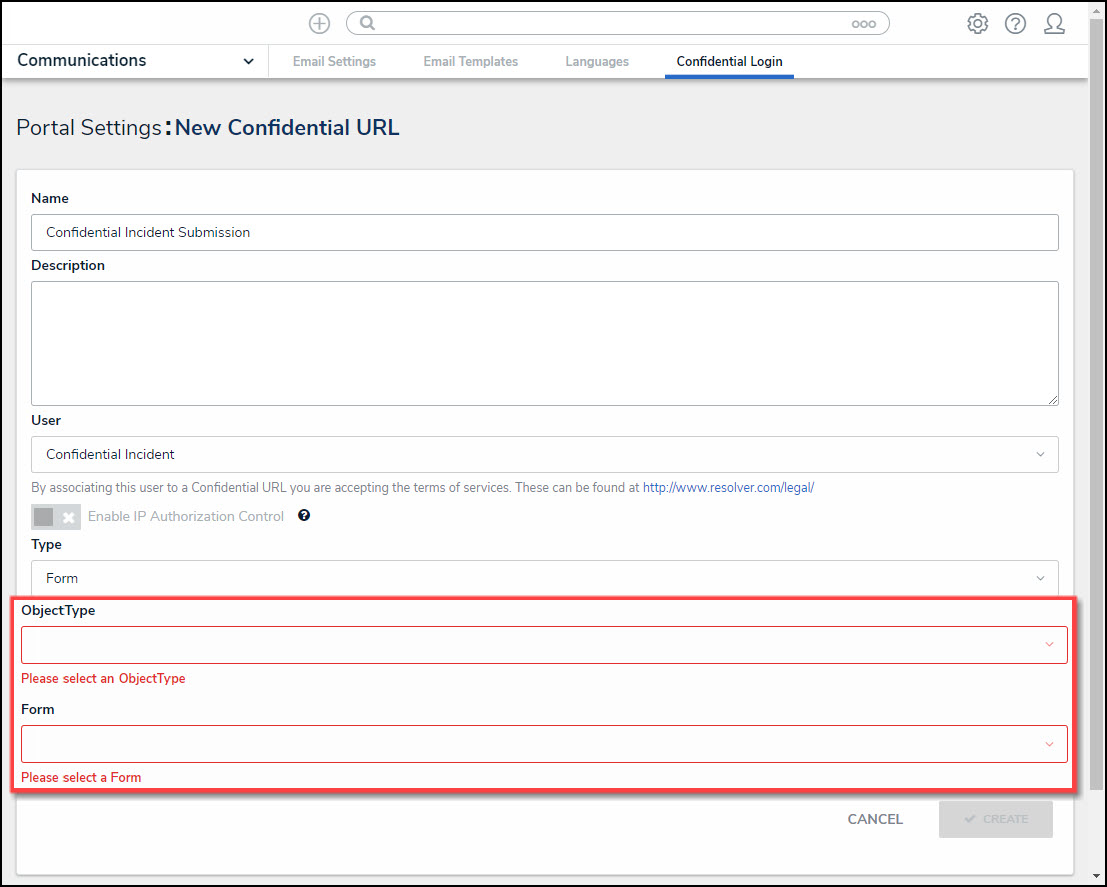
Form Additional Fields
- Activity: The Activity type displays the actions and views within an activity.
- Application: Select an Application (e.g., IT Risk Management) from the Application dropdown list. The Application dictates which Activities will be available to select on the Activity dropdown menu.
- Activity: Select a Activity from the Activity dropdown menu. An Activity is the part of an application where users can create, edit, and view data. The Activity selected will appear when access the Confidential Portal.
- (Optional) Pendo® Guide:
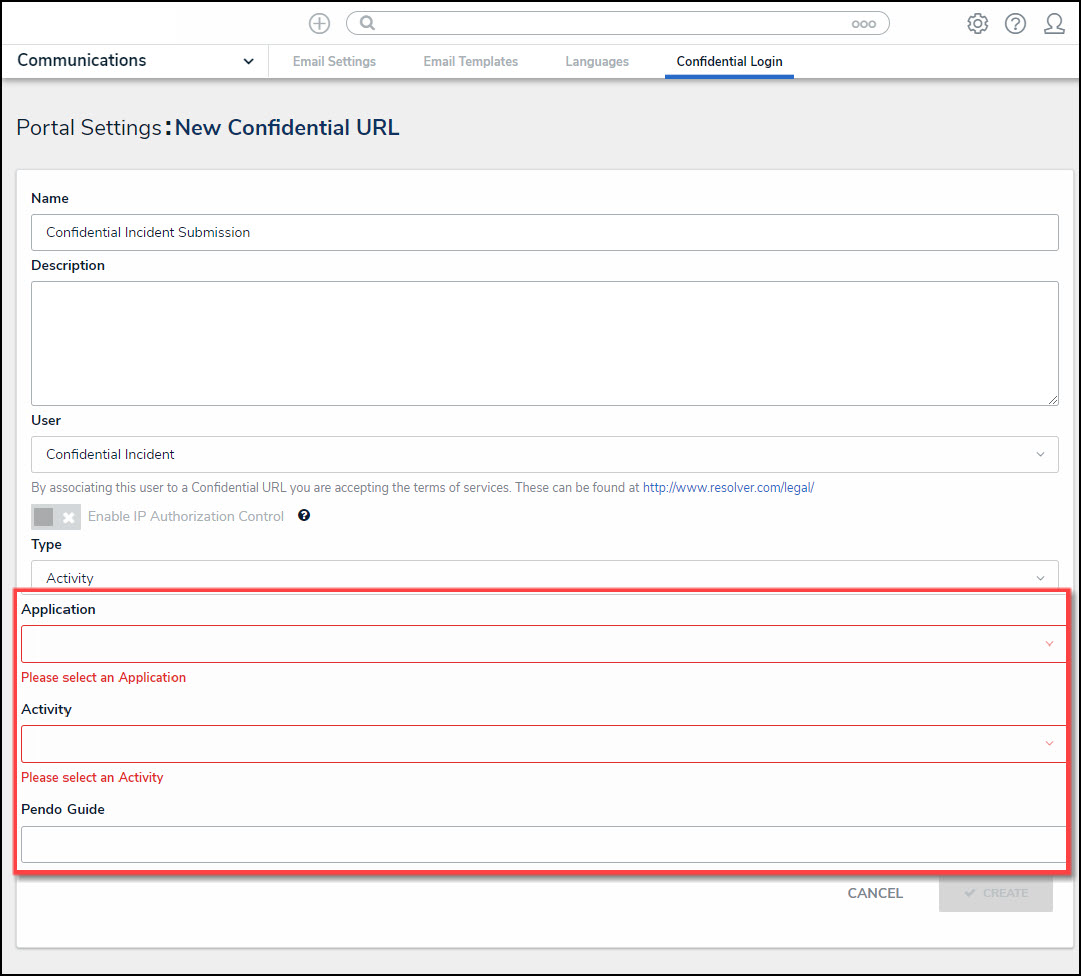
Activity Addition Fields
- Click the Create button to save your changes, the New Confidential URL screen will refresh and the system will generate the confidential Login URL. The Login URL field is a read-only field.
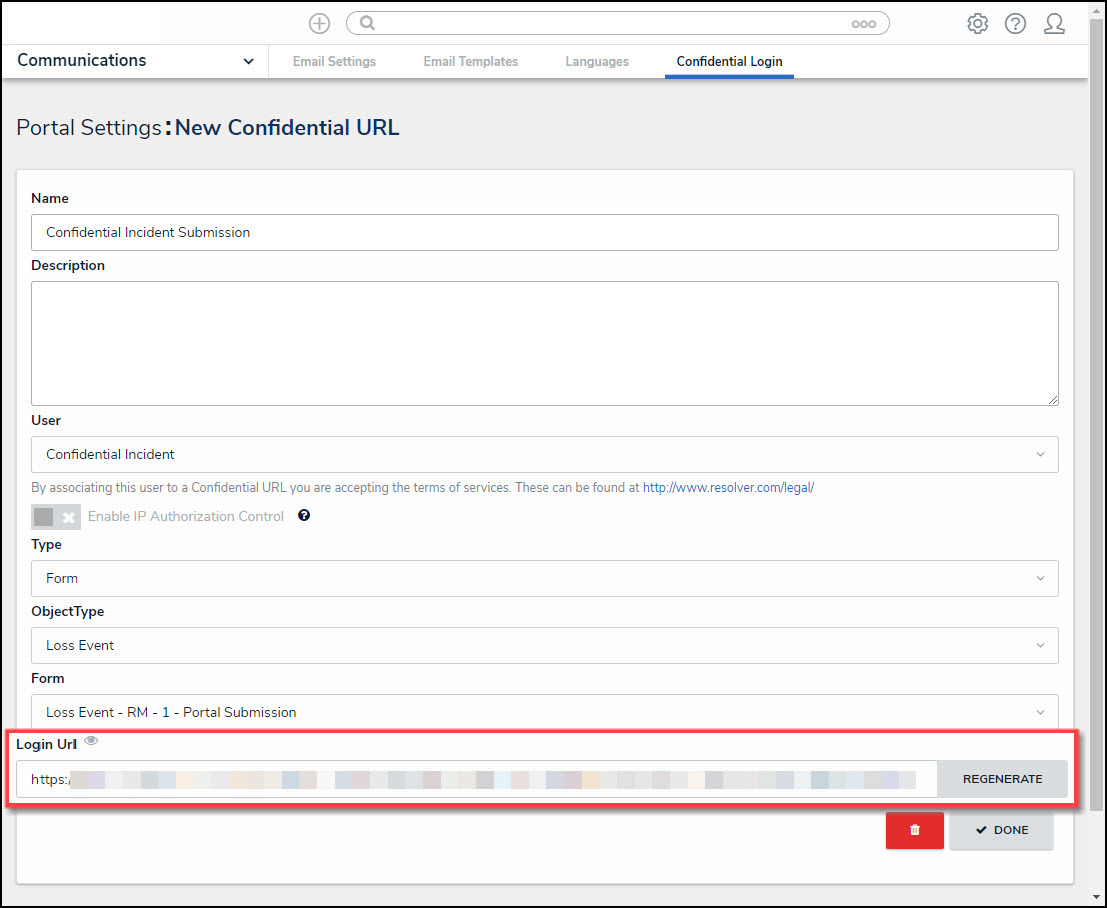
Login URL Field
- (Optional) Click the Regenerate button to create a new Login URL if you have edited any of the field on the New Confidential URL screen, or for security reasons.
- Using your cursor, highlight the Login URL and press the Right mouse button to select the Copy option from the Context Menu.
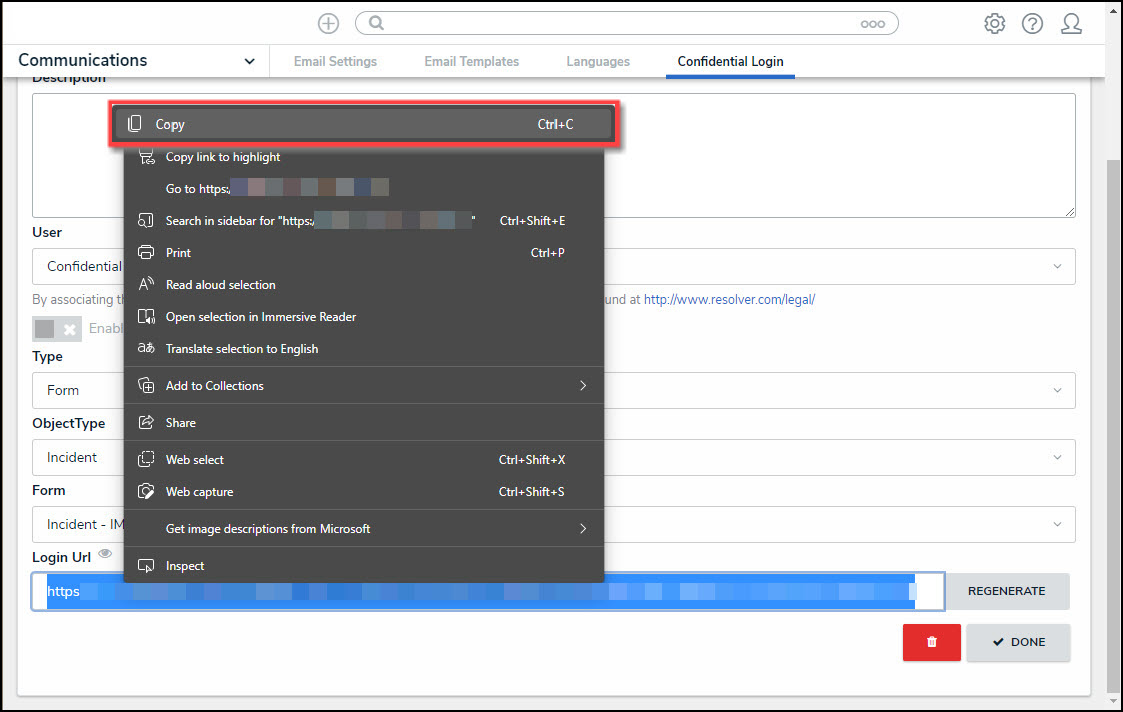
Context Menu
- Paste the Login URL in an email or document to send to a Submitter.
Overview
With the Impersonation Mode, Administrators can temporarily assume the account of another user to work with objects according to that user’s role and permissions. This feature is useful when Administrators need to test the user’s permission levels or to complete a task for users who may otherwise be unable to do so themselves. Administrators can impersonate other Administrators, but they are unable to perform administrative tasks while doing so.
A Form Conflict may occur when using Impersonation Mode. A system-generated blue header will appear indicating that there is a form conflict.

Forms Conflict Header
A Form Conflict occurs if a user belongs to two or more roles that have permission to view the same object, but each role should be accessing that object through a different standard form (including palette forms). To resolve this, administrators can use the impersonation feature to identify any conflicts, then assign number priorities to the forms to ensure the correct form is displayed. Form Conflicts can also be used to identify and fix standard form conflicts for users in multiple roles. Please see the Form Conflicts article for more information.
Any changes made while impersonating another user are captured in the User Audit Trail.
If IP authorization control is enabled on your Org, your IP address will be validated against the IP allow list when activating Impersonation Mode and when disabling it. If your IP address cannot be validated, you'll be logged out. See the IP Authorization Control section for more details.
User Account Requirements
The user account you use to log into Resolver must have Administrator or advanced permissions to access the User Management screen.
Related Information/Setup
For more information on the different user types in Resolver, please refer to the Create a New User article.
Navigation
- From the Home screen, click the Administration icon.
![]()
Administration Icon
- From the Administrator settings menu, click User Management.
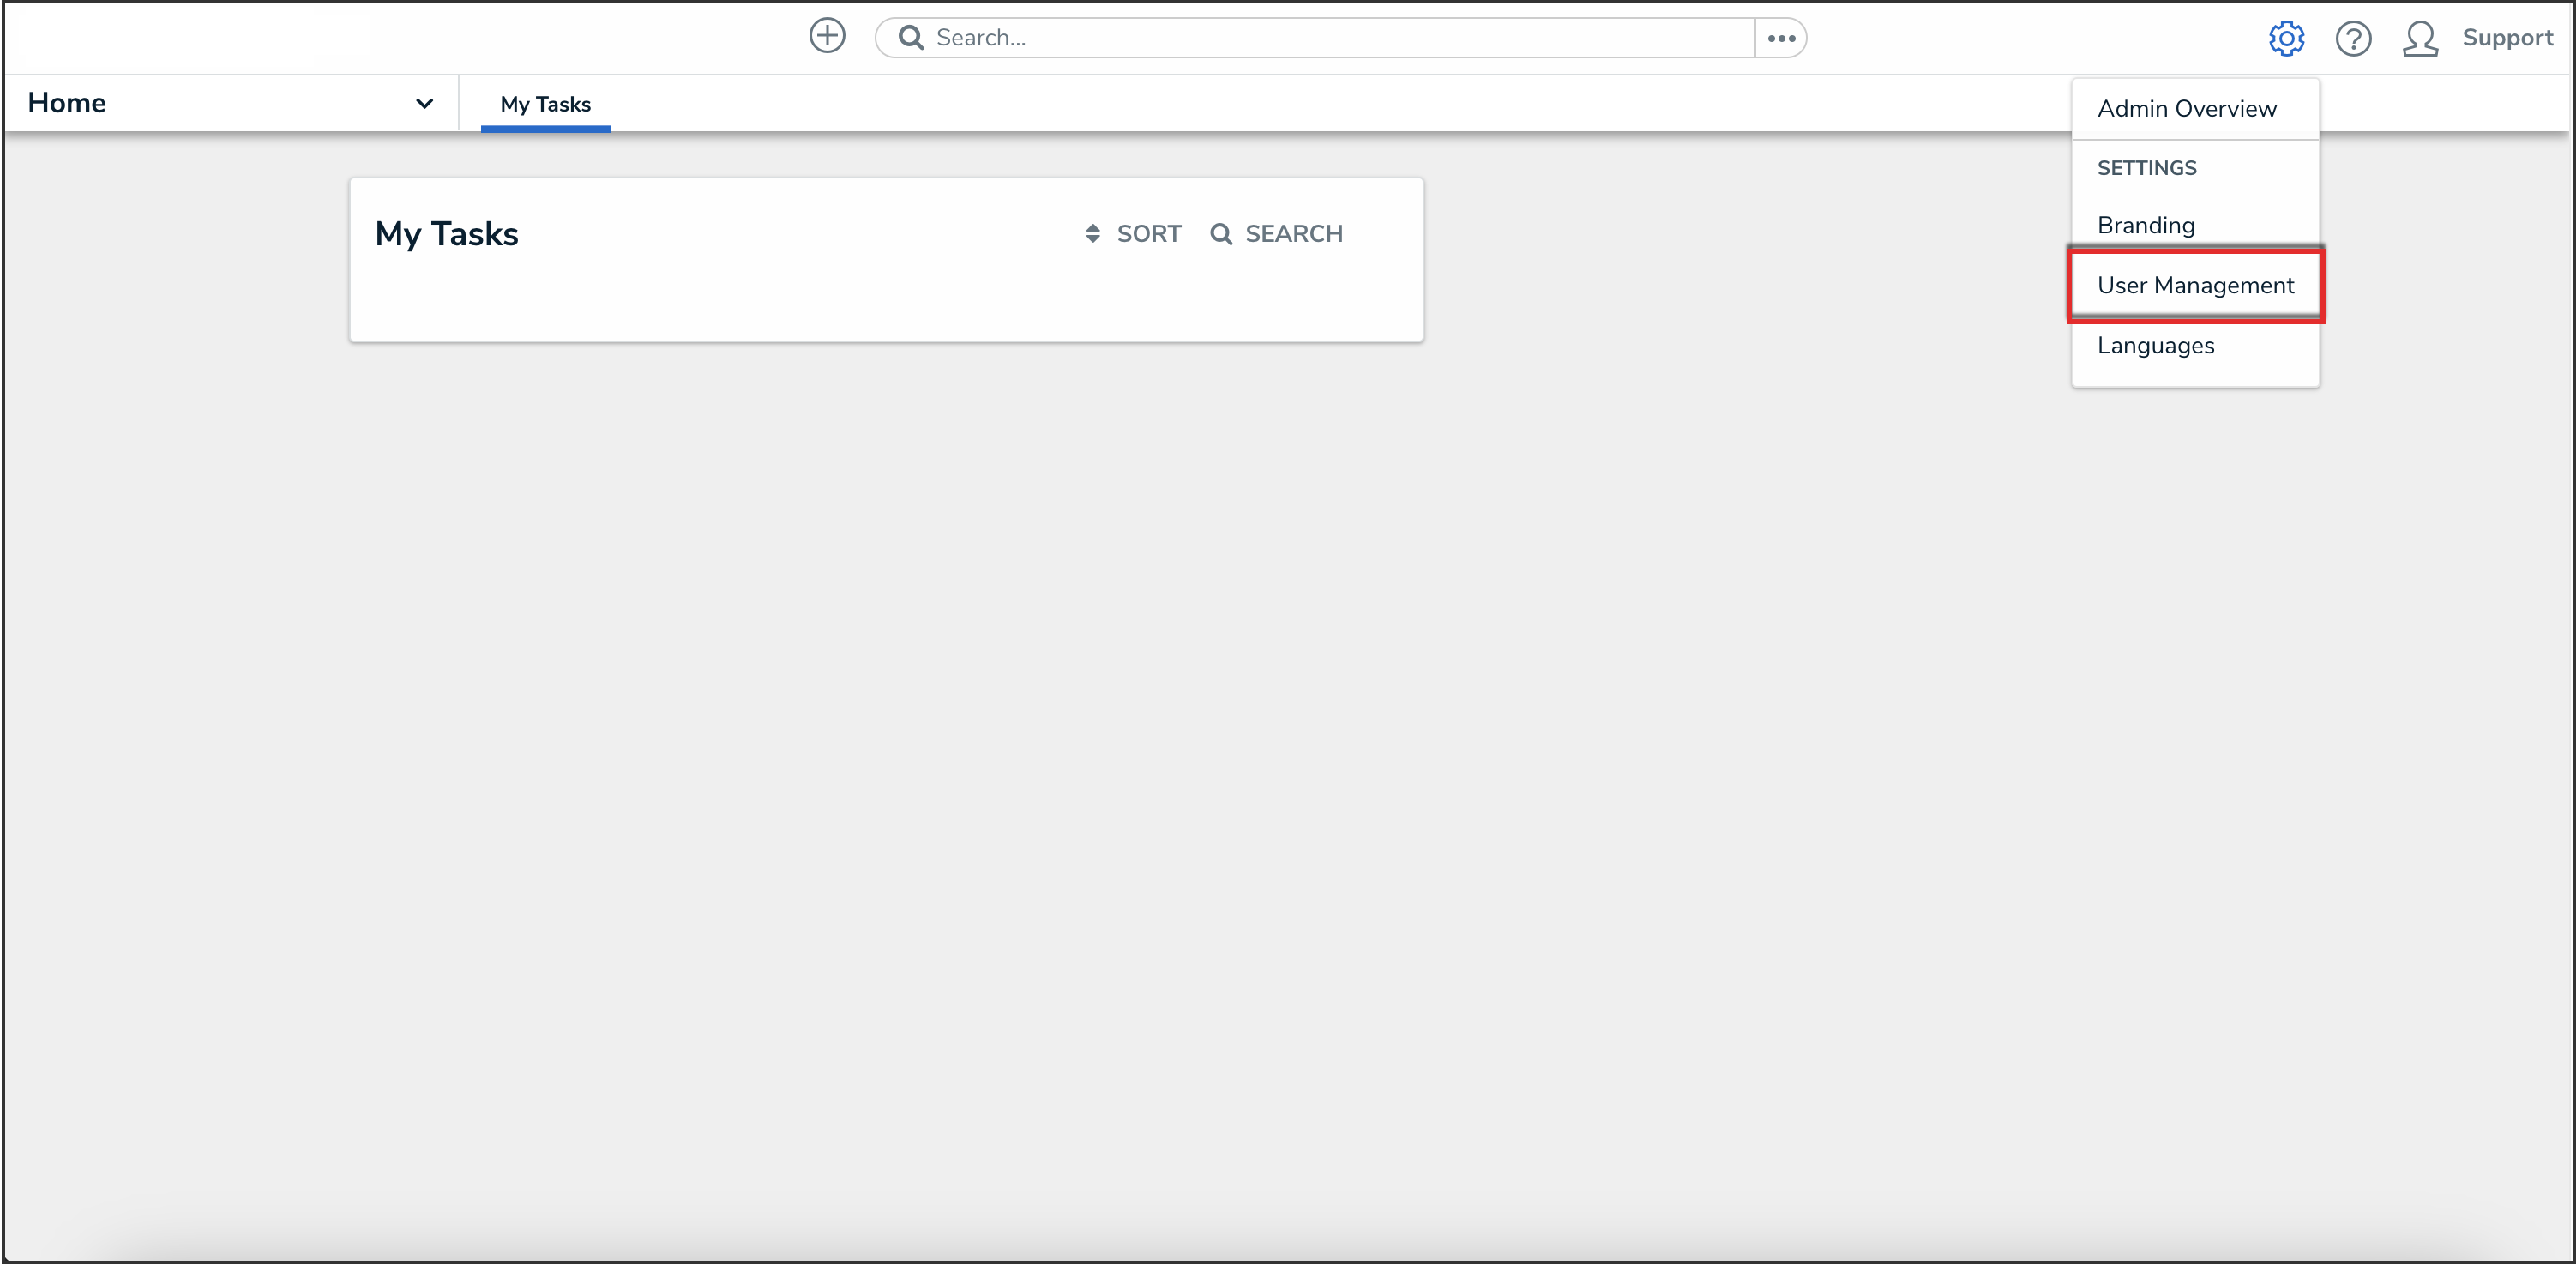
Administrator Settings Menu
Impersonating Another User
- From the User Management screen, enter a user's name in the Search field to narrow the search results.
- Click the Impersonate button next to the user you wish to impersonate.

Impersonate Button
- While in Impersonation Mode, the name of the user you're impersonating will appear in a yellow banner at the top of the page.

Impersonation Mode
- To deactivate Impersonation Mode, click Turn Off Impersonation Mode from the yellow banner at the top of the page.

Turn Off Impersonation Mode
Overview
From the Edit User screen, an Administrator or an User Management or Settings Management advanced permission user can edit a user's information, set the user account status and advanced permissions, and add the user to user groups and roles.
User Account Requirements
The user account you use to log into Resolver must have Administrator or the User Management or Settings Management advanced permissions to edit users.
Related Information/Setup
Please see the Languages Overview article for more information on using an alternate language setting.
Please see the Access Your Data Warehouse Settings article for Orgs that have Data Warehouse enabled.
Please see the Assigning Advanced Permissions to a User article for adding advanced permissions to a user.
Please see the Managing Portal URL Membership article for more information on managing Portal URL membership for Portal URL Access users.
Please see the Resetting Multi-Factor Authentication and Opt-Out Multi-Factor Authentication for a Specific User articles for more information on opting out of and resetting MFA for an individual user.
Navigation
- From the Home screen, click the Administration icon.
![]()
Administration Icon
- From the Administrator Settings menu, click User Management.
![]()
Administrator Settings Menu
- Enter a user's name in the Search field to narrow the search results.
- Click the name of the user you want to edit.

User Name
Editing a User
 Note:
Note:
The Edit User screen may look different if SSO or MFA is enabled on your Org.
- From the Edit User screen, an Administrator can edit the following fields under the User Profile section:
- First Name: Click the First Name field to change to the user's first name.
- Last Name: Click the Last Name field to change to the user's last name.
- Email Address: Click the Email Address field to change to the user's email address.
- The following are different situation that can occur when change a user's email address:
- If the Administrator who changes the email address is a member of all the same Orgs as the user. The email address change will take effect immediately.
- If the Administrator who changes the email address is not a member of all the same Orgs as the user. The user is moved to a Pending state and must click a Verification link for the changes to take effect. The Administrator can also Resend Email Confirmation or Cancel Changes.
- If the user is logged in to the system. The user will see a system notification at the top of their screen, indicating Email Updated.
- If the user is not logged in to the system. The user will be redirected the next time they log in. The user must log in on the redirected screen using their original email address. On successful login, the user will see an Email Updated confirmation message.
- The following are different situation that can occur when change a user's email address:
- Once you make an edit to one of these fields, click the Change User Information button to save the changes.
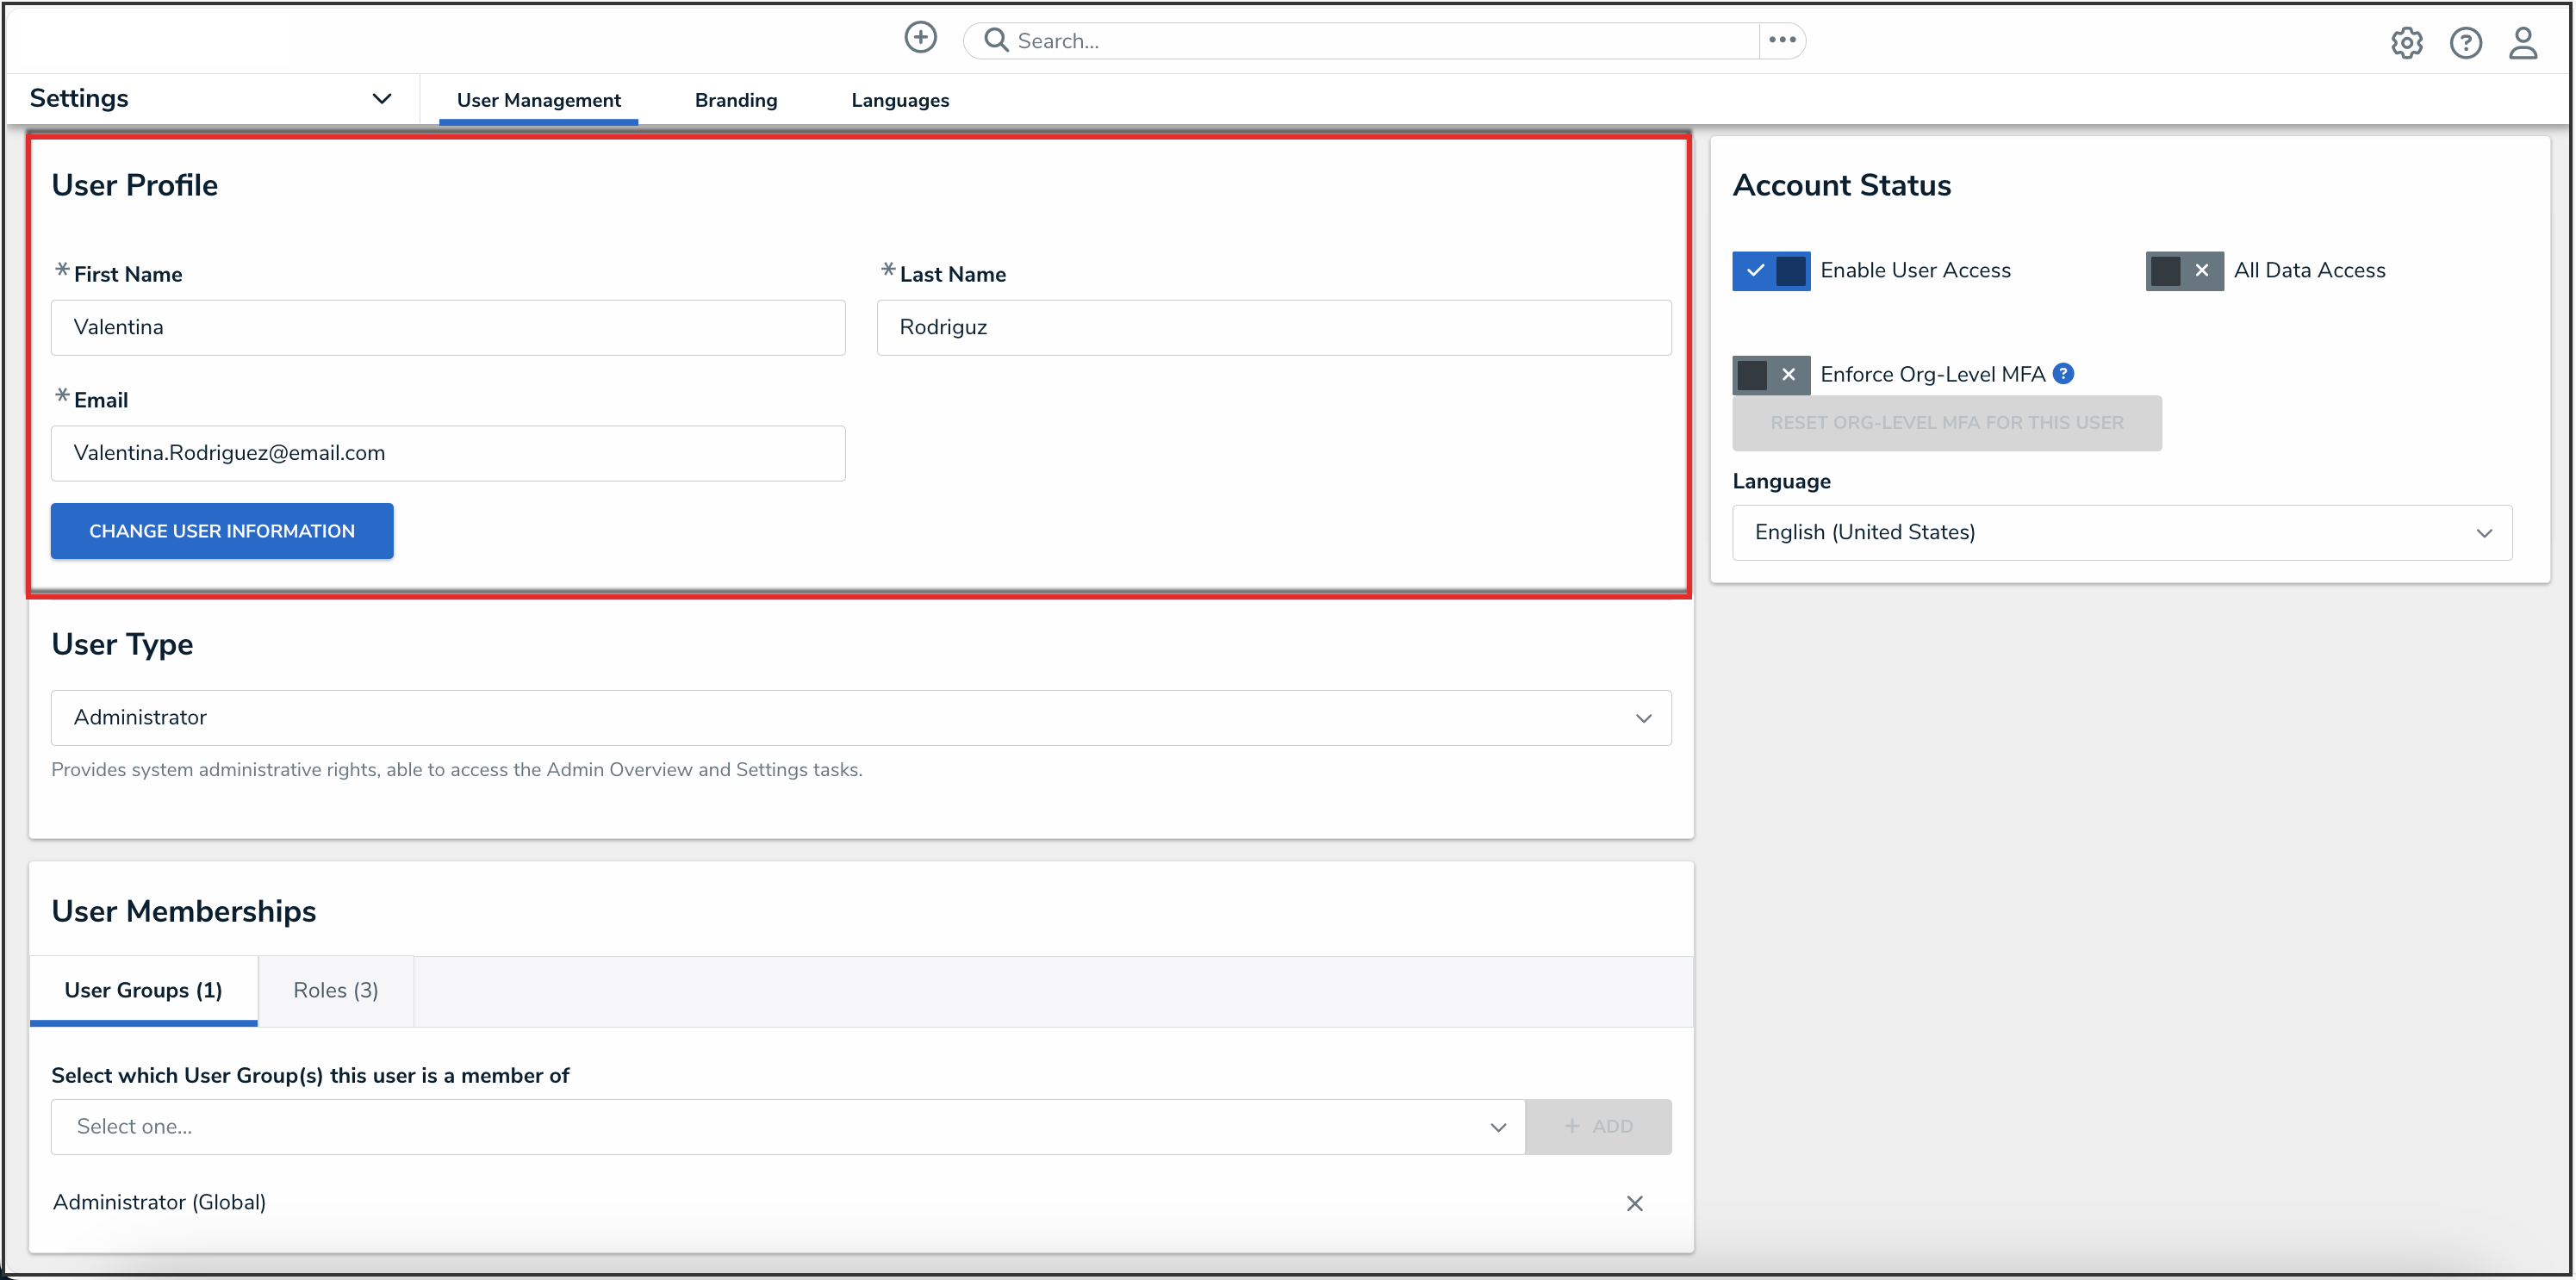
User Profile Section
- From the User Type drop-down menu, an Administrator can update the user type to one of these options:
- Standard User: The default user type, standard users are granted access to parts of Resolver based on their memberships and permissions.
- Administrator: This user type provides system administrative rights, and the ability to access the Admin Overview page and the Administrator Settings menu.
- Portal URL User: This user type enables users to be assigned to Portal URLs, and the ability to authenticate access to assigned Portals.
 Note:
Note:
The options displayed in the Account Status section and User Memberships cards will change based on the user type selected.
- An Administrator can edit the following toggle switches and fields under the Account Status section:
- Enable User Access: Select the Enable User Access toggle switch to enable (blue) or disable (grey) a user profile.
- All Data Access: Select the All Data Access toggle switch to enable (blue) or disable (grey) all access, granting the user access to all object types and objects within an organization.
 Warning:
Resolver recommends not enabling the All Access toggle switch for new user accounts. - For Orgs that have multi-factor authentication (MFA) enforced:
- An Enforce Org Level MFA toggle switch will be visible which allows Administrators to opt that user out of MFA for that Org. Please see the Opt-Out Multi-Factor Authentication for a Specific User article for more information.
- The Reset Org-Level MFA For This User button allows an Administrator to reset multi-factor authentication (MFA) for the end user. Please see the Resetting Multi-Factor Authentication article for more information.
- Language: Select a Language preference from the dropdown menu to change the system's language setting. Before you can set an alternate language setting, an Administrator needs to download a language CSV file from the system, map language translations to the user interface text, and upload the CSV file for use within Resolver.
 Note:
Note:
The default language setting in the user's browser will take precedence over Resolver for language translations.

Account Status Section
- In the User Memberships card, users will have a different view depending on which user type was selected in Step 2. Each tab in this section includes a count of how many of the designated memberships the user has.
- For all user types, the User Groups tab shows the user groups the user is enrolled in. To add a user to a user group, select the user group from the Select which User Groups(s) this user is a member of drop-down and click the Add button.
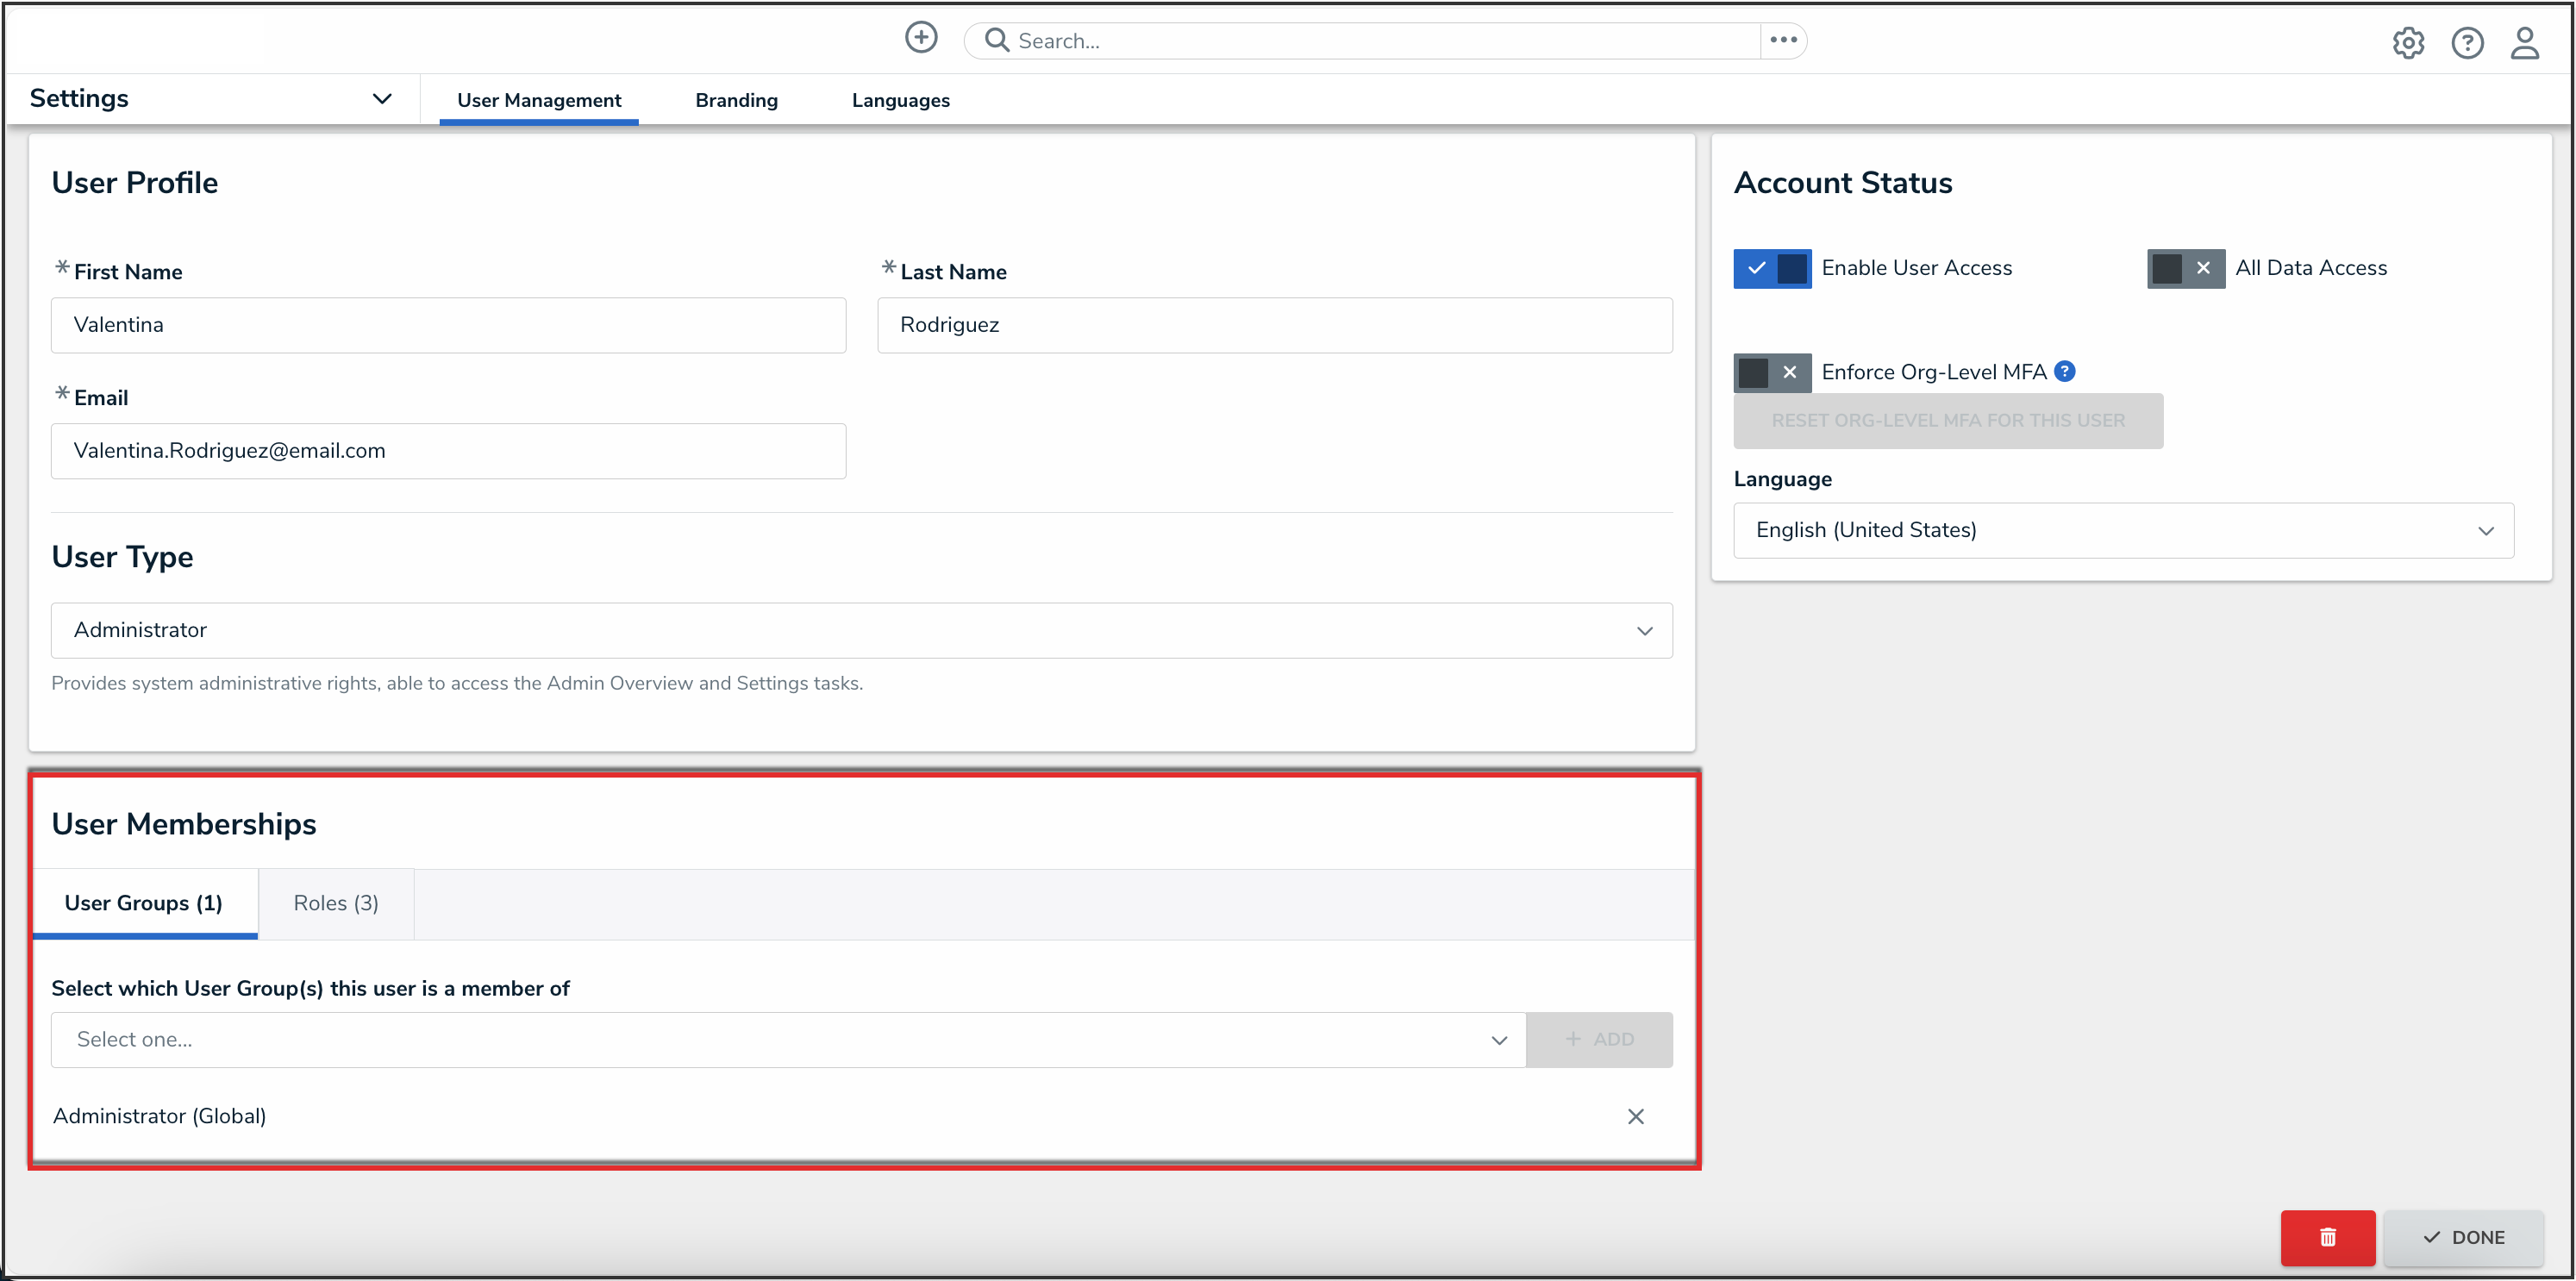
User Groups Tab
 Best Practice:
We recommend adding users to a user group via the User Memberships section to more accurately manage permissions for all the users in the same group.- Click a User Group to open the Admin: Edit User Group screen to view further details, remove, and add a user to the user group.
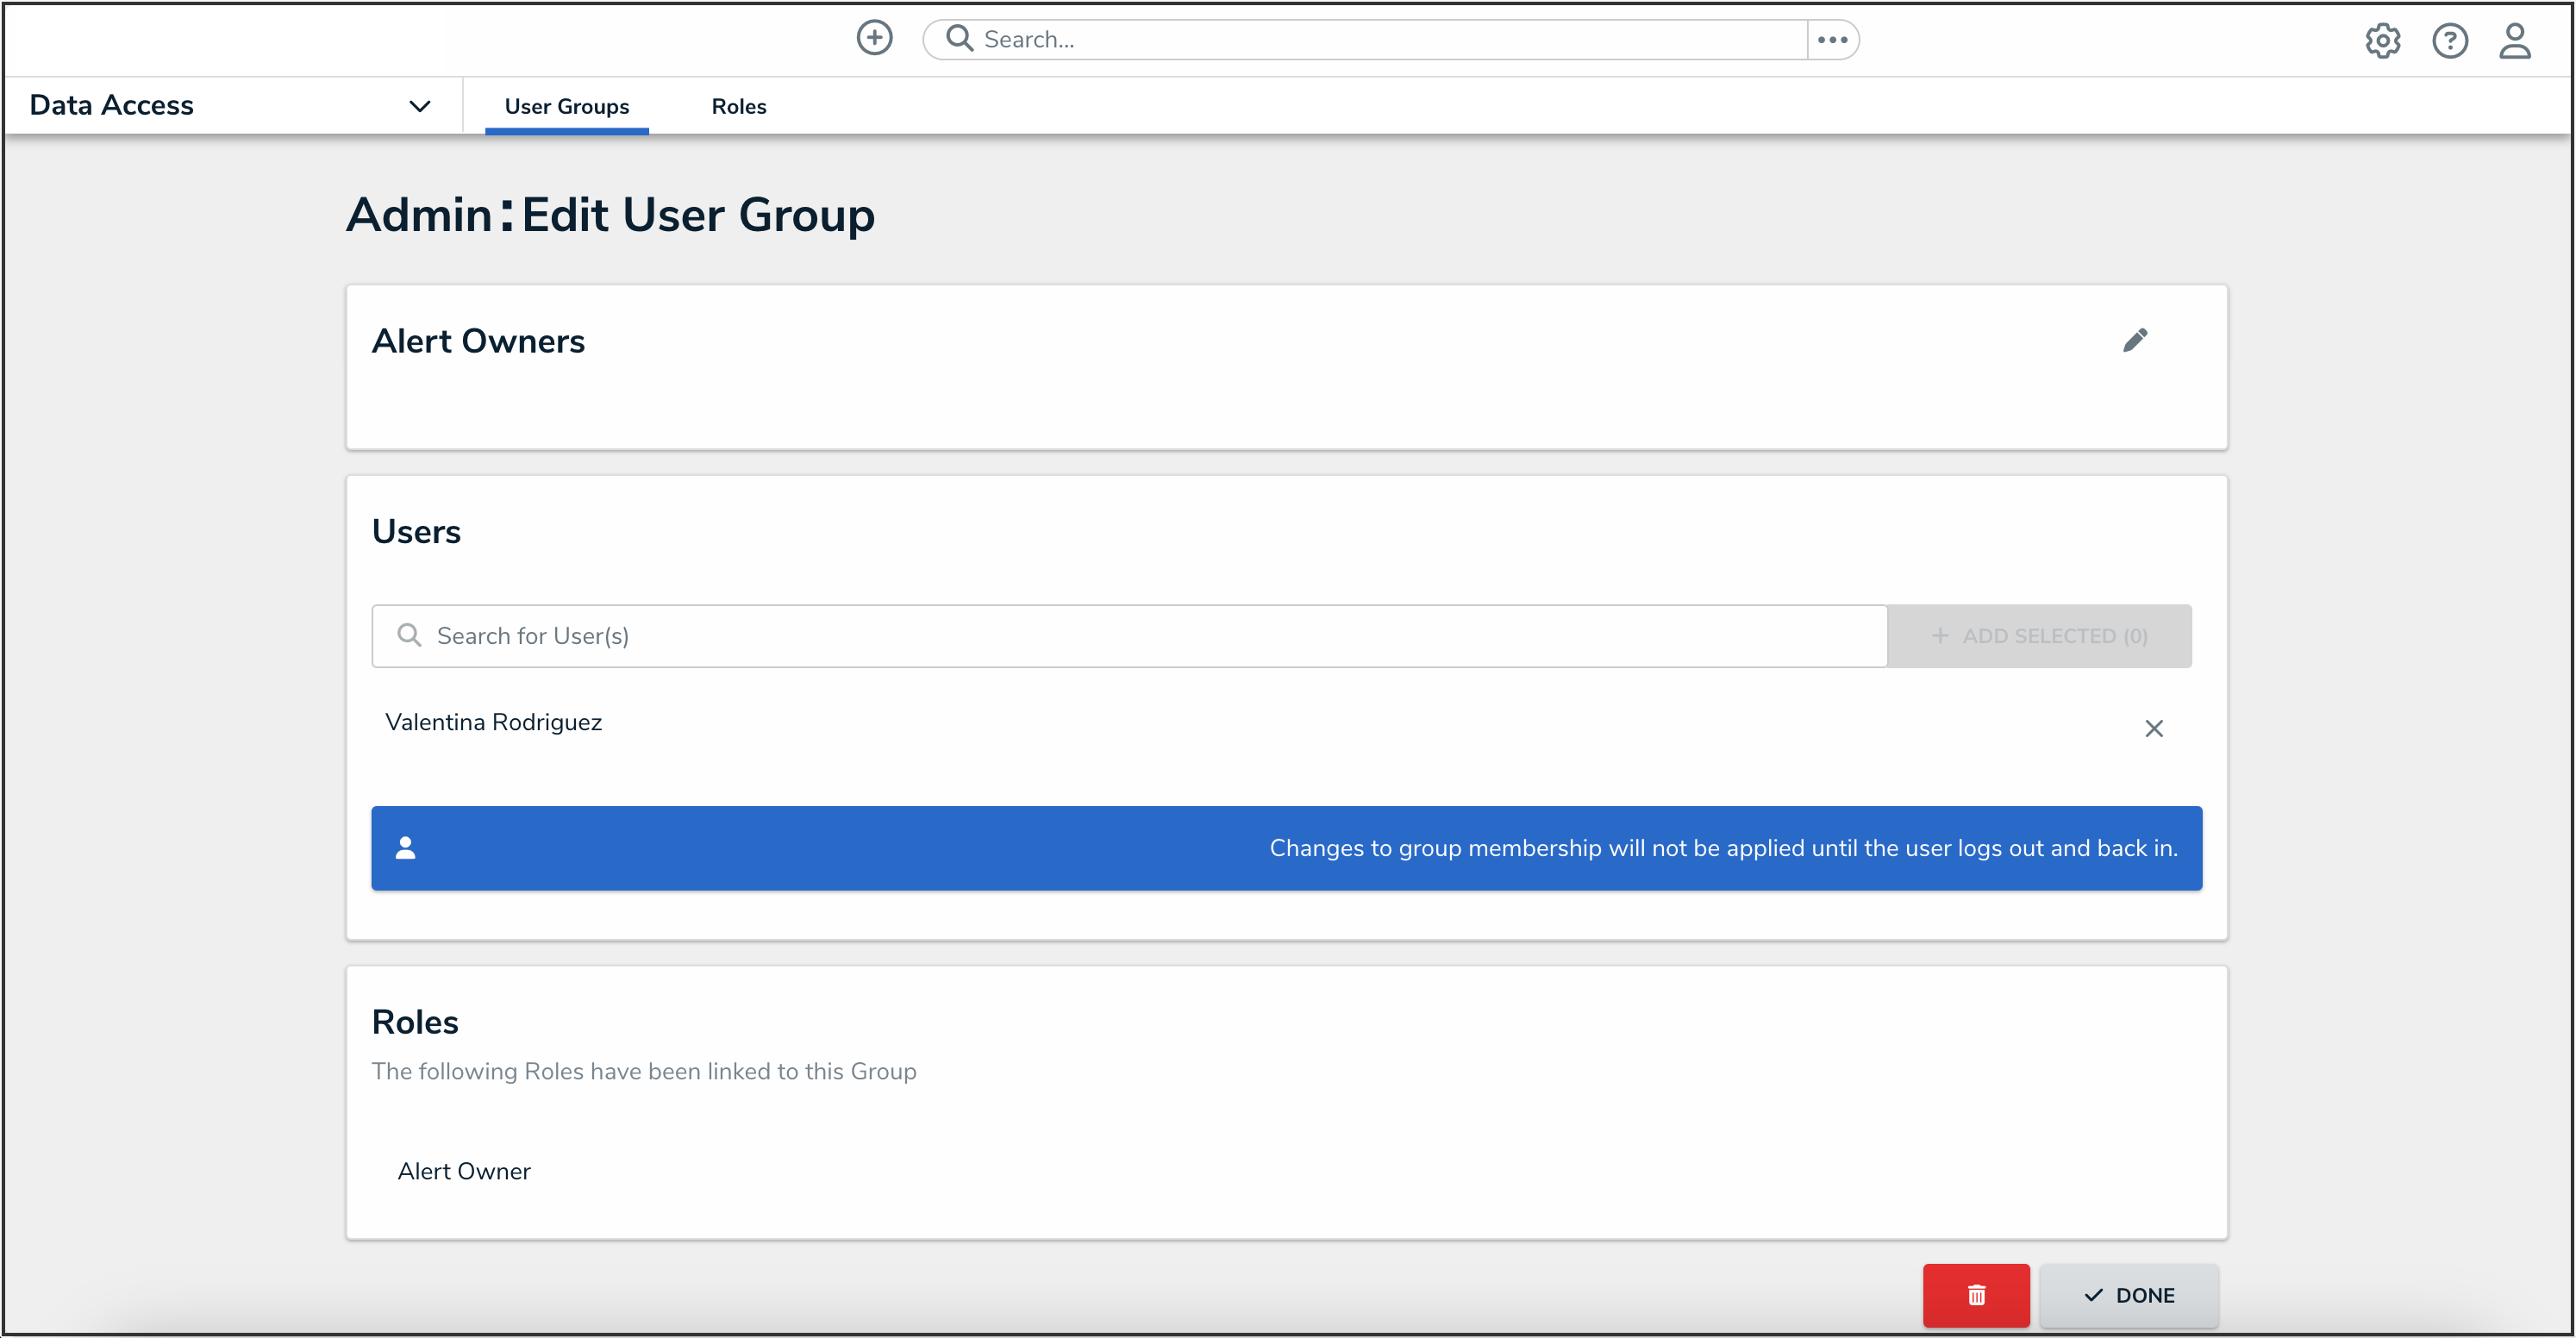
Edit User Groups Screen
- Click a User Group to open the Admin: Edit User Group screen to view further details, remove, and add a user to the user group.
- For all user types, the Roles tab shows the roles the user is enrolled in. To add a user to an individual role, select the role from the Select which Role(s) this user is a member of drop-down and click the Add button.

Roles Tab
- Click a Role to open the Admin: Edit Role screen to view further details, remove, and add a user to a role.
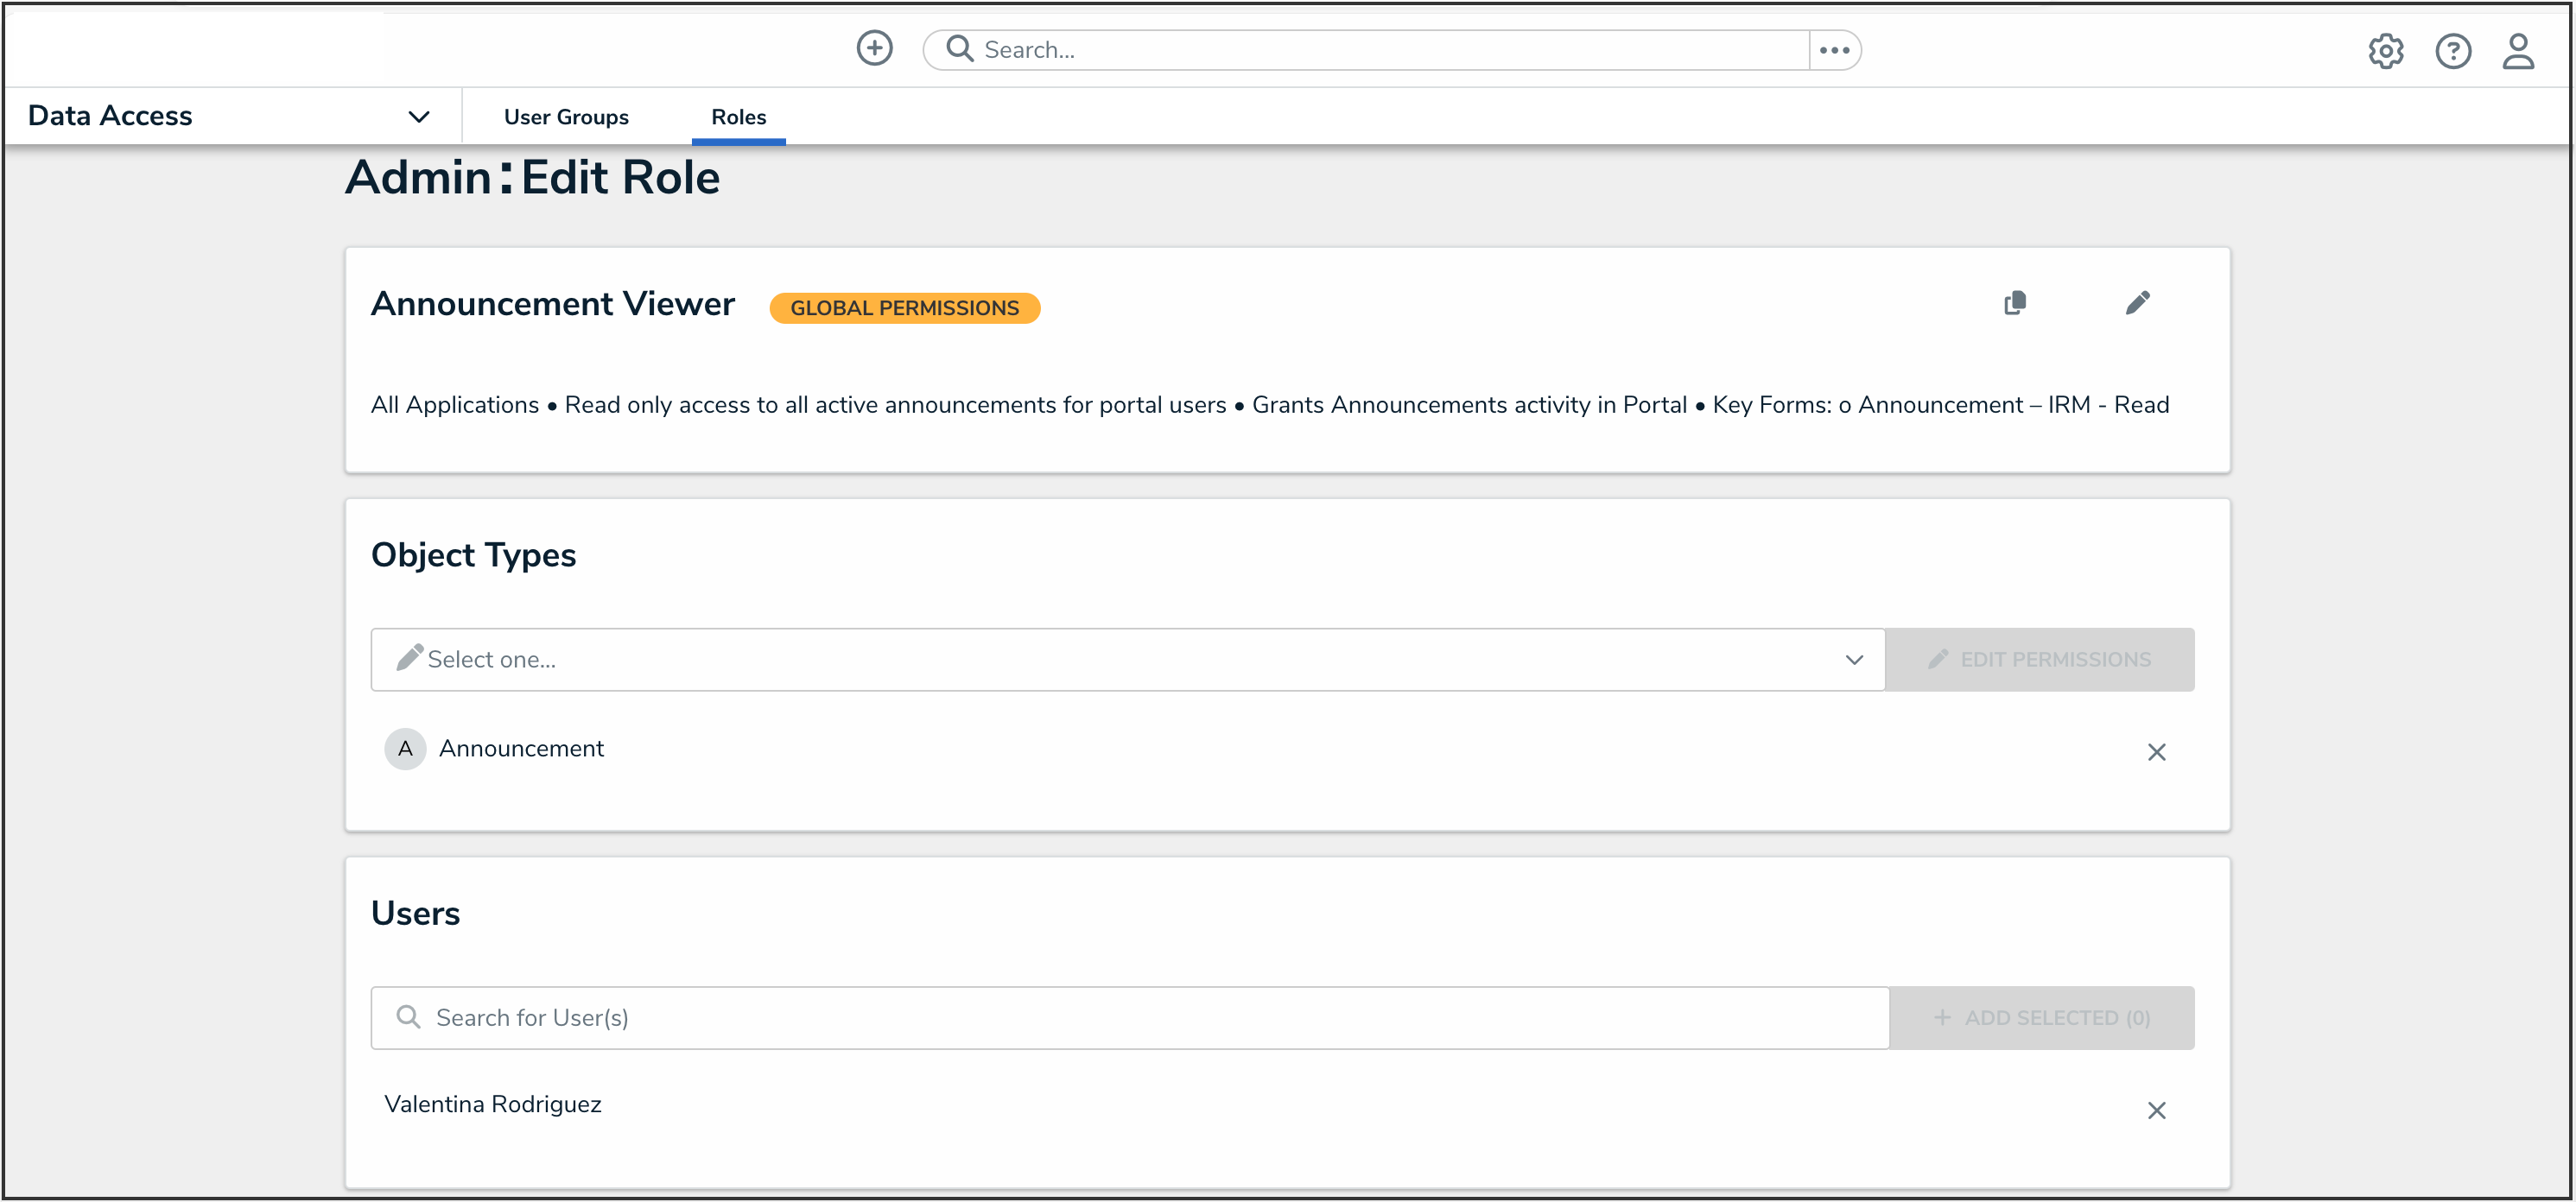
Edit Role Screen
- Click a Role to open the Admin: Edit Role screen to view further details, remove, and add a user to a role.
- For Portal URL Access users: The Portal URLs tab shows which Portal URL a Portal URL Access user is assigned to. Please see the Managing Portal URL Membership article for more information.
- For Standard users: Administrators can grant the following advanced permissions to standard users:
- Data Management: Manage reports and dashboards
- Settings Management: Manage all tasks under the Administrator Settings menu
- User Management: Create, manage, and assign user accounts, group memberships, and roles within the system
- For all user types, the User Groups tab shows the user groups the user is enrolled in. To add a user to a user group, select the user group from the Select which User Groups(s) this user is a member of drop-down and click the Add button.
- Click the Done button to save your changes.
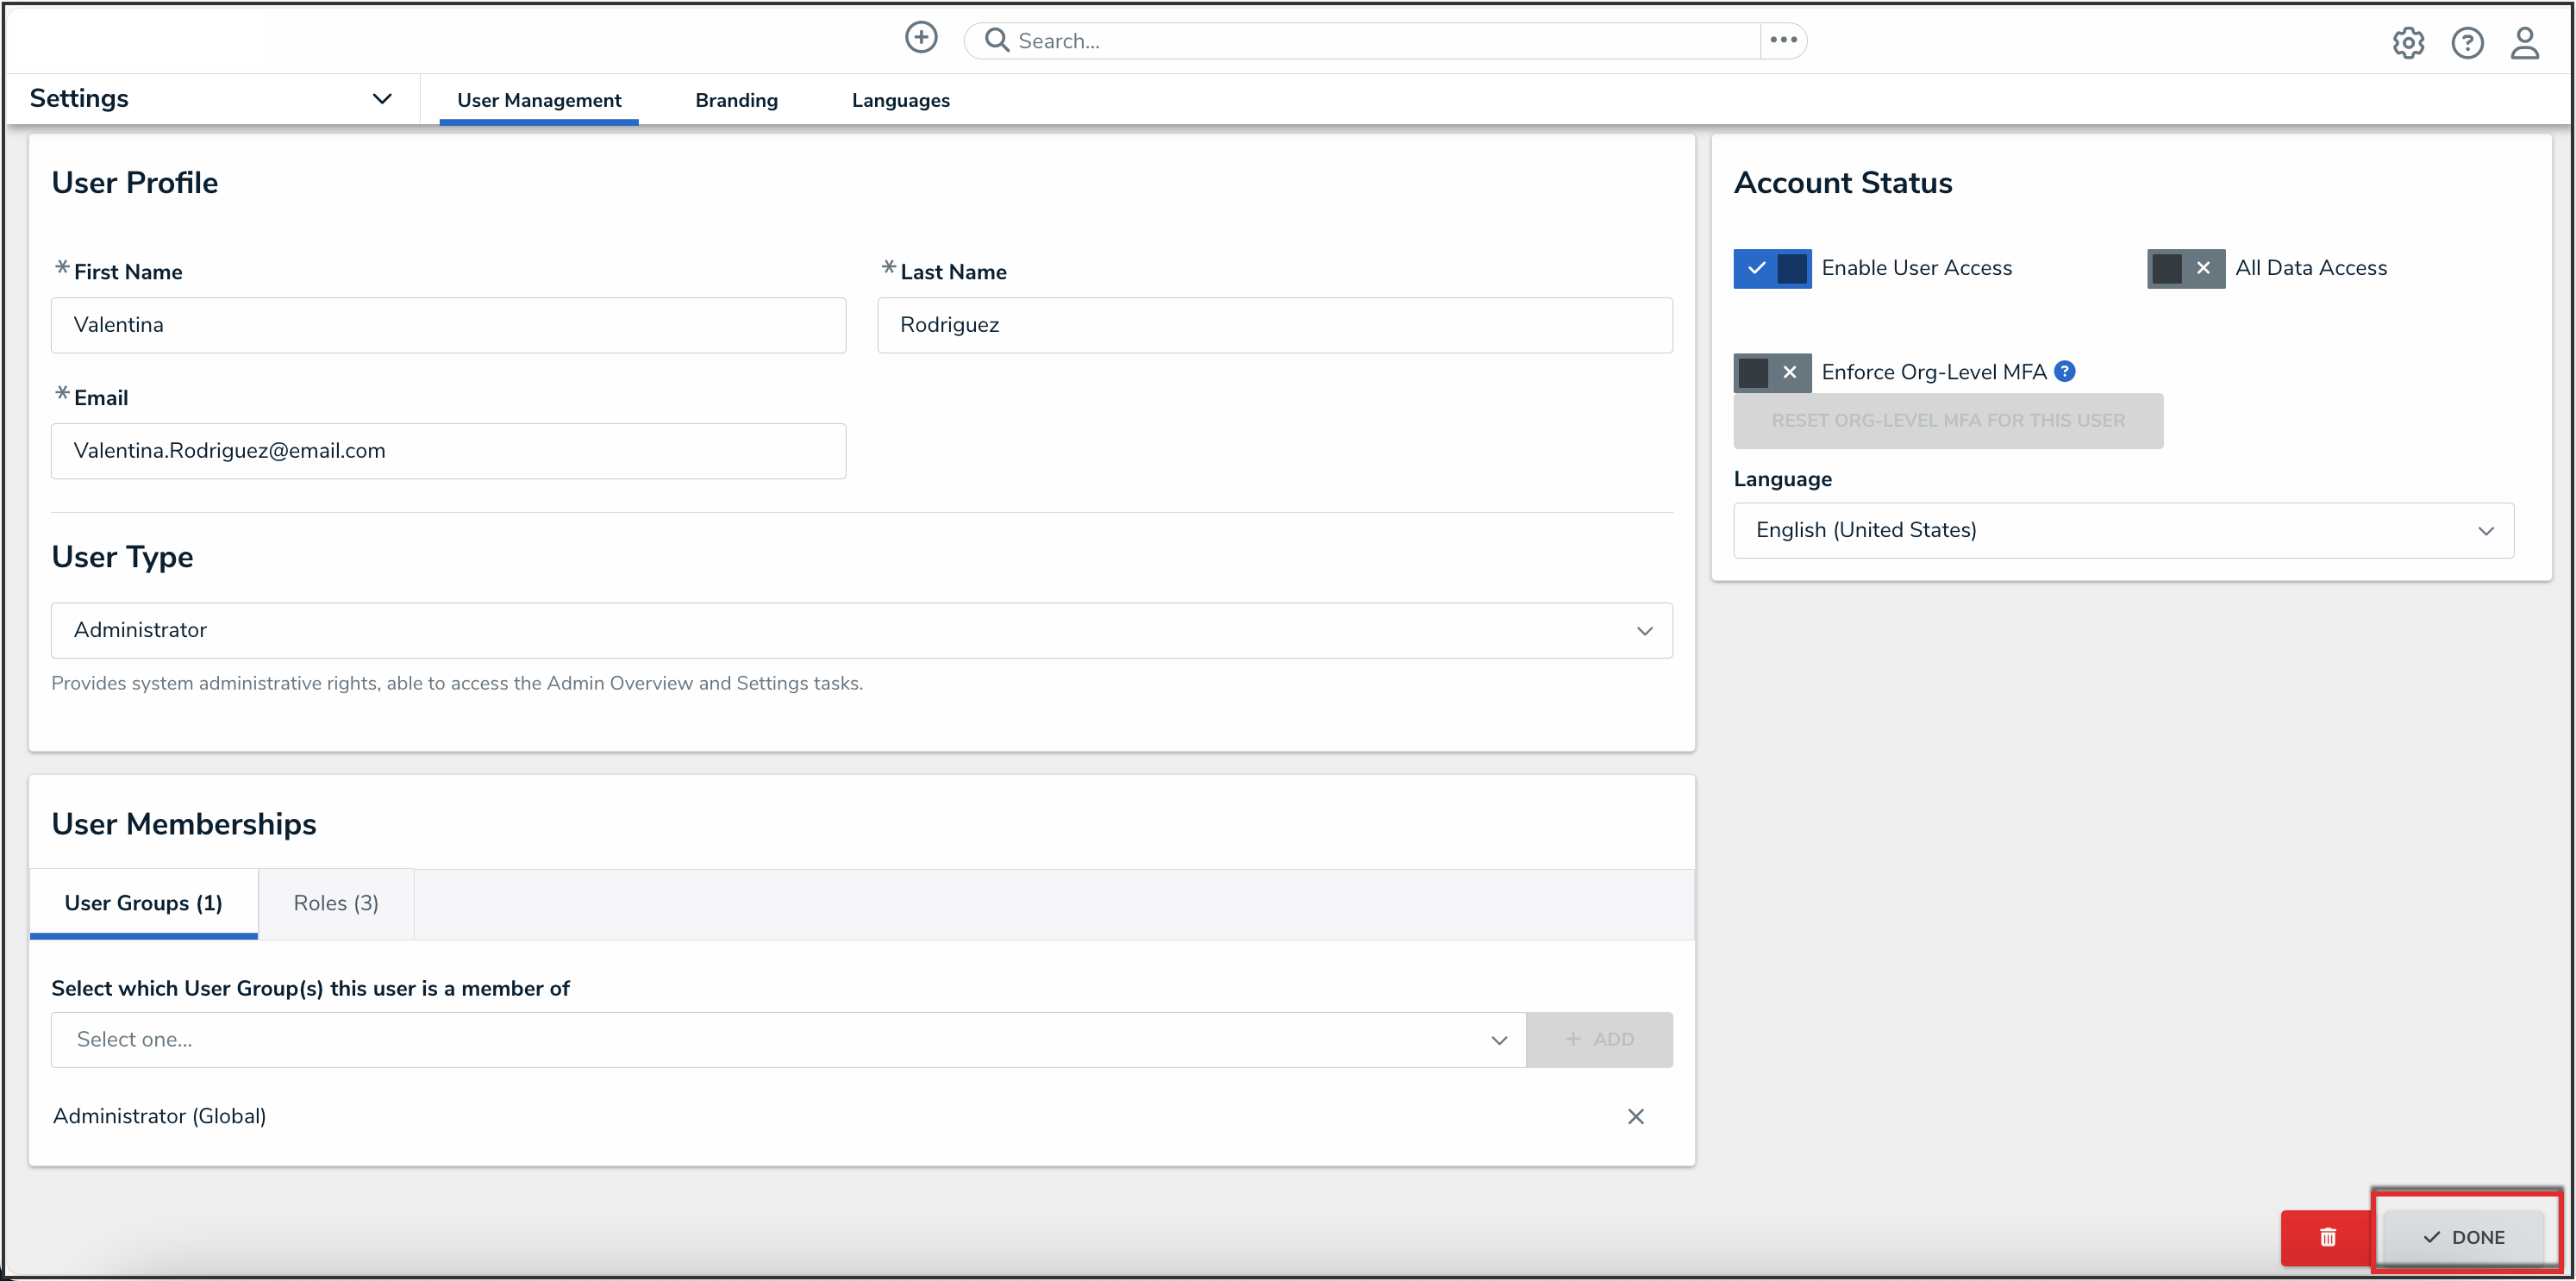
Done Button
Overview
An Administrator can make changes to a user group or delete a user group. A user group organizes users into specific groups based on their organizational role (e.g., Employee, Management, etc.). Adding users to a user group allows an Administrator to assign multiple users within a user group to a role by assigning the user group to a role instead of manually assigning a role to each user.
If your organization uses LDAP, adding or removing users on a user group will need to be done from LDAP. If changes are made in Resolver, any changes will revert during the next LDAP sync.
User Account Requirements
The user account you use to log into Resolver must have Administrator permission to access the Admin Overview screen.
Related Information/Setup
Please read the User Group Overview article for more information regarding user groups.
Please read the Configure & Run the LDAP Sync Tool article for more information regarding LPAD.
Navigation
- From the Home screen, click the Administration icon.
![]()
Administration Icon
- From the Administrator settings menu, click Admin Overview.

Administrator Settings Menu
- From the Admin Overview screen, click the User Groups tile under the People section.

User Groups Tile
- From the User Groups screen, enter a user group name or keyword in the Search field.

User Groups Screen
- Click the name of the user group that you want to edit or delete.
Editing a User Group
- From the Edit User Groups screen, click the Edit icon to edit the user group's Name and Description fields.

Edit Icon
- From the Users section, you can add users to the user group. Please read the Add a User to a User Group article for more information.
- To remove a user from the user group, click the Remove icon beside the user's name.
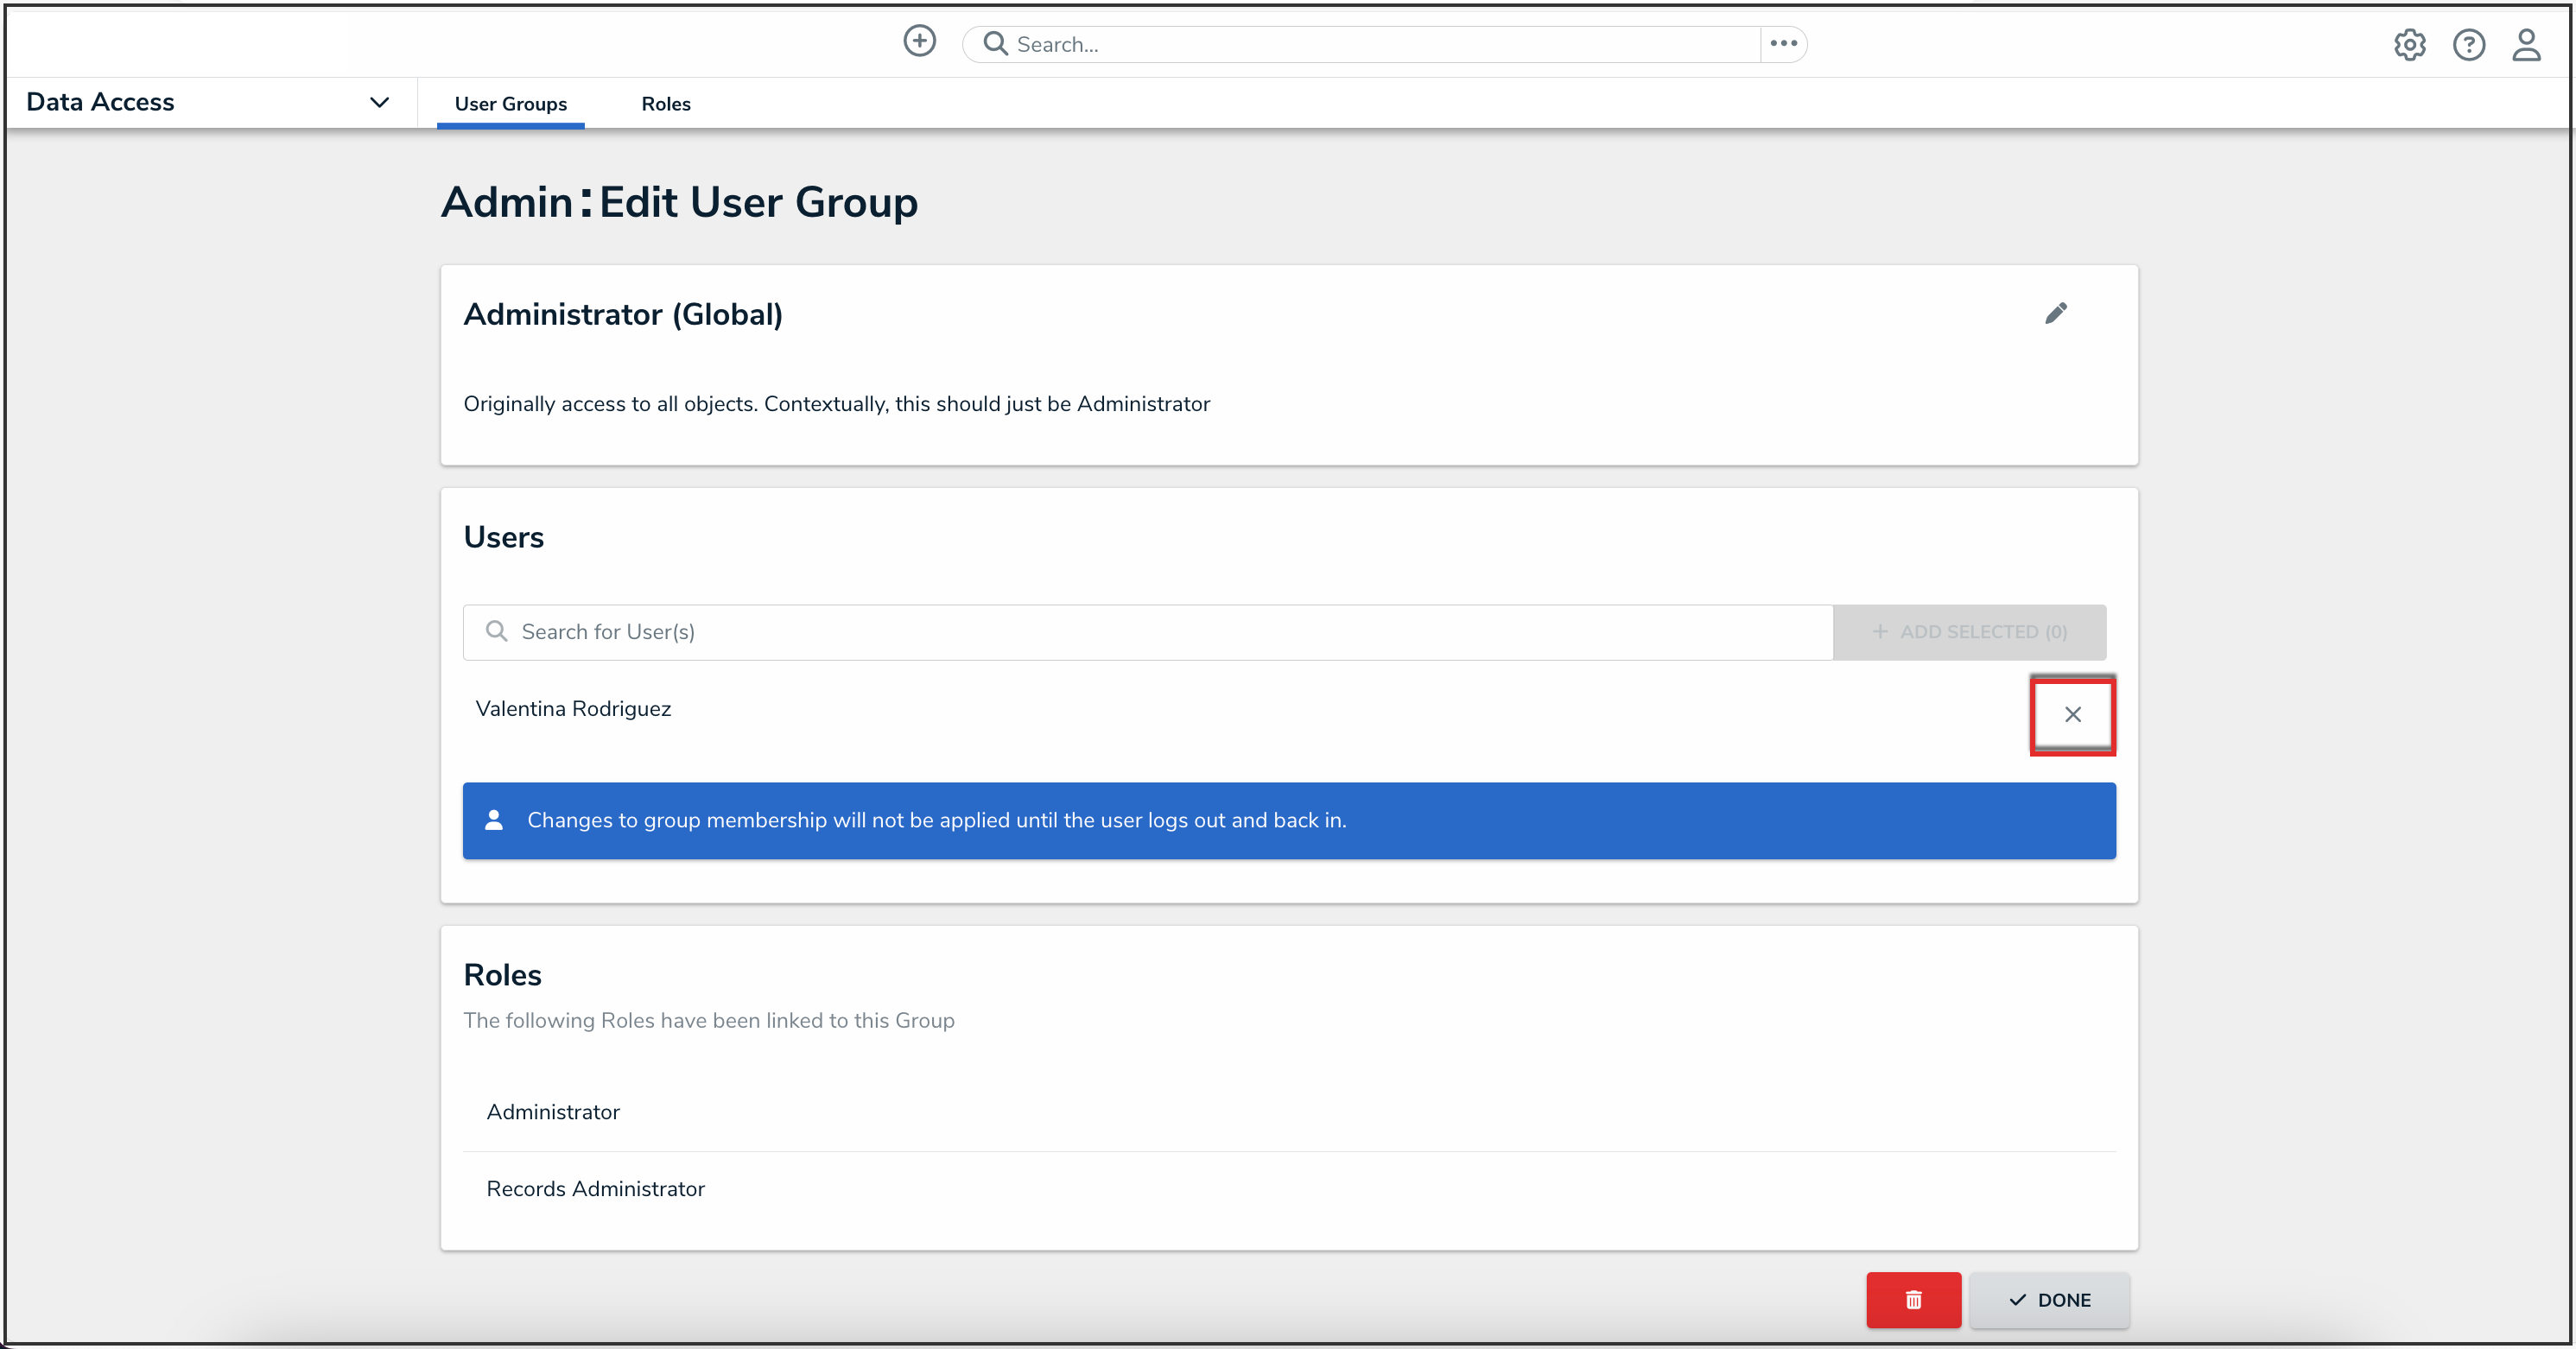
Remove Icon
- Click the Remove button from the Remove user? pop-up.

Remove Button
- Click the Done button to save your changes.
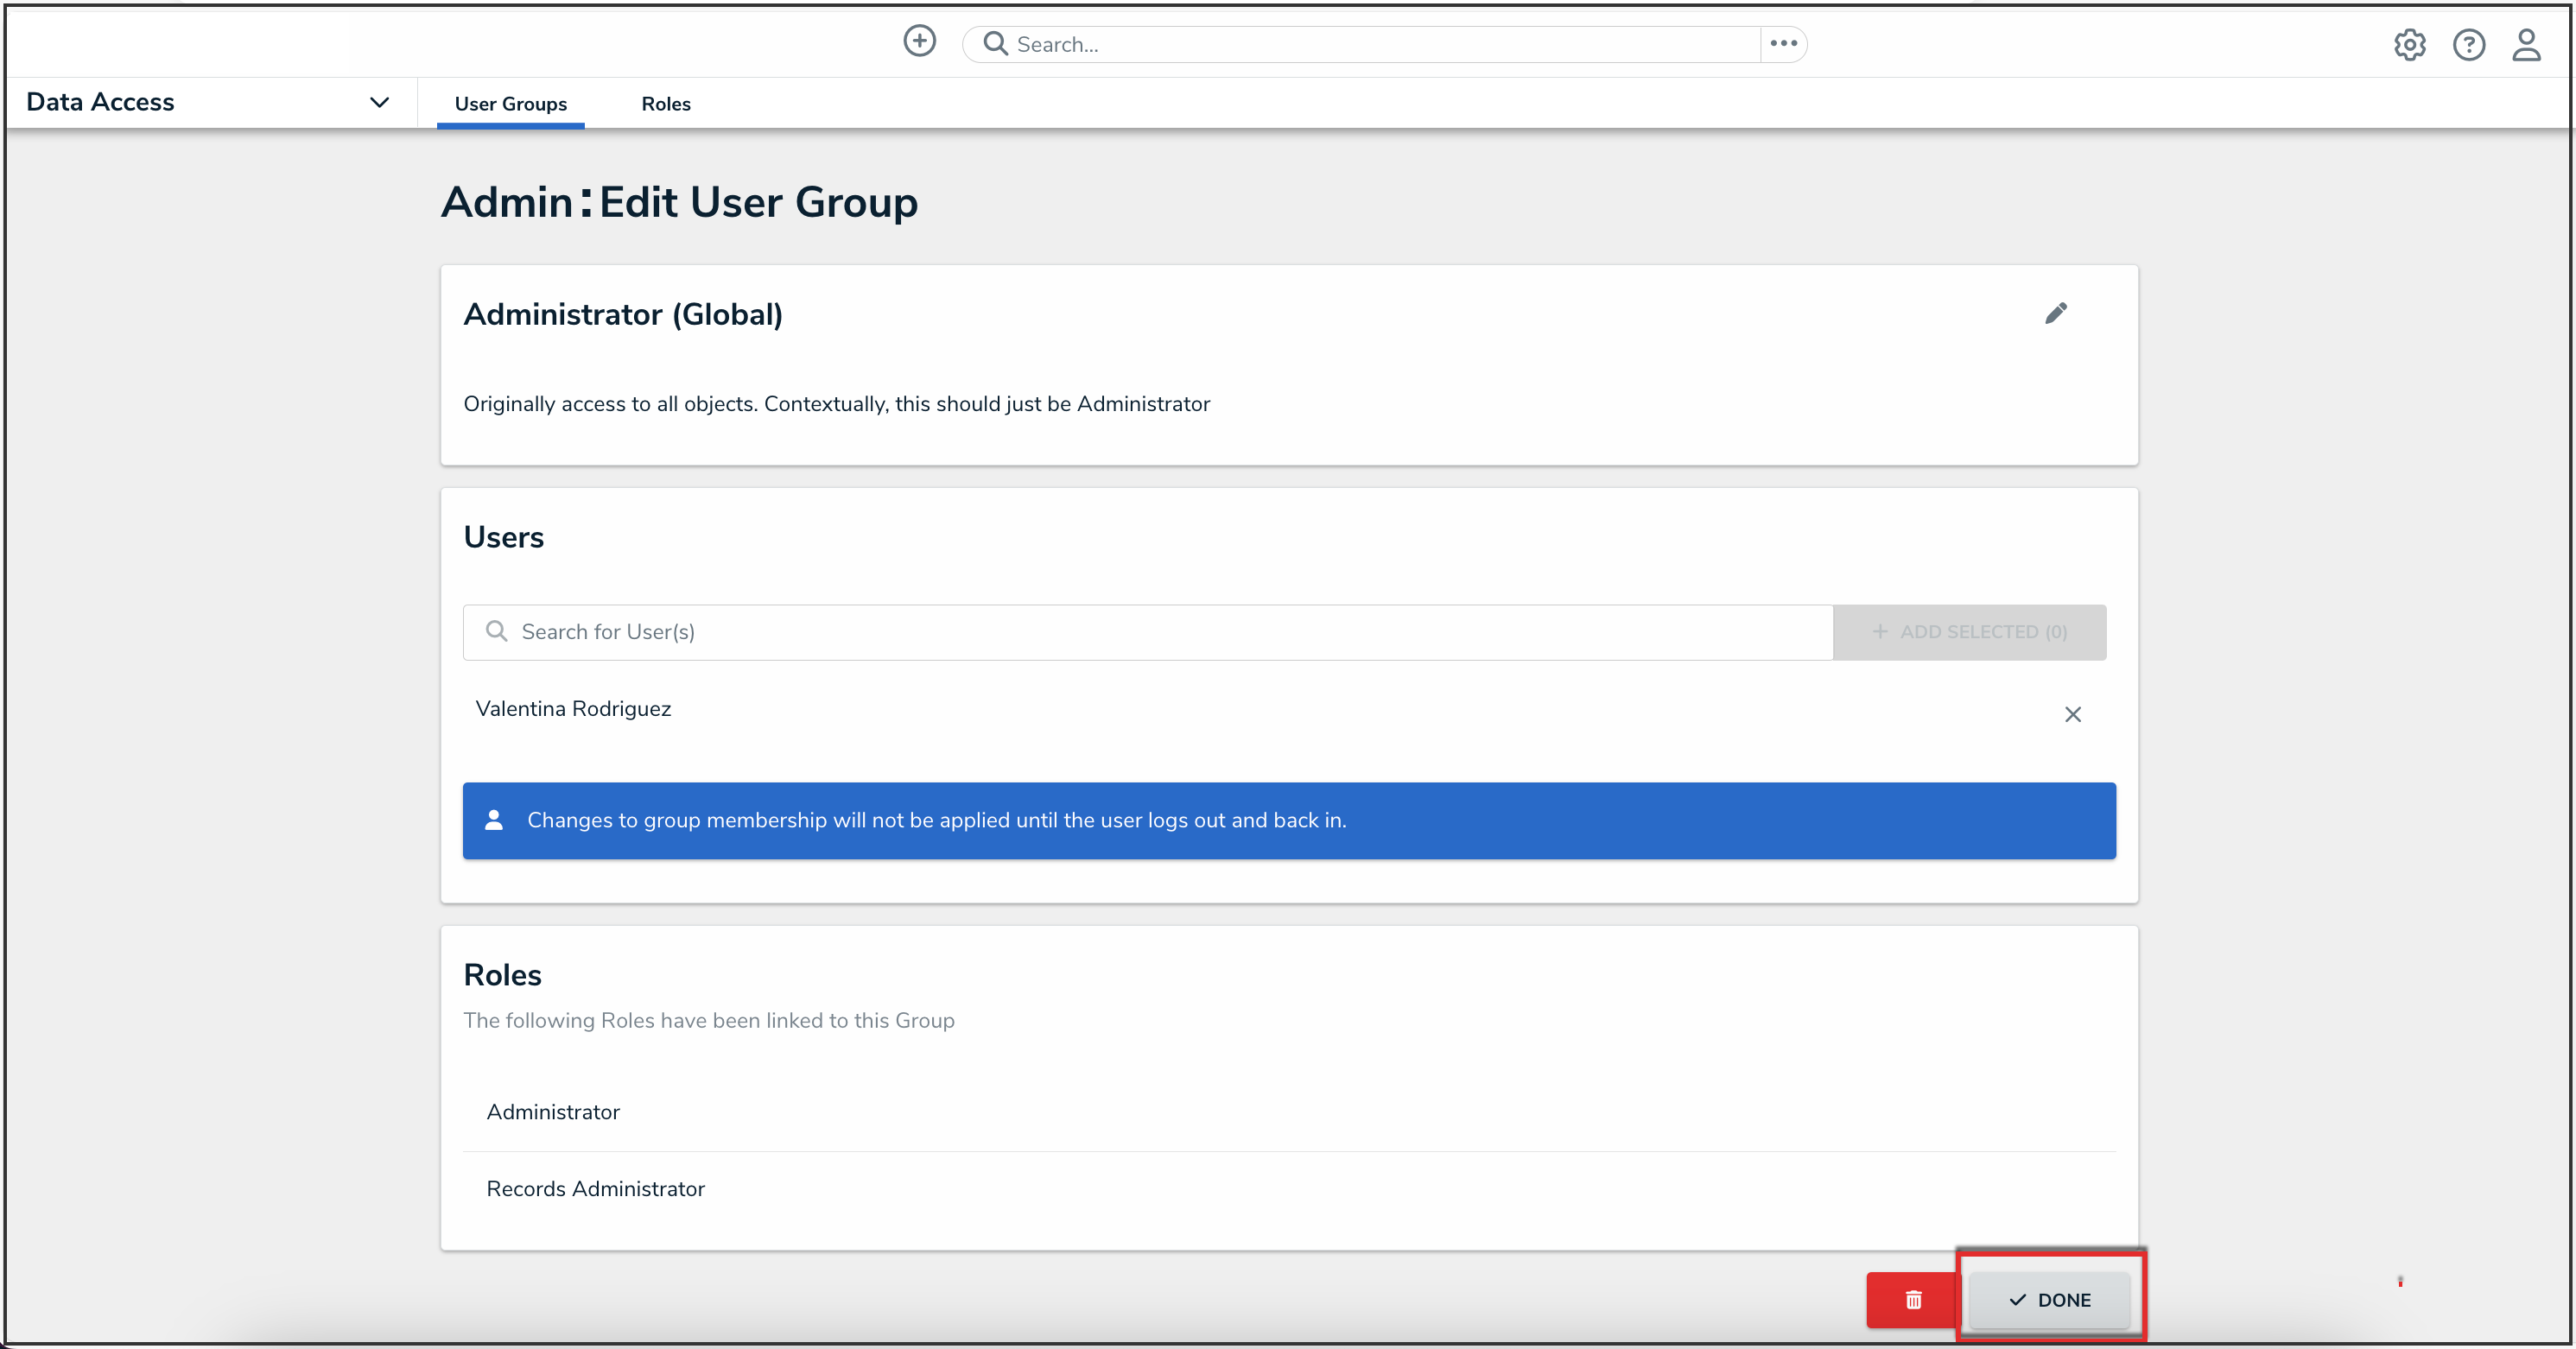
Done Button
Deleting a User Group
- From the Edit User Group screen, scroll to the bottom of the screen and select the Delete icon.

Delete Icon
- Click the Delete button from the Delete user group? pop-up.
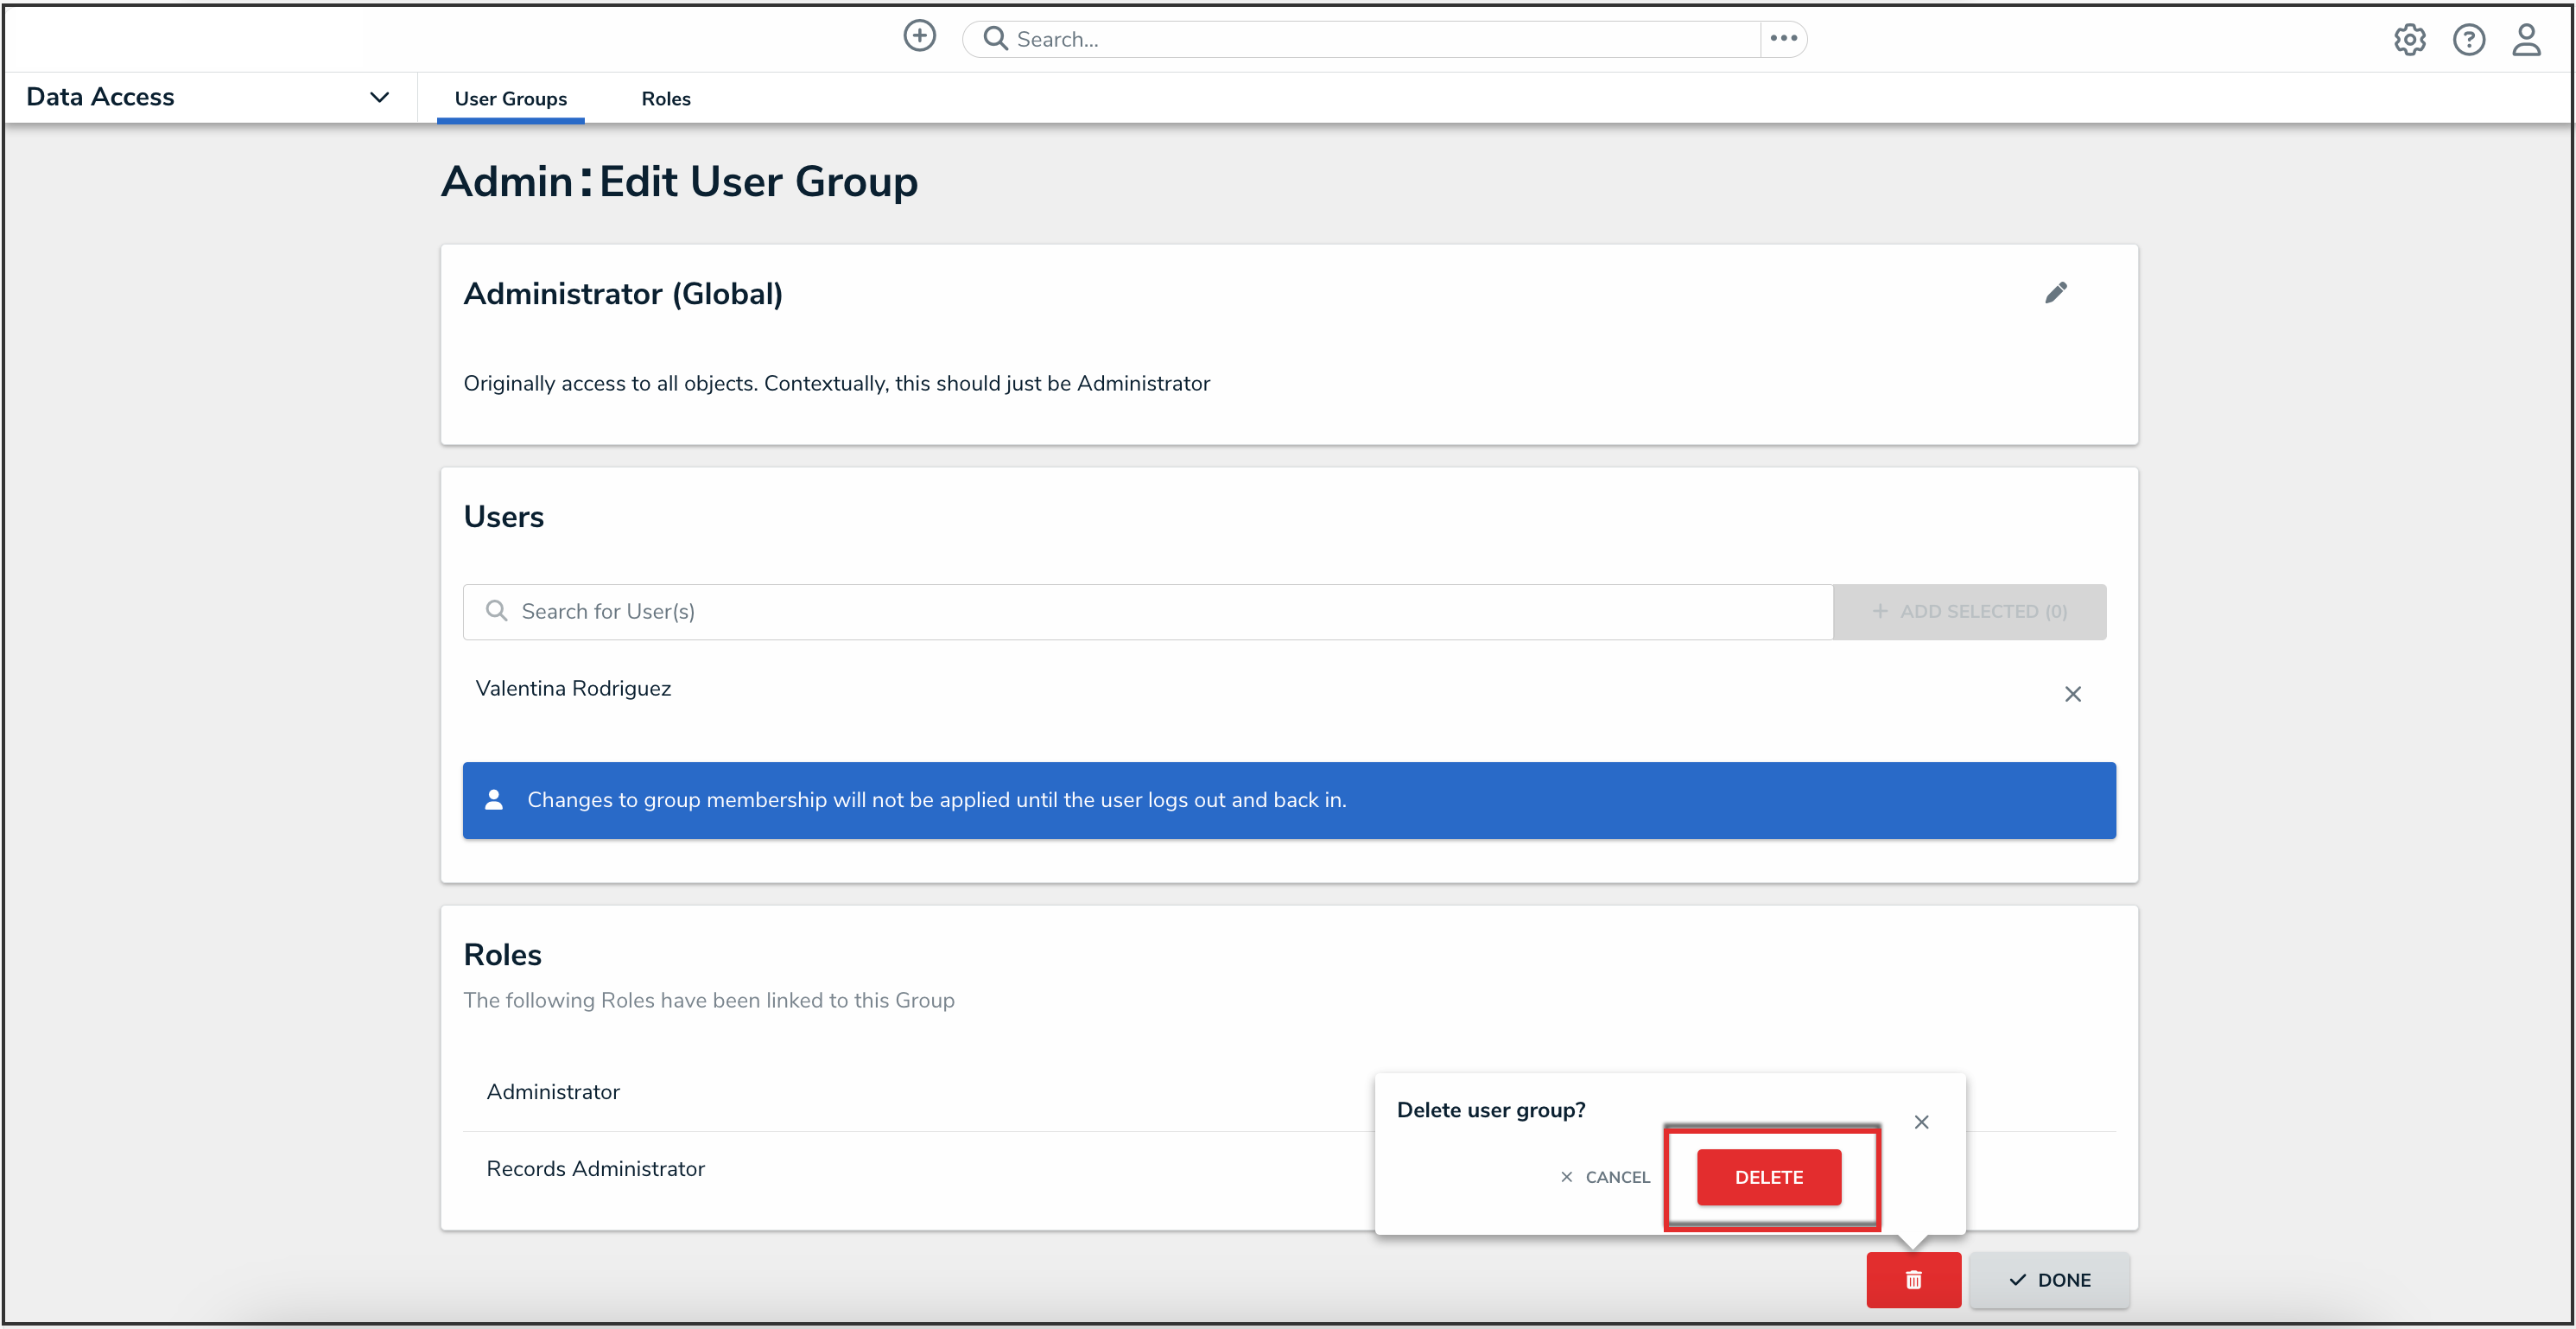
Delete Button


 Note:
Note:
 Note:
Note:


 Warning:
 Note:
Note:
 Best Practice:


