Overview
Roles control the data that users can create, edit, delete, view, or manage in Resolver by adding individual users or user groups to a role, selecting the object type(s) those users can see, applying either global or explicit permissions, then configuring the workflow permissions for each object type added to the role.
 Note:
Note:
If a user is in multiple roles and the permissions are in conflict, the role with the higher level of permissions will take precedence. You can review which roles an individual user has been added to from the User Memberships section on the Edit User screen.
User Account Requirements
The user must have Administrator permissions to access the Data Access section in the Admin Overview screen.
Related Information/Setup
Please refer to the Roles Overview article for more information on using roles in Resolver.
Navigation
-
From the Home screen, click the Administration icon.
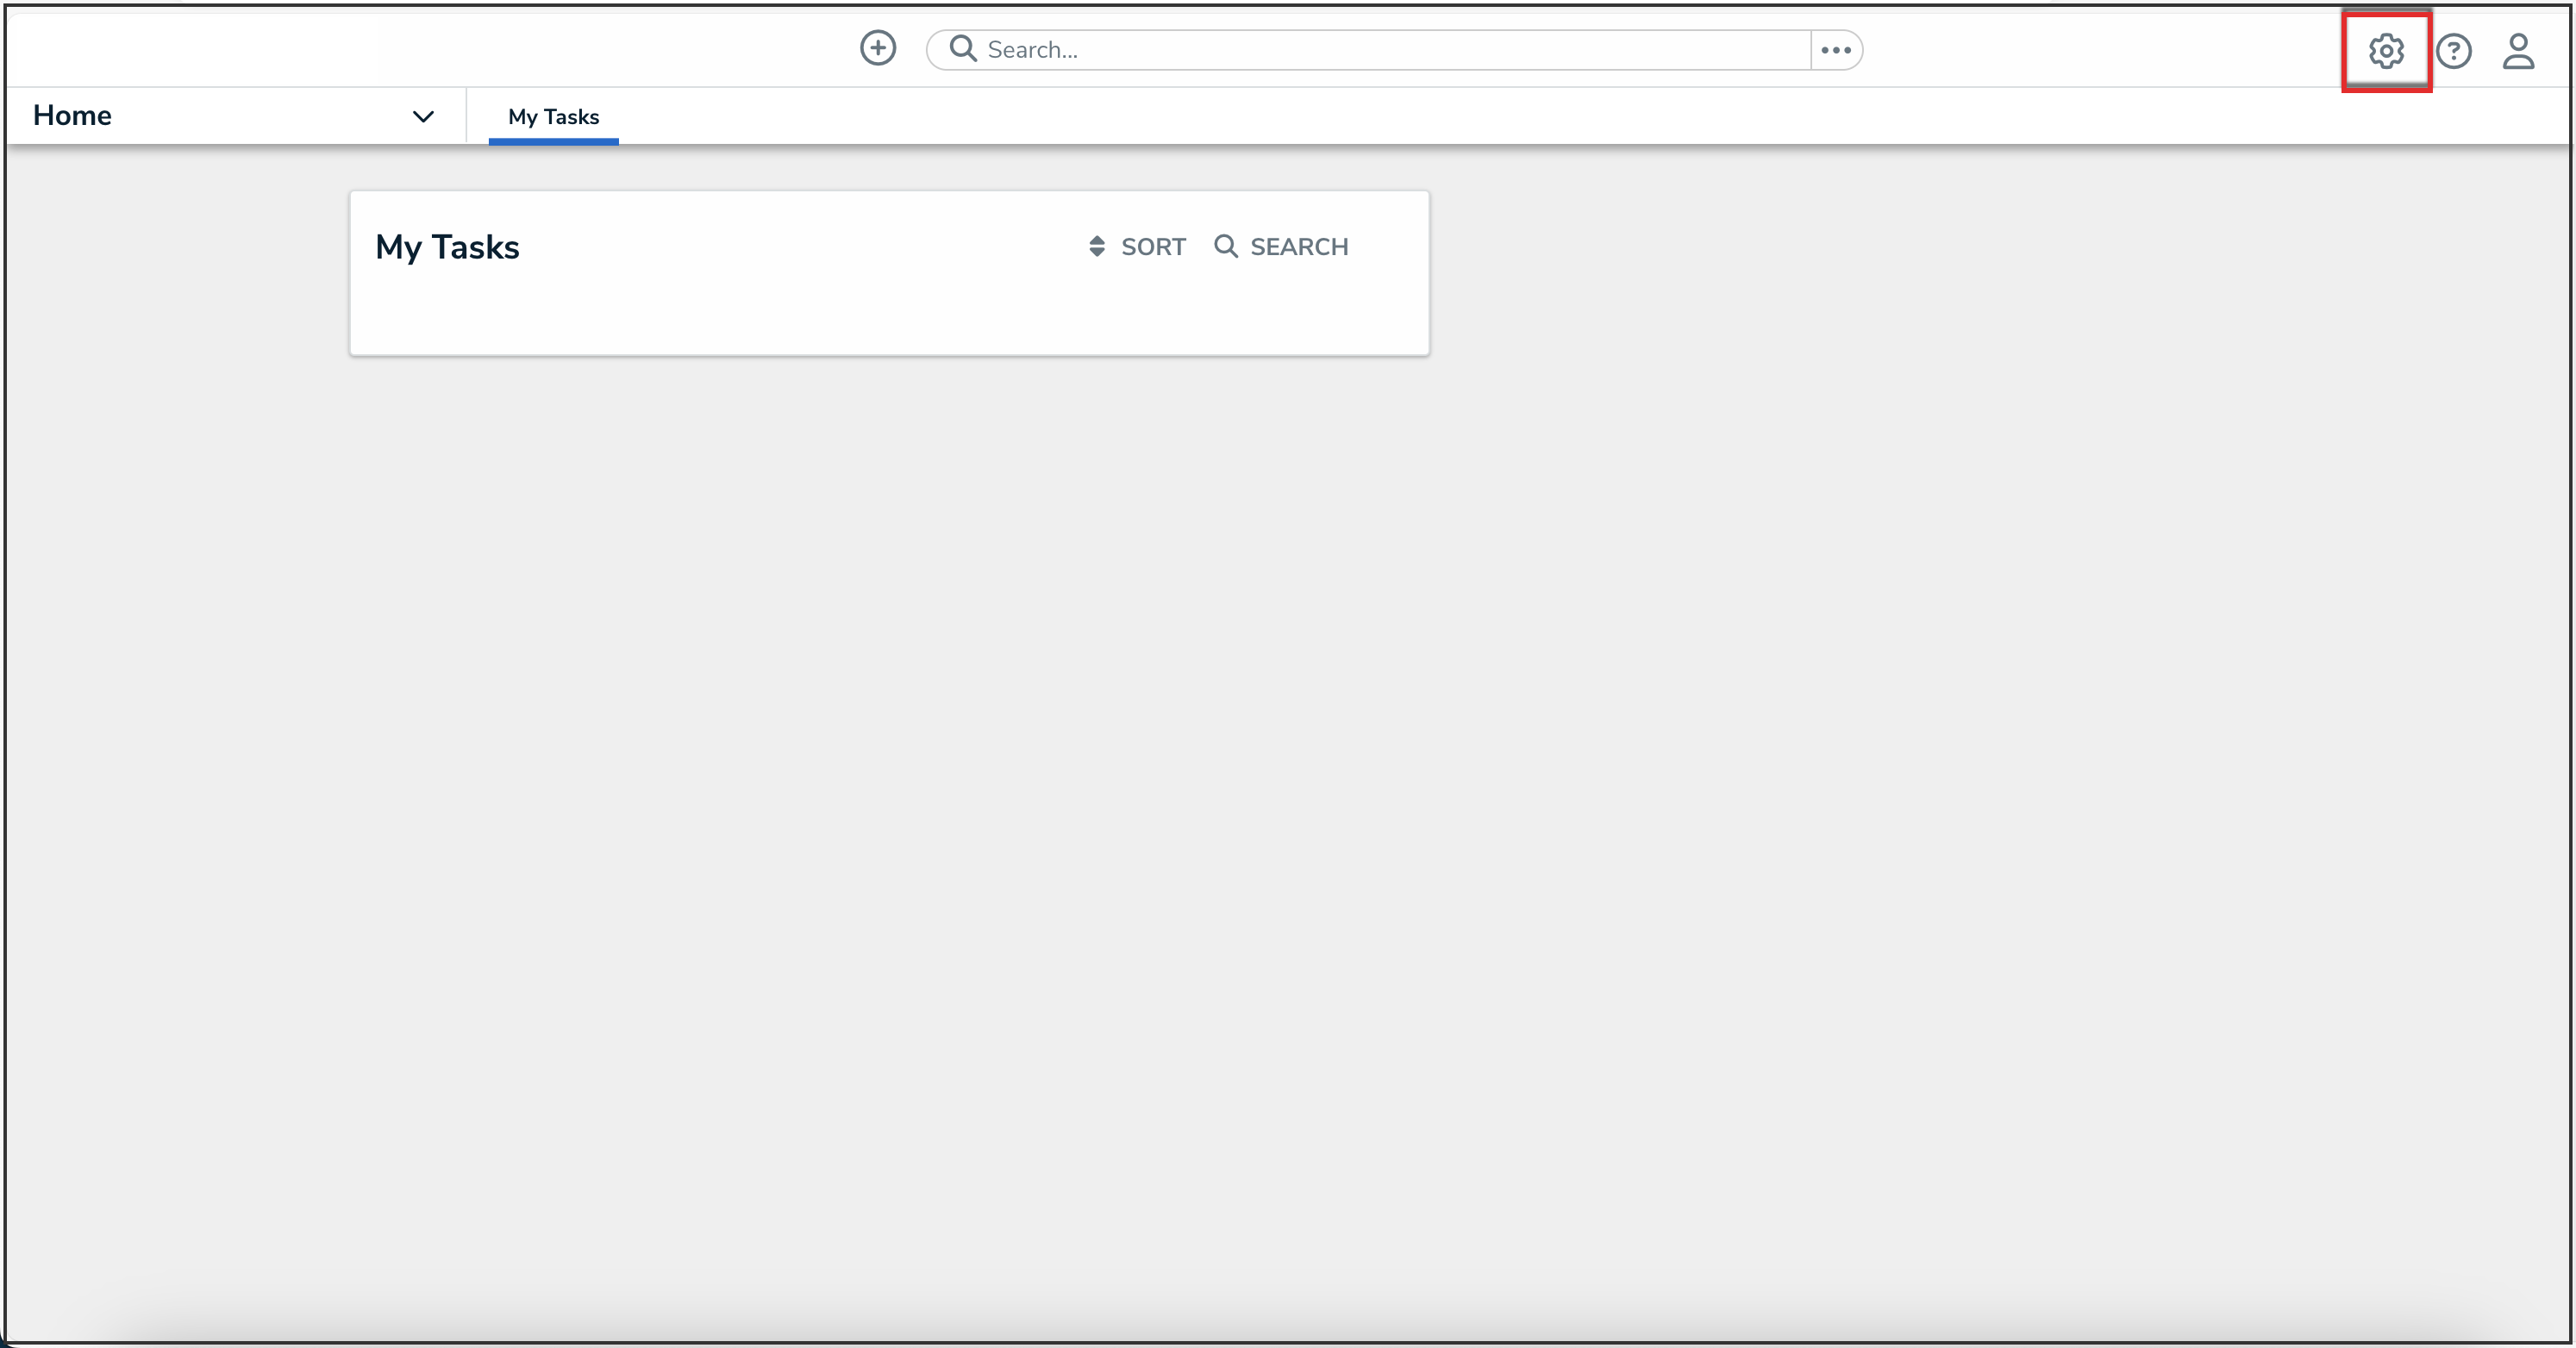
Administration Icon
- From the Administrator settings menu, click Admin Overview.
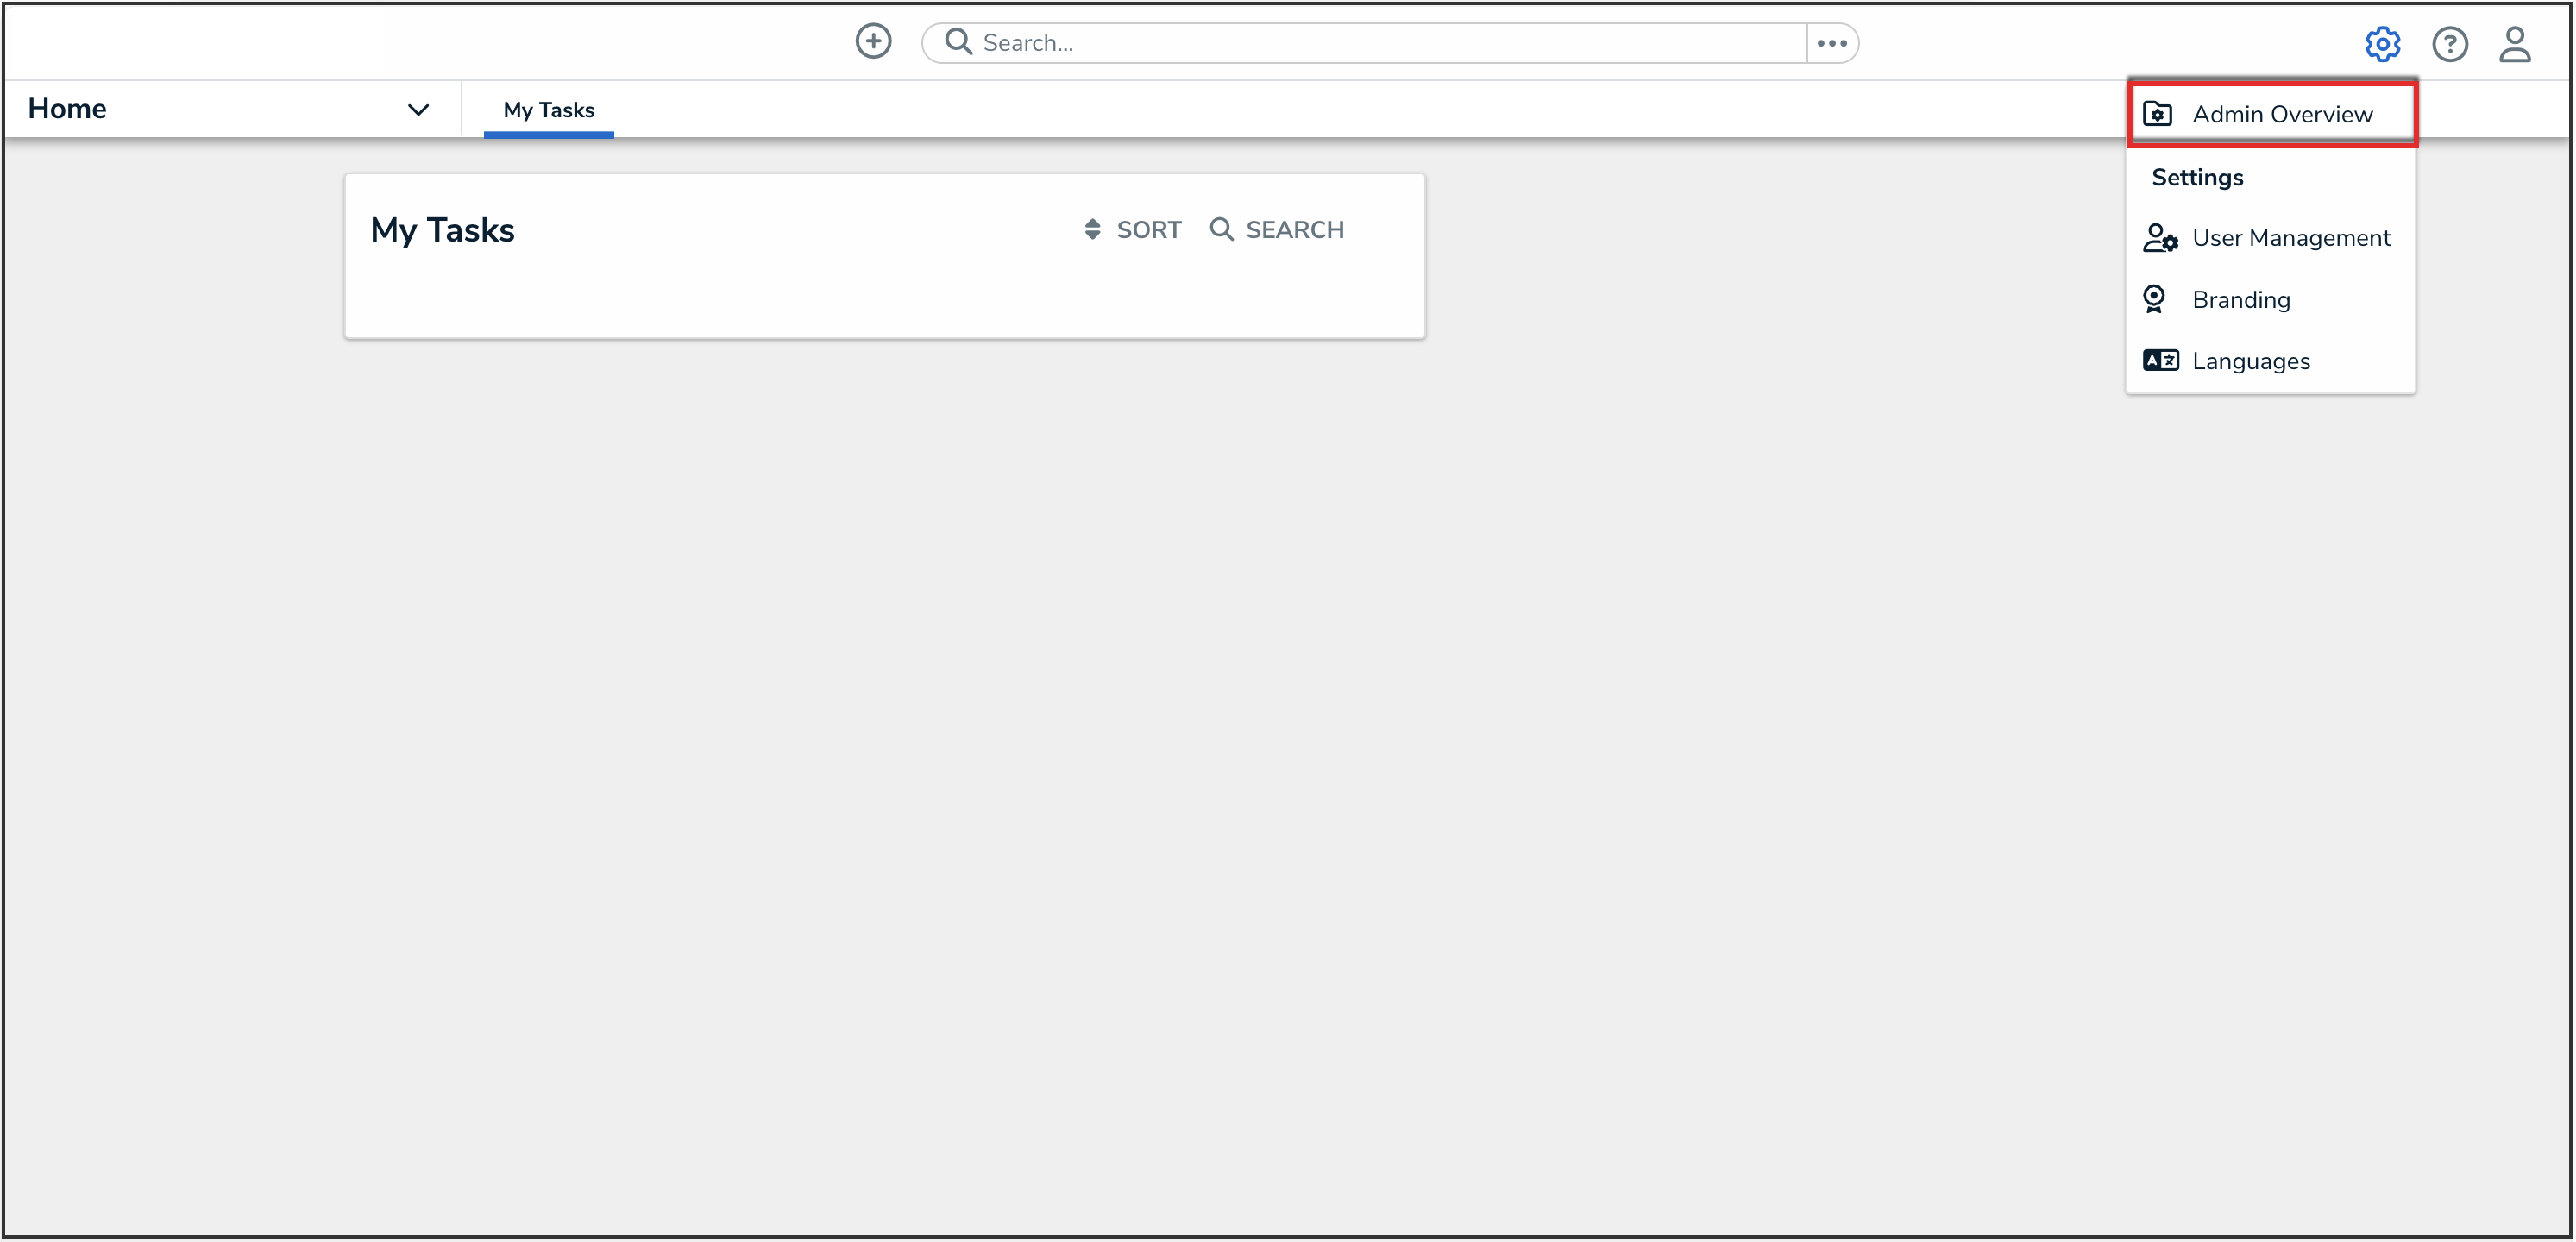
Administrator Settings Menu
- From the Admin Overview screen, click the Roles tile under the Data Access section.
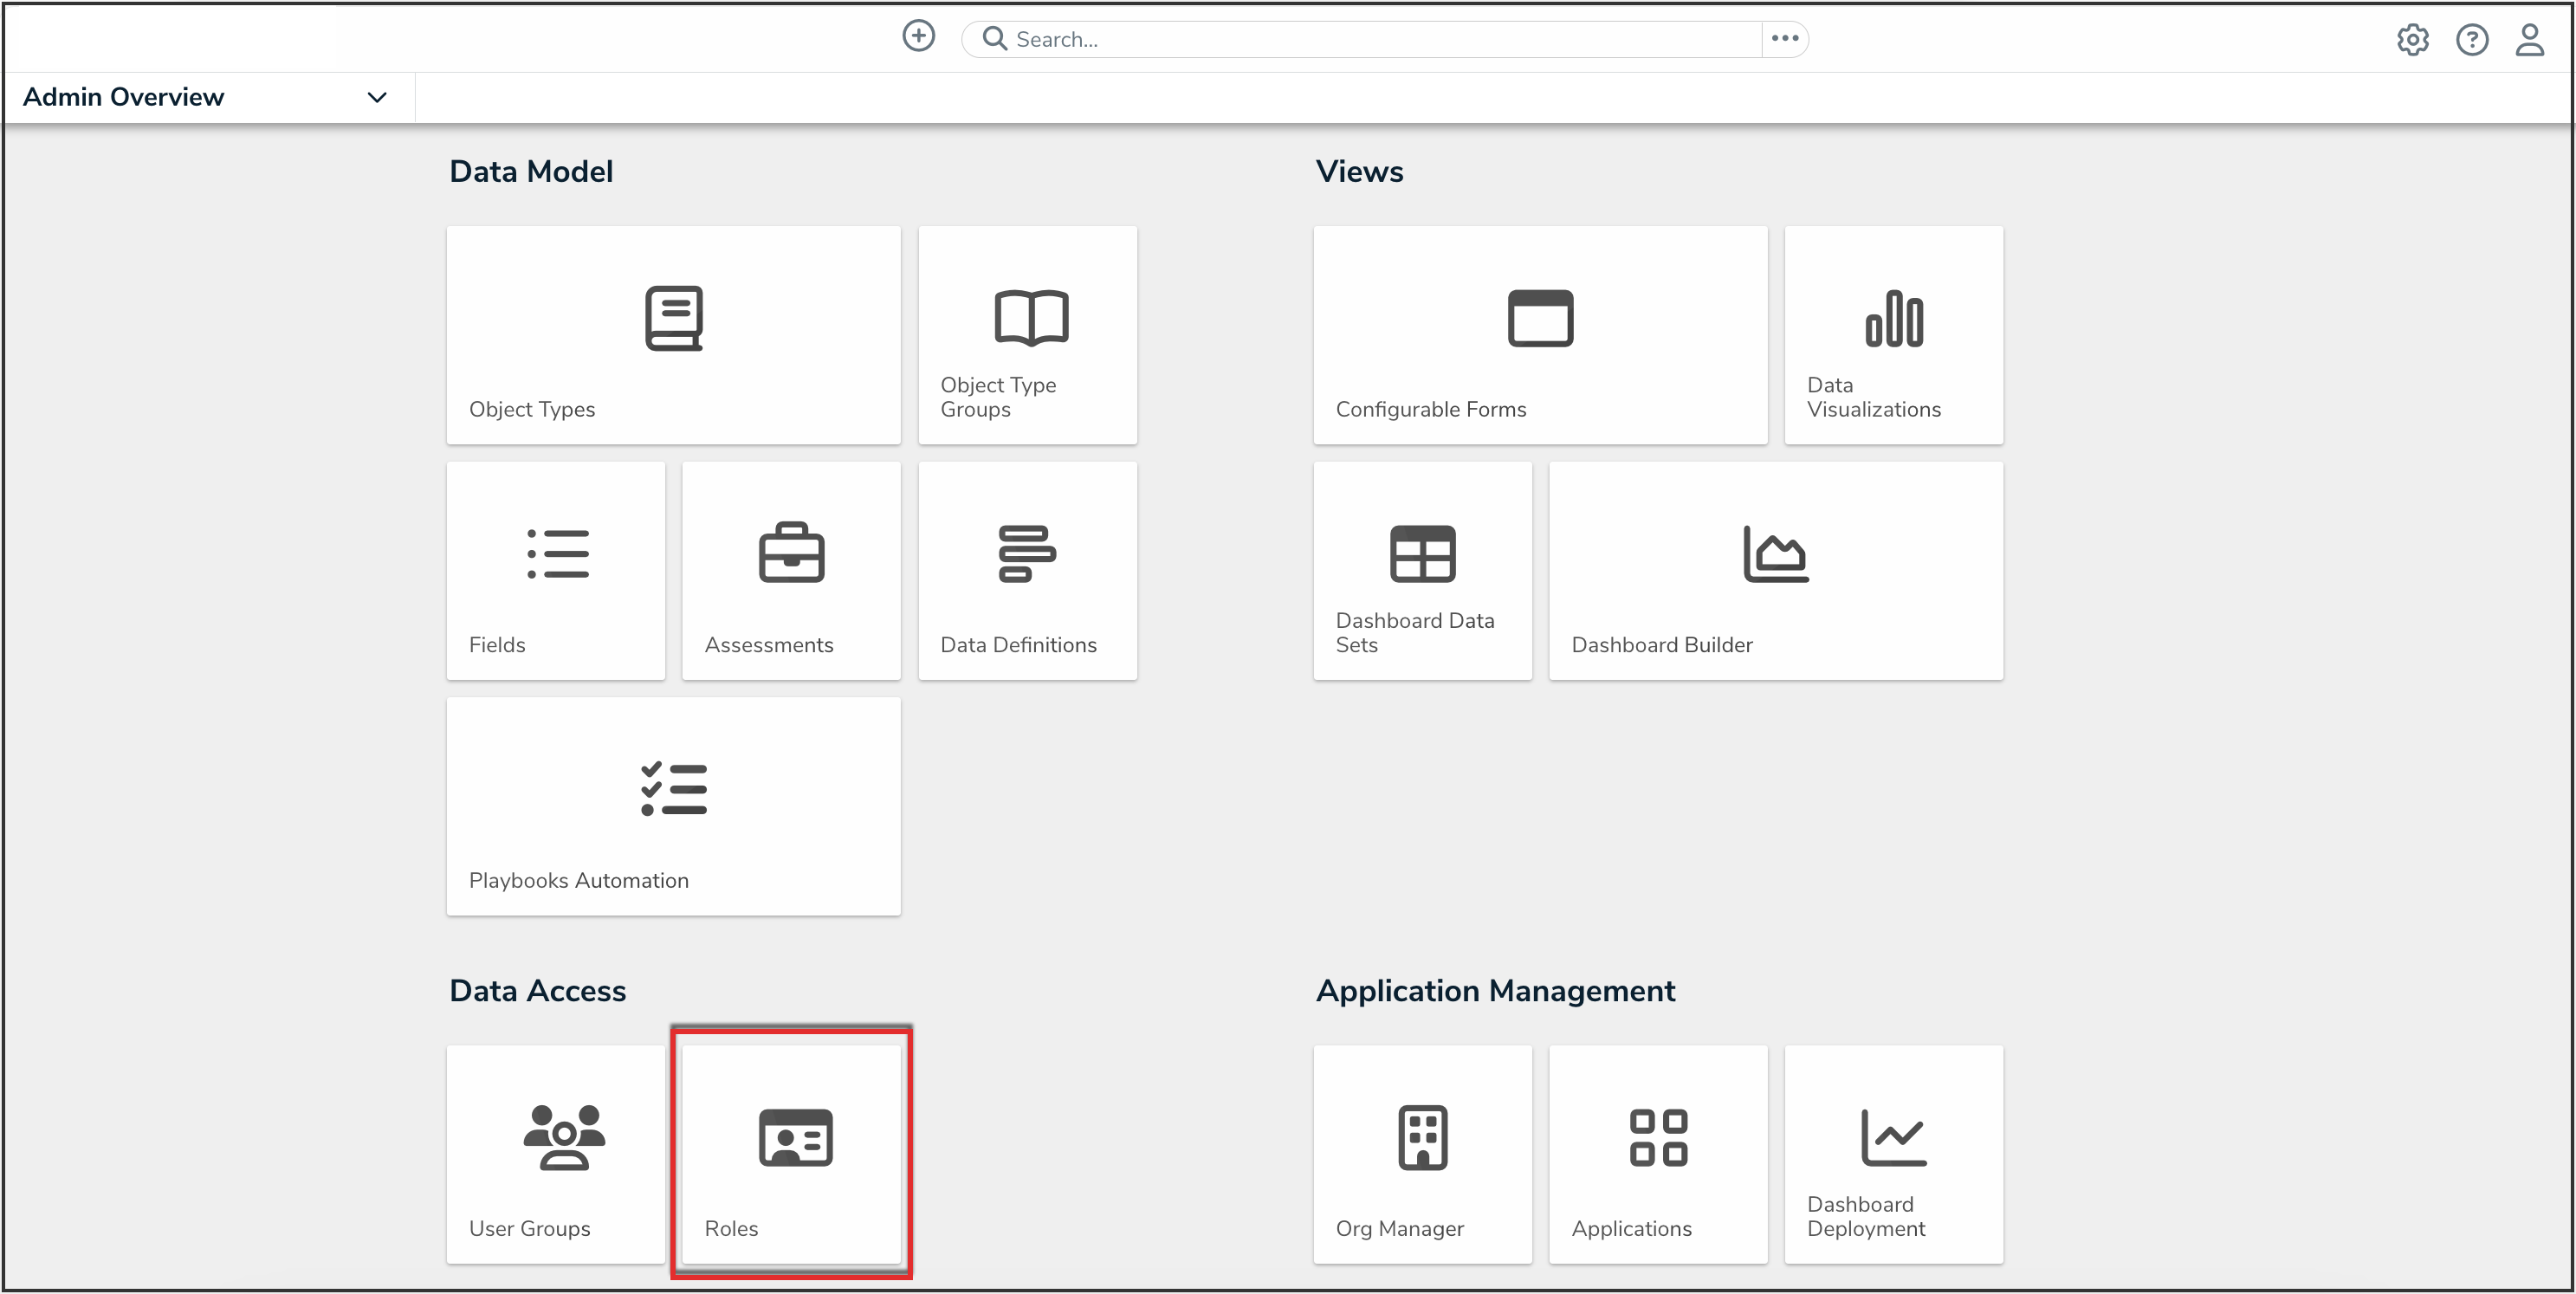
Roles Tile


Creating a New Role
- From the Roles screen, click the Create Role button.
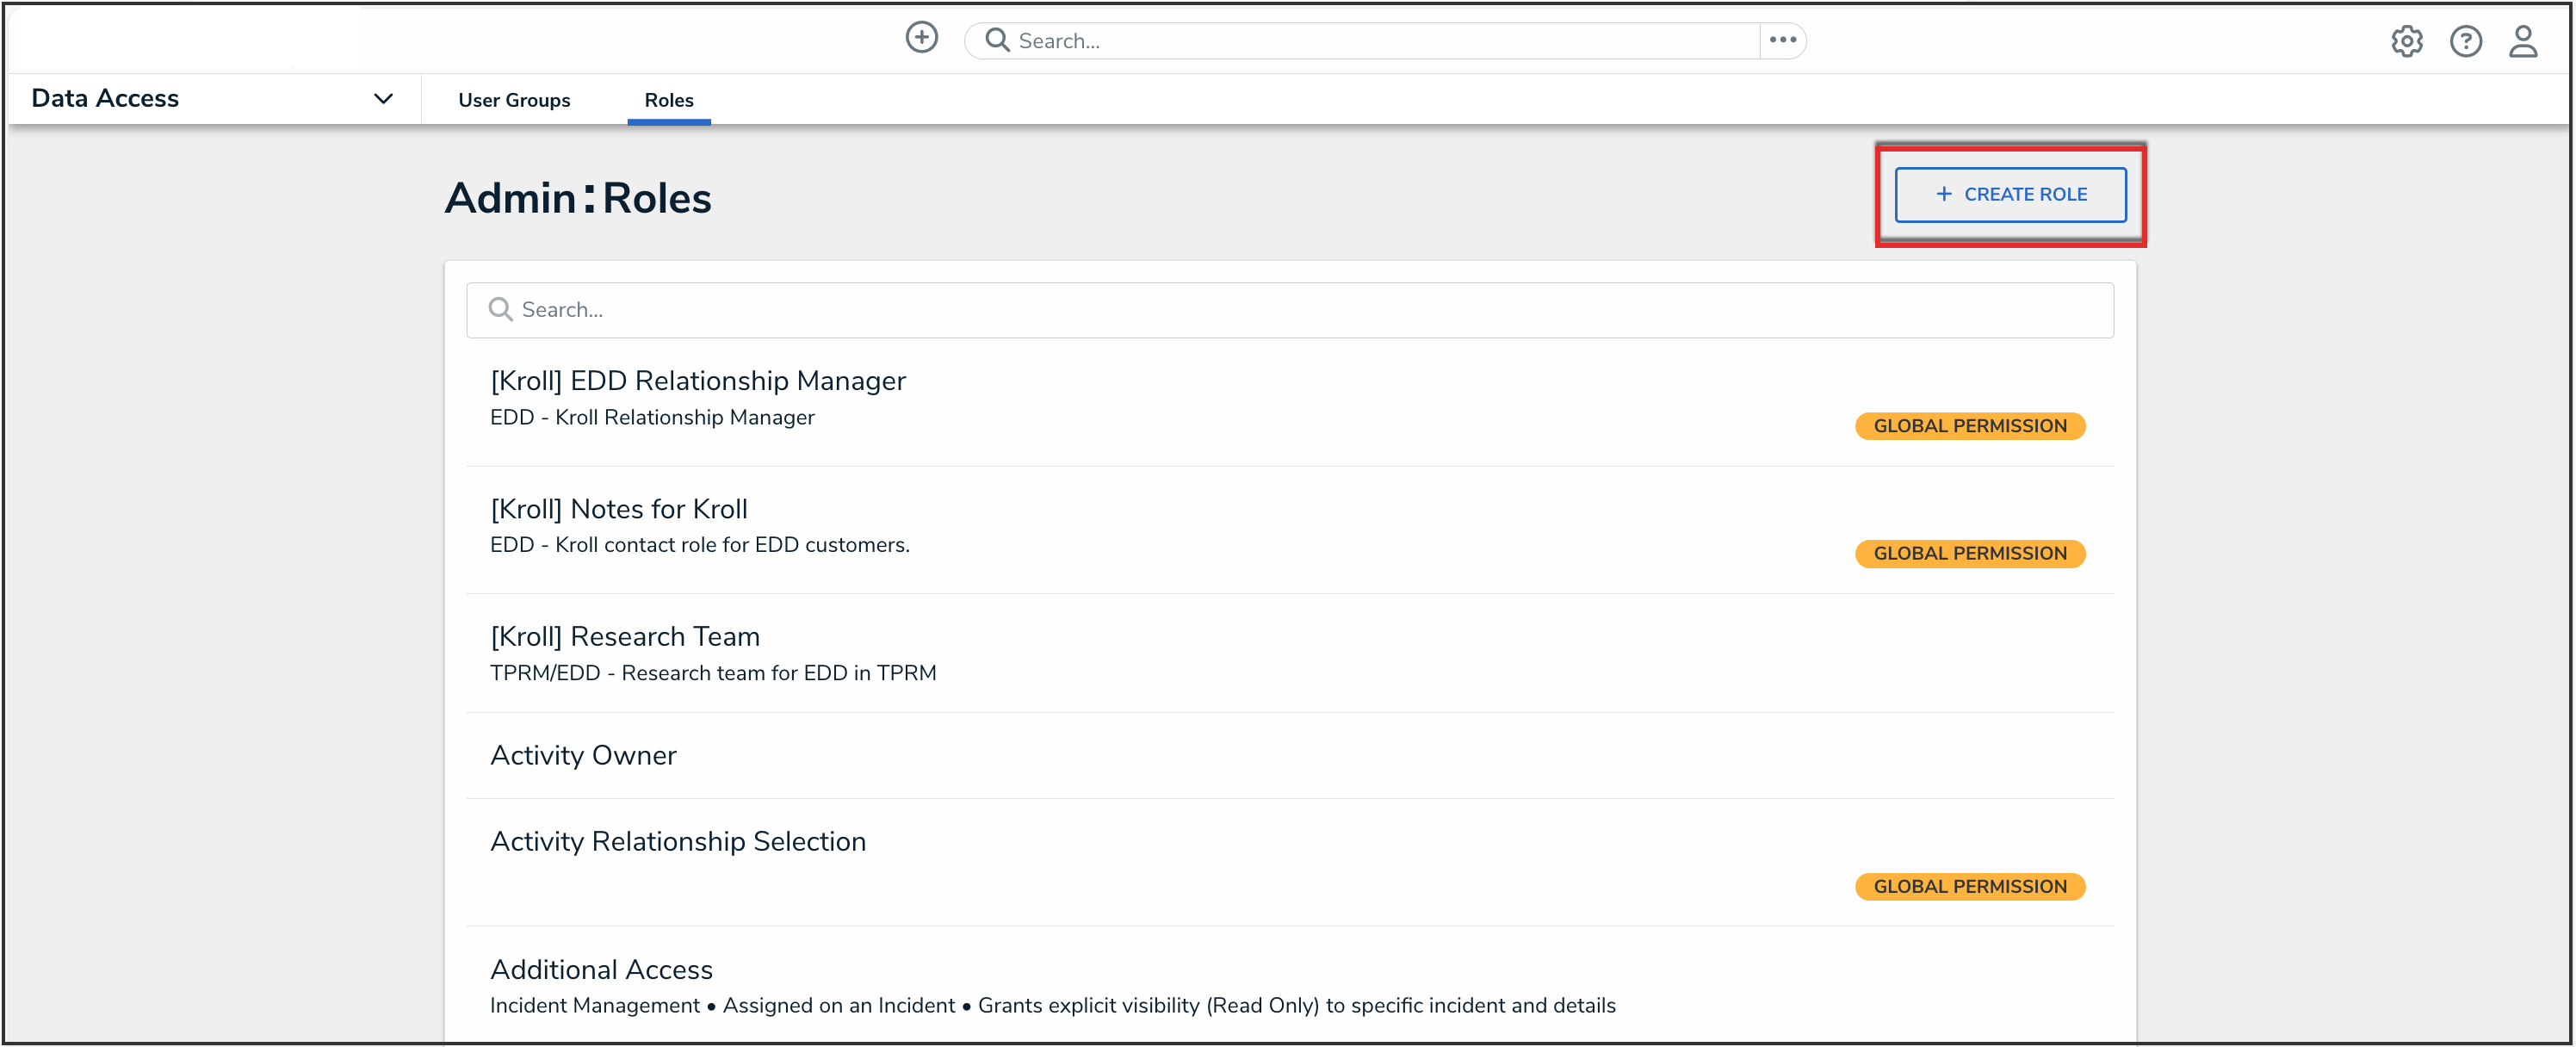
Create Role Button
- Enter the name for the role in the Name field.
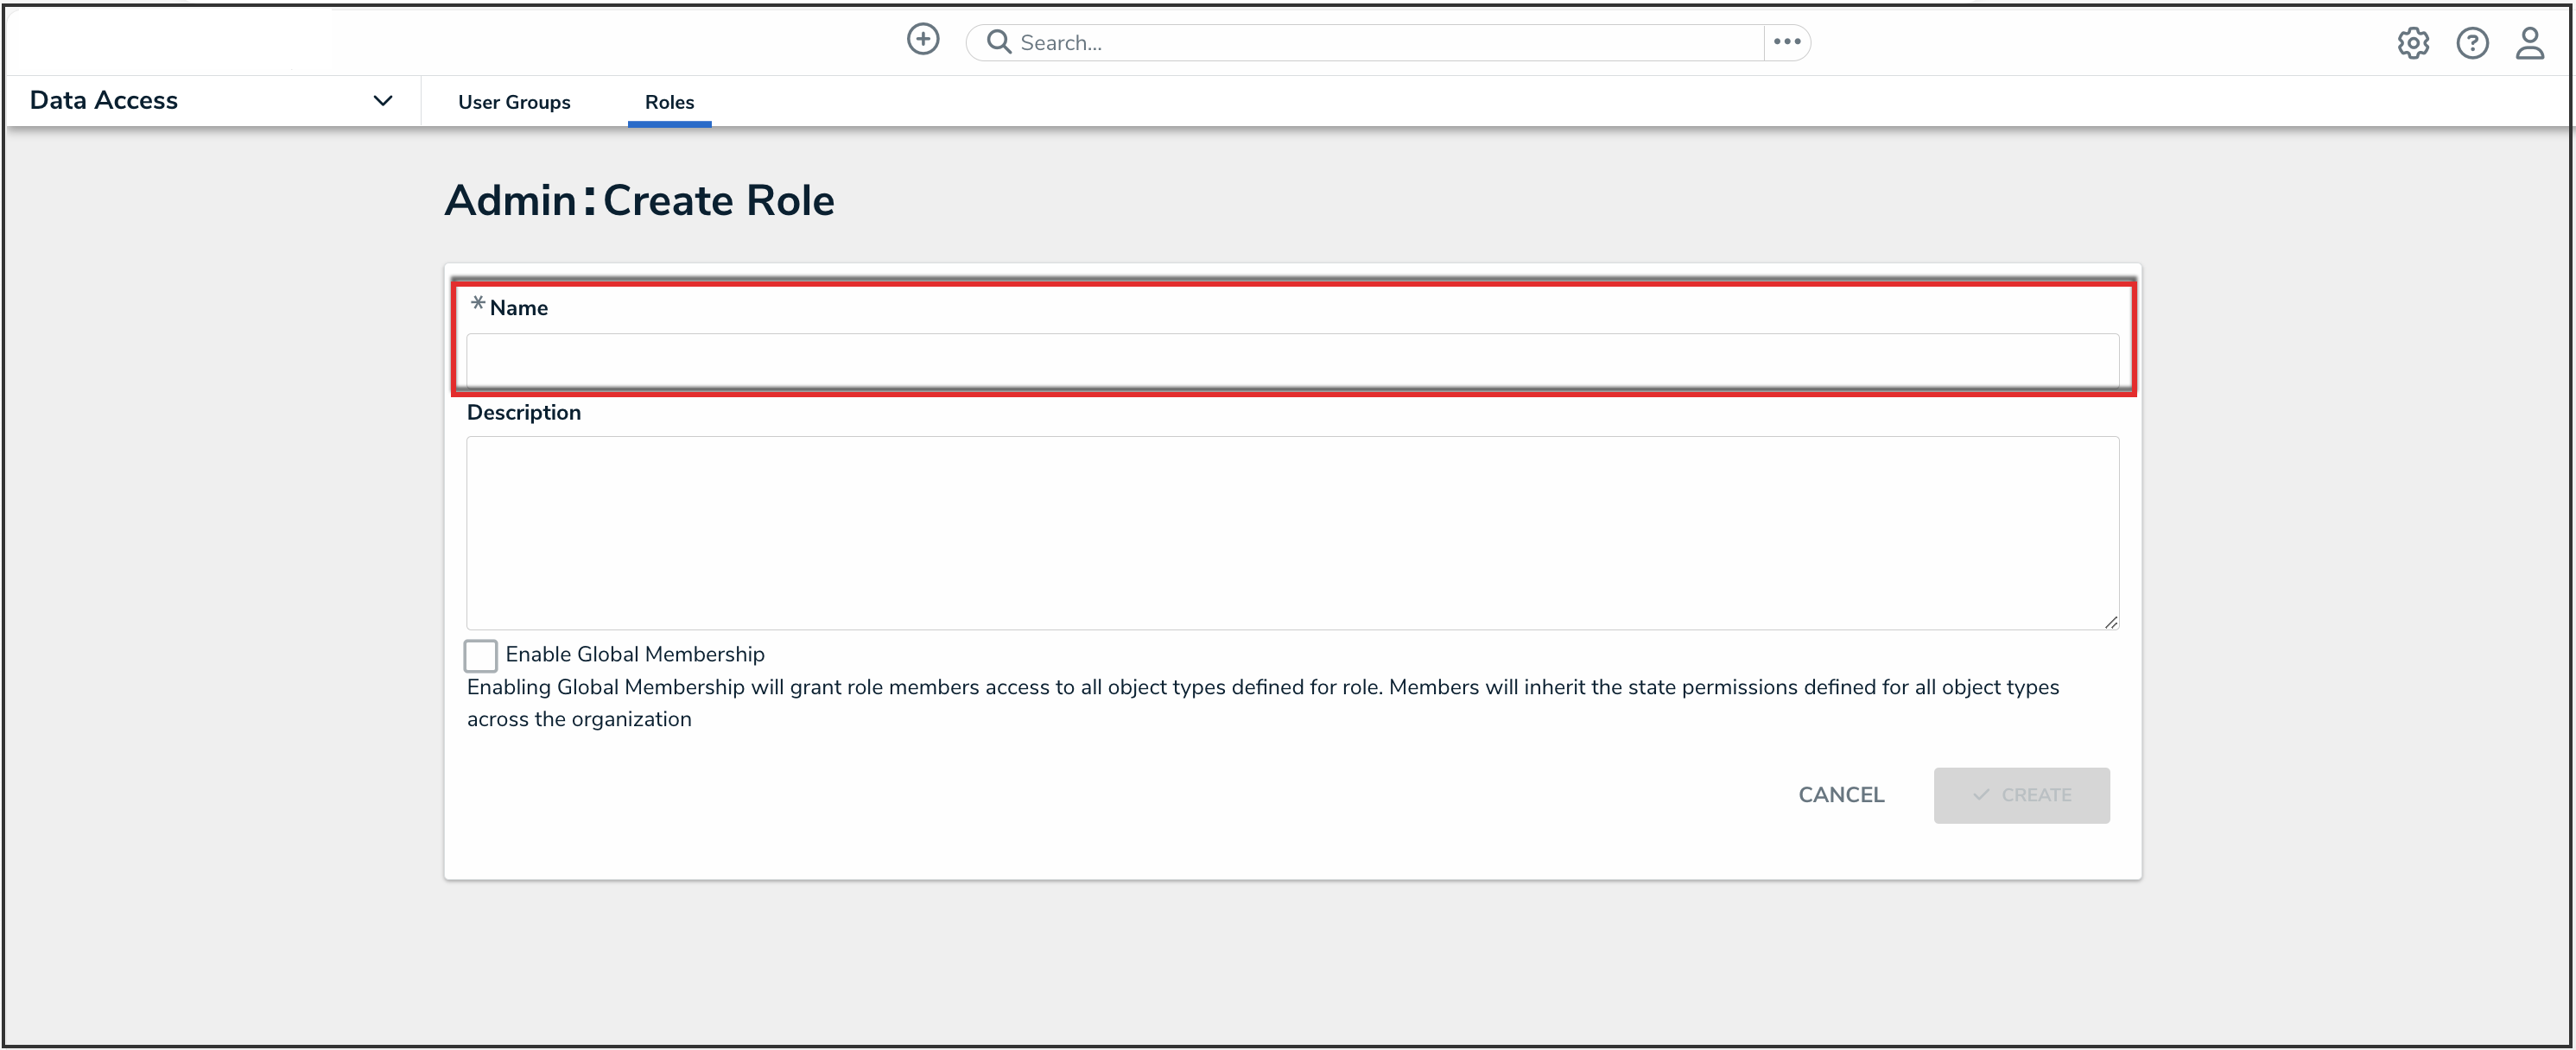
Name Field
- (Optional): Enter a description of the role in the Description field. This description will appear below the role’s name when editing it.

Description Field
- (Optional): Select the Enable Global Membership checkbox if you wish to grant this role global permissions.
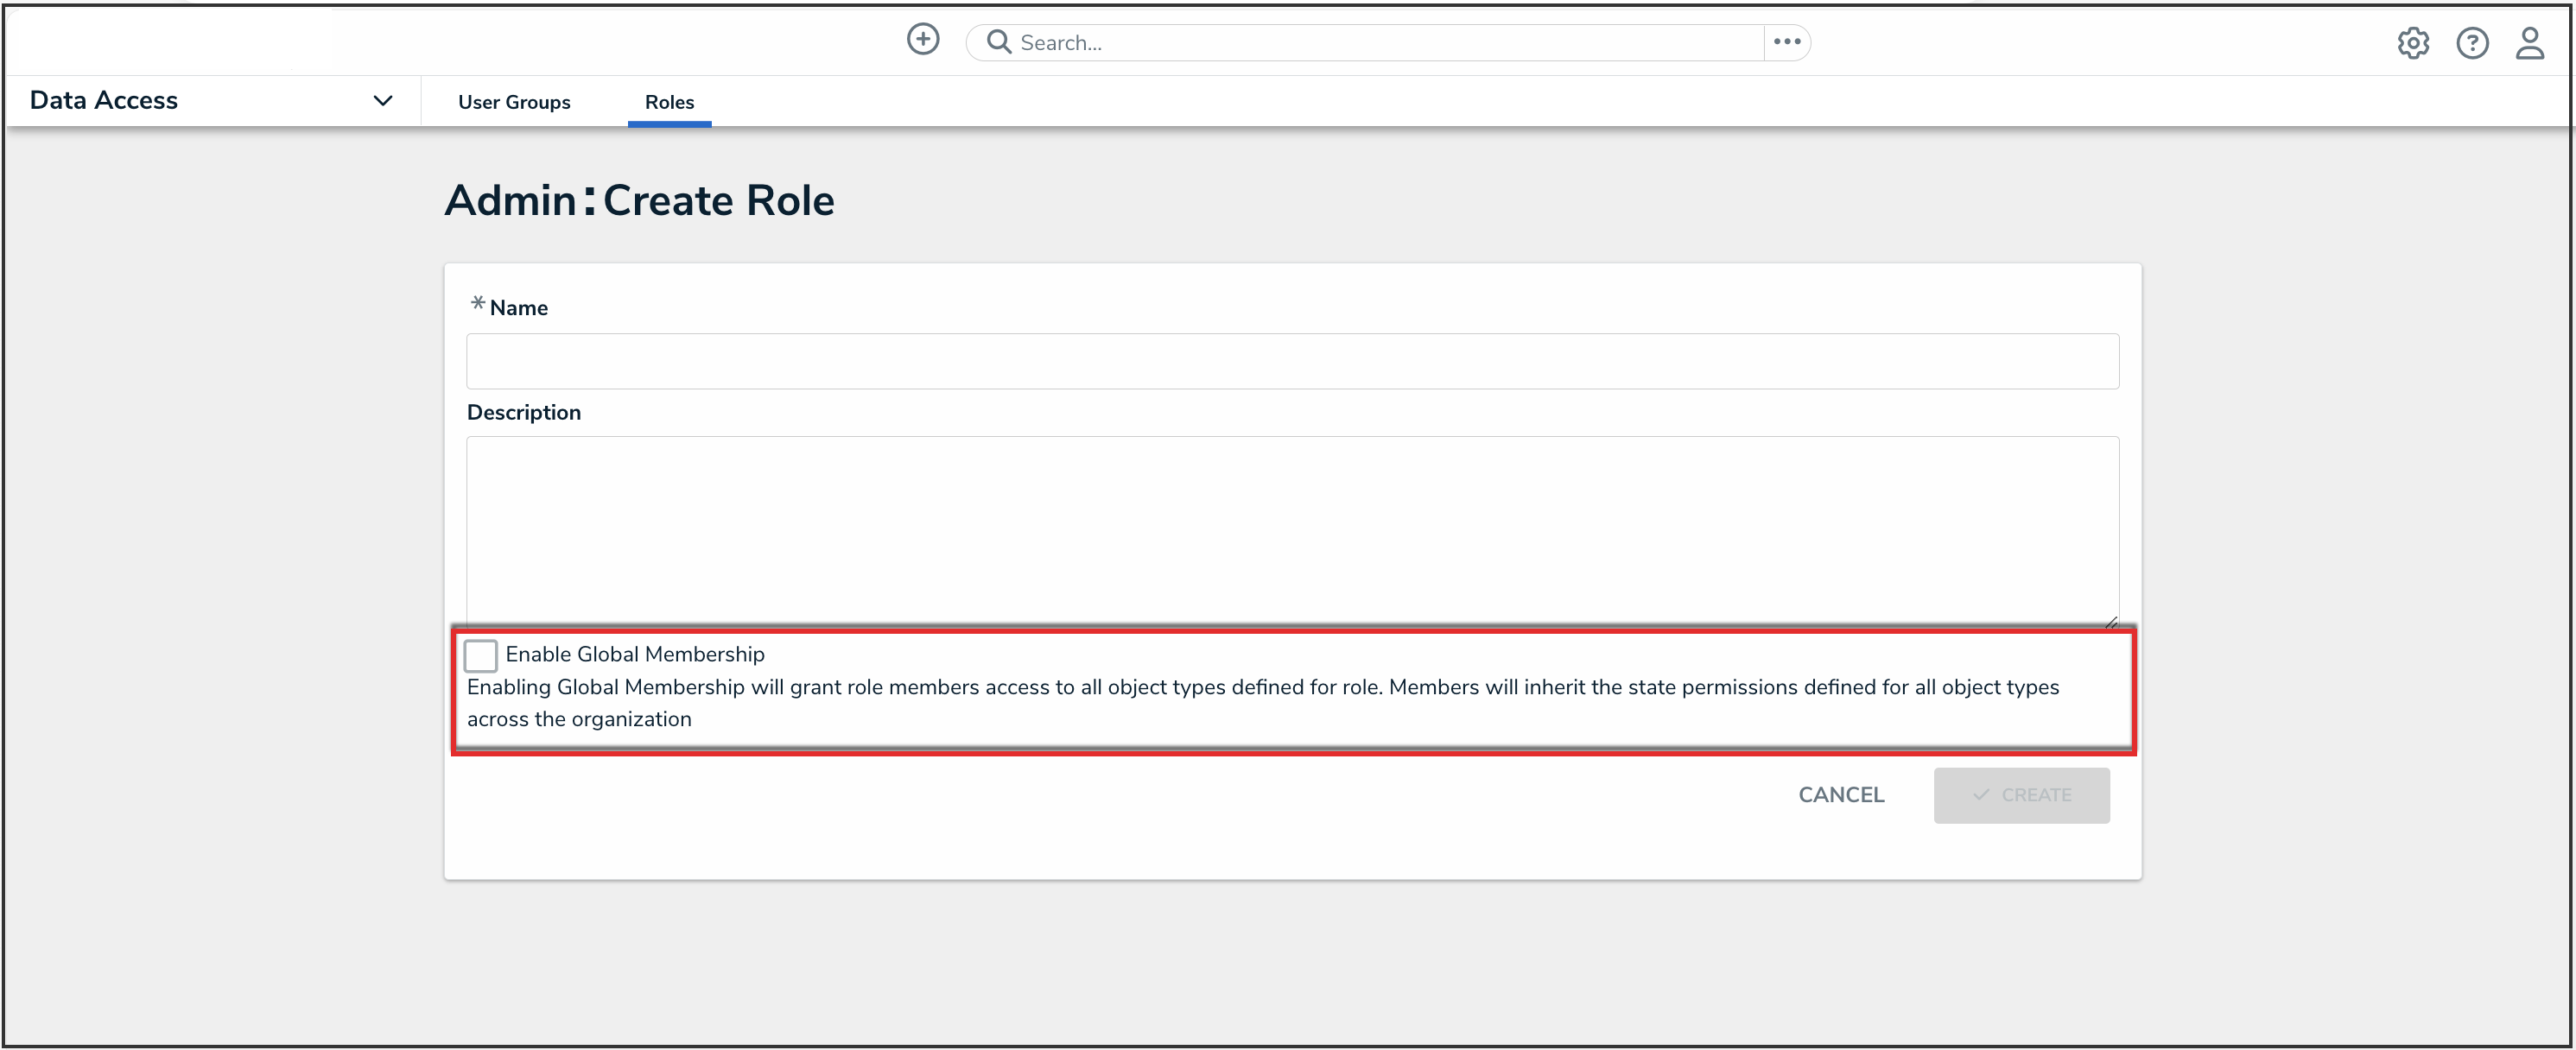
Enable Global Membership Checkbox
 Note:
Note:
Once a role is created, you cannot enable or disable global membership (permissions) from the Edit Roles screen. To enable or disable global permissions on an existing role, you must delete then recreate the role.
- Click the Create button.

Create Button
- In the field under Object Types, type the name of the object type you want to add, then press Enter on your keyboard or select it from the dropdown menu.

Object Types Field
- Click the Edit Permissions button to configure the workflow permissions.
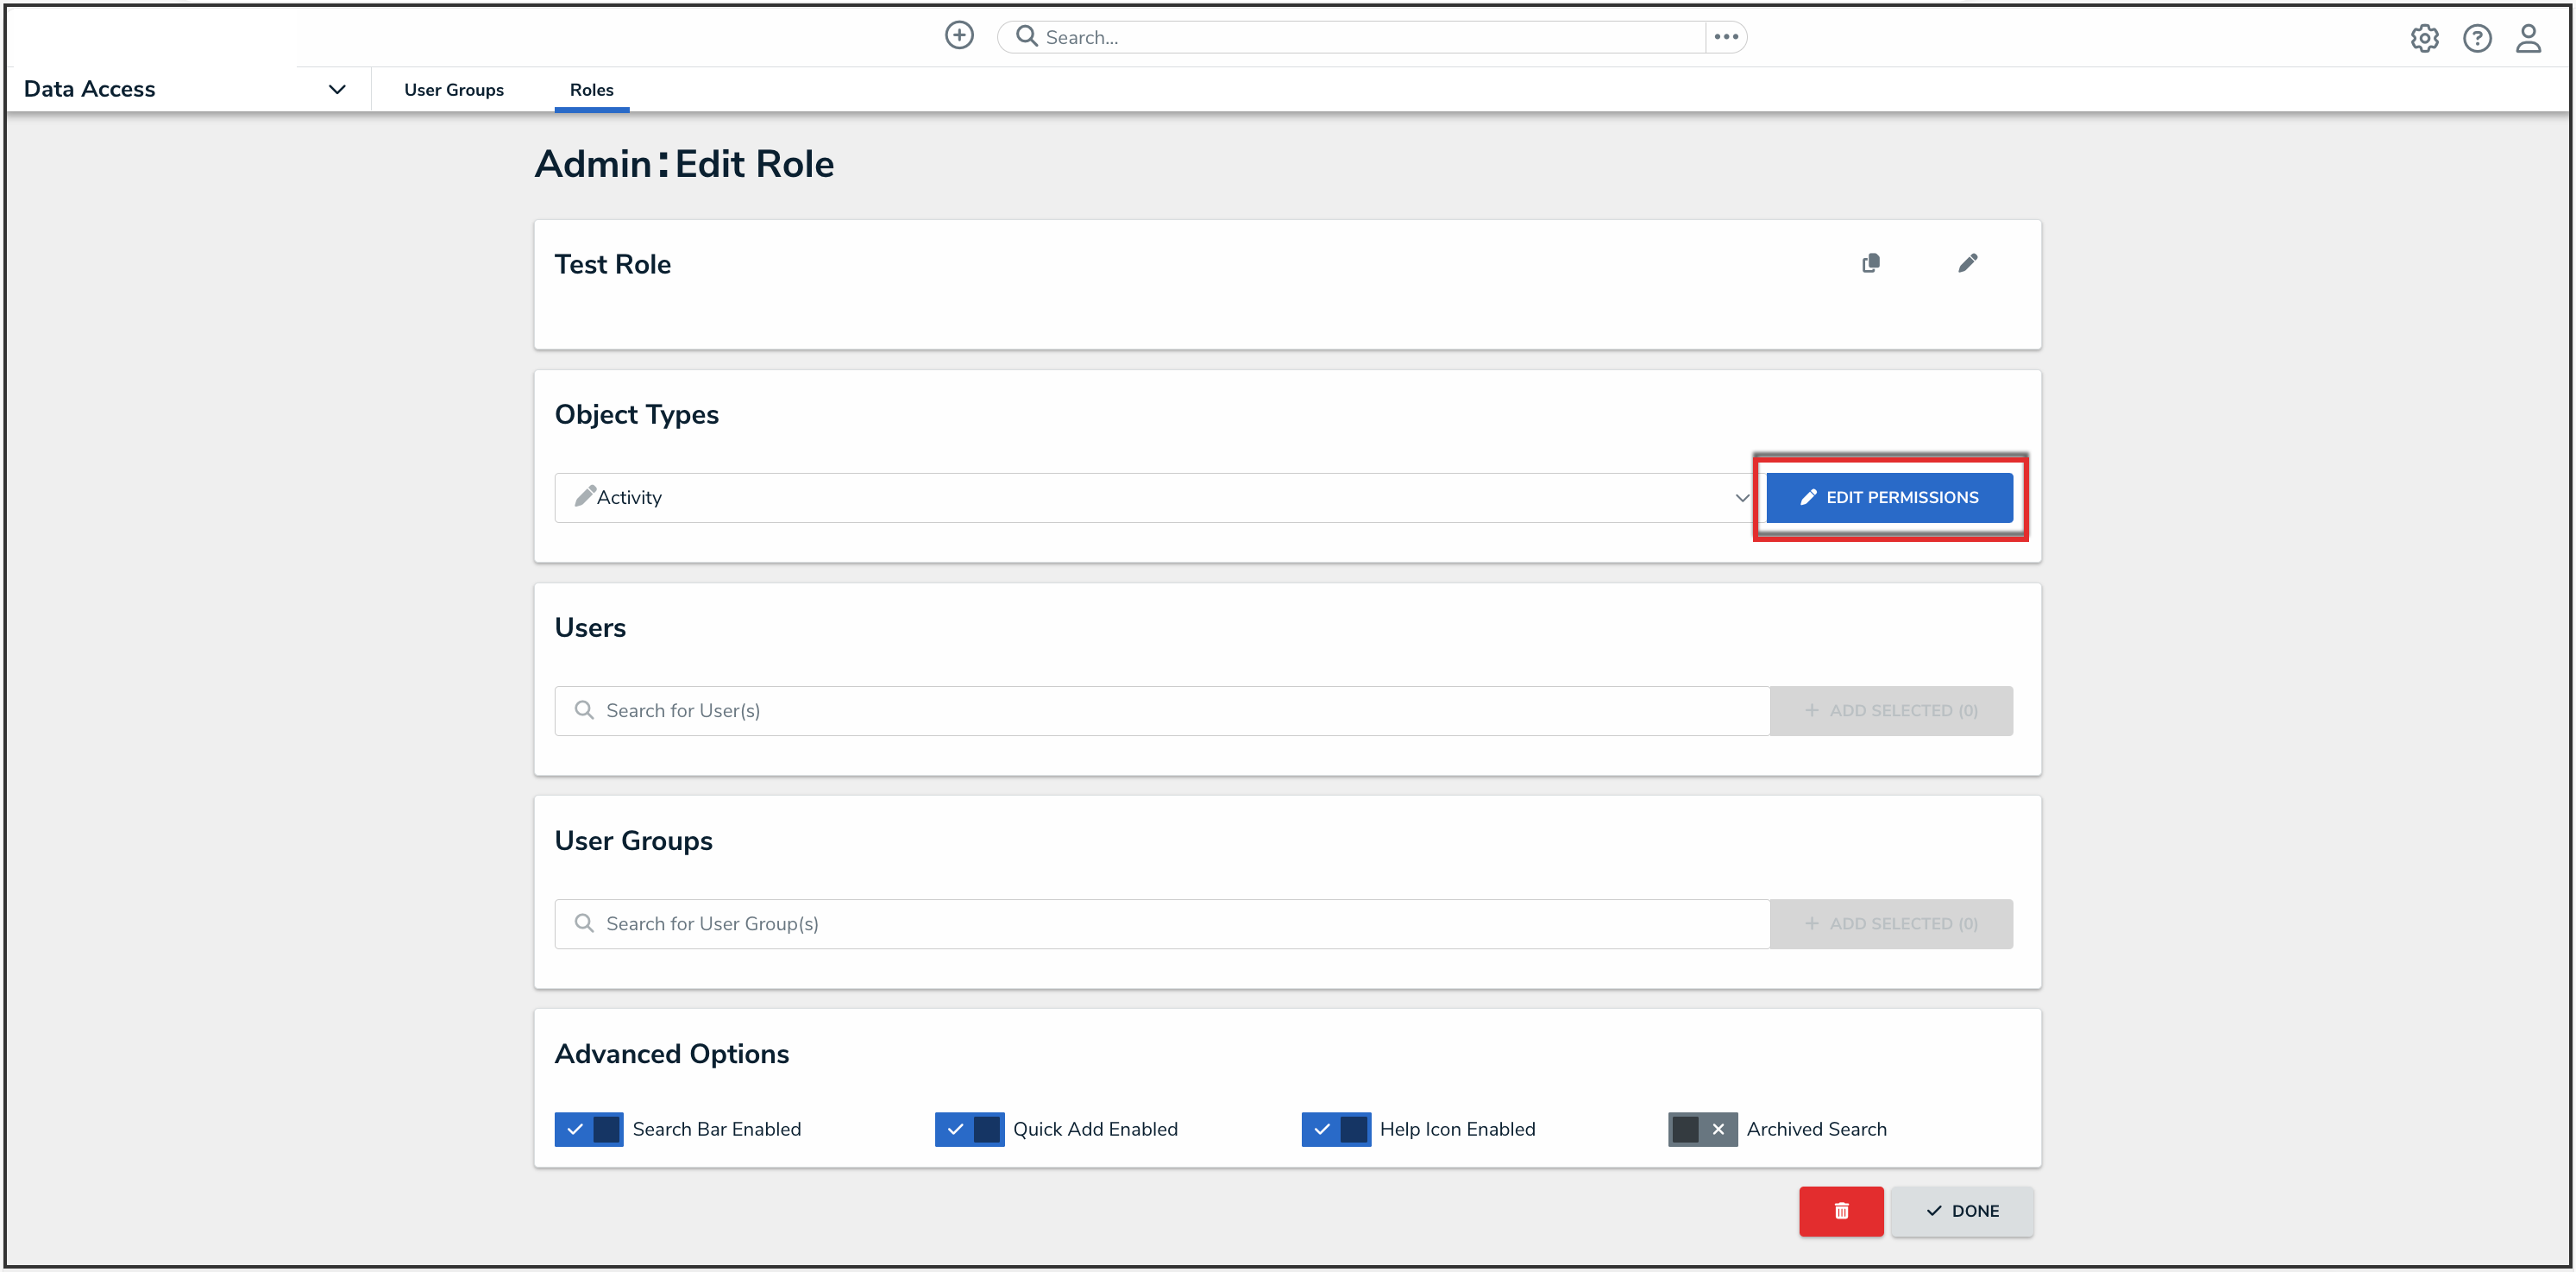
Edit Permissions Button
Note:
An object type will not be saved to a role until you’ve configured its workflow permissions. - Select the workflow permissions the user will have per each state:
- All States: Clicking All Triggers, Create, Read, and Edit in this section will automatically enable these permissions for all states in the workflow.
- All Triggers: Users can view and click all triggers on a form. The triggers that are visible to user depend on whether the object is in the state associated with the trigger. You can also select each individual trigger to grant access.
- Create: Users can create a new object. This permission applies only to the Creation state of the object type.
- Read: Users can view the object when it’s in the selected state. You cannot select the Edit, Delete, or Manage permissions unless Read has been selected.
- Edit: Users can edit existing objects in the selected state.
- Delete: Users can delete existing objects in the selected state.
- Manage: Users can add users from other roles to give them access to the object while it’s in the selected state. Note that the added user will not see the object until it’s in a state they have permission to view. Manage is applicable to explicit permissions only.
- Assign: Once the object is in the selected state, users who have been granted permission to view the object through a role will see it in their task list on the My Tasks page. Assign is applicable to explicit permissions only.

Edit Permissions Screen
- From the Select a default form for this state for this role dropdown menu, choose the form users will see when using Search, Quick Add, an assessment table, or relationship graph.
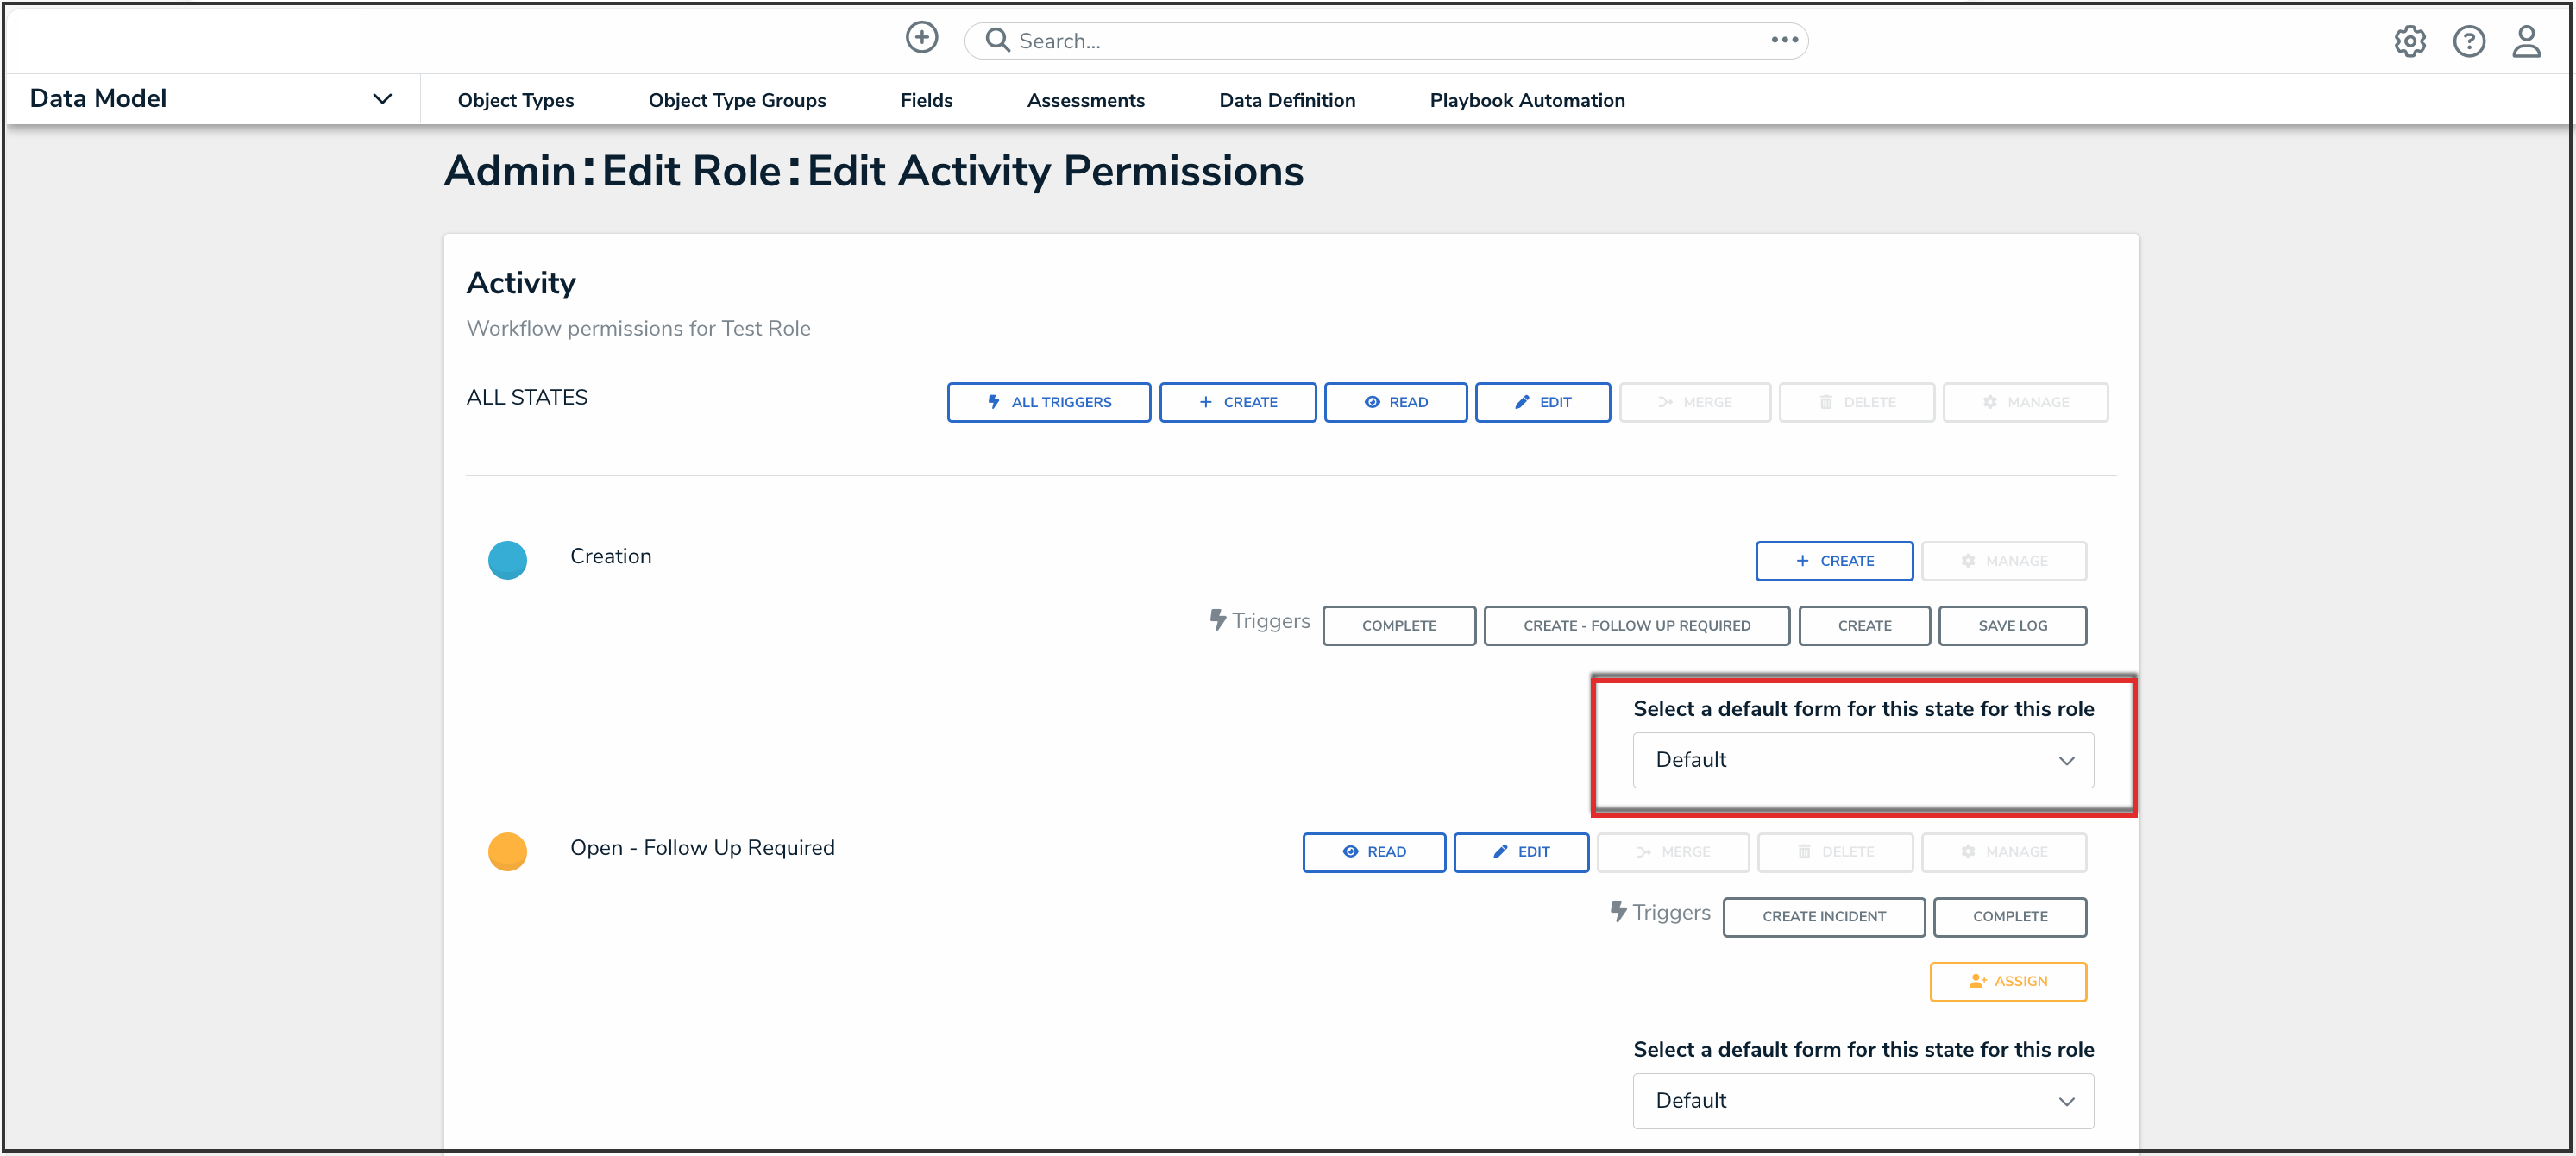
Select a Default Form For This State For This Role Dropdown
- If you do not choose a form from this dropdown menu, the object type’s default form (the unconfigured list of components added to an object type) will be displayed.
- If you select Default Form from this dropdown menu, the user will see the form selected by an administrator.
- If you select a configurable form from this dropdown menu, the selected form will be displayed.
Note:
Forms selected to display on an action, view, data visualization, or relationship table will override any selections made in the Select a default form for this state for this role field.
- Click the Done button to save your changes.
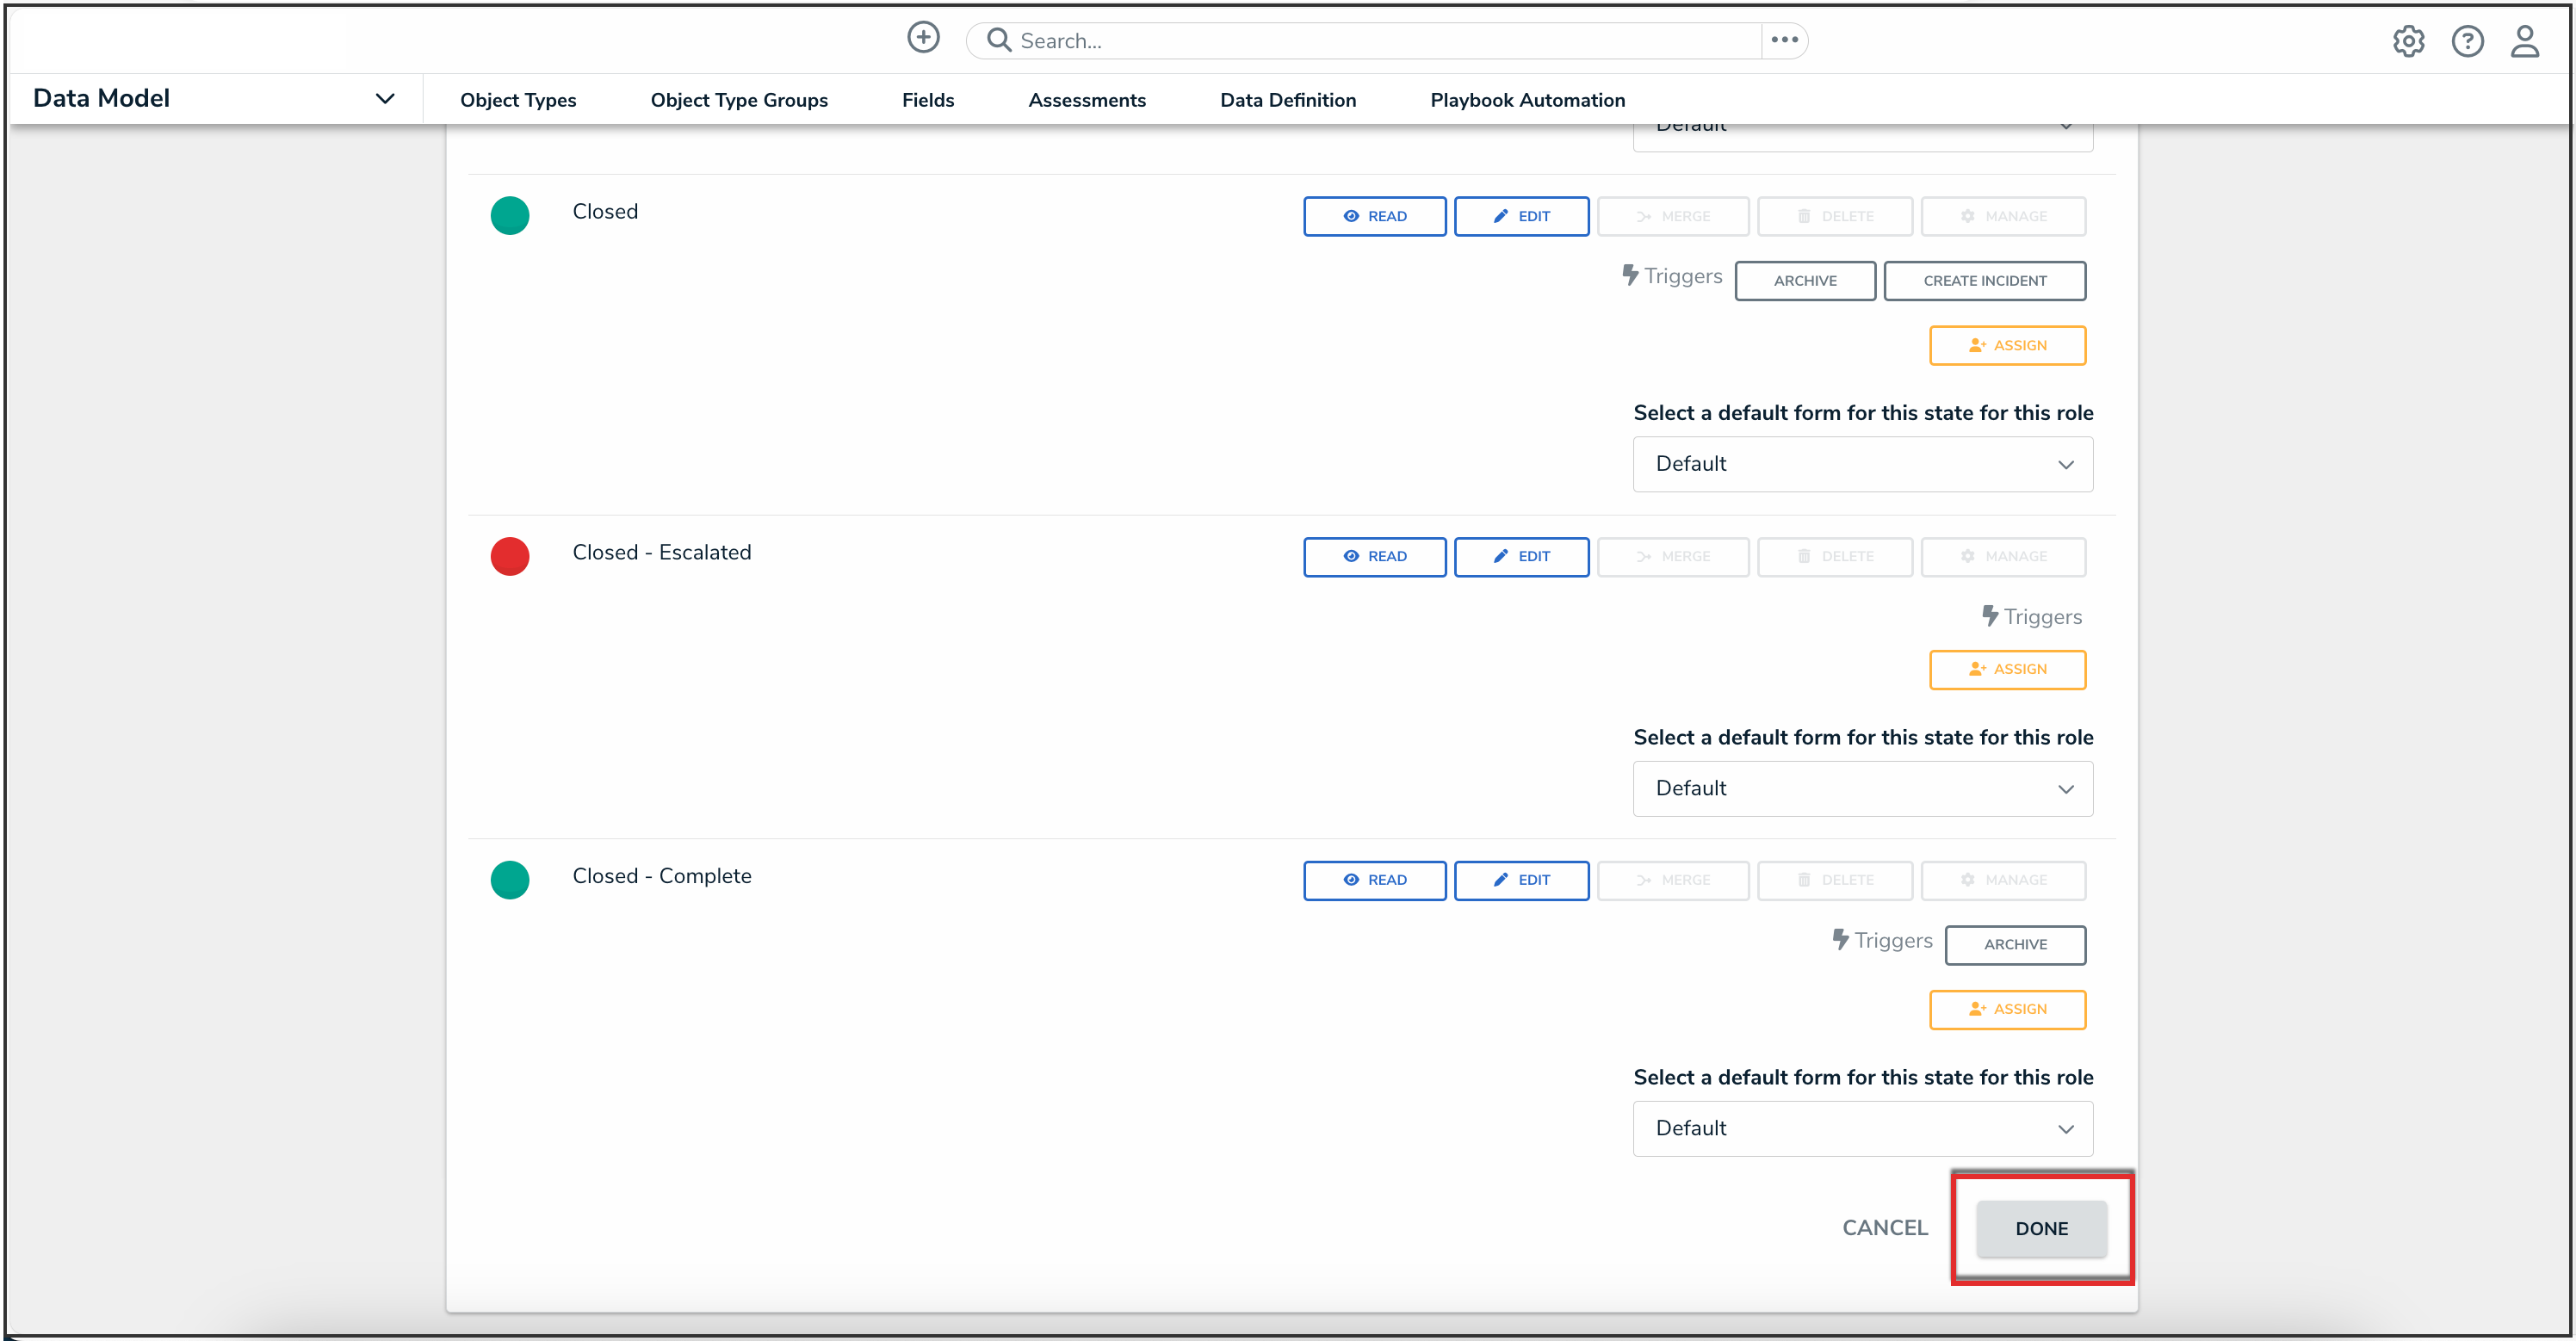
Done Button
- Repeat steps 6-10 to continue adding object types as needed.
- To add individual users to the role:
- In the field under Users, begin typing the name of the user you want to add to the role in, then press Enter on your keyboard or click to select the user.
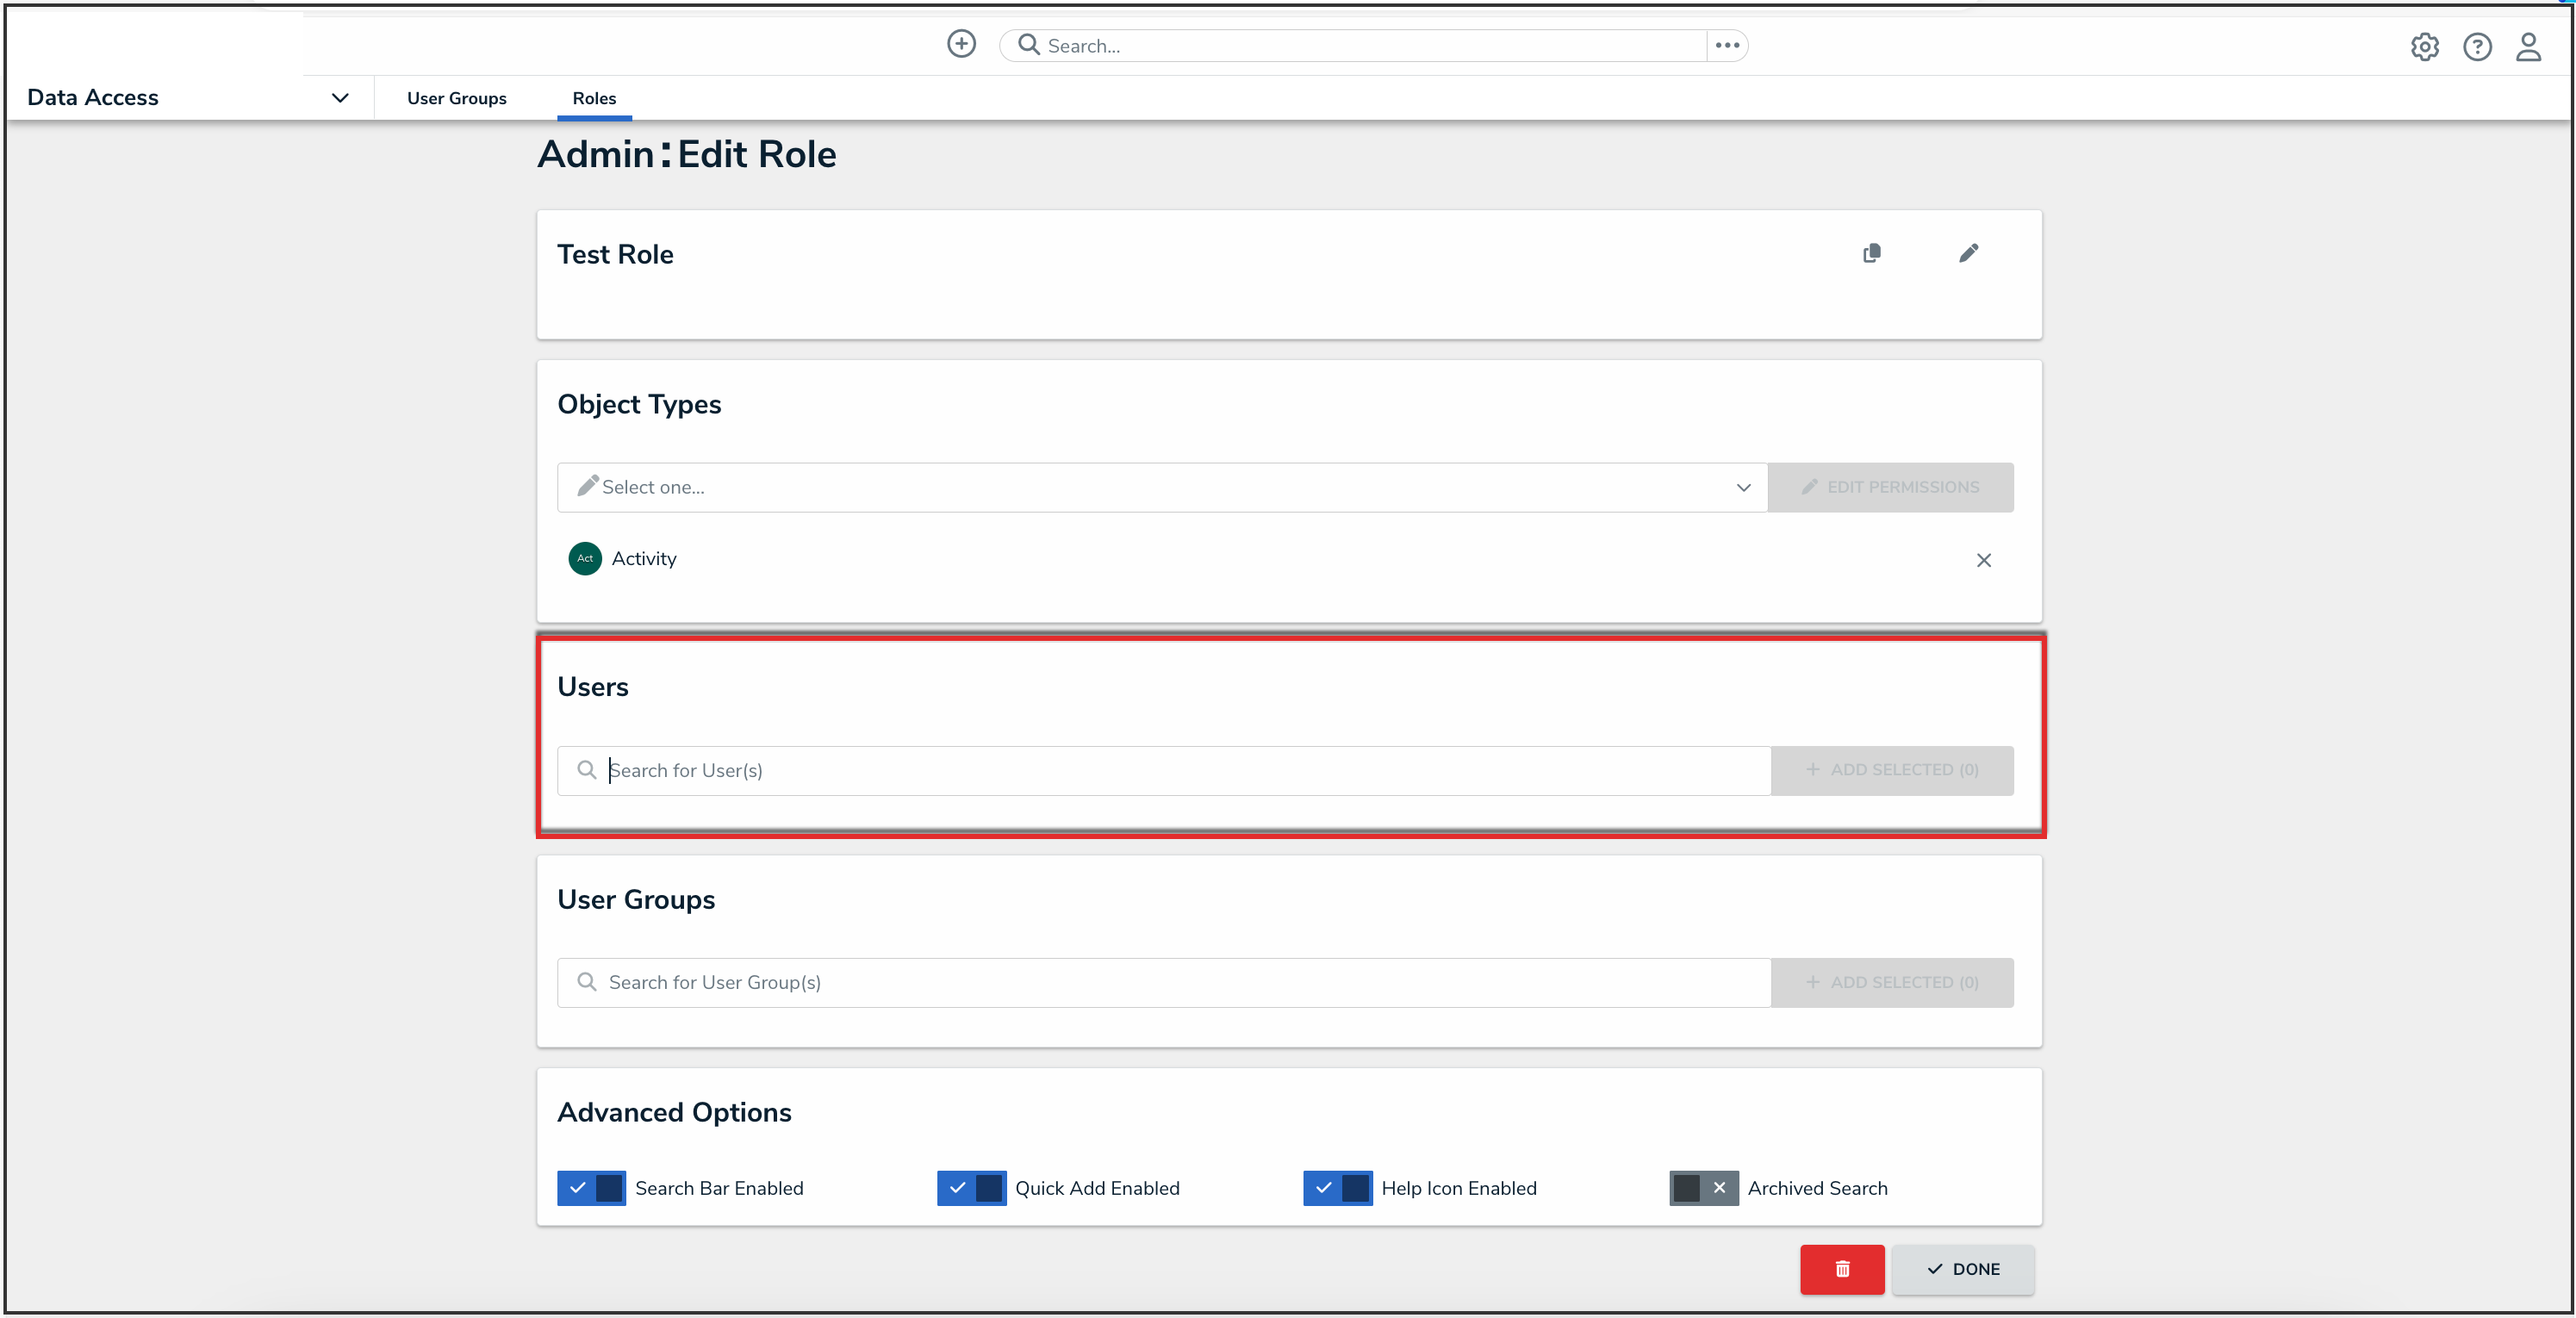
Users Field
- Repeat as needed to add more users, then click the Add Selected button.
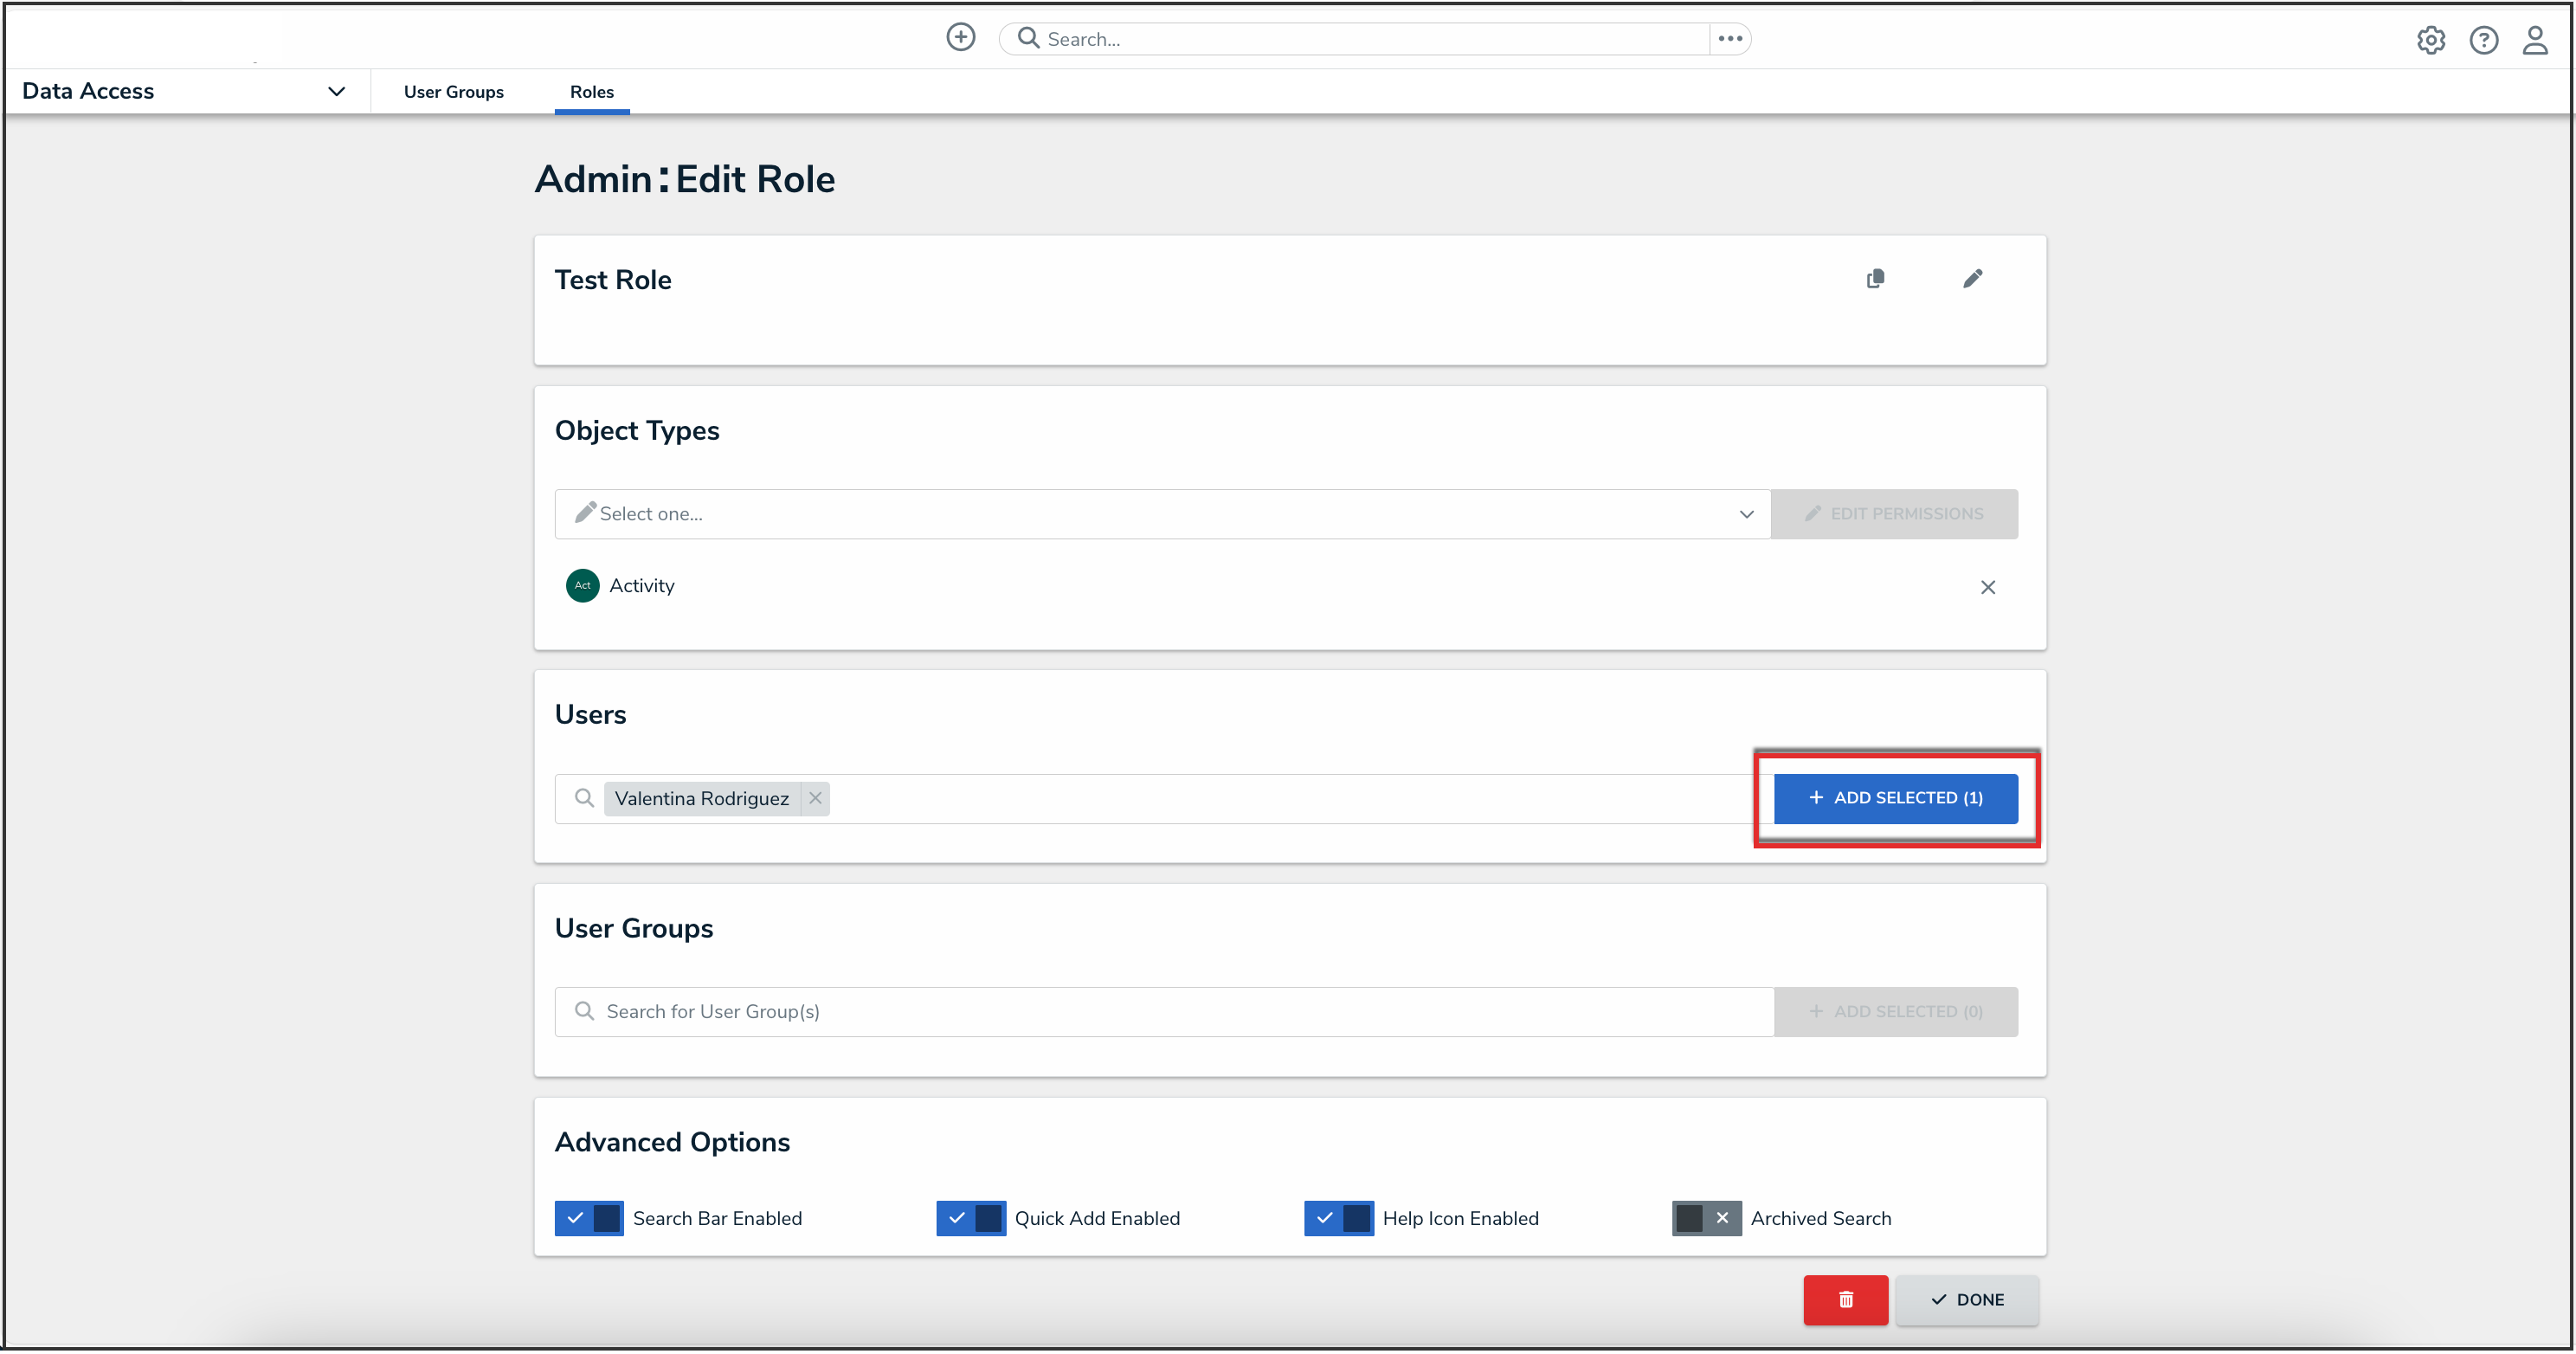
Add Selected Button
- In the field under Users, begin typing the name of the user you want to add to the role in, then press Enter on your keyboard or click to select the user.
- To add a user group to the role:
- In the field under User Groups, begin typing the name of the user group you want to add to the role, then press Enter on your keyboard or click to select the user group.
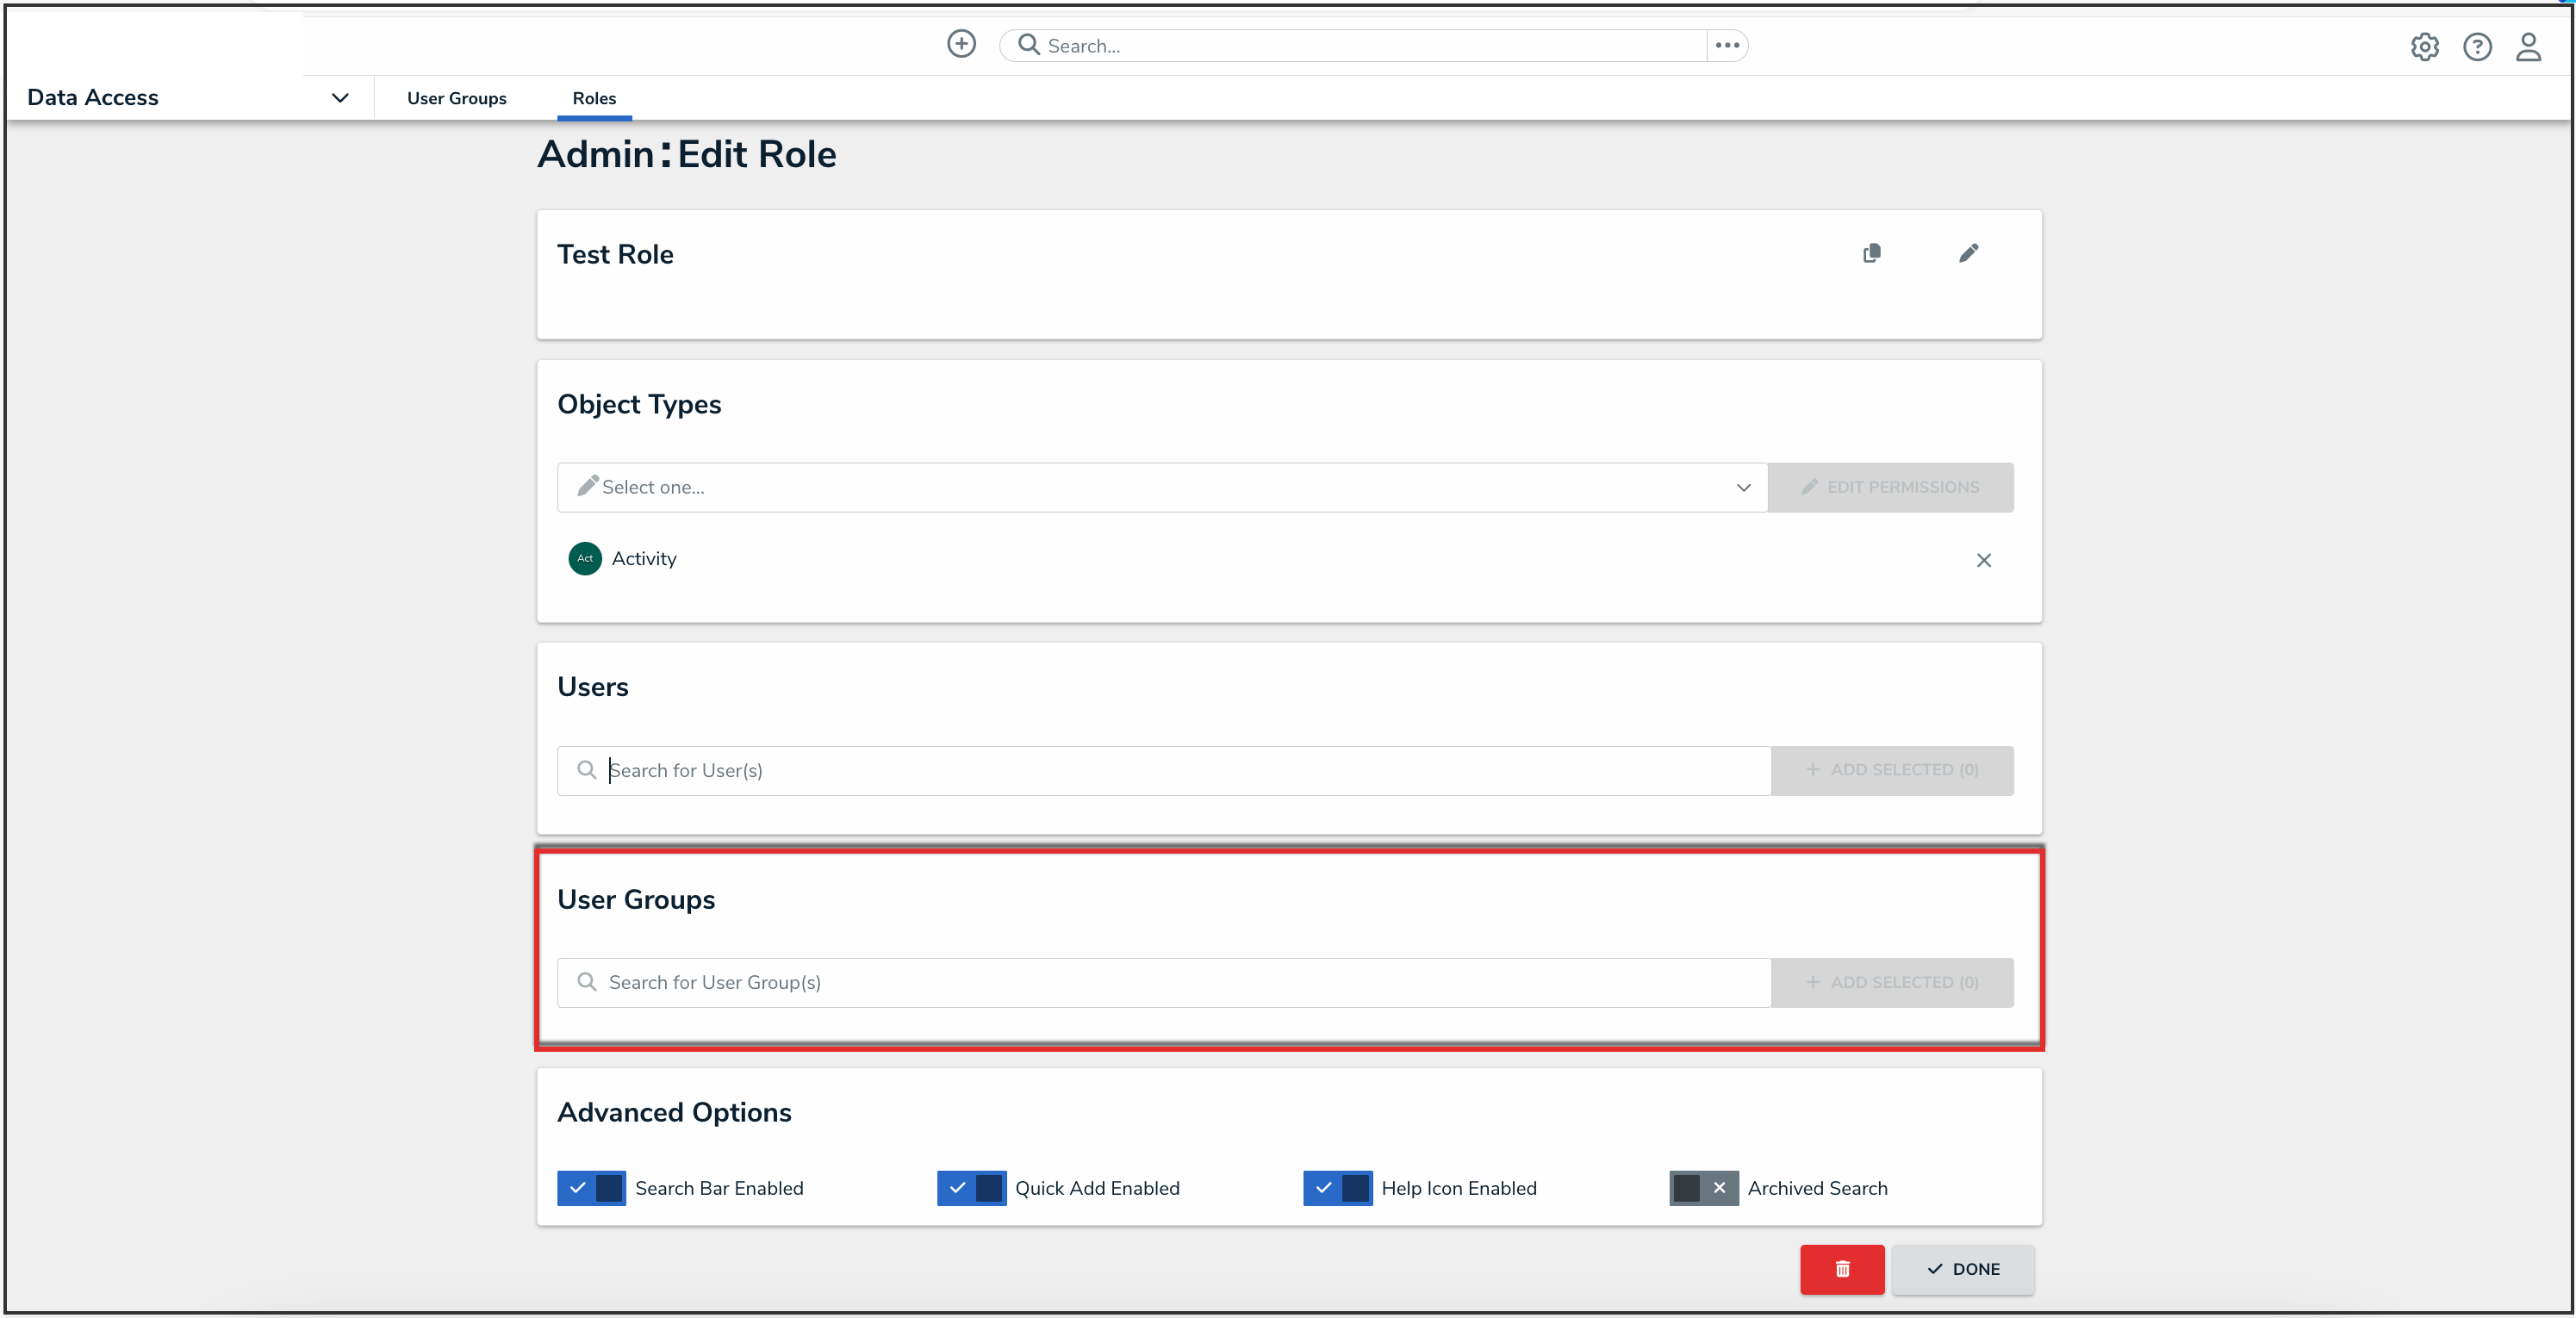
User Groups Field
- Repeat as needed to add more user groups, then click the Add Selected button.

Add Selected Button
- In the field under User Groups, begin typing the name of the user group you want to add to the role, then press Enter on your keyboard or click to select the user group.
- (Optional): In the Advanced Options section, you can select which advanced options to to enable or disable for users within the role. Please refer to the Advanced Options on Roles article for more information.
- Click the Done button to save your changes.
Done Button


Roles control the data a user can create, edit, delete, view, or manage on object types and objects. Once the role component for a specific role is added to an object type, it can be added to a configurable form, where you can grant users from within that role permission to view a specific object. Where necessary, roles allow users to see additional object types related through relationships or references by granting inferred permissions.
 | As users with global permissions can automatically view all the objects saved to the object type(s) specified in the role (subject to any workflow permissions), you can only add roles with explicit permissions to an object type. |
What the users within a role can do with the object types and objects, including those accessed through inferred permissions, is controlled by the object type’s workflow permissions on their role.
Roles must be created and configured before they can be added to an object type. See the Roles chapter for more information.
To add a role to an object type:
- Click the
 icon in the top bar > Object Types in the Data Model section.
 - Click the object type or enter the name of the object type in the Search field, then click it to display the Edit Object Type page.
- Click the Roles tab.
- Click Add Role.
- Click to select one or more roles under Select Roles to Add.
Selecting roles to add to an object type. - Click Add Selected.
- To add inferred permissions to the role:
Granting inferred permissions requires additional configurations on the role. See the Inferred Permissions section for more information on how these permissions work and how to configure the role. - Click the role in the Roles tab to open Edit Role Permissions.
- Click the monogram, which represents the object type you’re currently working in, to expand the node and reveal any relationships and references saved to the object type.
- Click a relationship or reference to show the object types associated with that relationship or reference (e.g. clicking People Involved will show the People and Employee Record object types).
- Click an object type to grant inferred permissions to that object type.

Granting inferred permissions. The checkmarks next to the P (People) and ER (Employee Record) monograms confirm that users in that role have access to those object types through the I (Incident) object type. - Click Done, then Continue to confirm.
- To edit the role's inferred permissions, click the role in the tab to open Edit Role Permissions.
- To delete the role from the object type only, click the
icon.
- Click Done when finished.
 icon in the top bar > Object Types in the Data Model section.

 icon.
icon.All users, including administrators and those with All Access settings enabled, will not be able to see an application in the left navigation menu until they’ve been added to one or more activities through a role. Note that adding a role to one activity with an application will not grant access to all its activities. Roles must be added to each activity individually in order to grant access.
Roles are saved to activities within an application. See the Create an Application & Activity section for more information on creating applications and activities.
| If you've recently added your role to an activity, you will need to log out then log back in before the application and/or activity will be displayed in the left navigation menu. |
To add roles to an activity:
- If needed, open the activity you wish to add the role to by clicking theicon in the top bar > Applications in the Application Management section, then clicking the application and activity to show the Edit Activity page.
- Click Add Roles in the Roles section.
- Select one or more roles from the dropdown menu.

Roles selected, but not yet added to an activity. - Click Add Roles.

 | To remove a role from the activity, click the trash can icon next to the role, then click Yes to confirm. |
The Clear Fields, Clear Roles, and Clear Relationships actions clear the values from selected fields, roles, or relationships on a form (excluding formulas). These features are particularly helpful to users who are working with existing assessments because they avoid the need to go into the assessment and manually remove data that's no longer applicable.
For example, the Clear Fields or Clear Relationships actions could be used when a user is relaunching an assessment, while the Clear Roles may be used when assigning an object type or assessment to a new user in a different role.
Before you can create these actions on a workflow state, the fields, roles, and relationships must be added to the object type as components and a transition must be created. See Add a Trigger & Transition to a State article for instructions.
| Because the Clear Roles action takes precedence over the Role Management action, avoid adding both these actions to the same transition, as the Clear Roles action will clear all roles, including any specified in the Role Management action, from the form. |
To add a Clear Fields, Clear Roles, or Clear Relationships action to a transition:
- From the Edit Workflow page, click a trigger below a state to open the Edit Trigger palette.
- Click the
icon next to the transition.
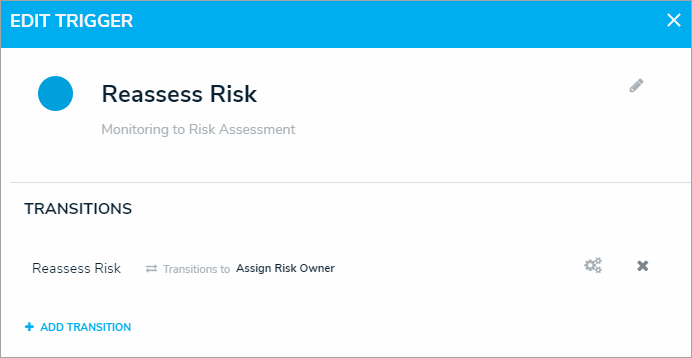
A transition on the Edit Trigger palette. - Click Add Action in the Actions section.
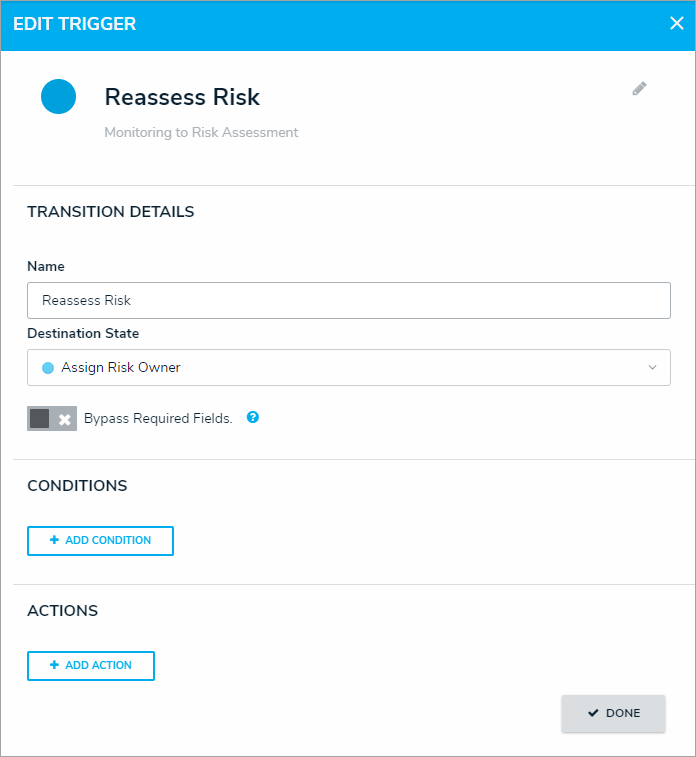
The Transition Details, Conditions, and Actions section of the Edit Trigger palette. - Select Clear Fields, Clear Roles or Clear Relationships from the Type dropdown menu.
- Enter a name for the action in the Name field.
- Depending on your selection in step 4 above, make the following selection in the dropdown menu:
 icon next to the transition.

| In the Type dropdown menu, if you selected | Then |
| Clear Fields |
|
| Clear Roles |
|
| Clear Relationships |
|

- Click Create.
Overview
Roles control the data that users can create, edit, delete, view, or manage in Resolver. Administrators can edit or delete roles from Resolver.
 Note:
Note:
If a user is in multiple roles and the permissions are in conflict, the role with the higher level of permissions will take precedence.
User Account Requirements
The user account used to log into Resolver must have Administrator permission to access the Data Access section.
Related Information/Setup
Please refer to the Roles Overview and the Create a New Role articles for more information on using roles in Resolver.
Navigation
- From the Home screen, click the Administration icon.
Administration Icon
- From the Administrator settings menu, click Admin Overview.
Administrator Settings Menu
- From the Admin Overview screen, click the Roles tile under the Data Access section.
Roles Tile
- From the Roles screen, enter a keyword in the Search field to narrow the search results.
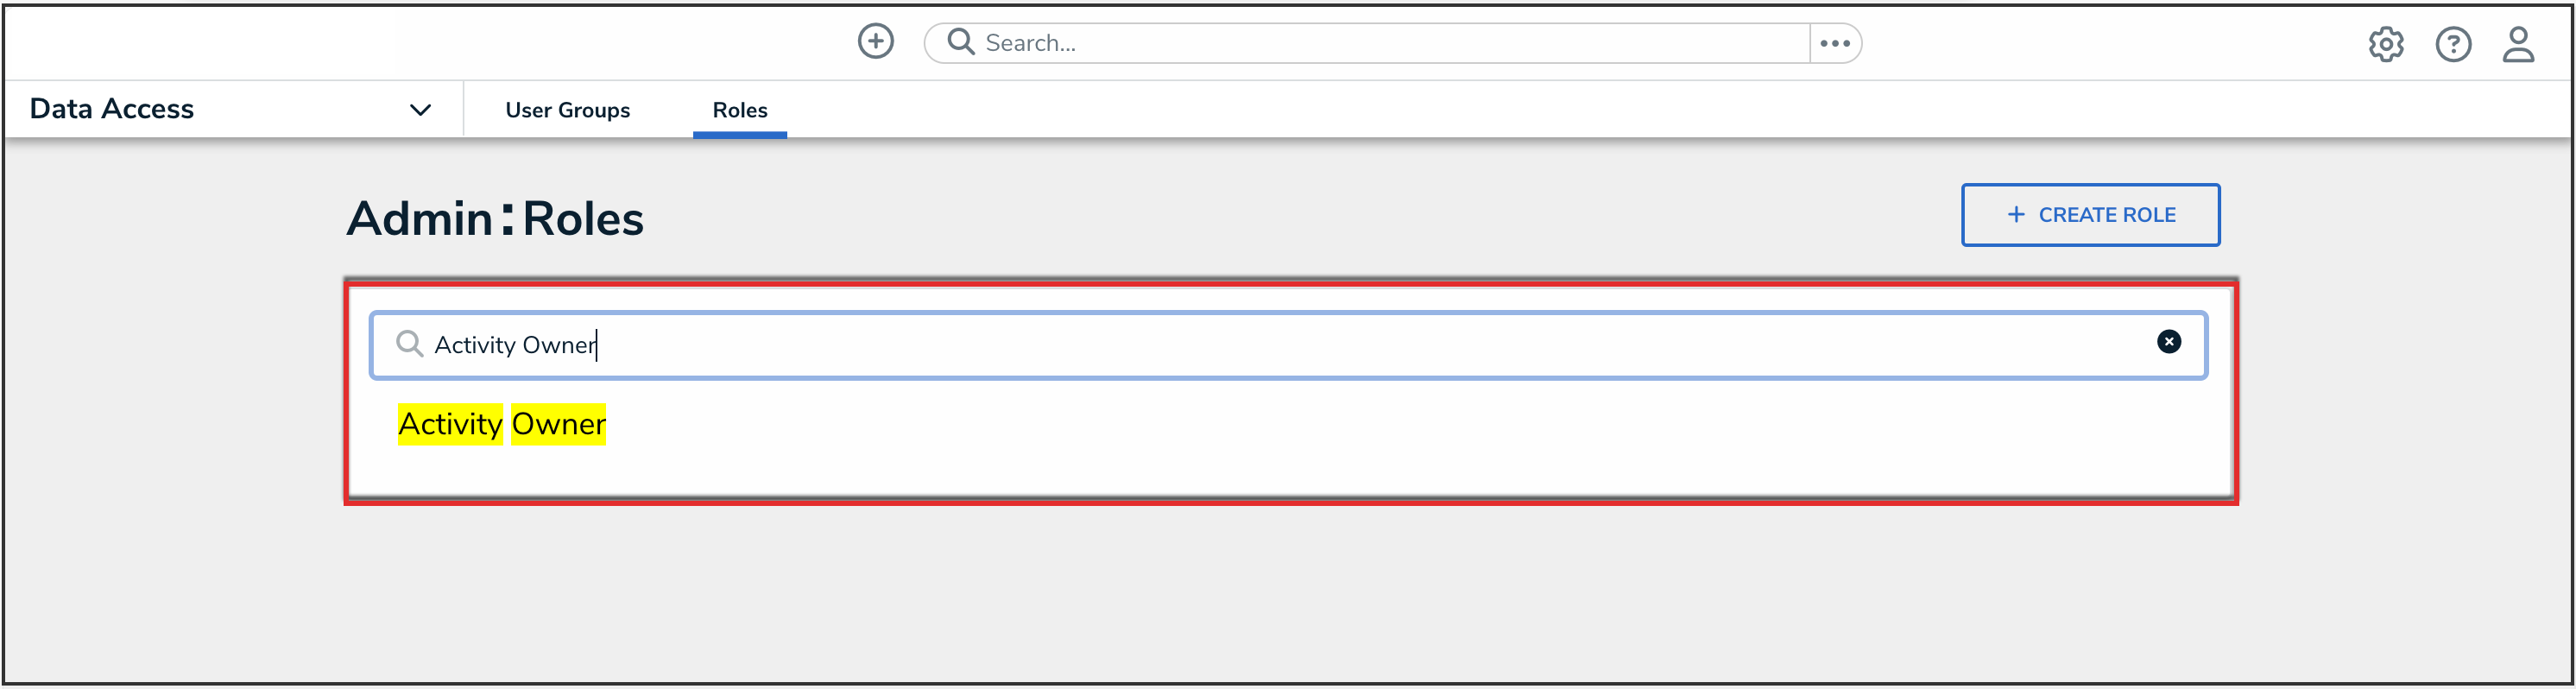
Search Field

- Click the role that you want to edit or delete.
Editing a Role
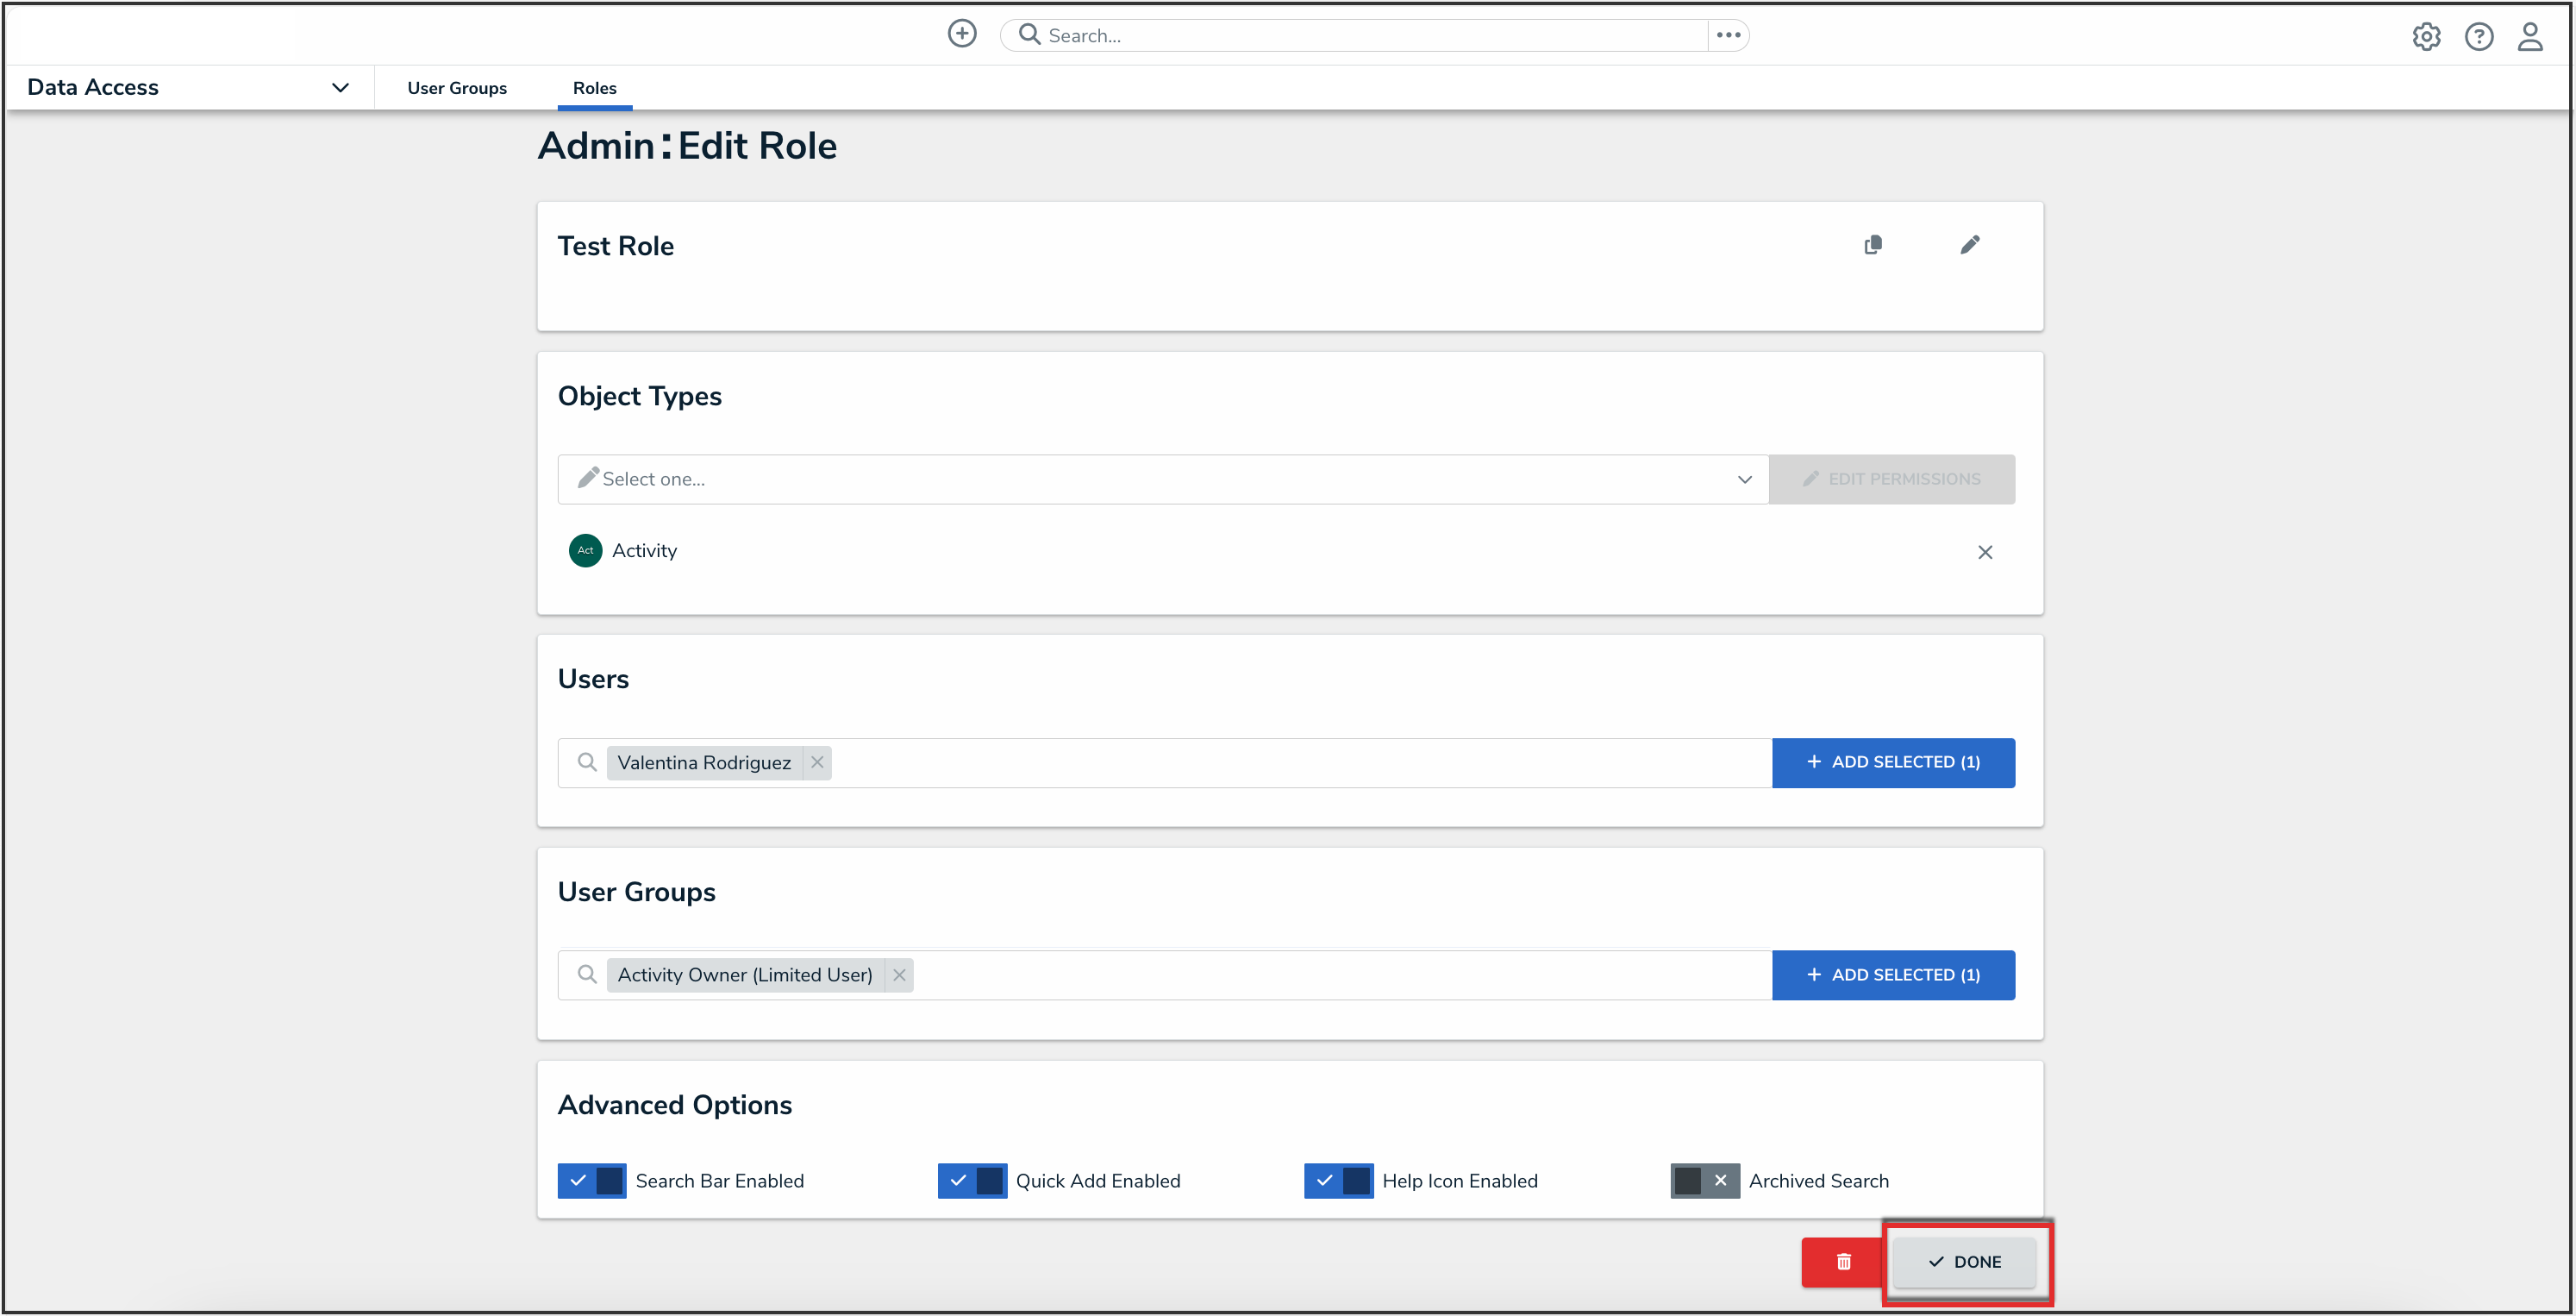
- From the Edit Role screen, you can add more object types to the role. Select the object types from the dropdown menu in the Object Types section, then click the Edit Permissions button to edit the object type's permissions. For more information on configuring permissions, please refer to the Workflow Permissions article.
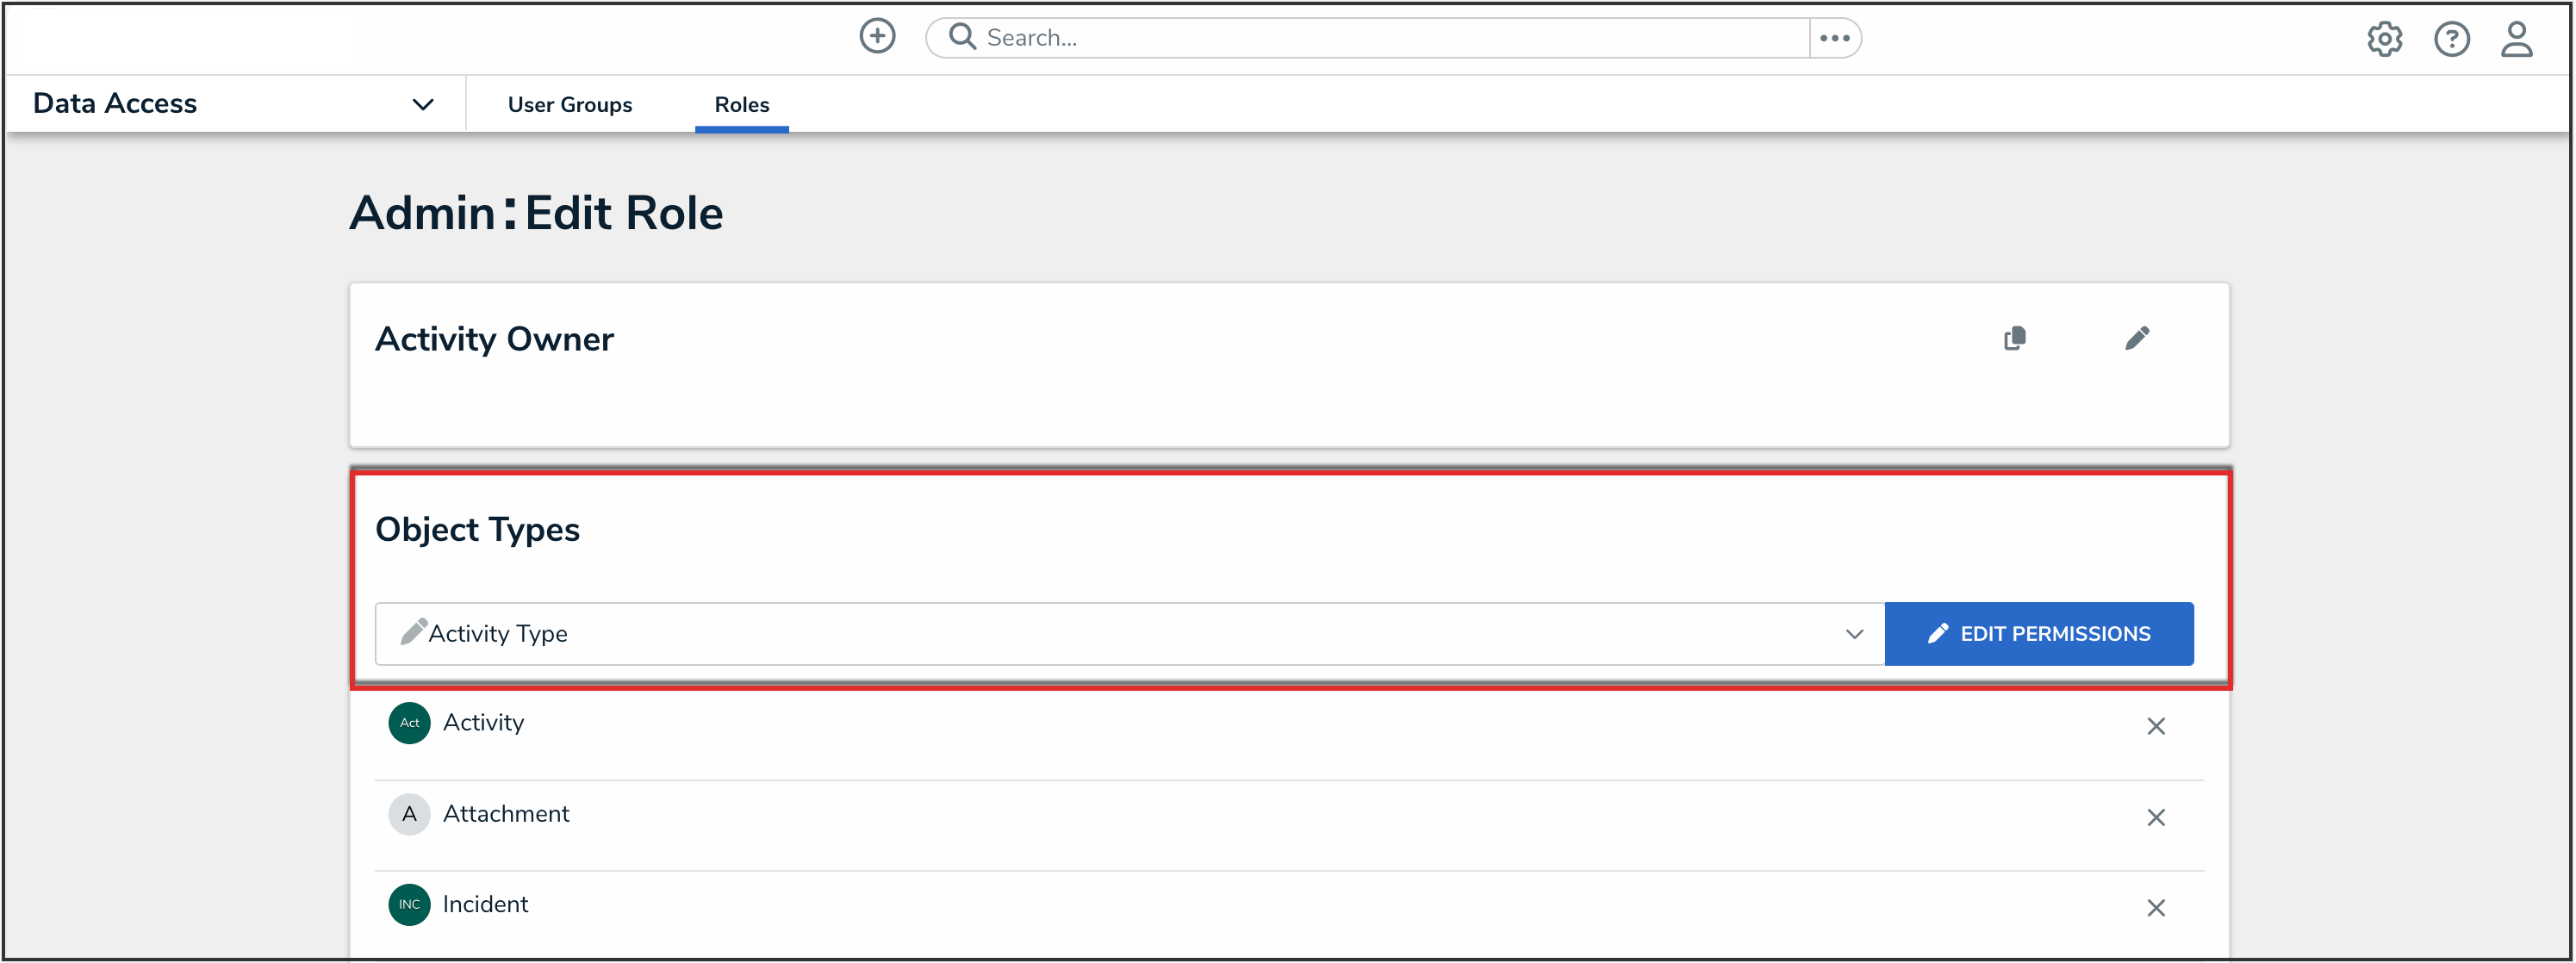
Object Types Section
- To edit an existing object type’s permissions, click the object type in the Object Types section, make your changes as needed, then click the Done button to return to the Edit Role page.

Done Button
- To add more users or groups to the role, select them from the dropdown menus in the Users and User Groups section.

Users and User Groups
- From the Edit Role screen, you can delete an object type, user, or user group from the role:
- To delete an object type, user, or user group from the role, click the Remove icon next to the object type, user, or user group you want to delete.
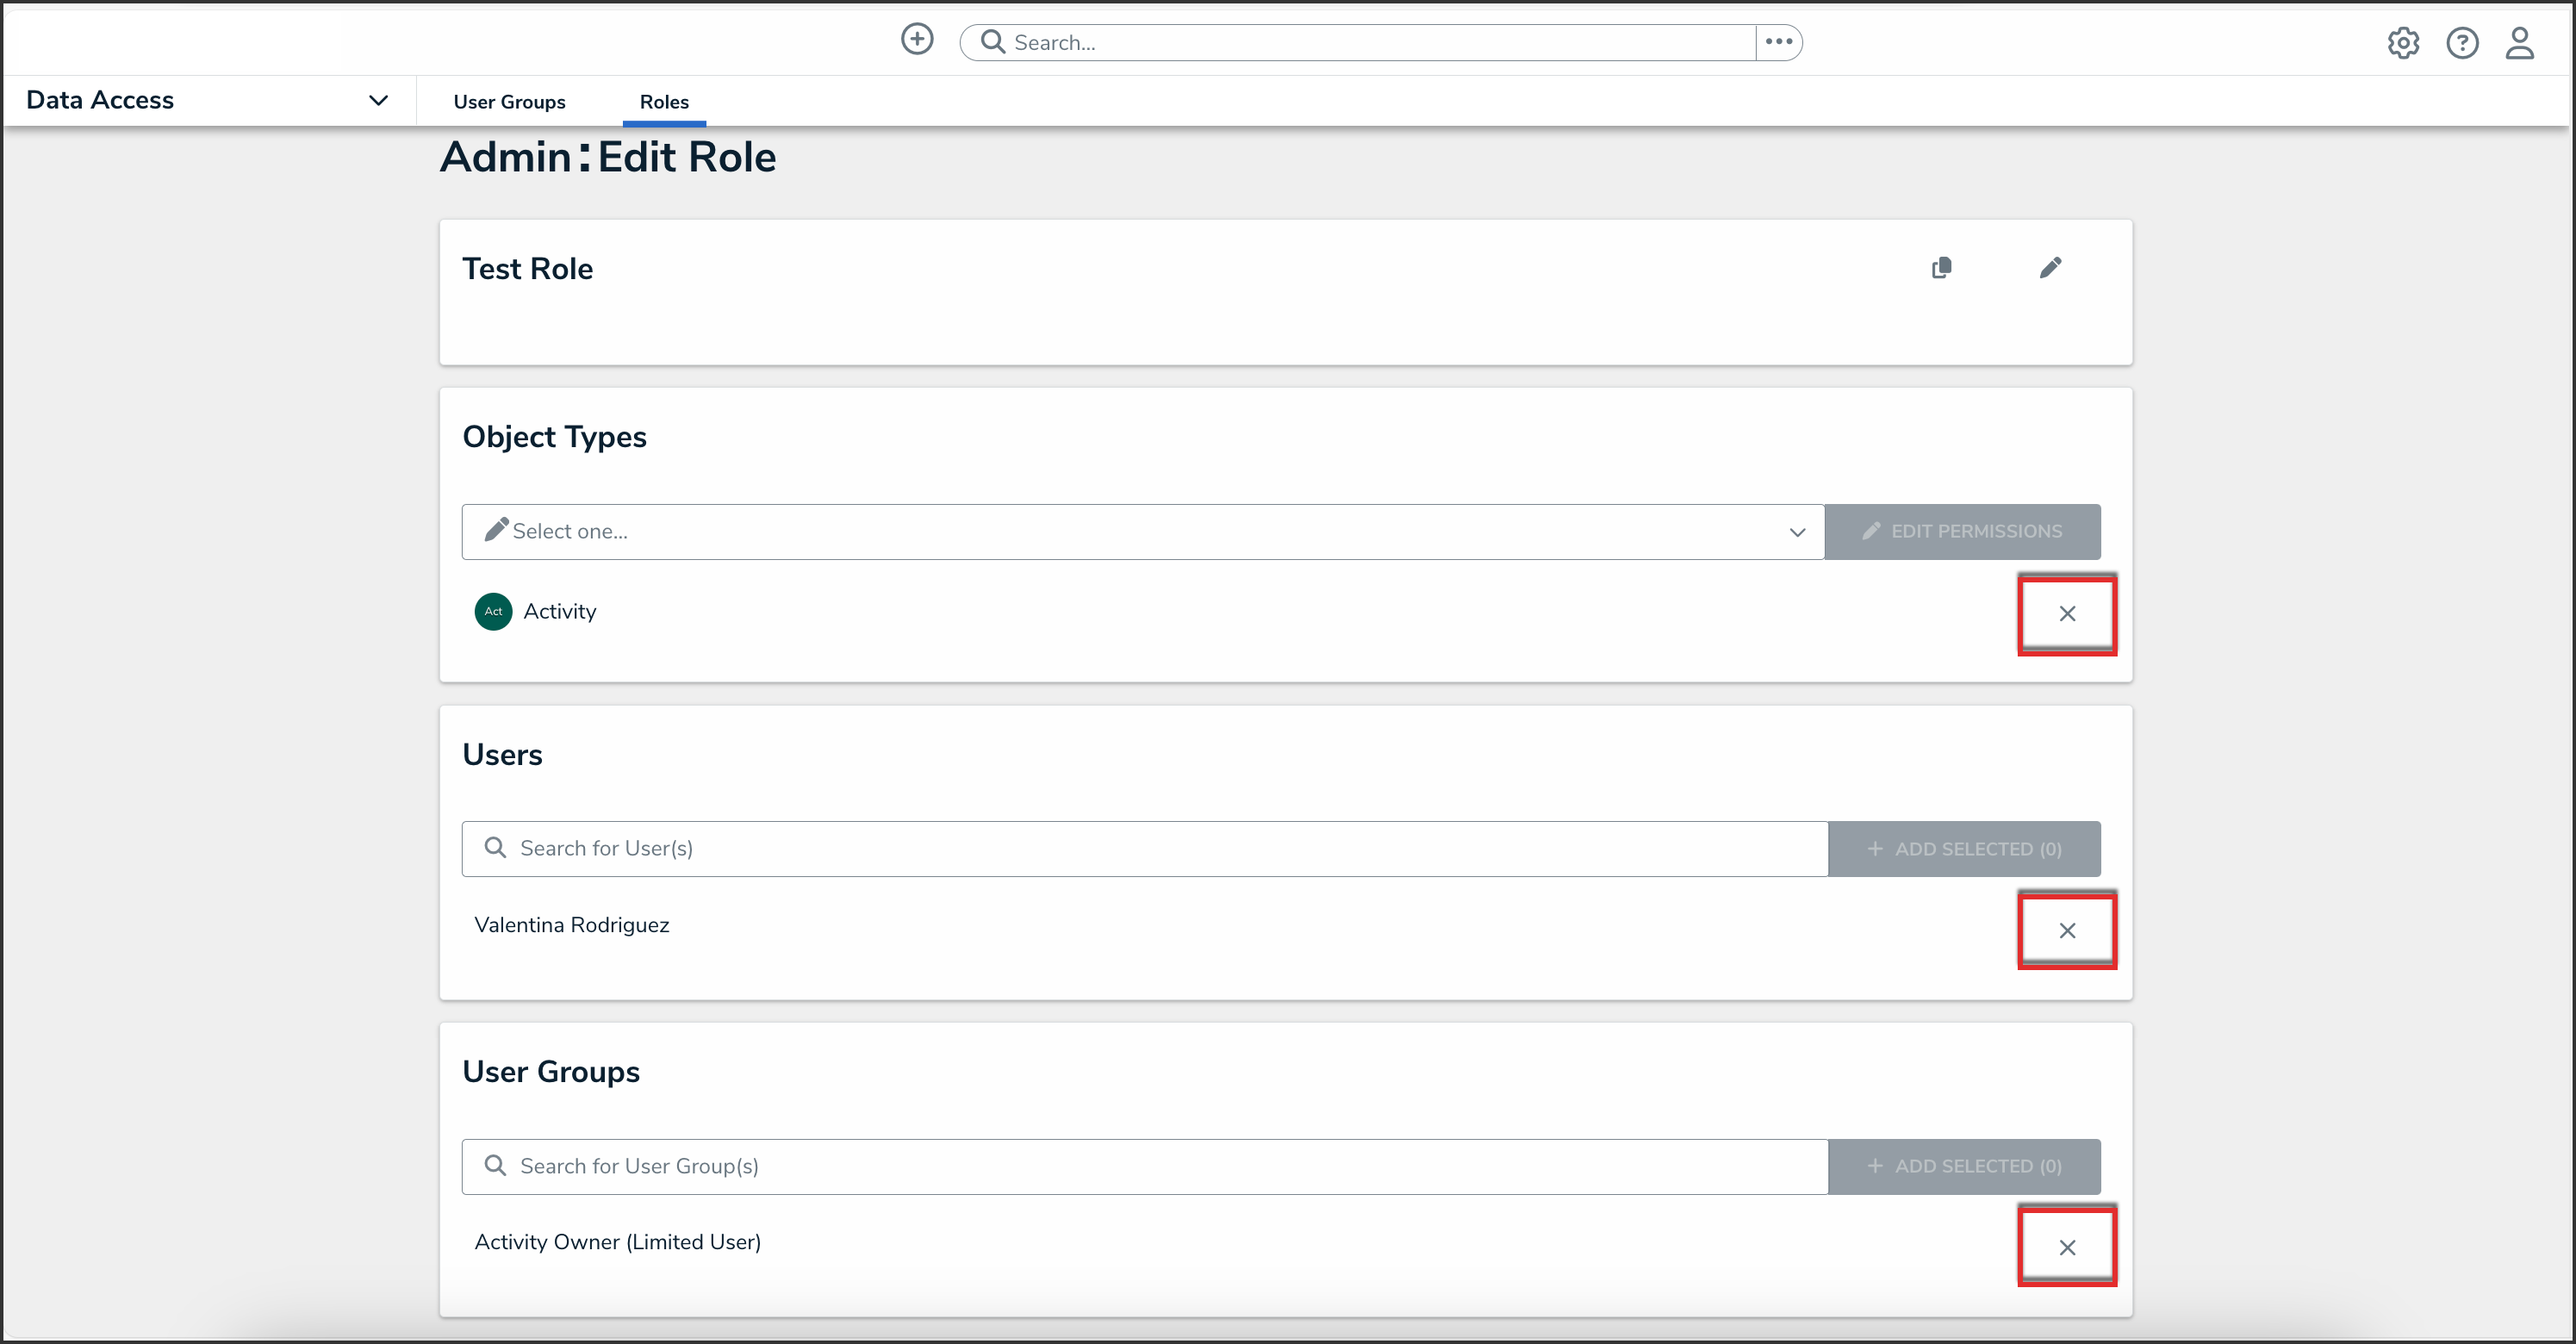
Remove Icon
- From the Remove pop-up, click the Remove button.
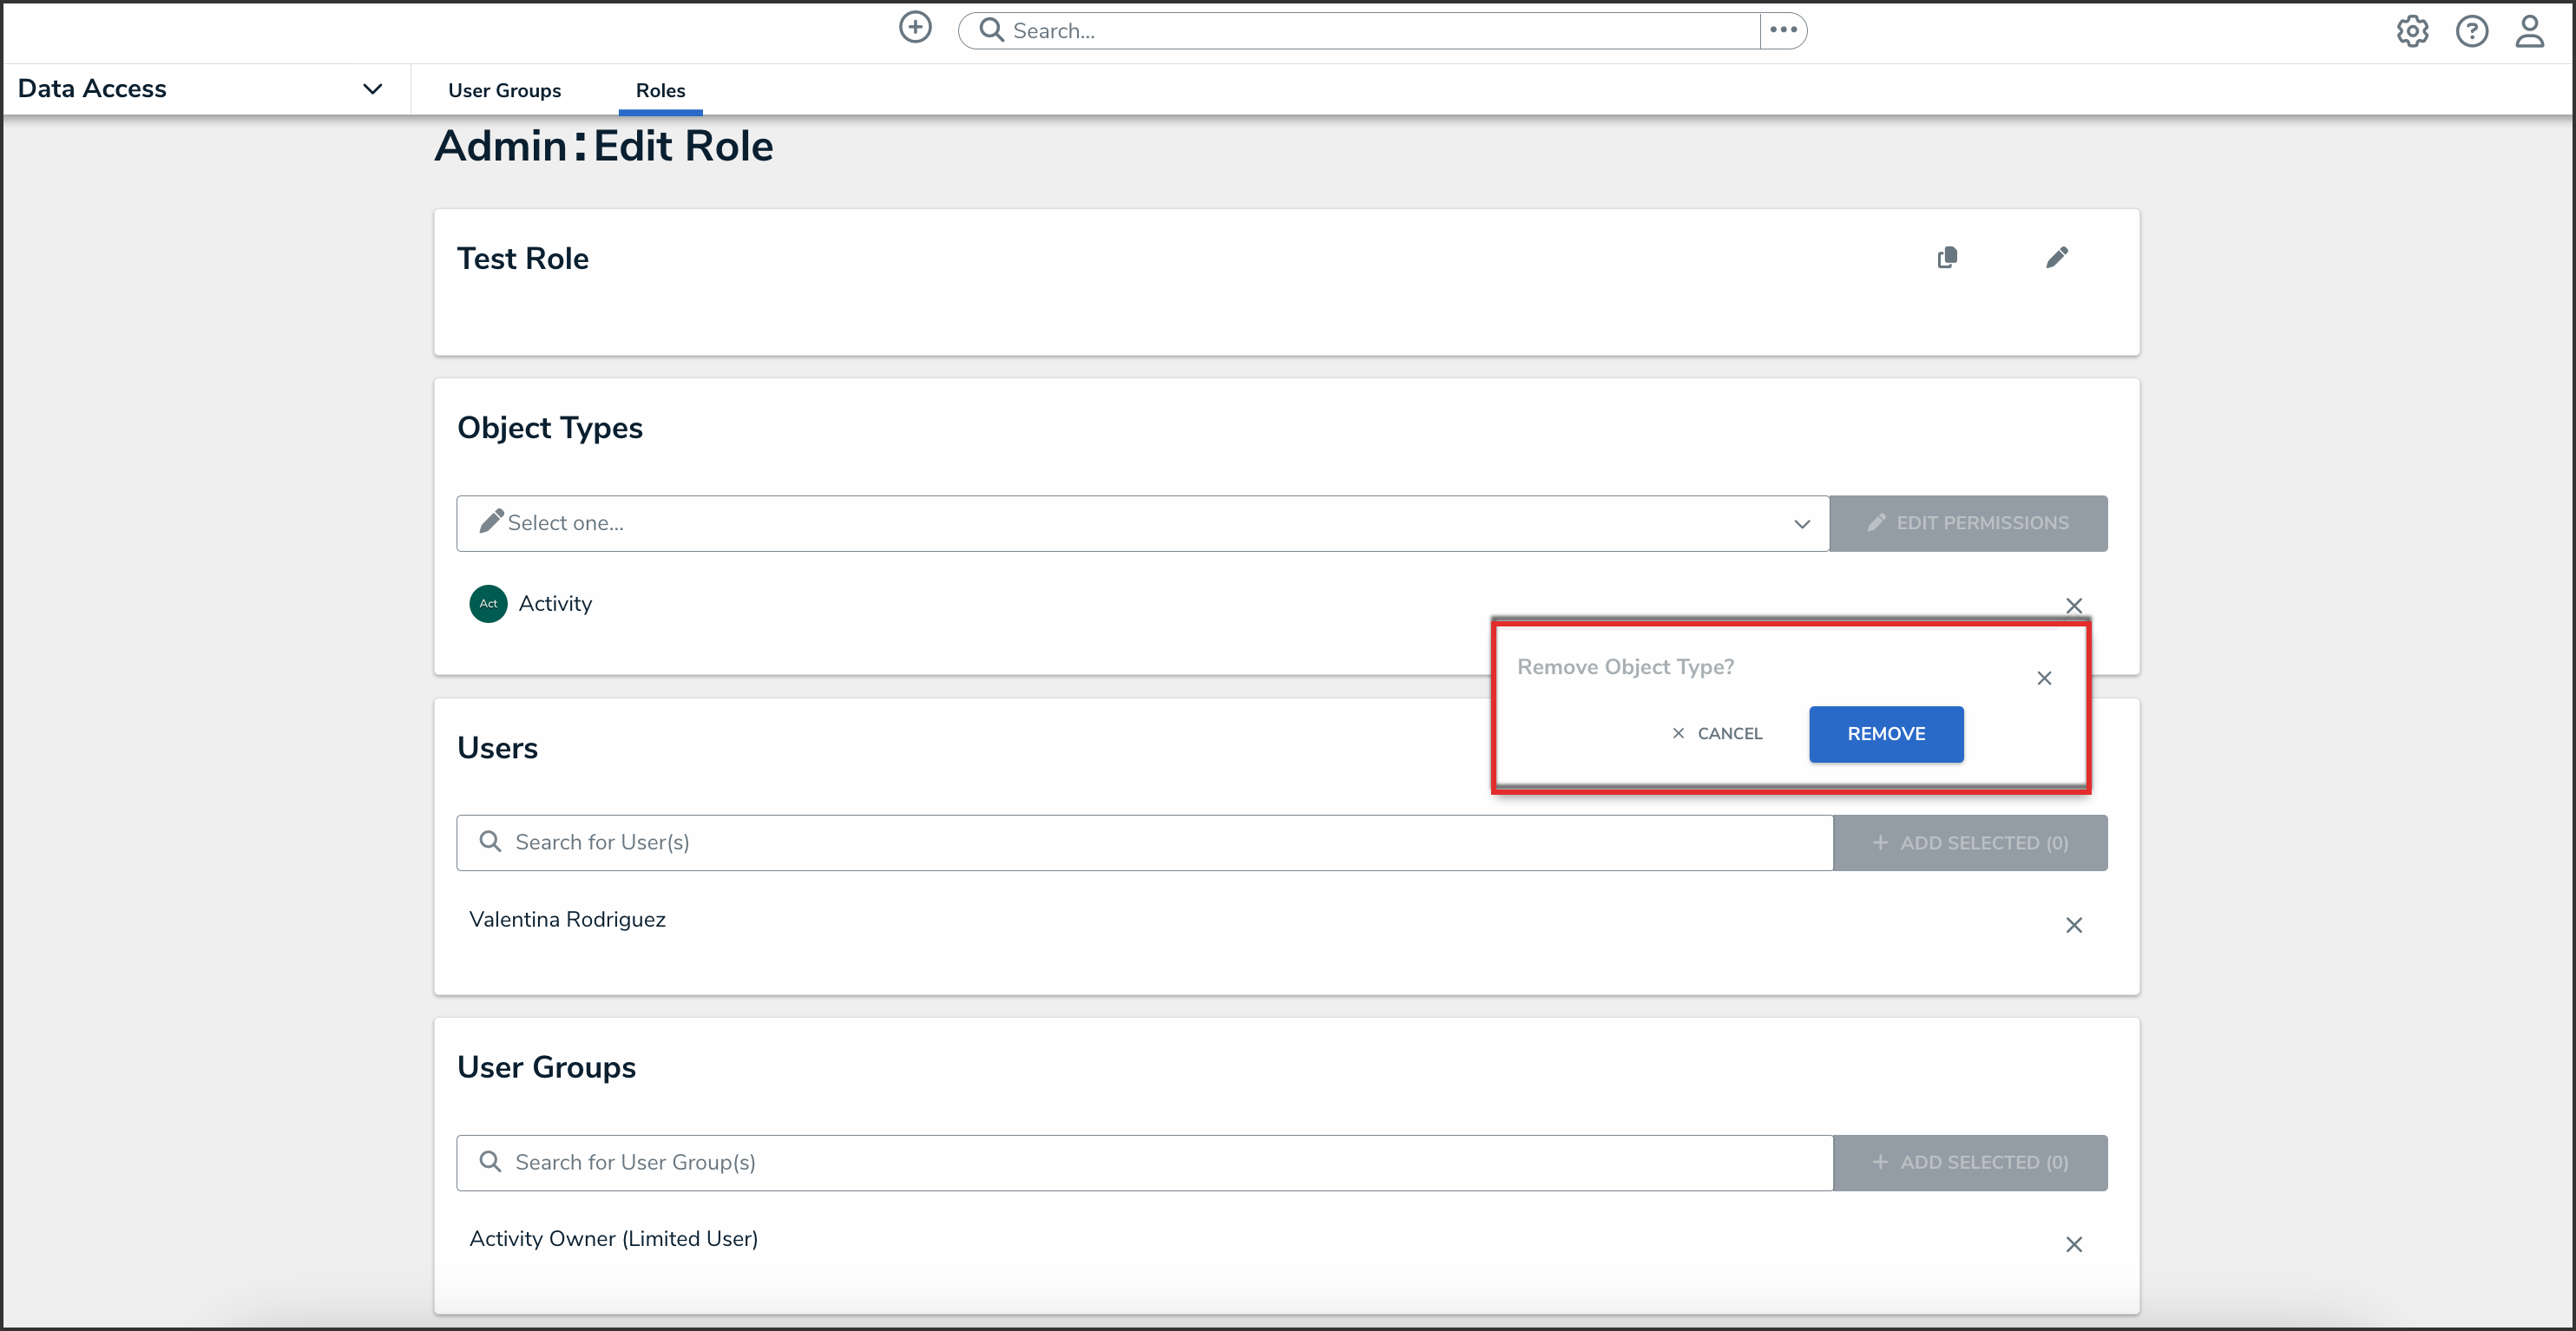
Remove Button
 Warning:
Roles determine a user's eligibility to access objects only. Removing a user from a role with explicit permissions after they've been granted direct access to an object does not automatically revoke their access to that object. Another user with the appropriate permissions must revoke access by removing the user from the role field on the object's form.
- To delete an object type, user, or user group from the role, click the Remove icon next to the object type, user, or user group you want to delete.


 Warning:
- (Optional): In the Advanced Options section, you can select which advanced options to to enable or disable for users within the role. Please refer to the Advanced Options on Roles article for more information.
- Click the Done button to save your changes.
Done Button
Deleting a Role
-
From the Edit Role screen, you can delete a role. Click the Delete icon to delete the role.

Delete Icon

- From the Delete role? pop-up, click the Delete button.

Delete Button
