Roles control the data a user can create, edit, delete, view, or manage on object types and objects. Once the role component for a specific role is added to an object type, it can be added to a configurable form, where you can grant users from within that role permission to view a specific object. Where necessary, roles allow users to see additional object types related through relationships or references by granting inferred permissions.
 | As users with global permissions can automatically view all the objects saved to the object type(s) specified in the role (subject to any workflow permissions), you can only add roles with explicit permissions to an object type. |
What the users within a role can do with the object types and objects, including those accessed through inferred permissions, is controlled by the object type’s workflow permissions on their role.
Roles must be created and configured before they can be added to an object type. See the Roles chapter for more information.
To add a role to an object type:
- Click the
 icon in the top bar > Object Types in the Data Model section.
 - Click the object type or enter the name of the object type in the Search field, then click it to display the Edit Object Type page.
- Click the Roles tab.
- Click Add Role.
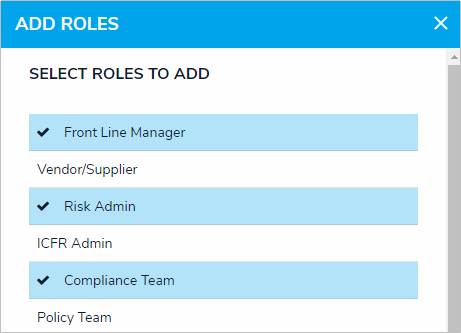
- Click to select one or more roles under Select Roles to Add.
Selecting roles to add to an object type. - Click Add Selected.
- To add inferred permissions to the role:
Granting inferred permissions requires additional configurations on the role. See the Inferred Permissions section for more information on how these permissions work and how to configure the role. - Click the role in the Roles tab to open Edit Role Permissions.
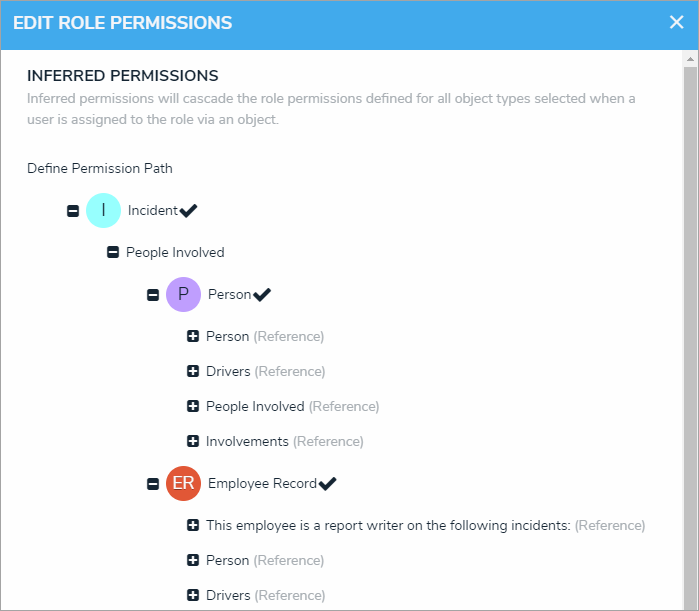
- Click the monogram, which represents the object type you’re currently working in, to expand the node and reveal any relationships and references saved to the object type.
- Click a relationship or reference to show the object types associated with that relationship or reference (e.g. clicking People Involved will show the People and Employee Record object types).
- Click an object type to grant inferred permissions to that object type.

Granting inferred permissions. The checkmarks next to the P (People) and ER (Employee Record) monograms confirm that users in that role have access to those object types through the I (Incident) object type. - Click Done, then Continue to confirm.
- To edit the role's inferred permissions, click the role in the tab to open Edit Role Permissions.
- To delete the role from the object type only, click the
icon.
- Click Done when finished.
 icon in the top bar > Object Types in the Data Model section.

 icon.
icon.