Overview
Administrator users can reorder a Workflow's States by clicking the Reorder button on the Admin: Object Types screen. The Administrator can click a state on the Reorder pop-up screen and drag and drop it in a new position within the Workflow.
User Account Requirements
The user account you use to log into Resolver must have Administrator permission to access the Object Types Tile.
Navigation
- From the Home screen, click on the System icon.
![]()
System Icon
- From the Admin Overview screen, click on the Object Types tile under the Data Model section.
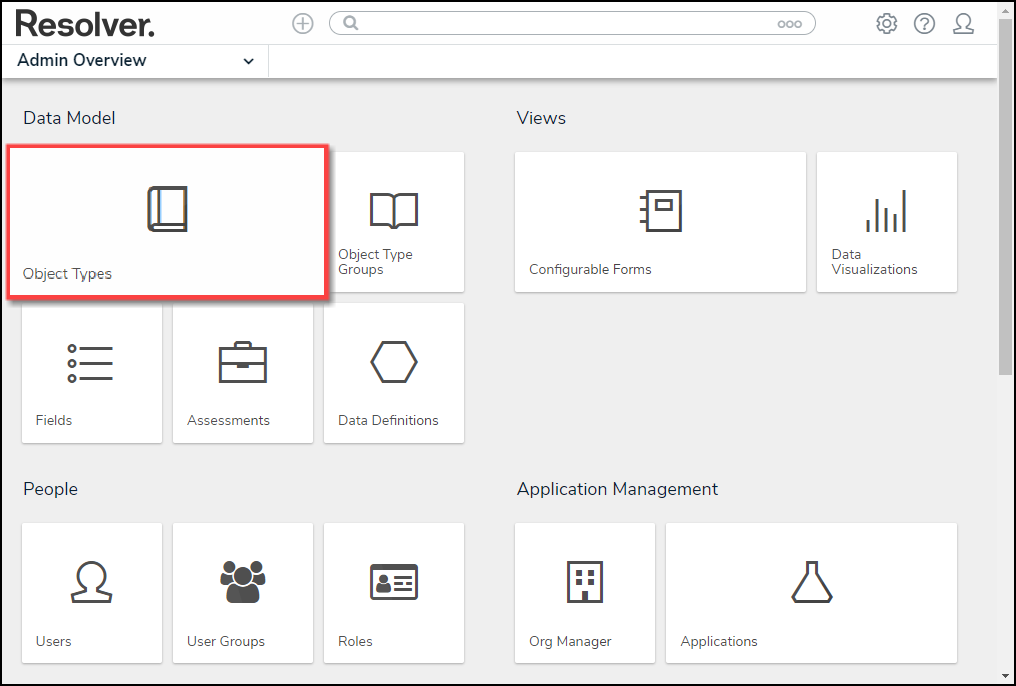
Object Types Tile
- From the Object Types screen, enter an Object Type Name in the Search field to narrow down the Object Types list.
- Click the Object Type's Name you want to edit.

Click the Object Type's Name
- From the Admin: Edit Object Type screen, click the Configure Workflow button.
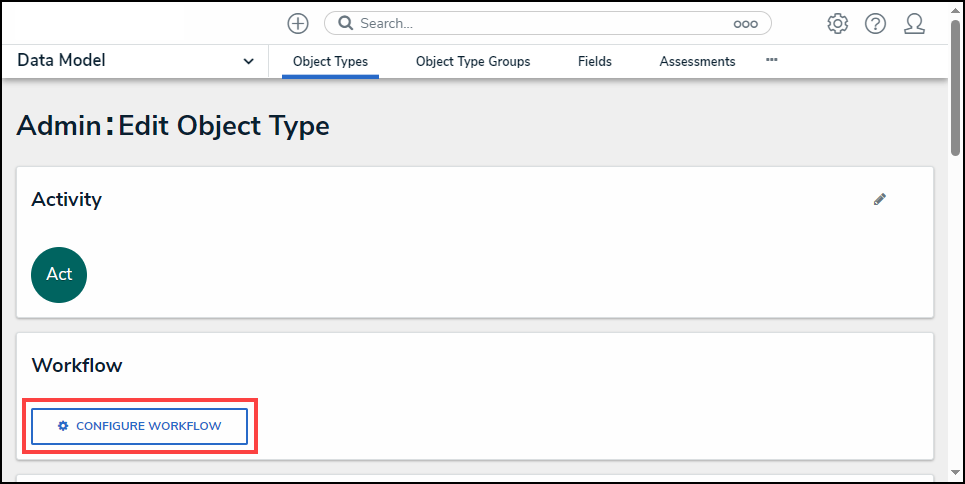
Configure Workflow Button
Reordering a Workflow State
- From the Admin: Edit Workflow screen, click the Reorder button.
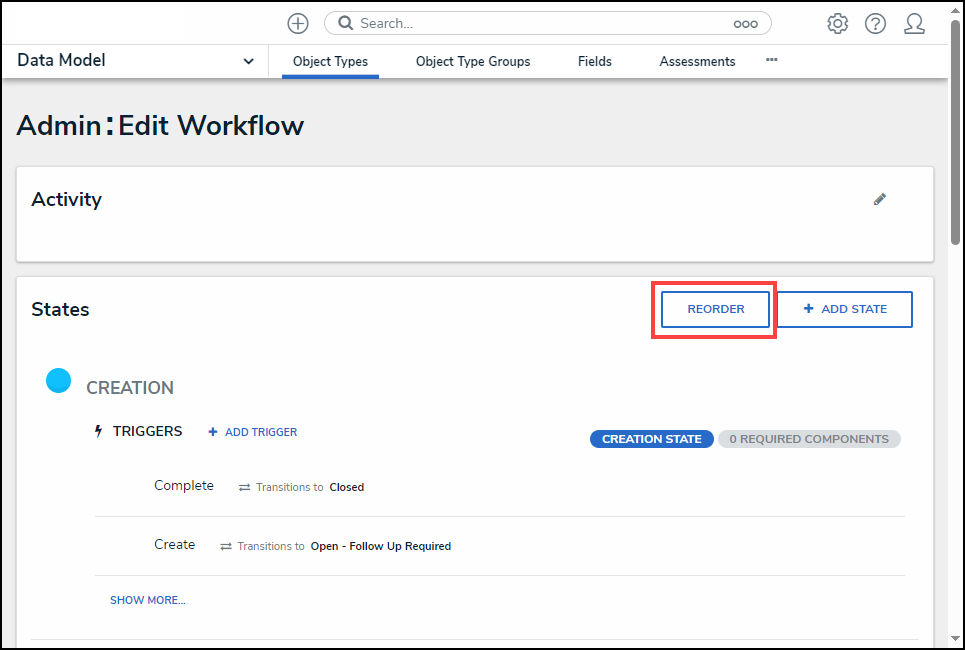
Reorder Button
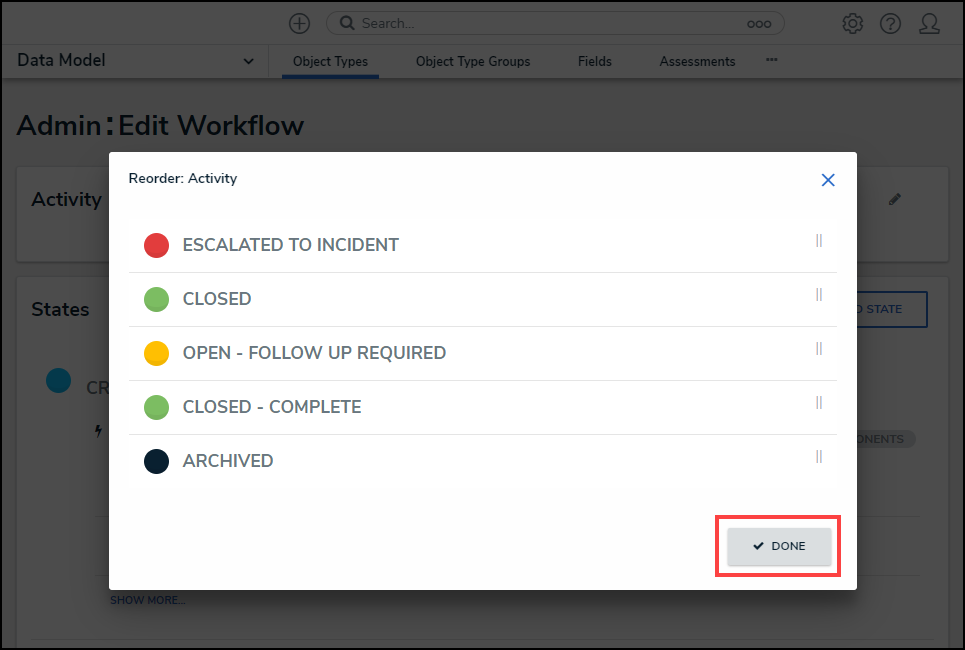
- From the Reorder pop-up screen, click the Move icon.
![]()
Move Icon
- While holding the left mouse button, drag and drop a State into a new position and release the left mouse button when the state is in the desired position.

Drag and Drop State

New State Position
- Click the Done button to return to the Admin: Edit Workflow screen
Done
- The moved state will appear in its new position within the Workflow.